Table of Contents
Advertisement
Quick Links
Advertisement
Table of Contents

Related Manuals for AEG LWR8516O5UD


Summary of Contents for AEG LWR8516O5UD
- Page 1 LWR8516O5UD User Manual Washer Dryer USER MANUAL...
-
Page 2: Table Of Contents
13. DAILY USE - WASHING & DRYING..............39 14. DAILY USE - DRYING ONLY................40 15. FLUFF IN THE FABRICS..................41 16. HINTS AND TIPS....................42 17. CARE AND CLEANING..................44 18. TROUBLESHOOTING..................50 19. CONSUMPTION VALUES................55 20. QUICK GUIDE....................58 21. ENVIRONMENTAL CONCERNS..............59 My AEG Care app... -
Page 3: Safety Information
ENGLISH FOR PERFECT RESULTS Thank you for choosing this AEG product. We have created it to give you impeccable performance for many years, with innovative technologies that help make life simpler – features you might not find on ordinary appliances. Please spend a few minutes reading to get the very best from it. - Page 4 Children between 3 and 8 years of age and persons • with very extensive and complex disabilities shall be kept away from the appliance unless continuously supervised.
- Page 5 ENGLISH Do not install the appliance behind a lockable door, a • sliding door or a door with a hinge on the opposite side, that would prevent the appliance door from being fully open. Connect the mains plug to the mains socket only at •...
-
Page 6: Safety Instructions
Do not use the appliance if items have been soiled • with industrial chemicals. - Page 7 ENGLISH than 0°C or where it is exposed to the a 13 A ASTA (BS 1362) fuse (UK and weather. Ireland only). • Always keep the appliance vertical 2.3 Water Connection when it is being moved. • Make sure that there is air circulation •...
-
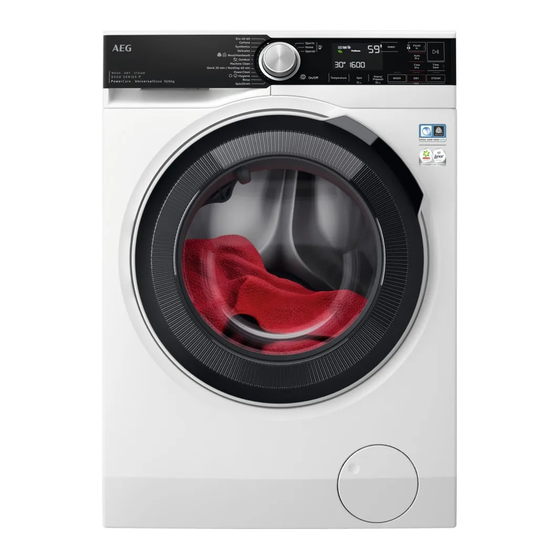
Page 8: Product Description
• Dry only fabrics that are suitable to sensors, software and firmware dry in the appliance. Follow the including reset software, door, door cleaning instruction on the item label. hinge and seals, other seals, door • Do not sit or stand on the open door locking assembly, plastic peripherals of the appliance. - Page 9 ENGLISH without consuming more time, energy • The AEG Steam Fragrance - thanks and water than necessary. to the steam mode - offers the perfect • The STEAM mode is a quick and solution for refreshing even the most easy way to refresh the clothes. The delicate garments without washing.
-
Page 10: Technical Data
4. TECHNICAL DATA Dimension Width/ Height/ Total 59.7 cm /84.7 cm /66.0 cm depth Electrical connection Voltage 230-240 V Overall power 2100 W Fuse 13 A Frequency 50 Hz Level of protection against ingress of solid particles IPX4 and moisture ensured by the protective cover, ex‐... - Page 11 ENGLISH 7. Remove the polystyrene protection from the bottom. 3. Remove the internal film. 8. Pull up the appliance in vertical position. 4. Open the door and remove the polystyrene piece from the door seal and all the items from the drum. 9.
- Page 12 5.4 Fixing plate kit below the appliance. Make sure that the appliance If you install the appliance on a plinth does not touch the wall or that is not an accessory supplied by other units. AEG, secure the appliance with the fixing...
- Page 13 ENGLISH plates. This spare part is available in web Do not use an extension shop or from authorised dealer. hose if the inlet hose is too Read carefully the instructions supplied short. Contact the service with the accessory. centre for the replacement of the inlet hose.
- Page 14 Make sure that the plastic guide cannot move when the appliance drains. 5. Without the plastic hose guide, to a sink spigot - Put the drain hose in the spigot and tighten it with a clamp. Refer to the illustration.
-
Page 15: Control Panel
ENGLISH Connect the appliance to an earthed The power supply cable must be easily socket. accessible after installing the appliance. For any electrical work required to install this appliance, contact our Authorised Service Centre. The manufacturer does not accept any responsibility for damage or injury through failure to comply with the above safety precaution. - Page 16 6.2 Display Washing phase indicator. It flashes during pre-wash and wash phase. Rinsing phase indicator. It flashes during rinse phase. Spinning and draining phase indicator. It flashes during spin and drain phase. Drying phase indicator. Steam phase indicator. Anti-crease phase indicator (available via APP only).
- Page 17 ENGLISH The digital indicator can show: • Programme duration (e. g. , washing and/or drying phase). The time shown when the programme is set could not correspond to effective duration and change af‐ ter ProSense phase. • Maximum load. • Finish in time (e.
-
Page 18: Dial And Buttons
Extra Rinse indicator. 7. DIAL AND BUTTONS 7.1 On/Off 7.4 Introduction Pressing this button for a few seconds The options/functions are allows to activate or deactivate the not selectable with all appliance. Two different tunes sound washing programmes. while switching the appliance on or off. - Page 19 ENGLISH The display shows the normal If you set a programme via programme duration alternatively with App and it does not match the set programme end time (expressed with the knob position, in hours 0h). The minimum selectable text appears alternating with time corresponds to rounded up hour of programme duration.
- Page 20 When the display shows the indicators performs the only draining phase of the selected washing programme. Set , the appliance does not heat this option for very delicate fabrics. the water. The rinses phase uses more water for some washing programmes 7.11 Spin...
- Page 21 The fragrance ( AEG Steam levels proposed by the appliance. Fragrance) On the display the relevant dryness The AEG Steam Fragrance allows you to indicator goes on: refresh even your delicate clothes, removing wrinkles and adding freshness with a gentle fragrance developed •...
-
Page 22: Settings
The fragrance is available on that "just washed" feeling. AEG web shop or by Read carefully the instructions supplied authorised dealer. with the fragrance. DO NOT: •... -
Page 23: Before First Use
10.1 My AEG Care app and additional hidden programmes My AEG Care app provides you with a wide choice of additional hidden programmes. Connect the appliance to My AEG Care and you will be able to choose the programme that suits your needs most. - Page 24 10.2 Programme Chart Programme Reference Maximum Programme description Default tempera‐ spin speed load ture Spin speed Temperature range range 1600 rpm 1600 rpm - Eco 40-60 (Wash 10.0 kg 400 rpm only mode) 40 °C White cotton and fast-coloured cotton.
- Page 25 ENGLISH Programme Reference Maximum Programme description Default tempera‐ spin speed load ture Spin speed Temperature range range Do not use fabric softener Outdoor and make sure that there is no softener residue in 30 °C the detergent dispenser. 40 °C - Cold Outdoor clothing, technical, sport fabrics, waterproof and breathable jackets, shell 1200 rpm...
- Page 26 Programme Reference Maximum Programme description Default tempera‐ spin speed load ture Spin speed Temperature range range White cotton items. This high-perform‐ ance wash programme combined with Hygiene steam vapour, removes more than 60 °C 99,99% of bacteria and viruses keeping the temperature above 60°C throughout...
- Page 27 ENGLISH Programme options compatibility Options PODS® ■ ■ ■ ■ ■ ■ ■ Spin (Spin re‐ ■ ■ ■ ■ ■ ■ ■ ■ ■ ■ duction) ■ ■ ■ ■ ■ ■ ■ ■ ■ Rinse Hold ■ ■ ■...
- Page 28 Suitable detergents for each programme Programme Universal Liquid Uni‐ Liquid for Delicates Special versal coloureds woollens powder Eco 40-60 ▲ ▲ ▲ Cottons ▲ ▲ ▲ Synthetics ▲ ▲ ▲ Delicates ▲ ▲ Wool/Hand‐ ▲ ▲ wash Outdoor ▲...
- Page 29 ENGLISH Dryness Level Type of fabric Load Cottons and Linen up to 6.0 kg (bathrobes, bath towels, etc) Extra Dry For towelling materials Cottons and Linen up to 6.0 kg (bathrobes, bath towels, etc) Synthetics and mixed fab‐ up to 4.0 kg For items to be stored rics (jumpers, blouses, under‐...
-
Page 30: Wi-Fi - Connectivity Setup
Dryness Level Type of fabric Load (kg) Suggested Spin speed duration (rpm) (mins) 155 - 175 1600 115 - 125 1600 Synthetics and mixed fabrics 135 - 145 (jumpers, blouses, underwear, house‐ 1200 hold and bed linen) 40 - 50... - Page 31 When connecting the appliance to the • Scan the QR code with the built-in application, stand near it with your smart camera app to download the My AEG device. Care application from the App store on your smart device and follow the Make sure that your smart device is required steps.
- Page 32 The access point will be open for about 3 button to start the minutes. programme, but it is also 5. Configure the My AEG Care app on possible to start a washing your smart device and follow the programme remotely. This...
-
Page 33: Daily Use
ENGLISH The update is accepted via App only. 1. Touch the Remote Start button If a programme is running, the App and the indicator blinks on the notifies that the update will start at the display for a few seconds. end of the programme. - Page 34 - Compartment for washing phase (powder detergent only). Make sure that the Pods® option is deactivated when using this compartment. If using liquid detergent, re‐ member to insert the con‐ tainer for liquid detergent CAUTION! Make sure that no laundry...
- Page 35 ENGLISH 4. Pour fabric softener in the compartment 5. Close the detergent dispenser. 12.4 Setting a programme 1. Turn the programme dial to select the desired washing programme. The related programme indicator comes The indicator of the Start/Pause button flashes. b) Pour the liquid detergent in the same The display shows an indicative compartment after inserting the relevant...
- Page 36 The In case of in case of indicator comes on. drum overload, the maximum declared load 2. Touch the Start/Pause button. indicator comes on again The drum starts rotating to perform the ProSense estimation, if foreseen in the...
- Page 37 ENGLISH When the phase ends the relevant If the ProSense phase is indicator stops flashing and is steady on. already carried out and the The next phase indicator starts flashing. water filling is already started, the new programme E.g. the rinse phase is running: starts without repeating the ProSense phase.
- Page 38 (if they are 1. If necessary, touch the Spin button to active). decrease the spin speed proposed by the appliance. In the display all washing phase 2. Touch the Start/Pause button: indicators become steady and the time •...
-
Page 39: Daily Use - Washing & Drying
ENGLISH 13. DAILY USE - WASHING & DRYING 13.2 Washing and Drying - WARNING! Automatic levels Refer to Safety chapters. The default level is the cupboard dry This appliance is an automatic washer dryer. one. In some programmes 13.1 NON-STOP programme - you can change the drying level. -
Page 40: Daily Use - Drying Only
Auto Dry l indicator goes off and the • In the display comes on. indicator comes on. • The led of the Start/Pause button The minimum timed drying is 10 minutes. goes off. The door locked goes off Each time you tap on this button the time •... -
Page 41: Fluff In The Fabrics
ENGLISH 2. Touch the Start/Pause button to start the programme. Extra dry: for cotton items. In the display the door locked The time value on the display is the indicator comes on and the indicator of duration of both cycles washing and the running phase starts flashing. -
Page 42: Hints And Tips
• Touch the Start/Pause button to start the programme. 16. HINTS AND TIPS WARNING! Refer to Safety chapters. 16.1 The laundry load • Divide the laundry into: white, coloured, synthetics, delicates and wool. • Follow the washing instructions on the •... - Page 43 ENGLISH wash performance, but also helps to • Loading the appliance to the avoid waste and protect the environment: maximum capacity indicated for each programmes helps to reduce • Use only detergents and other energy and water consumption. treatments specially made for •...
-
Page 44: Care And Cleaning
16.8 Garment labels 16.11 General Tips When you dry the laundry, obey the Refer to the «Timed drying» table to find indications on the labels of the the average drying times. manufacturers: Experience will help you to dry the laundry better. - Page 45 ENGLISH The regular detergents already contain water softening agents, but we Clean the inlet hose Twice a year recommend to run a cycle with empty and the valve filter drum and a descaling product 1) Refer to ''Fluff in the fabrics'' chapter. occasionally.
- Page 46 Always obey the instructions that you find on the packaging of the product. 17.7 Cleaning the detergent dispenser To prevent possible deposits of dried detergent, clotted fabric softener, formation of mould in the detergent dispenser, once in a while carry out the following cleaning procedure: 4.
- Page 47 ENGLISH CLICK 7. Make sure that all detergent residue is removed from the conveyor. Use only soft damp clothes. 8. Put bottom cover back to its position 9. Reassembly the drawer as follows: by aligning its holes on drawer hooks a.
- Page 48 • The appliance makes an unusual noise because of the blockage of the drain pump. • The display shows the alarm code WARNING! • Do not remove the filter while the appliance operates. • Do not clean the pump if the water in the appliance is hot.
- Page 49 ENGLISH occasionally to remove any deposit, collected over the time: 1. Remove the inlet hose from the tap and clean the filter. 11. Put the filter back into the special guides by turning it clockwise. Make sure that you tighten the filter correctly to prevent leakages.
-
Page 50: Troubleshooting
17.11 Frost precautions If the appliance is installed in an area where the temperature can reach the values around 0° C or drop below, remove the remaining water from the inlet hose and the drain pump. 1. Disconnect the mains plug from the mains socket. - Page 51 ENGLISH With some problems, the display shows an alarm code and the Start/Pause button may flash continuously: If the appliance is overloaded, remove some items from the drum and/or keep pressed the door while touching the Start/Pause button until the indicator stops flashing (see the picture below).
- Page 52 • The programme was not finished properly or the appliance stopped too early. Switch the appliance off and on again. Internal fail. No com‐ • If the alarm code appears again, contact the Authorised Serv‐ munication between ice Centre.
- Page 53 ENGLISH Problem Possible solution • Make sure that a washing programme that ends with water in tub, has not been selected. • Make sure that the washing programme is finished. • Set the drain or the spin programme if there is water in the drum.
- Page 54 Problem Possible solution • Make sure the levelling of the appliance is correct. Refer to The appliance makes "Installation instruction". an unusual noise and • Make sure that the packaging and/or the transit bolts are re‐ vibrates. moved. Refer to "Installation instruction".
-
Page 55: Consumption Values
ENGLISH 18.2 Emergency door To open the door, proceed as follows: opening 1. Press the On/Off button to switch the appliance off. In case of power failure or functioning 2. Disconnect the mains plug from the failure the appliance door remains mains socket. - Page 56 19.2 Legend Laundry load. hh:mm Programme duration. Energy consumption. °C Temperature in the laundry. Litres Water consumption. Spin speed. Remaining moisture at the end of the cycle. The higher is the spin speed, the higher is the noise and the lower is the remaining moisture at the end of washing cycle.
- Page 57 ENGLISH Delay start Networked Off (W) Stand-by (W) standby (W) Time to Off/Standby mode is 15 minutes maximum. 1) The energy consumption of the connected function is approximately 17.5 kWh per year. To disconnect this function, please refer to the chapter 'Wi-fi - Connectivity setup'. 19.4 Common programmes - Washing only These values are indicative only.
-
Page 58: Quick Guide
Programme Litres hh:mm °C Synthetics 2.800 85.0 05:00 1.00 40.0 1200 40°C 1) Reference indicator of the spin speed. 20. QUICK GUIDE 20.1 Daily use • Connect the mains plug to the mains • Pour the detergent and other socket. -
Page 59: Environmental Concerns
ENGLISH 20.3 Programmes Programmes Load Product description Low energy cycle for cottons. Decreases tem‐ 10.0 kg perature and extends time to reach good Eco 40-60 washing results. White and coloured cotton fabrics. Ideal for 10.0 kg normal and heavy soil. Cottons 4.0 kg Synthetic items or mixed fabric items. - Page 60 office.
- Page 64 My AEG Care app The software in this product contains components that are based on free and open source software. AEG gratefully acknowledges the contributions of the open software and robotics communities to the development project. To access the source code of these free and open source software components whose license conditions require publishing, and to see their full copyright information and applicable license terms, please visit: http://aeg.opensoftwarerepository.com (folder NIUS)