Axis Q1715 User Manual
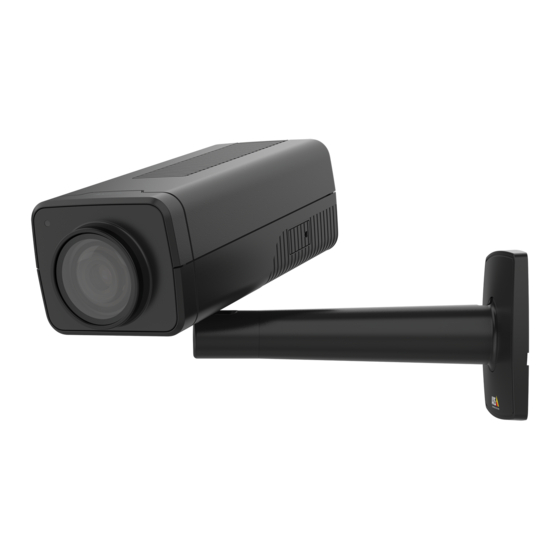
Block camera
Hide thumbs
Also See for Q1715:
- User manual (35 pages) ,
- Installation manual (24 pages) ,
- User manual (75 pages)
Table of Contents
Advertisement
Quick Links
Advertisement
Table of Contents

Related Manuals for Axis Q1715


Summary of Contents for Axis Q1715
- Page 1 AXIS Q1715 Block Camera User Manual...
-
Page 2: Table Of Contents
AXIS Q1715 Block Camera Table of Contents Installation .......... -
Page 3: Installation
AXIS Q1715 Block Camera Installation Installation To watch this video, go to the web version of this document. help.axis.com/?&piaId=63041§ion=install Installation video for the product. -
Page 4: Get Started
Get started Find the device on the network To find Axis devices on the network and assign them IP addresses in Windows®, use AXIS IP Utility or AXIS Device Manager. Both applications are free and can be downloaded from axis.com/support. -
Page 5: Webpage Overview
Secure passwords Important Axis devices send the initially set password in clear text over the network. To protect your device after the first login, set up a secure and encrypted HTTPS connection and then change the password. The device password is the primary protection for your data and services. Axis devices do not impose a password policy as they may be used in various types of installations. -
Page 6: Configure Your Device
AXIS Q1715 Block Camera Configure your device Configure your device Adjust the image This section includes instructions about configuring your device. If you want to learn more about how certain features work, go to Learn more on page 20. Level the camera To adjust the view in relation to a reference area or an object, use the level grid in combination with a mechanical adjustment of the camera. - Page 7 AXIS Q1715 Block Camera Configure your device Select exposure mode To improve image quality for specific surveillance scenes, use exposure modes. Exposure modes lets you control aperture, shutter speed, and gain. Go to Video > Image > Exposure and select between the following exposure modes: •...
- Page 8 5. If you still have problems, go to Exposure and adjust the Exposure zone to cover the area of interest. Find out more about WDR and how to use it at axis.com/web-articles/wdr. Stabilize a shaky image with electronic image stabilization (EIS) Electronic Image Stabilization (EIS) can be used in environments where the product is mounted in an exposed location and subject to vibrations, for example, wind or passing traffic.
- Page 9 Use corridor format to better utilize the full field of view in a long and narrow area, for example a staircase, hallway, road, or tunnel. 1. Depending on your device, turn the camera or the 3-axis lens in the camera 90° or 270°.
-
Page 10: Adjust The Camera View (Ptz)
AXIS Q1715 Block Camera Configure your device 3. In the camera’s live view, adjust the size and position of the rectangle around the area of interest, for example where you expect faces to appear. You can see the number of pixels for each of the rectangle’s sides, and decide if the values are enough for your needs. -
Page 11: View And Record Video
AXIS Q1715 Block Camera Configure your device 1. Go to PTZ > legacy device interface. 2. In the legacy device interface, go to PTZ > Guard tours. 3. Click +. 4. To edit the guard tour’s properties, click 5. Type a name for the guard tour and specify the pause length in minutes between each tour. -
Page 12: Set Up Rules For Events
AXIS Q1715 Block Camera Configure your device 2. Click Add network storage under Network storage. 3. Type the IP address of the host server. 4. Type the name of the shared location on the host server under Network share. 5. Type the username and password. - Page 13 AXIS Q1715 Block Camera Configure your device Record video when the camera detects an object This example explains how to set up the camera to start recording to the SD card five seconds before it detects an object and to stop one minute after.
- Page 14 AXIS Q1715 Block Camera Configure your device Record video when the camera detects loud noises This example explains how to set up the camera to start recording to the SD card five seconds before it detects loud noise and to stop two minutes after.
- Page 15 AXIS Q1715 Block Camera Configure your device 7. Click Save. Record video when the camera detects impact Shock detection allows the camera to detect tampering caused by vibrations or shock. Vibrations due to the environment or to an object can trigger an action depending on the shock sensitivity range, which can be set from 0 to 100. In this scenario, someone is throwing rocks at the camera after hours and you would like to get a video clip of the event.
- Page 16 AXIS Q1715 Block Camera Configure your device 7. The camera doesn’t have it’s own email server, so it will need to log into another email server to be able to send mails. Fill in the rest of the information according to your email provider.
-
Page 17: Audio
AXIS Q1715 Block Camera Configure your device 7. Click Save. Send an email automatically if someone spray paints the lens Activate the tampering detection: 1. Go to System > Detectors > Camera tampering. 2. Set a duration for Trigger after. The value indicates the time that must pass before an email is sent. - Page 18 Connect to a network speaker Network speaker pairing allows you to use a compatible Axis network speaker as if it is connected directly to the camera. Once paired, the speaker acts as an audio out device where you can play audio clips and transmit sound through the camera.
- Page 19 AXIS Q1715 Block Camera Cleaning recommendations Cleaning recommendations NOTICE TICE TICE Never use harsh detergent, for example gasoline, benzene, or acetone. 1. Use a can of compressed air to remove any dust or loose dirt from the device. 2. If necessary, clean the lens with a soft cloth dampened with lukewarm water.
-
Page 20: Learn More
Capture modes What capture mode to choose depends on the requirements for the frame rate and resolution of the specific surveillance setup. For specifications about available capture modes, see the product’s datasheet at axis.com. Privacy masks A privacy mask is a user-defined area that covers a part of the monitored area. In the video stream, privacy masks appear either as blocks of solid color or with a mosaic pattern. -
Page 21: Streaming And Storage
H.264 or MPEG-4 Part 10/AVC Note H.264 is a licensed technology. The Axis product includes one H.264 viewing client license. To install additional unlicensed copies of the client is prohibited. To purchase additional licenses, contact your Axis reseller. H.264 can, without compromising image quality, reduce the size of a digital video file by more than 80% compared to the Motion JPEG format and by as much as 50% compared to older MPEG formats. - Page 22 AXIS Q1715 Block Camera Learn more Variable bitrate (VBR) Variable bitrate allows the bandwidth consumption to vary depending on the level of activity in the scene. The more activity, the more bandwidth you need. With variable bitrate you are guaranteed constant image quality, but you need to make sure you have storage margins.
-
Page 23: Applications
Actual average bitrate Applications AXIS Camera Application Platform (ACAP) is an open platform that enables third parties to develop analytics and other applications for Axis products. To find out more about available applications, downloads, trials and licenses, go to axis.com/applications. -
Page 24: Security
AXIS Object Analytics AXIS Object Analytics is an analytic application that comes preinstalled on the camera. It detects objects that move in the scene and classifies them as, for example, humans or vehicles. You can set up the application to send alarms for different types of objects. To find out more about how the application works, see the user manual. -
Page 25: Troubleshooting
Using firmware from the active track is recommended if you want to access the newest features, or if you use Axis end-to-end system offerings. The LTS tracks are recommended if you use third-party integrations, which are not continuously validated against the latest active track. -
Page 26: Technical Issues, Clues, And Solutions
3. Go to Maintenance > Firmware upgrade and click Upgrade. When the upgrade has finished, the product restarts automatically. You can use AXIS Device Manager to upgrade multiple devices at the same time. Find out more at axis.com/products/axis-device-manager. Technical issues, clues, and solutions If you can’t find what you’re looking for here, try the troubleshooting section at axis.com/support. -
Page 27: Performance Considerations
IP addresses obtained from a DHCP server are dynamic and may change. If the IP address has been changed by DHCP changed, use AXIS IP Utility or AXIS Device Manager to locate the device on the network. Identify the device using its model or serial number, or by the DNS name (if the name has been configured). -
Page 28: Contact Support
Heavy network utilization due to poor infrastructure affects the bandwidth. • Viewing on poorly performing client computers lowers perceived performance and affects frame rate. • Running multiple AXIS Camera Application Platform (ACAP) applications simultaneously may affect the frame rate and the general performance. Contact support Contact support at axis.com/support. -
Page 29: Specifications
AXIS Q1715 Block Camera Specifications Specifications Product overview Security lock slot microSD card slot HDMI connector Control button SDI connector RS-485/422 connector PoE class switch Audio in (analogue/digital) Network connector (PoE) 10 Power connector (DC) 11 I/O connector 12 I2C connector (camera housing communication connector) -
Page 30: Sd Card Slot
This product supports microSD/microSDHC/microSDXC cards. For SD card recommendations, see axis.com. microSD, microSDHC, and microSDXC Logos are trademarks of SD-3C LLC. microSD, microSDHC, microSDXC are trademarks or registered trademarks of SD-3C, LLC in the United States, other countries or both. - Page 31 AXIS Q1715 Block Camera Specifications Audio input 1 Tip 2 Ring 3 Sleeve I/O connector Use the I/O connector with external devices in combination with, for example, motion detection, event triggering, and alarm notifications. In addition to the 0 V DC reference point and power (DC output), the I/O connector provides the interface to: Digital input - For connecting devices that can toggle between an open and closed circuit, for example PIR sensors, door/window contacts, and glass break detectors.
- Page 32 AXIS Q1715 Block Camera Specifications Power connector 2-pin terminal block for DC power input. Use a Safety Extra Low Voltage (SELV) compliant limited power source (LPS) with either a rated output power limited to ≤100 W or a rated output current limited to ≤5 A.
- Page 33 User Manual Ver. M3.3 AXIS Q1715 Block Camera Date: October 2022 © Axis Communications AB, 2021 - 2022 Part No. T10168073...