Bosch HBJ354ES0 User Manual And Installation Instructions
Hide thumbs
Also See for HBJ354ES0:
- User manual and installation instructions (40 pages) ,
- Instruction manual (40 pages)
Table of Contents
Advertisement
Quick Links
Advertisement
Table of Contents

Related Manuals for Bosch HBJ354ES0


Summary of Contents for Bosch HBJ354ES0
- Page 1 Oven HBJ354ES0 User manual and installation instructions [en]...
-
Page 2: Table Of Contents
en Safety 1.2 Intended use Table of contents This appliance is designed only to be built into kitchen units. Read the special installation instructions. USER MANUAL Only a licensed professional may connect ap- Safety .............. 2 pliances without plugs. Damage caused by in- correct connection is not covered under the Preventing material damage ....... -
Page 3: Safety
Safety en contact with the heating element and catch WARNING ‒ Risk of electric shock! fire. If the insulation of the power cord is dam- ▶ Never place greaseproof paper loosely aged, this is dangerous. over accessories when preheating the ap- ▶ Never let the power cord come into contact pliance and while cooking. -
Page 4: Preventing Material Damage
en Preventing material damage 2 Preventing material damage Take care not to trap anything in the appliance ▶ 2.1 General door. Only leave the cooking compartment to dry with the ▶ ATTENTION! door open if a lot of moisture was produced during Objects on the cooking compartment floor at over operation. -
Page 5: Familiarising Yourself With Your Appliance
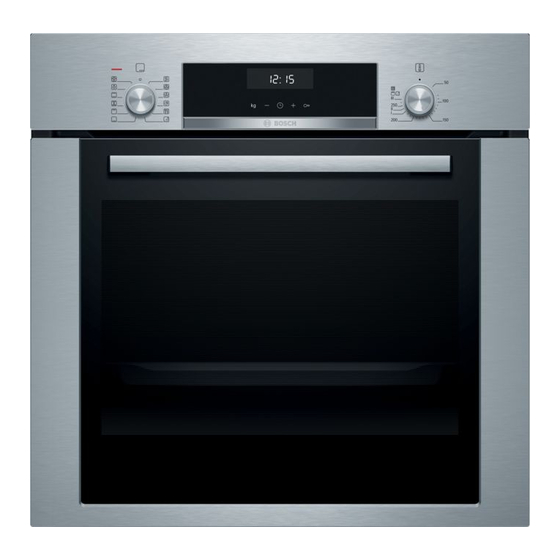
Familiarising yourself with your appliance en 4 Familiarising yourself with your appliance 4.1 Control panels Buttons and display The buttons are touch-sensitive surfaces. To se- You can use the control panel to configure all functions lect a function, simply press lightly on the relev- of your appliance and to obtain information about the ant field. -
Page 6: Ecoclean
en Familiarising yourself with your appliance Symbol Type of heating What it's used for and how it works Hot air gentle Cook selected dishes gently on one level without preheating. The fan distributes the heat from the ring-shaped heating element in the back wall evenly around the cooking compartment. -
Page 7: Rails
Familiarising yourself with your appliance en Self-cleaning surfaces Heat-up indicator The appliance indicates when it is heating up. The self-cleaning surfaces in the cooking compartment The line at the bottom of the display turns red in three are coated with a porous, matt ceramic layer and have increments, from left to right, as the cooking compart- a rough surface. - Page 8 You will find a comprehensive range of products for sal pan or your appliance in our brochures and online: baking tray www.bosch-home.com To place the accessory at the shelf positions with Accessories vary from one appliance to another. When the pull-out rails, pull out the pull-out rails.
- Page 9 Before using for the first time en 5 Before using for the first time Configure the settings for initial start-up. Clean the ap- Ventilate the room while the appliance is heating. pliance and accessories. Set the type of heating and the temperature. → "Basic operation", Page 9 5.1 Initial configuration Type of heat-...
- Page 10 en Time-setting options 8 Time-setting options Your appliance has different time-setting options which Use the button to reset the timer duration to zero. ▶ ensure that operation can be controlled. a After a few seconds, the appliance applies the change and goes out.
- Page 11 Childproof lock en Press repeatedly until is selected in the dis- Use the button to delay the end time. ▶ play. a The appliance applies the change after a few Press the button. seconds. a The display shows the calculated end time. Cancelling the end time Use the button to delay the end time.
- Page 12 en Cleaning and servicing Display Basic setting Selection Waiting time until a setting is adop- = 3 seconds = 6 seconds = 10 seconds Childproof lock can be adjusted = no = yes → "Childproof lock", Page 11 Factory setting (may vary according to model) To save the changes, press and hold for approx.
- Page 13 EcoClean en If a request to clean appears, use the cleaning func- ▶ Use the cleaning function. ▶ tion to clean the cooking compartment. → "EcoClean", Page 13 Do no use any oven cleaners or abrasive cleaning ▶ aids. If oven cleaner accidentally comes into contact with the self-cleaning surfaces, dab the surfaces im- mediately with water and a sponge cloth.
- Page 14 en Rails food that contains salt. Nutrients such as sugars 12.4 Wiping the appliance after the cleaning and proteins are not removed from the surface coat- function ing and may stick to the surface. These spots are Allow the appliance to cool down. not harmful and do not impair the cleaning ability of Wipe the cooking compartment with a damp cloth.
- Page 15 Appliance door en 14 Appliance door It is normally sufficient if you clean the outside of the Open the locking levers on the left- and right-hand appliance door. If the appliance door is very dirty on hinges. the inside and outside, you can remove the appliance door and clean it.
- Page 16 en Appliance door To remove the upper cover of the oven door, press Hold the top pane in both brackets and insert it at in the tabs on the left and right using your fingers. an angle towards the back. Pull out and remove the cover. Push the pane into both openings on the underside.
-
Page 17: Troubleshooting
Troubleshooting en The notch on the hinge must engage on both sides. Close the appliance door. 14.6 Additional door safety Additional safety devices have been fitted to prevent contact with the oven doors. Always attach these safety devices when children could come near the oven. You can purchase this special accessory from after-sales service. - Page 18 en Troubleshooting Fault Cause and troubleshooting The time does not appear in the The basic setting has been changed. display when the appliance is Change the basic setting for the time display. ▶ switched off. lights up in the display and no Childproof lock is activated.
-
Page 19: Transportation And Disposal
Transportation and disposal en 16 Transportation and disposal You can find out here how to prepare your appliance 16.2 Transporting the appliance for transportation. You will also find out how to dispose Keep the original appliance packaging. Only transport of old appliances. the appliance in the original packaging. - Page 20 en How it works Use the recommended settings when configuring open the appliance door before the food has fin- the appliance settings. ished cooking, you may not be able to achieve this result. WARNING ‒ Risk of scalding! The hot air gentle type of heating is used to meas- Hot steam may escape when you open the appli- ure both the energy consumption in circulating-air ance door.
- Page 21 How it works en ¡ Position baking tins/dishes either next to one an- Topic other or offset on different shelves so that they are You do not want small Leave a minimum clear- not directly one above the other in the cooking com- baked goods to stick to ance of 2 cm around partment.
- Page 22 en How it works Meal Accessory/cookware Shelf posi- Type of Temperature Cooking tion heating in °C time, minutes Sponge cake, 2 levels Universal pan 140–160 30–55 Baking tray Shortcrust tart with dry topping Universal pan 170–190 25–35 Shortcrust tart with dry topping, Universal pan 160–170 35–45 2 levels...
- Page 23 How it works en Biscuits Meal Accessory/cookware Shelf posi- Type of Temperature Cooking tion heating in °C time, minutes Viennese whirls Universal pan 140-150 30-40 Viennese whirls, 2 levels Universal pan 140–150 30–45 Baking tray Viennese whirls, 3 levels 5+3+1 130–140 40–55 Baking tray Universal pan Biscuits Universal pan...
- Page 24 en How it works Topic Topic Your cake is unevenly ¡ Reduce the baking The cake will not come ¡ Allow the cake to cool browned. temperature. out of the tin when turned for 5–10 minutes after ¡ Cut the greaseproof upside down. baking.
- Page 25 How it works en 18.7 Pizza, quiche and savoury cakes Here, you can find information about pizza, quiche and savoury cakes. Recommended settings Pizza, quiche and savoury cakes Meal Accessory/cookware Shelf posi- Type of Temperature Cooking tion heating in °C time, minutes Pizza, fresh Universal pan 170–190 20–30...
- Page 26 en How it works Meal Accessory/cookware Shelf posi- Type of Temperature Cooking tion heating in °C time, minutes Potato gratin, raw ingredients, 4 cm Ovenproof dish 150–170 60–80 deep Potato gratin, raw ingredients, 4 cm Ovenproof dish 150–160 70–80 deep, on 2 levels 18.9 Poultry, meat and fish Cookware with lid ¡...
- Page 27 How it works en ¡ When roasting, add a little liquid if the meat is lean. Tips for roasting and braising Cover the base of the glass cookware with ap- Use these tips for good results when roasting and prox. 1/2 cm of liquid. braising.
- Page 28 en How it works Meat Food Accessories/cook- Shelf posi- Type of Temperature Cooking ware tion heating in °C/grill set- time in mins ting Joint of pork without rind, e.g. neck, Cookware without lid 180–200 140–160 1.5 kg Joint of pork with rind, e.g. shoulder, Cookware without lid 170–190 190–200...
- Page 29 How it works en 18.10 Vegetables and side dishes This is where you can find information about preparing vegetable products that you can use as a side dish for your meals. Recommended settings Vegetables and side dishes Use the settings listed in the table. Food Accessories/cook- Shelf posi-...
- Page 30 en How it works If required, cut the fruit into thin pieces or slices of 18.13 Drying equal size. Place unpeeled fruit onto the dish with You can achieve outstanding drying results for the food the sliced surfaces facing upwards. using hot air. With this type of preserving, flavours are Ensure that neither fruit nor mushrooms overlap on concentrated as a result of the dehydration.
- Page 31 How it works en Pour 500 ml hot water (approx. 80 °C) into the uni- Once all of the jars are bubbling, reduce the tem- ‒ versal pan. perature to 120 °C. Use the recommended setting values when config- Switch off the appliance after the specified resid- ‒...
- Page 32 en How it works Tip: If you want to preheat the oven, do not carry out the final proving stage in the appliance. Recommended settings Proving dough The temperature and time are dependent on the type and quantity of the ingredients. The values in the table are therefore guide values only.
- Page 33 How it works en Recommended settings Cooking more than one dish/course at a time Meal Accessory/cookware Shelf pos- Type of Temperature Cooking ition heating in °C time, minutes Fish, whole Baking tray 5+3+1 Muffins, x 12 30–40 Pasta bake Universal pan 50–60 Ovenproof dish ¡...
- Page 34 en Installation instructions Meal Accessory/cookware Shelf posi- Type of Temperature Cooking tion heating in °C time, minutes Small cakes Universal pan 25–35 Small cakes Universal pan 25–35 Small cakes, 2 levels Universal pan 25–35 Baking tray Small cakes, 3 levels 5+3+1 35–45 Baking tray Universal pan Hot water sponge cake Springform cake tin,...
- Page 35 Installation instructions en 19.5 Corner installation ¡ The mains socket for the appliance must either be located in the hatched area A or outside of the area ¡ Observe the minimum dimensions in a corner in- where the appliance is installed. stallation in order to be able to open the cover of ¡...
- Page 36 en Installation instructions ¡ All work on the appliance, including replacing the 19.10 Only Sweden, Finland and Norway cabling, must only be carried out by the after-sales You can also connect the appliance to the protective service. contact system with the enclosed plug. The plug must be accessible following the installation.
- Page 40 Expert advice for your Bosch home appliances, help with problems or a repair from Bosch experts. Find out everything about the many ways Bosch can support you: www.bosch-home.com/service Contact data of all countries are listed in the attached service directory.