Viper AS4325B Instructions For Use Manual
Hide thumbs
Also See for AS4325B:
- Operating manuallines (2 pages) ,
- Use and maintenance (2 pages) ,
- Instructions for use manual (103 pages)

Related Manuals for Viper AS4325B


Summary of Contents for Viper AS4325B
- Page 1 AS4325B INSTRUCTION FOR USE(使用说明书) Model No.(型号): 50000582 SP-VS15362 版本 A 2020.01.19...
- Page 2 TABLE OF CONTENTS 目录 1-25 ENGLISH INSTRUCTION FOR USE(英文版说明书)………………… CHINESE INSTRUCTION FOR USE(中文版说明书)………………… 26-49...
-
Page 3: Table Of Contents
INSTRUCTION FOR USE ENGLISH TABLE OF CONTENTS INTRODUCTION ........................... 2 GUIDE PURPOSE AND CONTENTS ........................2 HOW TO KEEP THIS INSTRUCTION FOR USE ....................2 DECLARATION OF CONFORMITY ........................2 ACCESSORIES AND MAINTENANCE ......................2 CHANGE AND IMPROVEMENT ........................2 SCOPE OF APPLICATION ........................... -
Page 4: Introduction
INSTRUCTION FOR USE ENGLISH INTRODUCTION NOTE The numbers in brackets refer to the components shown in Machine Description chapter. GUIDE PURPOSE AND CONTENTS The purpose of this instruction for use is to provide the operator with all basic information and technical charac- teristics, operation, machine inactivity, spare parts and safety conditions etc. -
Page 5: Transport And Unpacking
INSTRUCTION FOR USE ENGLISH TRANSPORT AND UNPACKING When the carrier delivers the machine, make sure the packaging and machine are both whole and undamaged. If there is any damage, inform the carrier before accepting the goods, and reserve the right to compensation for the damage. -
Page 6: General Safety Instruction
INSTRUCTION FOR USE ENGLISH GENERAL SAFETY INSTRUCTION Specific warnings and cautions to inform about potential damages to people and machine are shown below. DANGER! This machine must be operated by trained and authorized personnel according to guidance of the manual. - Page 7 INSTRUCTION FOR USE ENGLISH Take all necessary precautions to prevent hair, jewelry, and loose clothes from being caught by the machine moving parts. Do not use the machine in particularly dusty areas. Do not wash the machine with direct or pressured water jets, or with corrosive substances. ...
-
Page 8: Machine Description
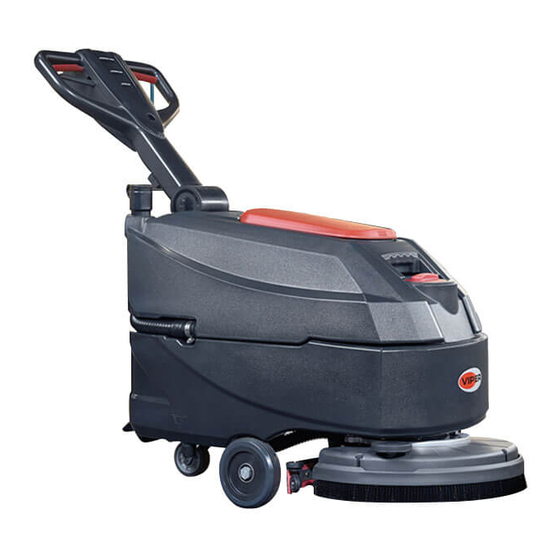
INSTRUCTION FOR USE ENGLISH MACHINE DESCRIPTION MACHINE STRUCTURE (as shown in Figure 1) Handlebar Control panel Safety switch lever Accessory parts box (*) Handlebar adjusting lever Battery charge cable holder Recovery water drain hose Battery charge cable Recovery tank lid Security cover of charging jack Fresh water cover Charging signal lights... -
Page 9: Control Panel
INSTRUCTION FOR USE ENGLISH CONTROL PANEL (as shown in Figure 2) 31. Discharged battery warning light (red) 41. Serial number plate/technical data 32. Semi-discharged battery warning light (yellow) 42. Charging red LED 33. Charged battery warning light (green) 43. Charging yellow LED 34. -
Page 10: Machine Size
INSTRUCTION FOR USE ENGLISH MACHINE SIZE 33Inches (835mm) 22.5 Inches (570 mm) 40.2Inches (1020mm) -
Page 11: Technical Parameters
INSTRUCTION FOR USE ENGLISH TECHNICAL PARAMETERS Model Parameter Type Units AS4325B Solution tank capacity L / Gal 25 L / 6.6 Gal. Recovery tank capacity L / Gal 25 L / 6.6 Gal. Machine Length mm/Inches 1020 mm / 40.1 Inches... -
Page 12: Wiring Diagram
INSTRUCTION FOR USE ENGLISH WIRING DIAGRAM... -
Page 13: Operating Guide
INSTRUCTION FOR USE ENGLISH OPERATING GUIDE WARNING! On some points of the machine there are some adhesive plates indicating: - DANGER - WARNING - CAUTION - CONSULTATION While reading this Manual, the operator must pay attention to the symbols shown on the plates. Do not cover these plates for any reason and immediately replace them if damaged. -
Page 14: Battery Installation And Battery Typesetting (Wet Or Gel/ Agm)
INSTRUCTION FOR USE ENGLISH The machine can be supplied in one of the following modes: A) Batteries (WET or GEL/ AGM) already installed and charged 1. Check that the batteries are connected to the machine with the connector (B, Figure 3). 2. - Page 15 INSTRUCTION FOR USE ENGLISH Battery installation Open the recovery tank cover (5, Figure 1) and check that the recovery tank (9, Figure 1) is empty; otherwise empty it with the drain hose. (4, Figure 1) Close the recovery tank cover (5, Figure 1). Move the recovery tank kit (A, Figure 3) carefully.
-
Page 16: Brush/Pad-Holder Installation And Removal
INSTRUCTION FOR USE ENGLISH BRUSH/PAD-HOLDER INSTALLATION AND REMOVAL NOTE Install either the brush (A, Figure 5) or pad-holder (B and C, Figure 5) according to the type of floor to be cleaned. CAUTION Before installation or removal of brush or pad-holder, make sure all the switches on machine are in off position and lifting up the squeegee and the brush/pad-holder deck from the floor. -
Page 17: Solution Or Washing Water Tank Filling
INSTRUCTION FOR USE ENGLISH Figure 6 SOLUTION OR WASHING WATER TANK FILLING Open the water inlet cover (A, Figure 7). Fill with water or solution suitable for work performance. The solution temperature must not exceed +104F (+40°C). Do not overfill the tank, refer to water level indicator (B, Figure 7) for the water volume. -
Page 18: Machine Start And Stop
INSTRUCTION FOR USE ENGLISH MACHINE START AND STOP Starting the machine Prepare the machine as shown in the previous paragraph. Push the machine to the area to be cleaned, by pushing it with the hands on the handlebar (I, Figure 8). Lower the brush/pad-holder deck (M, Figure 8) and the squeegee (L) by lifting the pedal (K). -
Page 19: Tank Emptying
INSTRUCTION FOR USE ENGLISH CAUTION! To avoid any damage to the floor surface, turn off the brushes/pad-holders when the ma- chine stops in one place. Figure 9 Battery discharge during operation While the green warning light (C, Figure 8) stays on, the batteries allow the machine to work normally. When the green warning light (C) turns off, and the yellow warning light (B) turns on, it is advisable to charge the batteries, because the remaining charge will last for a few minutes (depending on battery characteristics and work to be performed). -
Page 20: After Using The Machine
INSTRUCTION FOR USE ENGLISH Recovery water tank emptying Stop the machine. Lift the brush/pad-holder deck (M, Figure 8) and the squeegee (L) by pressing the pedal (K). Push the machine to the appointed disposal area. Empty the recovery water tank with the hose (N, Figure 8). -
Page 21: Scheduled Maintenance Table
INSTRUCTION FOR USE ENGLISH SCHEDULED MAINTENANCE TABLE CAUTION! The procedure marked with (1) must be performed when the machine is used after 9 hours for the first time. The procedure marked with (2) must be done by Service Center that is qualified by our company. - Page 22 INSTRUCTION FOR USE ENGLISH H I J Figure 12 NOTE Charge the batteries when the yellow (I, Figure 12) or red warning light (H) turns on, or when finishing cleaning. CAUTION! Keeping the batteries charged makes their life last longer. CAUTION! When the batteries are discharged, charge them as soon as possible, as that condition makes their life shorter.
-
Page 23: Brush/Pad Cleaning
INSTRUCTION FOR USE ENGLISH automatically cut off. If the red warning light (E) on the battery charger control panel stays on, the battery charger is charging the batteries. 10. When the green warning light (D) turns on, the battery charging is completed. 11. -
Page 24: Squeegee Cleaning
INSTRUCTION FOR USE ENGLISH SQUEEGEE CLEANING NOTE The squeegee must be clean, and its blades must be in good conditions to get a good drying. CAUTION! It is advisable to wear protective gloves when cleaning the squeegee because there may be sharp debris. -
Page 25: Squeegee Blade Check And Replacement
INSTRUCTION FOR USE ENGLISH SQUEEGEE BLADE CHECK AND REPLACEMENT Clean the steel or the plastic squeegee, as shown in the previous paragraph. Check that the edges (E, Figure 16) of the front blade (A) and the edges (F) of the rear blade (C) lay down on the same level, along their length;... -
Page 26: Accessories/Options
INSTRUCTION FOR USE ENGLISH Check whether the contact surface of sealing strip (E) has integrity and sealing is enough. If necessary, take the sealing strip of the tank out of the groove (F) and replace it. Assemble the new sealing strip as shown in (Figure 17), the joint should be back in the middle area. -
Page 27: Troubleshooting
Brush/Pad-holder Plastic hose and plastic parts Electrical and electronic components (*) (*) Please contact our company service center destroying any electrical and electronic components. Machine material composition and recyclability Recyclable per- AS4325B Type centage weight percentage% Aluminium 100% Electric motors-various... - Page 28 使用说明书 中文版 目录 简介 ............................27 说明书内容和目的 ............................... 27 如何保存说明书 ..............................27 符合标准声明 ............................... 27 配件和维修保养 ..............................27 变更和改进 ................................27 适用范围 ................................27 机器标识 ................................27 运输和拆除包装 ..............................28 安全指南 ..........................28 机器上的安全指示符号 ............................28 说明书中的安全指示符号 ........................... 28 通用安全指南 ............................... 29 机器描述...
-
Page 29: 说明书内容和目的
使用说明书 中文版 简介 提示 括号( )中描述的序号可以在对应的指示图中找到。 说明书内容和目的 本手册是为了给操作者提供正确、安全使用本机的必要信息。这些信息包括机器的技术数据、安全、操 作、储藏、维护、配件和如何处置机器。 在对本机进行任何的操作或维护步骤之前,操作者和具有相关资格的技术人员都必须仔细的阅读本手册。 对于本手册的解释有任何的疑问或是想得到更多的相关信息,请联系我们的售后服务部或代理商。 如何保存说明书 此说明书必须存放于机器附近便于取用,为了避免液体或其他物质污染损坏说明书,请将说明书存放于 合适的袋子或箱子。 符合标准声明 符合标准声明专为本机器提供,保证本机器符合法律强制要求。 提示 符合声明的原始文件的复印件将与本机器的其它文件资料一起提供。 配件和维护保养 一切必要的操作、维护和维修步骤都必须由有资格的人员或是我们公司指定维修中心来执行。只能使用 原厂的配件和附件。 如果需要服务及订购配件或附件,请联络我们公司,并请提供机器的型号和序列号。 变更和改进 公司致力于产品的持续改进并保留对已经销售的产品是否另行通知其改进和变更的权利。 适用范围 本洗地车用于商业和工业环境中,适合对光滑而坚硬的地面进行清洁(洗刷和污水回收) 。必须由合格 的操作者在安全的环境中使用。本洗地车不适合在户外及对地毯和比较粗糙的地面清洁。 机器标识 本机器的型号和连续号标示在连续号贴纸上。 此信息非常重要,当需要购买机器配件时,请使用以下的表格提供机器的出厂信息。 机器型号 ................... 机器序列码 .................. -
Page 30: 运输和拆除包装
使用说明书 中文版 运输和拆除包装 当收到机器时,请检查确保包装及机器完好无损。如果有任何破损,请在收货前确保运送人员清楚并书 面记录破损, 保留对此造成损失要求赔偿的权利。 拆除包装时请仔细遵从包装上的说明。 拆除包装后检查机器是否配备有如下的物品: 1.技术文件包含洗地车用户手册和零件清单。 2.电池连接线。 3.充电器说明书(如果有配充电器) (*) 安全指南 以下的符号指示了潜在的危险状况,任何情况下都请仔细的阅读这些信息并采取必要的预防措施来避免 可能的人员伤害和财产损失。 机器上的安全指示符 警告! 在对机器进行任何操作之前,请仔细阅读相关说明。 警告! 不要直接用水或高压水枪清洗机器。 警告! 不要在超过规定坡度的斜坡上使用机器。 说明书中安全指示符 危险! 它指示了可能会造成操作者死亡的危险。 警告! 它指示了潜在的可能对人员和物品造成损害的危险。 注意! 它指示对重要事项和有用功能的警示。注意带有此符号的段落。 提示 它指示对重要事项和有用功能的提示。 建议 它指示在采取任何措施之前可能的建议。... -
Page 31: 通用安全指南
使用说明书 中文版 通用安全指南 对人员和机器潜在的损害做出特定的警告和注意事项如下 危险! 此机器只能由经过适当的培训或被授权的人员来使用,且必须按照此说明书操作。 • •在进行任何的使用、维护保养、维修、更换部件等步骤之前,请确保认真阅读了说明书,机器处于关 闭状态并断开蓄电池连接。 •请不要在有毒、危险、可燃或具有爆炸性的粉尘、液体、蒸汽的附近使用本机器。本机器不适用于危 险粉尘的清洁。 •在电器元件附近工作时请不要佩戴珠宝首饰。 •除非有安全支撑,不然不可在提起的机器下面作业。 •当使用湿式蓄电池时,电池在正常使用过程中可能释放易燃气体,严禁烟火、烟火材料、强光、发热 物体靠近电池。 •当使用湿式蓄电池时,电池可能会释放少量氢气,必须确保充电环境通风并远离明火。 警告 ! 这台机器是用于商业用途,例如在酒店、学校、医院、工厂、商店、办公室和租赁业务。 • •机器无人使用需固定,防止意外移动。 •为了防止未经授权使用机器,应关掉电源或锁上,例如通过移除开关钥匙。 •每次使用前请仔细检查机器确保机器的所有部件都正确安装,否则可能给人或财产带来危害。 •在使用电池充电器充电之前,请确保电源的频率和电压与机器序列码贴纸上指示的电源频率和电压一 致。 •不要拉拽充电器电线来移动机器,不要让电线通过一扇关着的门,也不要将电线缠绕在具有锋边或锐 角的物体上,不能让机器从电线上碾过。请保持充电器电线远离热的表面。 •为了避免火灾、电击或人身伤害,当使用者离开机器时确保机器处于断电状态。 •本机器不适合室外使用,仅适合于室内使用,不用时存储于干燥的室内环境。 •机器的存储和工作温度必须在0 °C 至 +40 °C 之间,环境湿度需保持在30% - 95%。 •请不要在超过规定坡度的斜坡上使用本机器。 •当使用地面清洁液时,请遵循清洁熔液瓶体的使用标识并戴合适的手套等保护使用者。 •请使用和机器一起提供的刷盘和针座及用户手册指定的部件,使用其它的刷盘和针座会降低安全性。 •机器发生故障时,请确认不是因缺少保养引起的。若是其它的情况请寻求授权人员或维修中心的帮助。... -
Page 32: 机器描述
使用说明书 中文版 机器描述 机器结构 (如图1) 1. 手柄 21. 控制面板 2. 安全开关 22. 背部配件盒 (*) 3. 手柄调节杠杆 23. 充电线支架 4. 放污管 24. 充电线 5. 污水箱盖 25. 充电接口防护盖 6. 注水口盖 26. 充电指示窗口 7. 注水口盖拉链 27. 刷盘提起/放下踏板 8. 水管固定架 c) 刷盘放下时踏板位置 9. 污水箱 d) 刷盘提起时踏板位置... -
Page 33: 控制面板
使用说明书 中文版 控制面板 (如图2) 31. 电池电量耗尽指示灯 (红) 41. 序列号贴纸 32. 电池电量指示灯 (黄) 42. 充电器指示灯(红) 33. 电池电量饱和指示灯 (绿) 43. 充电器指示灯(黄) 34. 水流量增加开关 44. 充电器指示灯(绿) 35. 水流量大小指示灯 45. 裙边 (*) 36. 水流量减小开关 46. 刷盘 37. 自动卸刷开关 47. 针座 (*) 38. 吸力系统开关 39. 一键启动 40. -
Page 34: 机器尺寸
使用说明书 中文版 机器尺寸 33Inches (835mm) 22.5 Inches (570 mm) 40.2Inches (1020mm) -
Page 35: 技术参数
使用说明书 中文版 技术参数 型号 参数类型 单位 AS4325B 清水箱容量 Liter 25 L 污水箱容量 Liter 25 L 机器长度 1020 mm 570 mm 机器宽度(包括水刮) 485 mm 机器宽度(不包括水刮) 机器高度(不包括手柄) 647 mm 1182 mm 机器高度(手柄调垂直) 432 mm 工作宽度 153 mm 主动轮直径 89 mm 后轮直径 432 mm 刷盘/针座直径... -
Page 36: 控制电路图
使用说明书 中文版 线路图... -
Page 37: 使用指南
使用说明书 中文版 使用指南 警告! 在机器的某些部位粘贴着用于指示的标牌: -危险! -警告! -小心! -建议 在阅读本手册时,操作者必须对标牌上的这些符号特别加以小心。任何情况下都不能遮盖这些标牌,如果 它们被损坏,请马上更换。 新机器蓄电池安装和设定 警告! 如果蓄电池被错误地安装或不正确的接线,机器的电器元件可能会严重损坏。蓄电池只能由合 格的专业人员进行安装。根据所使用的蓄电池类型(湿电池 WET / 干电池 GEL 或 AGM 电池)来 设置电路板和车载充电器对应的功能(可选的) 。 安装前检查电池是否有损坏,装上随机附带的电池终端保护盖,操作时需小心谨慎。 提示 机器需要二个12 V 的电池,按图3所示连接。... -
Page 38: 蓄电池安装和型号设定 (Wet/Gel/Agm)
使用说明书 中文版 本机器可以采用如下几种电池模式 A) 蓄电池 (WET/GEL/AGM) 已经安装并随时可以供使用 1.检查蓄电池是否通过连接器连接到机器上(B, 图 3)。 2. 按下开关(39 图2) . 如果绿色指示灯(33)亮,蓄电池充满电状态。如果黄色指示灯(32)或红色指示 灯(31)亮,需要先给蓄电池充电。 B) 没有安装蓄电池 1. 购买指定的蓄电池 (参见技术参数章节). 2. 关于如何选择蓄电池,可以从合格的蓄电池代理商处得到。 根据下面段落中的设置方法对所选蓄电池(湿电池 WET/干电池 GEL 或 AGM 电池)的类型来设定机器和 车载充电器。 蓄电池安装和型号设定 (WET/GEL/AGM) 根据所选蓄电池类型 (WET/GEL/AGM), 按图4设定车载充电器和机器电路板。 机器设置 在一键启动 S3关闭状态下,同时按下水量加/减按键(S5和 S6) ,0.5秒后,LED1/LED2/LED3全亮,进入蓄 电池模式设置:... - Page 39 使用说明书 中文版 蓄电池安装 打开污水箱盖(5, 图 1)检查污水箱(9, 图 1)是否已经清空,如果污水箱还有污水,先利用放污 管(4, 图 1)排空污水箱的污水。 盖上污水箱盖(5, 图 1)。 小心地移开污水箱组件(A, 图 3)。 机器带有连接2X12V 蓄电池的连接线,小心地把蓄电池放进电池仓内,然后正确的安装。 如图3所示,将蓄电池连接电缆正确的连接并小心地用螺丝锁紧在蓄电池上。 将保护帽盖好在每个电池接线端子上,然后把连接器接到机器对应的接口上(B, 图 3)。 小心地放回污水箱组件(A, 图 3)。 蓄电池充电 10. 给蓄电池进行充电。 (参见维护保养章节). 警告 ! 在执行下列程序之前,切断机器的所有电源。 蓄电池充电器设置 11. 拆开机器上的螺丝(A, B, C, 图 4.1) 。 12.
-
Page 40: 刷盘/针盘的安装和卸载
使用说明书 中文版 刷盘/针座的安装和拆卸 提示 根据需要清洁的地面选择相应的刷盘(A, 图 5)或者针座(B 和 C, 图 5) 警告! 在安装或拆卸刷盘/针座之前,确保机器所有开关都处于关闭状态,刷盘水刮已提起离开地 面才能进行操作。操作时必须佩戴防护手套,避免被碎片划伤。具体步骤如下: 1. 关闭电源开关(39, 图2) 。 2. 通过踩下脚踏板(27, 图1)抬起刷盘罩。 3. 放置刷盘(A, 图5)或者针座(B, 图5)在刷 盘罩下(12, 图1) ,与刷盘罩中心对齐。 4. 通过升起脚踏板(27, 图1)放低刷盘罩。 5. 按下一键启动开关(39, 图2) 。 6. 轻按一下安全开关(2, 图1)其中一个或二 个均可,然后立即松开安全开关,装好刷盘 或针座。如果有必要的话,重复这一步骤直 到刷盘或针座被安装好。... -
Page 41: 溶液/清水注入
使用说明书 中文版 图 清水箱溶液/清水注入 打开进水盖(A, 图 7)。 使用注水口注入清水和适合地面清洗的 洗涤液,所注入的清水或洗涤液温度不 能超过+104F (+40°C)。 不要给清水箱注水过满,注入水量参照 水位指示管((B, 图 7)。 警告! 只能使用低泡沫、难燃的清洁剂, 这些清洁剂应适用于洗地车使用。 图... -
Page 42: 机器启动和停止
使用说明书 中文版 机器启动和停止 机器启动 1. 按前面描述的方法准备好机器。 2. 用手握在手柄上将机器推到需要清洁的区域((I, 图8) 。 3. 通过升起脚踏板(K,图8)来放低刷盘/针座(M)和水刮(L) 。 4. 按下一键启动开关(G, 图8) ,检查绿色指示灯(C)是否常亮(充满电状态),如果是黄色指示灯(B) 或红色指示灯(A)亮,表示蓄电池需要充电,关闭一键启动(G, 图8)把蓄电池充满电(参见维护保 养章节) 。 5. 根据清洁需要,通过按压水流量调节开关(D, 图8)来调节水流量的大小。 6. 用手推机器的手柄(I, 图8)同时按下安全开关(J, 图 8)开始清洗地面。 提示 移动机器或清涤地面可通过按压其中任何一个安全开关(J, 图 8)或同时按二个安全开关。 7. 如果有需要,通过按压手柄调节杠杆(3, 图1)来调节手柄的操作高度。 机器停止 8. 停止推动机器手柄(I)使机器停止。 9. 按压一键启动开关(G) ,停止刷盘电机和吸力系统,吸力系统将延迟几秒钟后停止工作。 10. -
Page 43: 水箱排水
使用说明书 中文版 警告! 为了避免损坏地面,当要机器停留在一个区域不动时,请停止刷盘工作。 图 工作期间蓄电池放电 当绿色指示灯(C,图8)常亮时,蓄电池已经充满电,机器可以正常工作;当绿色指示灯(C)熄灭,黄 色指示灯(B)常亮时,表示蓄电池电量低,建议停止工作给蓄电池充电。当黄色指示灯熄灭,红色指示 灯(A)常亮时,表示蓄电池电量已耗尽,刷盘电机和吸力系统将在几秒钟后停止工作。 警告! 蓄电池电量不足时不要再使用机器,以免损坏蓄电池和缩短蓄电池的使用寿命。 水箱排水 当污水箱(C,图10)装满污水后,一个自动浮球关闭 装置(B,图10)内的浮球将堵住连接吸力泵的入口, 通过吸力泵噪音的突然增大可以判断出吸力泵已经超 载,同时地面无法吸干,需要立即排放污水。 注意! 如果吸力泵突然被关闭(例如因为机 器的突然移动导致浮球被激活) ,想要 恢复操作请执行以下步骤: 按下一键 启动开关(G,图8)关掉吸力泵系统 和刷盘电机,打开污水箱盖(A,图 10)检查浮球滤网(B,图10)里的浮 球是否回到水面。然后关上污水箱盖 图 (A,图10) ,按下一键启动开关(G, 图8)机器开始正常工作。 当污水箱(C,图10)装满污水,请按以下步骤排空它。... -
Page 44: 首次使用
使用说明书 中文版 污水箱排水 1. 关闭机器。 2. 通过压下脚踏板(K,图8)来抬起刷盘/针座(M) 和水刮(L) 。 3. 将机器推到指定的排水区域。 4. 通过放污管(N,图8)排空污水箱内的污水,然后 用清水冲洗污水箱(C,图10)内部。 5. 将污水箱盖(A,图10)旋转90度垂直向上拆卸出 来,然后用清水冲洗污水箱盖内部和浮球滤网(B, 图10) 。 检查污水箱内出污口(D,图10)是否有异物堵塞, 如有需清理干净。 图 注意! 在排放污水时,务必将放污管折叠如 C,图 11 同时放置低位如 D,图 11 ,再打开放污管盖 排水,不可将放污管排水口端朝上直立排水,以免污水溅到操作者身上。 清水箱排水 7. 按照污水箱排水步骤1-3操作。 8. 打开清水箱放水口盖(E,图11) ,排干清水箱的水,然后用清水冲洗清水箱内部。 机器使用完之后 地面清洁工作完毕,在离开机器这前请按下列步骤操作: 1. 根据前面章节刷盘/针座安装和拆卸描述拆下刷盘或针座。 2. -
Page 45: 蓄电池充电
使用说明书 中文版 定期保养表 注意! 当机器第一次使用 9小时以后,必须执行标有(1)的保养程序。 标有(2)的保养程序必须由合格的人员或得到授权的维修中心来完成。 每天 步骤 每周 每半年 每年 每次使用完之后 蓄电池充电 水刮清洁 刷盘/针座清洁 水箱清洁 水箱密封条检查 浮球滤网清洁 水刮条的检查和更换 清水过滤器的清洁 吸力泵过滤网的清洁 WET 型号蓄电池液体高度的检查 螺丝和螺母坚固性的检查 (1) 刷盘电机碳刷的检查和更换 (2) 吸力泵电机碳刷的检查和更换 (2) 蓄电池充电 准备步骤 1. 打开污水箱盖(C,图12) ,检查污水箱(B)是否已经清空,如果污水箱还有污水,先通过放污管(A) 排空污水箱的污水。 2. 小心地移开污水箱组件(B,图12) 。 3. 连接蓄电池连接器(D,图12) 。 4. - Page 46 使用说明书 中文版 提示 保持蓄电池处于充满电的状态可以延长蓄电池的使用寿命。 警告! 蓄电池电量不足后要尽快给蓄电池充电,否则会缩短蓄电池的寿命。至少每周检查一次蓄 电池电量。 警告! 湿式蓄电池在充电过程中会产生易爆气体氢气,请保持充电环境通风并远离火源。充电时 禁止在充电的电池附件吸烟。 警告! 给蓄电池充电时要特别的小心,因为充电过程中可能有酸液的泄露。蓄电池酸液具有腐蚀 性,不慎接触到皮肤或眼睛请马上用大量水冲洗并去看医生。 H I J 图 用车载充电器给蓄电池充电 9. 连接充电器电源线(C,图13)到主电源和机器充电接口(A) ,主电源的电压和频率必须与机器序列号 贴纸(41,图2)上标示的电压和频率相符。当车载充电器被连接到主电源后,机器所有的其它功能 将被自动切断。当车载充电器面板上的红色指示灯(E,图13)常亮,表明充电器正在给蓄电池充电. 10. 当车载充电器面板上的绿色指示灯(D,图13)亮时,表示蓄电池充电已完成。 11. 蓄电池充电完成后,将充电器电源线(C,图13)与主电源和机器充电接口(A)断开,把充电器电源 线绕在充电线绕线支架(B)上。...
-
Page 47: 刷盘/针座清洁
使用说明书 中文版 图 提示 想得到更多关于车载充电器的信息,请参见相关的手册。 刷盘/针座清洁 警告! 建议在清洁刷盘/针座时必须佩戴防护手套,避免被尖锐的碎片划伤。 1. 按前面章节所述从机器上取下刷盘/针座。 2. 使用清洁液和水清洗刷盘/针座及抛光垫。 3. 检查刷盘上的刷毛/针座上抛光垫的磨损状况,当过度磨损时请更换刷盘/抛光垫。 清水过滤器清洁 1. 把机器推到水平的地面。 2. 确保机器处于关闭状态。 3. 建议清空清水箱。 4. 取下过滤器盖(D,图14) ,然后取下过滤网(E)并 清洗,再将它们装回到过滤器盒(F) 提示 过滤器滤网(E)必须正确安装到过滤器 图 盒 (F)的凸台(H)上的位置。 水刮清洁 提示 为了保证良好的吸水效果,水刮必须保持清洁,水刮条必须处于良好的状态。 警告! 建议在清洁水刮时必须佩戴防护手套,避免被尖锐的碎片划伤。... -
Page 48: 水刮条检查和更换
使用说明书 中文版 1. 把机器推到水平的地面。 2. 确保机器处于关闭状态。 3. 通过升起脚踏板(K,图8)来放低刷盘/针座(M)和水刮(L) 。 4. 从水刮(C,图15)上拆开连接的吸污管(B) 。 5. 松开水刮固定把手(D)拆下水刮(E) 。 6. 清理水刮架(E,图15) 。特别要清理干净固定的凹槽(I)和吸污管接头(H)内的污垢和碎片。检查 前刮条(F)和后刮条(G)是否完整,是否有缺口或裂痕。必要的情况下更换它们(参见下面段落中 的步骤) 。 7. 按照上述拆卸相反的顺序安装好水刮。 图 水刮条的检查和更换 1. 按前面章节步骤清理水刮。 检查前刮条(A,图16)的边(E)和后刮条(C)的边 (F) ,它们应该处于同一水平线上。否则通过以下的 步骤调整它们的高度。 松开所有的蝶形螺母(J) ,调整前刮条(A)和后刮 条(C) ,然后再扭紧所有的蝶形螺母。 3. 检查前刮条(A,图16)和后刮条(C)是否已磨损, 是否有缺口和裂痕。必要的话按照下面的方法更换它 们。检查刮条前面的边(E)和(F)是否已磨损,如 果已经磨损,而上面的边是完整的时,可以把它上下... -
Page 49: 水箱/浮球滤网清洁和水箱密封条检查
使用说明书 中文版 水箱/浮球滤网清洁和水箱密封条检查 1. 把机器推到水平的地面。 2. 确保机器处于关闭状态。 3. 将污水箱盖(A,图17)旋转到90度位置垂直向上取下来,然后从污水箱盖上取下浮球过滤装置(B) 。 4. 用清水冲洗污水箱(C)/清水箱(D)/污水箱盖(A,图17)和浮球过滤装置(B) 。 5. 清洁干净后将浮球过滤装置(B)安装到污水箱盖(A)上并垂直向下装入到污水箱上。 6. 检查污水箱盖上的水箱密封条的完整性。 提示 水箱密封条(E)使水箱内产生真空,必须密闭才可以有效的从地面上吸取污水。 7. 检查密封条(E)的承受面是否完整和足够密封。如果有必要,把水箱密封条从槽(F)里取出更换。 组装新的水箱密封条时,如图17所示,安装接头放在二边的中间区域。 8. 盖上污水箱盖(A) 。 图 配件/选配件 机器除了标准配置,还可根据需求配置相应的选配件。关于选配件的更多详细信息,请联系授权的经销商 或零售商。 配件/选配件 参见“Parts List”章节部分。 1. GEL/AGM 蓄电池。 2. 刷盘。 3. 针座。 4. 连载充电器。 5. -
Page 50: Scrapping
清理碎片等杂物 水刮在地面留下刮痕 水刮条破损,开裂,变脆 更换水刮条 提示 配车载充电器的机器,当车载充电器有故障时,机器是不能操作的。 如果车载充电器有故障的话,请联络得到授权的维修中心。 了解更多的信息,请参考从任一维修中心获得的维修手册。 报废 让合格的废品处理机构处理报废机器。 销毁机器前,请取走和隔离下述材料,按照相关的法律法规,这些材料必须得到妥善的处置。 - 蓄电池。 - 刷盘/针座。 - 塑料软管和塑料元件。 - 电气和电子元件(*) 。 (*) 需要销毁电气和电子元件时请联系我们公司的服务中心。 机器材料组成和可回收性 可回收利用的 AS4325B 类型 百分比 重量百分比% 100% 铝合金 电机 100% 铁 电线 液体 100% 不可回收塑料 100% 可回收塑料 橡胶... - Page 51 使用说明书 中文版 有害物质含量表 有害物质 部件名称 六价铬 多溴联苯 多溴二苯醚 铅(Pb) 汞(Hg) 镉(Cd) (Cr VI) (PBB) (PBDE) 水管 清水箱组件 污水箱组件 开关面板组件 控制箱组件 安全开关组件 底盘组件 刷盘组件 车轮 水刮组件 充电器 驱动电机 刷盘电机 吸力电机 电线部件 电子开关部件 电池(可选) 包装外箱类 贴纸类 说明书 PE 袋 本表格依据 SJ/T 11364 的规定编制 o:...
- Page 52 Manufacturer:Viper Cleaning Equipment Co., Ltd. Sales company: Nilfisk Cleaning Equipment (Shang- hai) Co., Ltd. Add: 4189 Yindu Road, Xinzhuang Industrial Park, Shanghai, P.R.C. 201108 Sales hotline:400-080-3200 Aftersales service:400-880-5900 https://www.vipercleaning.cn 制造商:东莞威霸清洁器材有限公司 销售公司:力奇清洁设备(上海)有限公司 地址:上海莘庄工业园区银都路4189号 邮编:201108 市场热线:400-080-3200 售后维修:400-880-5900 https://www.vipercleaning.cn...