Whirlpool Refrigerator French Door Bottom Quick Start Guide
- Use & care manual (128 pages)
Advertisement
OPERATING INSTRUCTIONS

Before operating this appliance, make sure it has been properly installed according to the appliance's Owner's Manual.
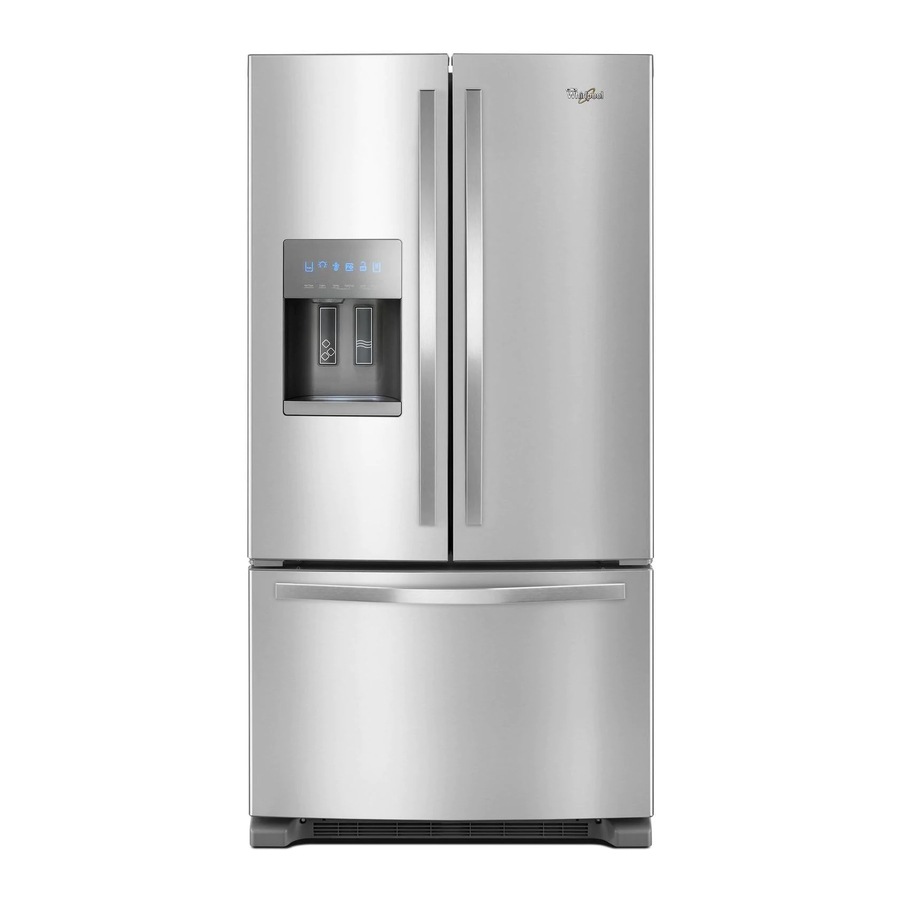
The controls are located above the external dispenser. Touch any control button on the dispenser panel to activate the display screen.
NOTE: The display screen on the dispenser control panel will turn off automatically and enter "sleep" mode when the control buttons and dispenser levers have not been used for 2 minutes or more. While in "sleep" mode, the first press of a control button will only reactivate the display screen, without changing any settings. After reactivation, changes to any settings can then be made. If no changes are made within 2 minutes, the display will re-enter "sleep" mode.

For your convenience, your refrigerator and freezer controls are preset at the factory. When you first install your refrigerator, make sure that the controls are still set to the "mid-settings." The factory recommended set points are 38°F (3°C) for the refrigerator and 0°F (-18°C) for the freezer.
- Wait 24 hours for your refrigerator to cool completely before adding food. If you add food before the refrigerator has cooled completely, your food may spoil.
NOTE: Adjusting the set points to a colder than recommended setting will not cool the compartments any faster. - If the temperature is too warm or too cold in the refrigerator or freezer, first check the air vents to be sure they are not blocked before adjusting the controls.
- The recommended settings should be correct for normal household refrigerator use. The controls are set correctly when milk or juice is as cold as you like and when ice cream is firm.
NOTE: Areas such as a garage, basement, or porch may have higher humidity or extreme temperatures. You may need to adjust the temperature away from the recommended settings to accommodate for these conditions. - Wait at least 24 hours between adjustments. Recheck the temperatures before other adjustments are made.
TEMPERATURE SET POINTS
- To view and adjust the set points, press and hold Temp for 3 seconds to activate Temperature mode.
NOTE: To view temperature in degrees Celsius, press the Light button, under Units, when adjust mode is activated. To return the display setting to Fahrenheit, press the Light button again.
When Temperature mode is activated, press Temp to toggle between Fridge and Freezer. The display will show the temperature set point of the selected compartment and temperature adjusting information will appear on the display screen.
Recommended Refrigerator Temperature

Fridge set point range: 33°F to 45°F (0°C to 7°C)
Recommended Freezer Temperature

Freezer set point range: -5°F to 5°F (-21°C to -15°C)
- When Temperature mode is activated, press Temp to select the Refrigerator or Freezer zone. The display will show the temperature set point of the selected compartment.
- Press Lock to raise the set point, or press Options to lower the set point.
- When you have finished viewing (and adjusting if desired) the refrigerator set point, press Temp, under Select Zone, to change the display to show the freezer set point. When the zone has been changed, "Freezer" appears on the display screen.
- Press the Lock button to raise the set point, or press the Options button to lower the set point.
When adjusting temperature set points, use the following chart as a guide.
| CONDITION: | TEMPERATURE ADJUSTMENT: |
| Refrigerator too cold | Refrigerator setting 1° higher |
| Refrigerator too warm | Refrigerator setting 1° lower |
| Freezer too cold | Freezer setting 1° higher |
| Freezer too warm / too little ice | Freezer setting 1° lower |
Save/Confirm Temperature Settings
When you have finished viewing (and adjusting if desired) both the refrigerator and freezer set points, press Measured Fill to save the settings.
NOTE: To exit without saving changes, press Ice Type at any time while in adjust mode, or allow about 60 seconds of inactivity and adjust mode will turn off automatically.
COOLING ON/OFF
Your refrigerator and freezer will not cool when cooling is turned off. To turn cooling off, press and hold the Lock and Measured Fill buttons at the same time for 3 seconds.
- To avoid unintentionally locking the dispenser or changing other settings, press both buttons at exactly the same time.
- When cooling is off, "Refrigeration Cooling is Off" will appear on the display screen.
- Press and hold Lock and Measured Fill for 3 seconds again to turn cooling back on.
ICE MAKER ON/OFF
You can turn the ice maker on or off from the control panel.
Press the Options button to enter Options mode. The words "Ice Maker" will illuminate. Then press Temp to toggle between "Ice Maker" and "Ice Maker Off." When the ice maker is turned off, "Ice Maker Off" will flash three times and then stay lit. When the ice maker is set to off, it will stop producing ice. Pressing Ice Maker, if the ice maker is currently off, turns on the ice maker.
FAST COOL
The Fast Cool feature assists with periods of high refrigerator use, full grocery loads, or temporarily warm room temperatures. Once selected, Fast Cool will remain on for 24 hours unless manually turned off.
- To turn on the Fast Cool feature, press the Options button to enter Options mode, then press Options again to activate the feature. When the feature is on, "Fast Cool" will appear on the dispenser display screen..
- To manually turn off the Fast Cool feature, press the Options button to enter Options mode (unless you are already in Options mode), then press Options again. When the feature has been turned off, "Fast Cool" will disappear on the dispenser display.
NOTE: Setting the freezer to a colder temperature may make some foods, such as ice cream, harder.
WATER FILTER STATUS
When a water filter has been installed in the refrigerator, the water filter status lights help you know when to change your water filter.
The disposable water filter should be replaced at least every 6 months. If the water flow to the water dispenser or ice maker decreases noticeably before 6 months have passed, replace the water filter more often.
- The "Order Filter" icon will illuminate when 90% of the volume of water for which the filter is rated has passed through the filter or 5 months have passed since the filter was installed.
- The "Replace Filter" icon will illuminate and blink continuously during dispensing when the rated volume of water has passed through the filter or 6 months have passed since the filter was installed. A new water filter should be installed immediately when the "Replace Filter" light is illuminated.
- After 14 days at Replace Filter stage, the "Replace Filter" and "water" icons will glow at all times and blink continuously during dispensing. Also, an alert chime will sound three times following dispensing.
The filter reset control allows you to restart the water filter status tracking feature each time you replace the water filter. See "Water Filtration System" in the Owner's Manual.
After changing the water filter, reset the status light. Press the Options button to enter Options mode, then press Lock to initiate the reset, then press Measured Fill to confirm that you want to reset the status light. When the system is reset, the "Order" and "Replace" icons will disappear from the display screen.
NOTES:
- During the first hour after Vacation Mode is turned on, opening and closing the refrigerator door will not affect the setting. After 1 hour has passed, opening and closing the refrigerator door will turn off Vacation Mode.
- While in Vacation Mode, if Fast Ice is turned on or the Door Ajar alarm sounds, Vacation Mode will be canceled.
DISPENSER LIGHT
When you use the dispenser, the lights will turn on automatically. If you want the light to be on continuously, you may choose either On or Pads. The display screen indicates which mode is selected.
ON: Press Light to turn on the dispenser light and the light behind the dispenser paddles.
PADS: Press Light a second time to select Pads mode. The dispenser light will turn off, but the light behind the dispenser paddles will remain on.
OFF: Press Light a third time to turn off the dispenser light.


The dispenser lights are LEDs that cannot be changed. If it appears that your dispenser lights are not working, see online "Troubleshooting" for more information.
DISPENSER LOCK
The dispenser can be turned off for easy cleaning or to avoid unintentional dispensing by small children and pets.
NOTE: The lock feature does not shut off power to the refrigerator, to the ice maker, or to the dispenser light. It simply deactivates the controls and dispenser lever. To turn off the ice maker, see the "Ice Maker and Storage Bin" section in the Owner's Manual.
- Press and hold Lock for 3 seconds to lock the dispenser.
- Press and hold Lock a second time to unlock the dispenser.
The display screen indicates when the dispenser is locked.


Online Ordering Information
For detailed installation instruction and maintenance information, winter storage, and transportation tips, please see the Owner's Manual included with your appliance.
For information on any of the following items, a full cycle guide, detailed product dimensions, or for complete instructions for use and installation, please visit https://www.whirlpool.com/owners, or in Canada https://www.whirlpool.ca/owners. This may save you the cost of a service call. However, if you need to contact us, use the information listed below for the appropriate region.
United States:
1–800–253–1301
Whirlpool Brand Home Appliances
Customer eXperience Center
553 Benson Road
Benton Harbor, MI 49022–2692
Canada:
1–800–807–6777
Whirlpool Brand Home Appliances
Customer eXperience Centre
200–6750 Century Ave.
Mississauga, Ontario L5N 0B7
SAVE THESE INSTRUCTIONS

®/™ ©2020 Whirlpool. All rights reserved. Used under license in Canada.
VideosEasily Disassemble Your Whirlpool French Door Refrigerator: Step-by-Step Guide Video
Removing the Doors on a French Door Refrigerator Video
Documents / Resources
References
Download manual
Here you can download full pdf version of manual, it may contain additional safety instructions, warranty information, FCC rules, etc.
Download Whirlpool Refrigerator French Door Bottom Quick Start Guide
Advertisement
Thank you! Your question has been received!


Need Assistance?
Do you have a question about the French Door Bottom that isn't answered in the manual? Leave your question here.