Table of Contents
Advertisement
Quick Links
Advertisement
Table of Contents

Related Manuals for M-Audio M-Game Solo


Summary of Contents for M-Audio M-Game Solo
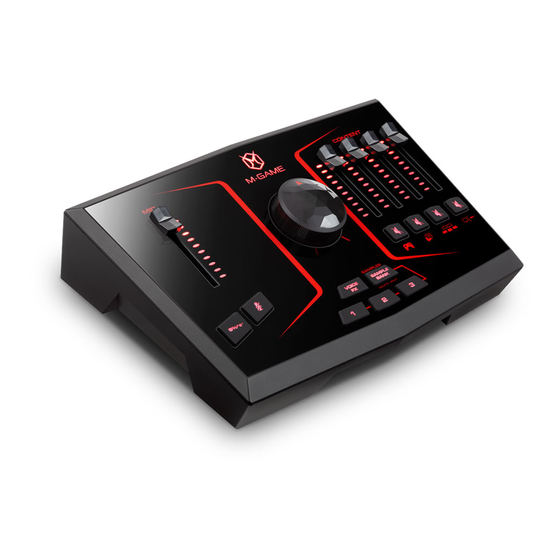
- Page 1 M-Game Solo User Guide v1.2...
-
Page 2: Table Of Contents
Table of Contents Introduction ....................... 5 Information & Support ....................5 About This User Guide ....................5 Software Download and Installation ................5 Hardware Setup ......................6 Software Setup ....................7 Windows ........................7 macOS .......................... 9 Operation ......................11 Home Menu ........................ - Page 3 Sampler ........................16 Sample List ..........................17 Sample Control ..........................17 LED Control ..........................18 Menu Bar ............................18 Sample Editor ..........................19 Effects ........................20 Button Control ..........................21 Menu Bar ............................21 LED Control ..........................21 Button Type ..........................22 Individual Effects .......................
- Page 4 Appendix ......................31 LEDs ........................... 31 Voice Effects ......................32 Technical Specifications ................... 33 Trademarks and Licenses ..................33...
-
Page 5: Introduction
Software Download and Installation 1. Before connecting M-Game Solo to your computer, first download and install the M-Game software (Windows 10, 64 bit minimum supported, and macOS 10.15 minimum supported) to the computer that will be connected to M-Game Solo using the link on the software download card. For the latest driver compatibility details and app support, please visit m-game.com. -
Page 6: Hardware Setup
Note: Connect an 1/8" (3.5 mm) stereo cable into the Main Out if you wish to route a stereo copy of your livestream to other devices. In a dual-PC setup, connect the Main Out on M-Game Solo to the LINE IN input on your streaming PC. -
Page 7: Software Setup
Continue speaking into the mic and turning up the Gain knob until you see the Mic Fader LEDs flash red 3 times. If you see the Mic Fader LEDs flash red 3 times, this means M-Game Solo's Mic Gain knob is set too high. - Page 8 Important: If you're using a Chat application like Discord, set the Audio Input to Chat and Output to Chat. This will ensure that your Chat audio is sent to the M-Game Solo's Chat fader, and that your Mic is only sent to the Chat.
-
Page 9: Macos
Continue speaking into the mic and turning up the Gain knob until you see the Mic Fader LEDs flash red 3 times. This means M-Game Solo's Mic Gain knob is set too high. Turn down the Mic Gain knob until you no longer see the LED flash red 3 times. - Page 10 Important: If you're using a Chat application like Discord, set the Audio Input to Chat and Output to Chat. This will ensure that your Chat audio is sent to the M-Game Solo's Chat fader, and that your Mic is only sent to the Chat.
-
Page 11: Operation
Operation Home Menu The home page shows the hardware in its current state. This gives a visual reference of the M-Game Solo hardware when in use, and is usually the page that will be open when actively streaming. The software toolbar at the top of the main window is used to access the File, Options, and Help dropdown menus listed below. - Page 12 Support: Select to register your product and download M-Game software. • Setup: Select here for articles and videos on how to setup software and connect your computer and devices to the M-Game Solo. • About: Opens the About software dialog box.
-
Page 13: Setup
Setup Microphone Settings 1. HW Meter: This button changes the Mic LED/fader on the hardware to show what the mic gain is to aid in setting the optimal gain level. Unticking this button or exiting the setup page will toggle back to normal mic fader mode and turn off the mic LED at the top of the page. -
Page 14: (Censor) Button
"$%^#*" (CENSOR) Button This selection enables you to select and set the sample that will be triggered when the "$%^#*" (CENSOR) button is pressed. When the "$%^#*" (CENSOR) button is pressed the selected sample will play as a one-shot and the microphone signal will be muted for as long as the button is pressed and held. -
Page 15: Routings
4. Output Icons: The Output Icons are used to represent the various USB audio outputs and hardware outputs on the M-Game Solo. Right clicking (Windows) or secondary clicking (macOS) on each icon brings up a menu that can activate the following options. Secondary clicking can be changed in macOS System Preferences. -
Page 16: Sampler
Sampler Samples (1-6) This menu accesses the sample button functions. The sampler page is broken into four sections: The Sample List, the Sample Button Control, the Menu Bar, and the Sample Editor. -
Page 17: Sample List
Sample List This is a list of the current available samples. Sample Control This gives a visual display of the hardware where you can configure the sample buttons. 1. Bank Toggle: This shows a bank selection toggle to determine which bank you are affecting. -
Page 18: Led Control
LED Control Click to select what the button’s LED color and effect will be. • Solid: Keeps the LED as the selected solid color. One color can be selected from the list of colors. • Pulse: Activates the pulsing effect, which will brighten the LEDs and then dim the LEDs. When Pulse is active, the LEDs will pulse uniformly. -
Page 19: Sample Editor
Sample Editor 1. Sample Transport: The sample editor includes standard play and stop controls. The Play button will play the sample from the start flag to the end flag. Adjust the flags to adjust the play start and end area. 2. -
Page 20: Effects
Effects Access this menu to view, assign and customize the vocal effects. The effects page is broken into four sections: The Effect List (Multi-Effect List), the Effect Button Control, the Menu Bar, and the Individual Effects Editor. -
Page 21: Button Control
Button Control Inside the effect button control there is a visual display of the hardware where you can set up the effect button. 1. Frame: When an effect has been assigned, this framed area will show a voice effect’s corresponding image and Button Type (Mode). 2. -
Page 22: Button Type
Button Type Press this to open a submenu with a Toggle and Hold selection to determine the button behavior when pressed. -
Page 23: Individual Effects
Individual Effects The Effects listed in the Effects List are a creation of individual Effects settings. There are 3 individual Effect categories: Reverb and Echo, Chorus and Modulation, and Distortion. Each individual Effect includes an On/Off switch for that effect, a pulldown menu for effect presets/types, and a Parameter knob for controlling the amount of the effect preset. -
Page 24: Distortion
Distortion The Distortion effect produces an altered, crunchy, or harsh signal. This is usually used on guitars but can also be creatively used to achieve a lo-fi sound or gritty vocals. Adjust the virtual knob to control how much of the effect is applied from 0-100%. -
Page 25: Leds
LEDs This section allows you to adjust LED settings for any LED on the hardware. The selected LED is highlighted, and the info shows data about that LED (if applicable, for instance with buttons). Sample button LEDs have an extra control of UNASSIGNED, allowing you to select color and LED type for its unassigned state. - Page 26 Solid - 1 Color: Keeps all of the LEDs lit as the selected solid color. Solid - Gradient: Keeps all of the LEDs lit as a spectrum of selected solid colors. You will select 2 LED colors to fade between. Pulse: Activates a pulsing effect keeping all of the LEDs lit as the selected colors, which will brighten the LEDs and then dim the LEDs.
-
Page 27: Color Frame
Color Frame Press a button to open a color selection menu to set the sample color for the hardware control. -
Page 28: Features
Features Top Panel Headphone/Main Level Control 1. Main Control: This knob will adjust the Headphone/Main speakers level. 1. Mic Level Fader: This fader controls the mic volume being sent to the USB port, Headphone, and Main Outs. This is not a “gain” control. When fully lowered, it lowers the mic to its lowest level. Configurable Mic Mute Button: This backlit button can be configured to mute the mic audio signal being sent to all audio streams, the chat audio stream, the broadcast audio stream or any other stream the mic is able to be sent to. -
Page 29: Stream
Stream GAME Level Fader: This fader will adjust the volume of the game audio being sent to the USB port, Headphone, and Main Outs. This level will be identical to the audio that is being sent to the headphones unless the headphone/speaker mix is changed in the M-Game's software's Routing tab. -
Page 30: Rear Panel
1/4” (6.35 mm) (PCM type) output to capture and stream its audio. 9. USB: Connect your streaming computer here to capture and stream audio from M-Game Solo's microphone inputs, game audio, chat audio, and the aux input using the M-Game software. -
Page 31: Appendix
Appendix LEDs Fader Colors 6 (gradients of red) Solid 1 Color LED Modes Solid Gradient Pulse 1 Color Pulse 2 Colors Pulse 3 Colors Pulse 4 Colors Chasing 1 Color Chasing 1 Color with Background Fader 1 Color Fader 1 Color with Indicator Fader 1 Color with Indicator and Background Gradient Color Gradient Color with Indicator... -
Page 32: Voice Effects
Voice Effects Distortion Telephone Megaphone Walkie Talkie Edgy Drive Mild Dirt Awful Grungy Face Melter Intimate Presence Tiny Chorus & Modulation Doubler Wide Doubler Trio Hive Warbler Deep Flange Wide Flange Case What Physician In the Pipe Trembling Tremolo Reverb & Echo Small Room Medium Room Large Room... -
Page 33: Technical Specifications
59 dB Trademarks and Licenses M-Audio is a trademark of inMusic Brands, Inc., registered in the U.S. and other countries. Windows is a registered trademark of Microsoft Corporation in the United States and other countries. macOS is a trademark of Apple Inc., registered in the U.S. and other countries.