Table of Contents
Advertisement
Quick Links
BIOS User Guide
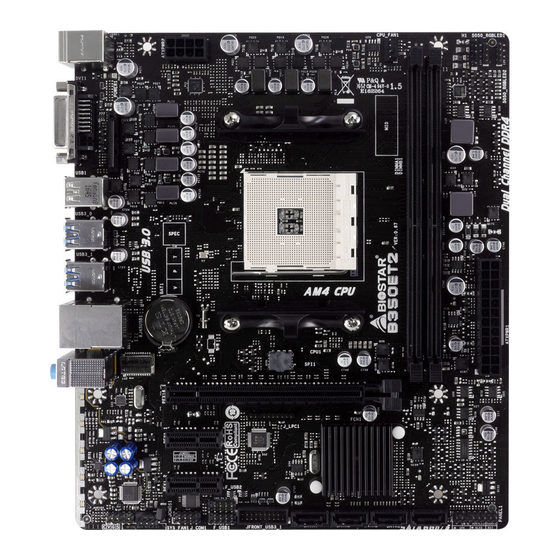
B350ET2
BIOS Update ������������������������������������������������������������������������������������� 2
UEFI BIOS Setup �������������������������������������������������������������������������������� 6
1� Main Menu ����������������������������������������������������������������������������������� 7
2� Advanced Menu ���������������������������������������������������������������������������� 8
3� Chipset Menu �������������������������������������������������������������������������������22
4� Boot Menu �����������������������������������������������������������������������������������26
5� Security Menu ������������������������������������������������������������������������������28
6� O�N�E Menu����������������������������������������������������������������������������������30
7� Exit Menu�������������������������������������������������������������������������������������34
Advertisement
Table of Contents

Related Manuals for Biostar B350ET2


Summary of Contents for Biostar B350ET2
-
Page 1: Table Of Contents
BIOS User Guide B350ET2 BIOS Update ������������������������������������������������������������������������������������� 2 UEFI BIOS Setup �������������������������������������������������������������������������������� 6 1� Main Menu ����������������������������������������������������������������������������������� 7 2� Advanced Menu ���������������������������������������������������������������������������� 8 3� Chipset Menu �������������������������������������������������������������������������������22 4� Boot Menu �����������������������������������������������������������������������������������26 5� Security Menu ������������������������������������������������������������������������������28 6� O�N�E Menu����������������������������������������������������������������������������������30 7� Exit Menu�������������������������������������������������������������������������������������34... -
Page 2: Bios Update
The BIOS can be updated using either of the following utilities: • BIOSTAR BIOS-FLASHER: Using this utility, the BIOS can be updated from a file on a hard disk, a USB drive (a flash drive or a USB hard drive), or a CD-ROM. - Page 3 B350ET2 7. A dialog pops out after BIOS flash is completed, asking you to restart the system. Press the <Y> key to restart system. 8. While the system boots up and the full screen logo shows up, press <DEL> key to enter BIOS setup.
- Page 4 Then, the BIOS Update is completed. BIOS Update Utility (through a BIOS file) 1. Installing BIOS Update Utility from the DVD Driver. 2. Download the proper BIOS from http://www.biostar.com.tw/ 3. Launch BIOS Update Utility and click the “Update BIOS” button on the main screen.
- Page 5 B350ET2 6. After the BIOS Update process is finished, click on “OK” to reboot the system. 7. While the system boots up and the full screen logo shows up, press <DEL> key to enter BIOS setup. After entering the BIOS setup, please go to the <Save & Exit>, using the <Restore Defaults>...
-
Page 6: Uefi Bios Setup
UEFI BIOS Setup Introduction The purpose of this manual is to describe the settings in the AMI UEFI BIOS Setup program on this motherboard. The Setup program allows users to modify the basic system configuration and save these settings to NVRAM. UEFI BIOS determines what a computer can do without accessing programs from a disk. -
Page 7: 1� Main Menu
B350ET2 1� Main Menu Once you enter AMI UEFI BIOS Setup Utility, the Main Menu will appear on the screen providing an overview of the basic system information. BIOS Information It shows system information including UEFI BIOS version, Project Code, Model Name, Build Date and etc. -
Page 8: 2� Advanced Menu
2� Advanced Menu The Advanced Menu allows you to configure the settings of CPU, Super I/O, Power Management, and other system devices. Note » Beware of that setting inappropriate values in items of this menu may cause system to malfunction. Trusted Computing Security Device Support This item enables or disables BIOS support for security device. - Page 9 B350ET2 SHA-1 PCR Bank This item enables or disables SHA-1 PCR Bank. Options: Enabled (Default) / Disabled SHA256 PCR Bank This item enables or disables SHA256 PCR Bank. Options: Enabled (Default) / Disabled Pending operation This item Schedule an Operation for the Security Device.
- Page 10 ACPI Settings/WakeUp Event control ErP Control This item enables or disables ErP Control function. When ErP Enabled, system meets ErP requirment. All wake up events do not work except Power Button after power down system(S5). Options: Disabled (Default) / Enabled ACPI Sleep State This item select ACPI sleep state the system will enter when the SUSPEND button is pressed.
- Page 11 B350ET2 Specific Key This item will show only when Keyboard PowerOn is set “Specific Key.” Press Enter to set Specific key. PS2 Mouse PowerOn This item allows you to control the mouse power on function. Options: Disabled (Default) / Enabled...
- Page 12 Promontory Common Options PT USB Configuration Options PT XHCI GEN1/2 Options: Auto (Default) / Disabled / Enabled 12 | 2. Advanced Menu...
- Page 13 B350ET2 SMART FAN Control CPU Smart FAN & System Smart FAN1 This item allows you to control the CPU/System Smart Fan function. Options: Disabled (Default) / 4Pin Note » The following items appear only when you set the Smart Fan function to [4Pin].
- Page 14 IT8613 Super IO Configuration Serial Port 1 Configuration Serial Port This item enabled or Disabled Serial Port (COM). Options: Enabled (Default) / Disabled Change Settings This item select an optimal settings for Super IO Device. Options: Auto (Default) / IO=3F8h; IRQ=4 / IO=3F8h; IRQ=3,4,5,6,7,9,10,11,12 / IO=2F8h; IRQ=3,4,5,6,7,9,10,11,12 / IO=3E8h;...
- Page 15 B350ET2 H/W Monitor PWM Processor Hot Options: Enabled (Default) / Disabled Shutdown Temperature This item allows you to set up the CPU shutdown Temperature. Options: Disabled (Default) / 70°C/158°F / 75°C/167°F / 80°C/176°F / 85°C/185°F / 90°C/194°F CPU Configuration This item shows CPU Information.
- Page 16 NX Mode This item enables or disables No-execute page protection Function. Options: Enabled (Default) / Disabled SVM Mode This item enables or disables CPU Virtualization. Options: Enabled (Default) / Disabled CPB Mode This item specifies the method of core performance boost enablement. Options: Enabled (Default) / Disabled C6 Mode This item enables or disables C6.
- Page 17 B350ET2 ABove 4G Decoding This item enables or disables 64bit capable Devices to be Decoded in Above 4G Address Space (Only if System Supports 64bit PCI Decoding). Options: Disabled (Default) / Enabled SR-IOV Support This item if system has SR-IOV capable PCIe Devices, this option enables or disables Single Root IO Virtualization Support.
- Page 18 Network Stack Configuration Network Stack This item enables or disables UEFI network stack Options: Disabled (Default) / Enabled Note » The following items appear only when you set the Network Stack function to [Enabled] IPv4 PXE Support This item enables or disables IPv4 PXE Boot Support. If disabled IPv4 PXE boot option will not be created.
- Page 19 B350ET2 CSM Configuration CSM Support This option enables or disables CSM support. Options: Enabled (Default) / Disabled GateA20 Active Upon Request – GA20 can be disabled using BIOS services. Always – do not allow disabling GA20; this option is useful when any RT code is executed above 1MB.
- Page 20 Other PCI device ROM priority This item for PCI devices other than Network, Mass storage or Video defines which OpROM to launch. Options: UEFI (Default) / Legacy / Do not launch NVMe Configuration The item shows NVMe controller and driver information. Offboard PCIe SATA Controller 20 | 2.
- Page 21 B350ET2 USB Configuration Legacy USB Support The item allows you to enable Legacy USB support. AUTO option disables legacy support if no USB devices are connected. DISABLE option will keep USB devices available only for EFI applications. Options: Enabled (Default) / Disabled / Auto Legacy USB3.0 Support...
-
Page 22: 3� Chipset Menu
3� Chipset Menu This section describes configuring the PCI bus system. PCI, or Personal Computer Interconnect, is a system which allows I/O devices to operate at speeds nearing the speed of the CPU itself uses when communicating with its own special components. Note ... - Page 23 B350ET2 SB USB Configuration XHCI Controller This item enables/disables XHCI Controller. Options: Enabled (Default) / Disabled EHCI HC(Bus 0 Dev 18 Fn 0) Options: Auto (Default) / Disabled / Enabled North Bridge IOMMU This item enables or disables IOMMU support.
- Page 24 GFX Configuration Primary Video Device This item select Primary Video Device that BIOS will use to for optput. Options: NB PCIe slot Video (Default) / IGD Video Integrated Graphics This item allows you to controller the Integrated Graphics function. Options: Auto (Default) / Disabled UMA Frame Buffer Size This item allows you to set UMA FB Size.
- Page 25 B350ET2 Onboard Device Realtek PCIE NIC This item enables or disables Realtek PCIE NIC. Options: Enabled (Default) / Disabled Onboard LAN Option ROM This item enables or disables Onboard LAN Option ROM. Options: Disabled (Default) / Enabled 3. Chipset Menu | 25...
-
Page 26: 4� Boot Menu
4� Boot Menu This menu allows you to setup the system boot options. Setup Prompt Timeout This item sets number of seconds to wait for setup activation key. Options: 2 (Default) Bootup NumLock State This item selects the keyboard NumLock state. Options: On (Default) / Off Full Screen Logo Display This item allows you to enable/disable Full Screen Logo Show function. - Page 27 B350ET2 USB Support If Disabled, all USB devices will NOT be available until after OS boot. If Partial Initial, USB Mass Storage and specific USB port/device will NOT be available before OS boot. If Enabled, all USB devices will be available in OS and Post.
-
Page 28: 5� Security Menu
5� Security Menu Administrator Password This item sets Administrator Password. User Password This item sets User Password. Secure Boot Menu 28 | 5. Security Menu... - Page 29 B350ET2 Attempt Secure Boot Secure Boot activated when Platform Key(PK) is enrolled, System mode is User/Deployed, and CSM function is disabled. Options: Disabled (Default) / Enabled Key Management Install Factory Default keys Force System to User Mode - install all Factory Default Keys. Change takes effect after reboot.
-
Page 30: 6� O�N�E Menu
6� O�N�E Menu This submenu allows you to change voltage and clock of various devices. Note » We suggest you use the default setting. Changing the voltage and clock improperly may damage the device. » The options and default settings might be different by RAM or CPU models. ... - Page 31 B350ET2 Memory Insight DIMM Profile These items display memory information. 6. O.N.E Menu | 31...
- Page 32 Vivid LED Control On/Off This item Vivid LED Control Switch. Options: Enabled (Default) / Disabled Color Wheel This item Vivid LED Color Wheel. Options: Disabled (Default) / Enabled Sparkle Mode This item Vivid LED Sparkle Mode. Options: Permanent (Default) / Shine / Breathe This item allows you to adjust the value for RED color model.
- Page 33 B350ET2 CPU Core Voltage This item CPU Core Voltage Control. Options: Auto (Default) / +0.020 V / +0.040 V / +0.060 V / +0.080 V / +0.100 V / +0.120 V / +0.140 V / +0.160 V / +0.180 V / +0.200 V / +0.220 V / +0.240 V / +0.260 V / +0.280 V / +0.300 V / +0.320 V / +0.340 V +0.360 V / +0.380 V / +0.400 V / +0.420 V / +0.440 V / +0.460 V /...
-
Page 34: 7� Exit Menu
7� Exit Menu This menu allows you to load the optimal default settings, and save or discard the changes to the BIOS items. Discard Changes and Exit Abandon all changes made during the current session and exit setup. Save Changes and Reset Reset the system after saving the changes.