Table of Contents
Advertisement
Quick Links
Advertisement
Table of Contents

Related Manuals for ELNA eXplore 150


Summary of Contents for ELNA eXplore 150
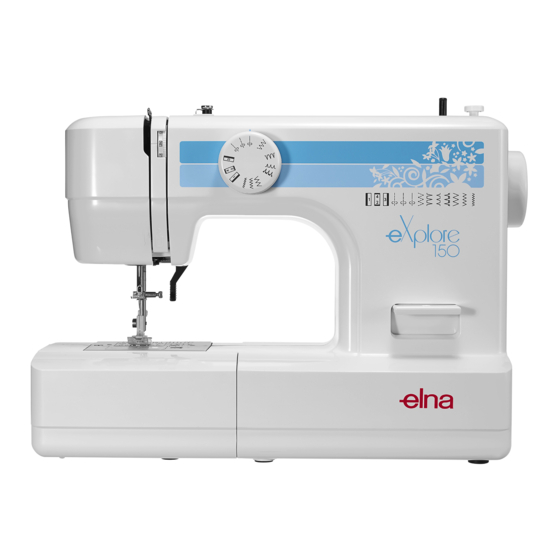
- Page 1 150 | Instruction Book | Manuel d’instructions | Bedienungsanleitung |...
- Page 3 IMPORTANT SAFETY INSTRUCTIONS When using an electrical appliance, basic safety precautions should always be followed, including the following: This sewing machine is designed and manufactured for household use only. Read all instructions before using this sewing machine. DANGER — To reduce the risk of electric shock: 1.
- Page 4 CONSIGNES IMPORTANTES DE SECURITE Pour utiliser un appareil électrique, il faut toujours respecter les consignes de sécurité fondamentales, notamment les consignes suivantes: Cette machine à coudre a été conçue et fabriquée pour l'usage domestique uniquement. Avant d’utiliser cet appareil, lisez toutes ces instructions. DANGER: Pour éviter tout risque de décharge électrique: 1.
- Page 5 WICHTIGE SICHERHEITSHINWEISE Bei der Benutzung eines elektrischen Geräts sind stets grundlegende Sicherheitsvorkehrungen zu treffen, darunter: Diese Nähmaschine wurde rein für den privaten Gebrauch entwickelt und hergestellt. Lesen Sie vor Inbetriebnahme dieses Geräts alle Anweisungen. GEFAHR— Befolgen Sie die nachstehenden Anweisungen, um das Risiko eines Stromschlags zu mindern: 1.
-
Page 6: Table Of Contents
TABLE OF CONTENTS TABLE DES MATIÈRES ESSENTIAL PARTS PIÈCES PRINCIPALES Names of Parts .............2 Nom des pièces ............3 Setting the Spool Pin ..........2 Fixer le porte-bobine..........3 Standard Accessories ...........4 Accessoires standard ...........5 Extension Table ............4 Table d'extension ..........5 Free-arm Sewing ..........4 Couture avec le bras libre........5 GETTING READY TO SEW SE PRÉPARER À... - Page 7 INHALTSVERZEICHNIS WICHTIGE TEILE DER MASCHINE Teilebezeichnungen ..........3 Einsetzen des Garnrollenhalters ......3 Serienmäßiges Zubehör ........5 Anschiebetisch .............5 Freiarmnähen ............5 VORBEREITUNGEN VOR DEM NÄHEN Anschluss an den Netzstrom ........7 Regulieren der Nähgeschwindigkeit .....9 Rückwärtstaste .............9 Herabsenken des Transporteurs ......9 Nähfußhebel ............11 Auswechseln des Nähfußes .......11 Abnehmen und Anbringen des Fußhalters ..11 Nadel austauschen ..........13 Stoff- und Nadeltabelle ........15...
-
Page 8: Essential Parts Names Of Parts
ESSENTIAL PARTS Names of Parts Bobbin winder stopper Bobbin winder spindle Spool pin Bobbin winder thread guide Thread guide Thread take-up lever Face cover Thread cutter Needle plate Extension table (Accessory box) Hook cover plate Hook cover plate release button Thread tension dial Reverse stitch lever Pattern selector dial... -
Page 9: Pièces Principales Nom Des Pièces
PIÈCES PRINCIPALES WICHTIGE TEILE DER MASCHINE Nom des pièces Teilebezeichnungen Butée du bobineur de canette Spuleranschlag Axe du bobineur canette Spuler Porte-bobine Garnrollenhalter Guide-fil du bobineur Fadenführung des Spulers Guide-fil Fadenführung Levier releveur de fil Fadenhebel Boîtier frontal Kopfdeckel Coupe-fil Fadenabschneider Plaque aiguille Stichplatte... -
Page 10: Standard Accessories
Standard Accessories Zipper foot E Blind hem foot G Sliding buttonhole foot Needle set Bobbin x 3 Screwdriver Seam ripper (buttonhole opner) Spool holder (small) Spool holder (large) Spool pin Cover Instruction book Extension Table The extension table provides an extended sewing area and can be easily removed for free arm sewing. -
Page 11: Accessoires Standard
Accessoires standard Serienmäßiges Zubehör Pied fermeture Eclair E Reißverschlussfuß E Pied ourlet invisible G Blindsaumfuß G Pied boutonnière automatique Knopflochfuß Assortiment d'aiguilles Nadelsatz Canettes (x 3) Spule x 3 Tournevis Schraubendreher Découd-vite Nahttrenner (Knopflochschneider) Disque fixe-bobine (petit) Fadenabzugsscheibe (klein) Disque fixe-bobine (grand) Fadenabzugsscheibe (groß) Porte-bobine Garnrollenhalter... -
Page 12: Getting Ready To Sew Connecting The Power Supply
GETTING READY TO SEW Connecting the Power Supply z Turn the power switch off. x Insert the machine plug into the machine socket. c Insert the power supply plug into the wall outlet. v Turn the power switch on. q Power switch w Machine plug e Machine socket r Power supply plug... -
Page 13: Se Préparer À Coudre Interrupteur D'alimentation Électrique
SE PRÉPARER À COUDRE VORBEREITUNGEN VOR DEM NÄHEN Interrupteur d’alimentation électrique Anschluss an den Netzstrom z Mettez l’interrupteur d’alimentation en position z Schalten Sie den Netzschalter aus. d’arrêt. x Stecken Sie den Maschinenstecker in die x Insérez la fiche du câble d’alimentation de la Maschinensteckdose. -
Page 14: Controlling The Sewing Speed
Controlling the Sewing Speed Foot control Sewing speed can be varied by the foot control. The harder you depress the foot control, the faster the machine runs. Reverse Stitch Lever Push the reverse stitch lever down to sew in reverse. The machine will sew in reverse while the lever is pushed. -
Page 15: Contrôle De La Vitesse De Couture
Contrôle de la vitesse de couture Regulieren der Nähgeschwindigkeit Pédale Fußanlasser Vous pouvez modifier la vitesse de couture en Die Nähgeschwindigkeit kann mit dem appuyant sur la pédale. Fußanlasser geändert werden. Plus vous appuyez sur la pédale, plus la machine Je stärker auf den Fußanlasser gedrückt wird, tourne rapidement. -
Page 16: Presser Foot Lifter
Presser Foot Lifter The presser foot lifter raises and lowers the presser foot. You can raise it about 1/4˝ (0.6 cm) higher than the normal up position for easy removal of the presser foot, or to help you place heavy fabric under the foot. -
Page 17: Releveur Du Pied-De-Biche
Releveur du pied-de-biche Nähfußhebel Le releveur du pied-de-biche permet de relever et Der Nähfußhebel hebt und senkt den Nähfuß. d’abaisser le pied-de-biche. Sie können den Fuß etwa 0,6 cm über die Vous pouvez le relever à environ 0,6 cm de plus normale gehobene Stellung heben, damit der que sa position haute normale. -
Page 18: Changing Needles
Changing Needles CAUTION: Always make sure to turn the power switch off and disconnect the machine from power supply before changing the needle. Raise the needle by turning the handwheel and lower the presser foot. Turn off the power switch. z Loosen the needle clamp screw by turning it counterclockwise. -
Page 19: Changer L'aiguille
Changer l’aiguille Nadel austauschen ATTENTION: VORSICHT: Veillez à toujours éteindre la machine et Schalten Sie die Maschine immer am débranchez la prise de l'alimentation avant de Netzschalter aus und ziehen Sie den Stecker ab, changer l'aiguille. bevor Sie die Nadel auswechseln. Levez l’aiguille en tournant le volant vers vous et Drehen Sie das Handrad, um die Nadel abaissez le pied-de-biche. -
Page 20: Fabric And Needle Chart
Fabric and Needle Chart • For general sewing, use needle size 11/75 or 14/90. • A fine thread and needle should be used for sewing lightweight fabrics, so the fabric will not be marred. • Heavy fabrics require a needle large enough to pierce the fabric without fraying the needle thread. -
Page 21: Tableau Des Tissus Et Aiguilles
Tableau des tissus et aiguilles Stoff- und Nadeltabelle • Pour la couture en général, utilisez des aiguilles • Verwenden Sie für normale Näharbeiten de tailles 11/75 ou 14/90. Nadelgröße #11/75 oder #14/90. • En géneral, on utilise les fils fins et les aiguilles •... -
Page 22: Winding The Bobbin
Winding the Bobbin Setting the spool Place a spool of thread on the spool pin with the thread coming off the spool as illustrated. A : Press the large spool holder firmly against the spool of thread. q Large spool holder B : For a small spool, use the small spool holder. -
Page 23: Remplissage De La Canette
Remplissage de la canette Spulen Fixer la bobine Einsetzen der Garnrolle Placez une bobine de fil sur le porte-bobine avec Stecken Sie die Garnrolle auf den le fil sortant de la bobine comme illustré. Garnrollenhalter, wobei der Faden wie dargestellt abläuft. - Page 24 Winding the bobbin z Hold the thread with both hands and guide the thread from back to front under the thread guide. q Thread guide Guide the thread into the bobbin winder thread guide as illustrated. w Bobbin winder thread guide x Pass the thread through the hole in the bobbin from the inside to the outside.
- Page 25 Bobinage de la canette Spulen z Tirez le fil de la bobine et passez le autour du z Halten Sie den Faden mit beiden Händen und guide du fil supérieur. führen Sie den Faden von hinten nach vorne q Guide-fil unter die Fadenführung.
- Page 26 Inserting the Bobbin z Place the bobbin in the bobbin holder with the thread running off as illustrated. q Thread x Guide the thread into the front notch on the front side of the bobbin holder. Draw the thread to the left, sliding it between the tension spring blades.
- Page 27 Insertion de la canette Einsetzen der Spule z Placez la canette dans le porte-canette avec le z Legen Sie die Spule in den Spulenhalter ein, fil tournant dans le sens inverse des aiguilles wobei das Garn wie dargestellt abläuft. d’une montre, comme illustré. q Faden q Fil x Führen Sie den Faden durch den Schlitz an...
-
Page 28: Threading The Machine
Threading the Machine Raise the presser foot. Turn the handwheel toward you to raise the thread take-up lever to its highest position. z Draw the thread from the spool and pass it under the thread guide. q Thread guide x Draw the thread down along the right channel and pull it up around the bottom of the thread guide plate. -
Page 29: Enfiler La Machine
Enfiler la machine Einfädeln der Maschine Relevez le pied-de-biche. Heben Sie den Nähfuß an. Tournez le volant vers vous pour mettre le Bringen Sie den Fadenhebel durch Drehen des releveur de fil dans sa position la plus haute. Handrads in seine höchste Stellung. z Tirez le fil de la bobine et passez-le sous le z Ziehen Sie den Faden von der Garnrolle und guide-fil. -
Page 30: Drawing Up The Bobbin Thread
Drawing up the Bobbin Thread z Raise the presser foot and hold the needle thread lightly with your left hand. q Needle thread x Turn the handwheel slowly toward you one complete turn. Bring the bobbin thread up by pulling the needle thread as illustrated. w Bobbin thread c Pull 4˝... -
Page 31: Installation Du Fil De Canette
Installation du fil de canette Heraufholen des Unterfadens z Relevez le pied-de-biche et tenez légèrement z Heben Sie den Nähfuß und legen Sie den le fil de l’aiguille avec votre main gauche. Oberfaden wie gezeigt unter den Nähfuß. q Fil de l’aiguille q Oberfaden x Tournez le volant d’un tour complet dans le x Drehen Sie das Handrad mit einer... -
Page 32: Selecting The Stitch Pattern
Selecting the Stitch Pattern Raise the needle to its highest position Pattern selector dial Turn the pattern selector dial to set the symbol of the desired stitch pattern at the setting mark. q Pattern selector dial w Setting mark CAUTION: Do not turn the pattern selector dial while the needle is in the fabric, otherwise the needle may bend or break. -
Page 33: Bouton De Sélection Des Points
Bouton de sélection des points Auswahl der Stichmuster Relevez l’aiguille dans sa position la plus haute. Bringen Sie die Nadel in ihre höchste Stellung. Sélection des points Musterauswahlregler Pour choisir votre point, tournez le bouton de Drehen Sie den Musterauswahlregler und stellen sélection des points en veillant à... -
Page 34: Basic Sewing Straight Stitch
BASIC SEWING Straight Stitch Machine setting q Stitch selector: w Thread tension: 2 – 6 e Presser foot: Zigzag foot A Starting to sew Raise the presser foot and position the fabric next to a seam guide line on the needle plate (5/8˝ :1.6 cm is most common). -
Page 35: Couture De Base Point Droit
COUTURE DE BASE EINFACHES NÄHEN Point droit Nähen mit Geradstichen Réglages de la machine Maschineneinstellungen q Motif de point: q Stichmuster: w Tension du fil: 2 – 6 w Fadenspannung: 2 – 6 e Pied-de-biche: Pied zigzag A e Nähfuß: Zick-Zack-Fuß... -
Page 36: Using The Seam Guide Lines
Using the Seam Guide Lines The seam guides on the needle plate and hook cover help you to measure seam allowance. Numbers 10 15 30 40 3/8 1/2 5/8 1 1 1/2 Distance 1.5 3 — — — — — (cm) Distance —... -
Page 37: Utilisation Des Guides De Couture
Utilisation des guides de couture Verwendung der Nahtführungslinien Les lignes-guide de couture sur la plaque aiguille Die Nahtführungslinien auf der Stichplatte und et le couvercle du crochet vous aident à mesurer der Greiferabdeckung helfen Ihnen dabei, die une réserve de couture. Nahtzugabe zu messen. -
Page 38: Utility Stitches Basic Zigzag
UTILITY STITCHES Basic Zigzag Machine setting q Stitch selector: w Thread tension: 2 – 5 e Presser foot: Zigzag foot A Simple zigzag stitching is widely used for overcasting, sewing on buttons, etc. NOTE: Use a stabilizer for stretch fabrics such as tricot and knits to prevent puckering. -
Page 39: Points Utilitaires Point Zigzag De Base
POINTS UTILITAIRES NUTZSTICHE Point zigzag de base Zick-Zack-Stich Réglages de la machine Maschineneinstellungen q Motif de point: q Stichmuster: w Tension du fil: 2 – 5 w Fadenspannung: 2 – 5 e Pied-de-biche: Pied zigzag A e Nähfuß: Zick-Zack-Fuß A Der einfache Zick-Zack-Stich wird oft zum La couture simple en zigzag est utilisée pour Versäubern von Kanten, zum Annähen von... -
Page 40: Tricot Stitch
Tricot Stitch Machine setting q Stitch selector: w Thread tension: 3 – 6 e Presser foot: Zigzag foot A This stitch is used to finish a raw edge on synthetics and other fabrics that tend to pucker. Place the fabric to leave a 5/8˝ (1.6 cm) allowance. Trim the extra allowance after sewing. -
Page 41: Point Pour Tissu Tricot (Point Zigzag Multiple)
Point pour tissu tricot (point zigzag multiple) Trikotstich Réglages de la machine Maschineneinstellungen q Motif de point: q Stichmuster: w Tension du fil: 3 – 6 w Fadenspannung: 3 – 6 e Pied-de-biche: Pied zigzag A e Nähfuß: Zick-Zack-Fuß A Ce point est utilisé... -
Page 42: Button Sewing
Button Sewing Machine setting q Stitch selector: w Thread tension: 3 – 7 e Presser foot: Zigzag foot A r Feed dog: Lowered Unthread the needle. Adjust the stitch width to match it with the span of the holes in the button. Turn the handwheel to check if the needle enters into each hole in the button. -
Page 43: Coudre Des Boutons
Coudre des boutons Annähen von Knöpfen Réglages de la machine Maschineneinstellungen q Motif de point: q Stichmuster: w Tension du fil: 3 – 7 w Fadenspannung: 3 – 7 e Pied-de-biche: Pied zigzag A e Nähfuß: Zick-Zack-Fuß A r Griffe d’entraînement: Abaissée r Transporteur: Abgesenkt... -
Page 44: 4-Step Buttonhole
4-Step Buttonhole Machine setting q Stitch selector: w Thread tension: 1 – 5 e Presser foot: Sliding buttonhole z Set the pattern selector dial at “ ”. Carefully mark buttonhole length on fabric. Place the fabric under the foot with the buttonhole marking running toward you. -
Page 45: Boutonnière En 4 Phases
Boutonnière en 4 phases Knopflochnähen in 4 Schritten Réglages de la machine Maschineneinstellungen q Motif de point: q Stichmuster: w Tension du fil: 1 – 5 w Fadenspannung: 1 – 5 e Pied-de-biche: Pied boutonnière e Nähfuß: Knopflochfuß z Réglez le bouton de sélection de point sur « ». -
Page 46: Corded Buttonhole
Corded Buttonhole Machine setting q Stitch selector: w Thread tension: 1 – 5 e Presser foot: Sliding buttonhole z With the buttonhole foot raised, hook the filler cord on the spur at the back of the foot. Bring the ends toward you under the foot, clearing the front end. -
Page 47: Boutonnière Cordonnet
Boutonnière cordonnet Knopflöcher mit Einlauffaden Réglages de la machine Maschineneinstellungen q Motif de point: q Stichmuster: w Tension du fil: 1 – 5 w Fadenspannung: 1 – 5 e Pied-de-biche: Pied boutonnière e Nähfuß: Knopflochfuß z Relevez le pied boutonnière et faites passer le z Stellen Sie den Knopflochfuß... -
Page 48: Zipper Application
Zipper Application Machine setting q Stitch selector: w Thread tension: 3 – 6 e Presser foot: Zipper foot E Attaching the zipper foot q Slit w Pin Fit the pin on the zipper foot into the slit on the foot holder. (A) To sew the left side of the zipper, attach zipper foot on the right-hand side of pin. -
Page 49: Pose De Fermeture Eclair
Pose de fermeture Eclair Einnähen von Reißverschlüssen Réglages de la machine Maschineneinstellungen q Motif de point: q Stichmuster: w Tension du fil: 3 – 6 w Fadenspannung: 3 – 6 e Pied-de-biche: Pied à semelle étroite E e Nähfuß: Reißverschlussfuß E Fixation du pied à... - Page 50 To sew z Attach zipper foot with the right side pin. Fold back the upper layer seam allowance. Fold back the lower layer seam allowance to leave a 1/8˝ (0.4 cm) margin of fabric. q Lower layer w End of the opening e Zipper teeth r 1/8˝...
- Page 51 Couture Nähen: z Bringen Sie den Reißverschlussfuß mit dem Fixez le pied à semelle étroite avec l’aiguille du côté droit. Stift auf der rechten Seite an. Repliez le rentré de couture de l’épaisseur Falten Sie die obere Nahtzugabe um. Falten supérieure.
- Page 52 b Raise and release the foot, and re-attach it with the left side pin. Starting just below zipper bottom stop, sew across fabric to about 3/8˝ (1 cm) distance from the basting line. Turn fabric 90 degrees and sew a seam the entire length of the zipper tape.
- Page 53 b Relevez et détachez le pied-de-biche, puis b Heben Sie den Reißverschlussfuß an, lösen fixez-le de nouveau sur le côté gauche de la Sie ihn und bringen Sie ihn wieder mit dem Stift charnière. auf der linken Seite an. Faites un point arrière de 1 cm d’un bout à Nähen Sie auf dem Stoff etwa 1 cm von der l’autre de l’extrémité...
-
Page 54: Blind Stitch Hemming
Blind Stitch Hemming Machine setting q Stitch selector: w Thread tension: 1 – 4 e Presser foot: Blind hem stitch foot G z On heavy weight fabrics that ravel, the raw edge should be overcast first. Fold the hem under the fabric as illustrated for fine or medium fabrics. -
Page 55: Ourlet Invisible
Ourlet invisible Blindsaum Réglages de la machine Maschineneinstellungen q Motif de point: q Stichmuster: e Tension du fil: 1 – 4 e Fadenspannung: 1 – 4 r Pied-de-biche: Pied ourlet invisible G r Nähfuß: Blindsaumfuß G z Sur les tissus épais qui s’effilochent, il faut tout z Bei schweren, ausfransenden Stoffen ist die d’abord surfiler le bord brut. -
Page 56: Decorative Stitches Pin Tucking
DECORATIVE STITCHES Pin Tucking Machine setting q Stitch selector: w Thread tension: 2 – 6 e Presser foot: Blind hem stitch foot G Fold a fabric wrong side together and Lower the needle into the fabric 0.1 – 0.2 cm inside the folded edge. -
Page 57: Points Décoratifs Nervures
POINTS DÉCORATIFS ZIERSTICHE Nervures Biesen Réglages de la machine Maschineneinstellungen q Motif de point: q Stichmuster: w Tension du fil: 2 – 6 w Fadenspannung: 2 – 6 e Pied-de-biche: Pied ourlet invisible G e Nähfuß: Blindsaumfuß G Pliez le tissu envers contre envers et piquez Legen Sie den Stoff auf der linken Seite l’aiguille dans le tissu à... -
Page 58: Patchwork
Patchwork Machine setting q Stitch selector: w Thread tension: 1 – 4 e Presser foot: Zigzag foot A Place two layers of the fabric with the right side together. Seam along the edges with the straight stitch. Open fabrics flat and fold each seam allowances. Place the fabric under the foot so that the seam line matches the center of the foot width. -
Page 59: Patchwork
Patchwork Patchwork Réglages de la machine Maschineneinstellungen q Motif de point: q Stichmuster: w Tension du fil: 1 – 4 w Fadenspannung: 1 – 4 e Pied-de-biche: Pied zigzag A e Nähfuß: Zick-Zack-Fuß A Placez deux couches de tissu endroit contre Legen Sie zwei Stofflagen mit der rechten Seite endroit. -
Page 60: Care And Maintenance
CARE AND MAINTENANCE WARNING: Turn the power switch off and unplug the machine before cleaning. NOTE: Do not dismantle the machine other than as explained in this section. Do not store the machine in a high-humidity area, near a heat radiator, or in direct sunlight. Clean the outside of the machine with a soft cloth and mild soap. -
Page 61: Soins Et Entretien
SOINS ET ENTRETIEN PFLEGE UND WARTUNG AVERTISSEMENT: WARNHINWEIS: Eteignez l’interrupteur et débranchez la machine Schalten Sie die Maschine am Netzschalter aus avant de procéder au nettoyage. und ziehen Sie den Stecker ab, bevor Sie die Maschine reinigen. REMARQUE: ANMERKUNG: Ne pas démonter la machine autrement Bauen Sie die Maschine nur so weit auseinander, qu’expliqué... -
Page 62: Replacing The Bobbin Holder
Replacing the Bobbin Holder z Insert the bobbin holder into the hook race. x Make sure the knob of the bobbin holder fits next to the stopper on the race. q Knob w Stopper c Replace the bobbin. Attach the needle plate. Tighten the screw firmly with the screwdriver. -
Page 63: Remplacement Du Porte-Canette
Remplacement du porte-canette Austausch des Spulenhalters z Introduisez le porte-canette dans le logement z Setzen Sie den Spulenhalter in die Greiferbahn. du crochet. x Assurez-vous que le bouton de la capsule est x Achten Sie darauf, dass sich der Knopf des bien placé... -
Page 64: Troubleshooting
Troubleshooting Condition Cause Reference The needle 1. The needle thread is not threaded properly. Page 22 thread breaks 2. The needle thread tension is too tight. Page 26 3. The needle is bent or blunt. Page 12 4. The needle is incorrectly inserted. Page 12 5. -
Page 65: Dépannage
Dépannage Etat Cause Référence Le fil de l’aiguille 1. Le fil d’aiguille n’est pas enfilé correctement. Page 23 se casse 2. La tension du fil de l’aiguille est trop serrée. Page 27 3. L’aiguille est tordue ou émoussée. Page 13 4. -
Page 66: Problemlösungen
Problemlösungen Störung Ursache Bezug Oberfaden reißt. 1. Oberfaden nicht richtig eingefädelt. Seite 23 2. Oberfadenspannung zu stark. Seite 27 3. Nadel verbogen oder stumpf. Seite 13 4. Die Nadel ist nicht korrekt eingesetzt. Seite 13 5. Ober- und Unterfaden bei Nähbeginn nicht unter Nähfuß Seite 29 gelegt. - Page 68 508-809-176 (EFG)