Table of Contents
Advertisement
Available languages
Available languages
Quick Links
Use & Care G uide
M anual de Uso y Cuidado
Kenmore
®
CSV| G o
™
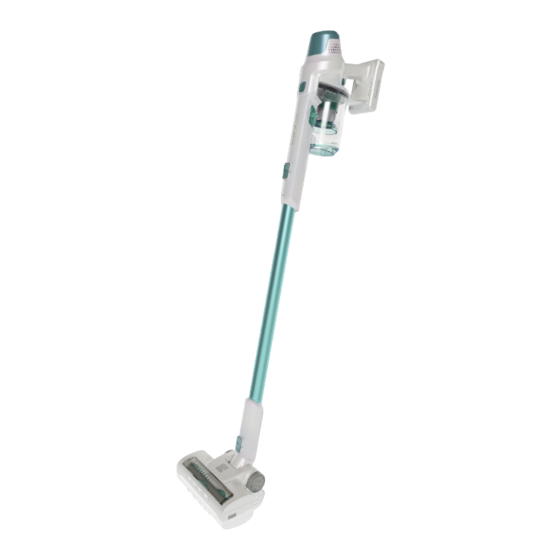
Cordless Stick Vac
Aspiradora inalámbrica de vara
M odel/ M odelo: DS40 20
Vacuum Cleaner Help Line:
1-87 7 -531-7 321
8:0 0 am-5:0 0 pm EST, M -F
www.kenmore.com
Kenmore and the Kenmore logo are registered
trademarks of KCD IP , LLC and/ or Transform SR
Brands LLC and are used under license by Cleva
N orth America, Inc.
All Rights Reserved.
Advertisement
Chapters
Table of Contents

Related Manuals for Kenmore Go CSV DS4020


Summary of Contents for Kenmore Go CSV DS4020
- Page 1 1-87 7 -531-7 321 8:0 0 am-5:0 0 pm EST, M -F www.kenmore.com Kenmore and the Kenmore logo are registered trademarks of KCD IP , LLC and/ or Transform SR Brands LLC and are used under license by Cleva N orth America, Inc.
-
Page 2: Table Of Contents
Troubleshooting ......................17-18 BEFORE USIN G YOUR N EW VACUUM CLEAN ER Read this Use & Care G uide. It will help you assemble and operate your new Kenmore vacuum cleaner in the safest and most effective way. For more information about vacuum cleaner care and operation, call the Vacuum Cleaner Help Line at 1-87 7 -531-7 321. -
Page 3: Important Safety Instructions
IMPORTAN T SAFETY IN STRUCTION S WARN IN G! READ ALL INSTRUCTIONS IN THIS GUIDE BEFORE ASSEMBLING OR USING YOUR VACUUM CLEANER. To reduce the risk of fire, electrical shock, injury to persons or damage w hen using your vacuum cleaner, follow all safety precautions listed below. •... - Page 4 IMPORTAN T SAFETY IN STRUCTION S toxic materials. damage the battery and increase the risk • Do not pick up hard or sharp objects such of fire. as glass, nail, screws or coins that could • You are responsible for making sure damage the vacuum cleaner.
-
Page 5: Kenmore Vacuum Cleaner Warranty
W ITH PRO O F O F SALE a defective product will be replaced free of charge. The Kenmore brand is used under license. Direct all claims for warranty service to: Cleva N orth America, Inc., 1-87 7 -531-7 321 This warranty does not cover filters or belts, which are expendable parts that can wear out from normal use within the warranty period. -
Page 6: Parts And Features
PARTS AN D FEATURES It is important to know your vacuum cleaners parts and features to assure its proper and safe use. Review these before using your vacuum. REPLACEMEN T PARTS Item Part N o. HEPA Filter 5610 5110 7 Pre-filter Basket 5610 5910 2 Brush Roll... - Page 7 PARTS AN D FEATURES Hand Vacuum Charging Adapter W and M otorized N ozzle W all M ountable Bracket 2-in-1 Combination Tool Screw (2) - 7 -...
- Page 8 PARTS AN D FEATURES The motorized nozzle and the combination tool can be inserted into either the hand vacuum or the wand. You will hear a click if the motorized nozzle installed correctly. Combination Tool The combination brush can be used as a crevice tool or as a dusting brush.
-
Page 9: Assembly Instructions
ASSEMBLY IN STRUCTION S Before assembling the vacuum cleaner, check the PACKIN G LIST (Page 2). Use this list to verify that you have received all the components of your new Kenmore CSV G o Cordless Stick Vac. 1. Insert the hand vacuum into the top of 4. - Page 10 CHARGIN G The battery requires approximately 4 hours WARN IN G of charging to regain full capacity. W hile the unit is charging, the battery indicator Before charging make sure the unit is ring will pulse blue. W hen the battery is turned OFF.
-
Page 11: Operating Instructions
OPERATIN G IN STRUCTION S CAUTION Moving parts! To reduce the risk of personal injury, DO NOT touch the brush roll w hen vacuum is on. Contacting the brush roll w hile it is rotating can cut, bruise or cause other injuries. Always turn off before servicing. - Page 12 VACUUM OPERATION To start the vacuum, press the on/ off trigger W hen vacuuming on plush carpet, use ECO button. O nce turned on, the battery level mode for best performance. indicator will be lit. N OTE: W hen battery power decreases The vacuum starts in the ECO speed to about 10% remaining, the battery level position.
-
Page 13: Vacuum Maintenance And Care
VACUUM MAIN TEN AN CE AN D CARE CAUTION To reduce the risk of electric shock, remove the charging adapter from the unit, and make sure the unit is turned off before any maintenance. EMPTYIN G DUST CUP AN D CLEAN IN G FILTER Dust Cup Emptying Filter Cleaning For best performance, empty dust cup... - Page 14 EMPTYIN G DUST CUP AN D CLEAN IN G FILTER 2. Remove the HEPA filter and pre-filter 5. To reassemble the dust cup to the hand basket from the dust cup. vacuum, align the tabs on the dust cup with slots in the hand vacuum. O nce aligned, attach the dust cup to the hand HEPA Filter vacuum until you hear a click.
- Page 15 CLEAN IN G THE MOTORIZED N OZZLE & BLOCKAGES The brush roll may accumulate debris 4. Place the brush roll back into the such as strings, hair and fibers. This type housing by aligning the hexagon end of of debris can wrap around the brush and the brush roll into the right end of the diminish its ability to clean effectively.
- Page 16 CLEAN IN G THE MOTORIZED N OZZLE & BLOCKAGES 2. Carefully remove any debris or blockage CAUTION from the inside of the hose. Reattach the motorized nozzle onto the wand. Do not use scissors or other sharp objects to remove a blockage from the hose. 3.
-
Page 17: Troubleshooting
TROUBLESHOOTIN G Review the table for solutions to minor performance problems. Any service needed, other than maintenance described in this Use & Care G uide, should be performed by a qualified service dealer. WARN IN G Disconnect electrical supply before performing maintenance to the vacuum cleaner. Failure to do so could result in electrical shock or personal injury. - Page 18 TROUBLESHOOTIN G Reinstall the dust cup correctly as instructed on The dust cup is installed incorrectly. page 14. The hand vacuum and the wand Reinstall the hand vacuum and the wand correctly are not connected into place. as instructed on page 9. The motorized nozzle and the Reinstall the motorized nozzle and the wand Brush roll in the...
- Page 19 Lea esta guía de uso y cuidado. Lo ayudará a ensamblar y operar su nueva aspiradora Kenmore de la manera más segura y efectiva posible. Para obtener más información sobre el cuidado y uso de la aspiradora, llame a la línea de ayuda al 1-87 7 -531-7 321.
-
Page 20: Instrucciones De Seguridad Importantes
IN STRUCCION ES DE SEGURIDAD IMPORTAN TES ¡ADVERTEN CIA! LEA TODAS LAS INSTRUCCIONES DE ESTA GUÍA ANTES DE ENSAMBLAR O USAR SU ASPIRADORA. Para reducir el riesgo de incendio, descarga eléctrica, lesiones a personas o daños al usar su aspiradora, siga todas las precauciones de seguridad indicadas a continuación. - Page 21 IN STRUCCION ES DE SEGURIDAD IMPORTAN TES • M antenga la aspiradora moviéndose • Los cambios o modificaciones a esta sobre la superficie alfombrada en todo unidad no aprobados expresamente por momento para así evitar que las fibras de el responsable del cumplimiento anularían la alfombra se dañen.
- Page 22 IN STRUCCION ES DE SEGURIDAD IMPORTAN TES basura doméstica corriente. Consulte a su autoridad de eliminación local para obtener información sobre la disponibilidad de opciones de reciclaje o eliminación. GUARDE ESTAS IN STRUCCION ES Exclusivamente para uso doméstico. - 4 -...
-
Page 23: Garantía De La Aspiradora Kenmore
Un producto defectuoso puede reemplazarse por uno nuevo, de manera gratuita, considerando que se presente una PRUEBA DE VEN TA. La marca Kenmore se utiliza bajo licencia. Dirija sus reclamaciones de garantía a: Cleva N orth America, Inc., 1-87 7 -531-7 321 Esta garantía no cubre los filtros ni correas, las cuales son piezas desechables que pueden... -
Page 24: Piezas Y Características
PIEZAS Y CARACTERÍSTICAS Es importante que conozca las piezas de su aspiradora y sus funciones para así garantizar su uso seguro y adecuado. Repase esto antes de usar su aspiradora. PIEZAS DE REPUESTO Artículo N ° de pieza Filtro HEPA 5610 5110 7 Canasto prefiltro 5610 5910 2... - Page 25 PIEZAS Y CARACTERÍSTICAS Aspiradora de mano Adaptador de carga Vara Boquilla motorizada Soporte de montaje Herramienta combinada 2 en 1 Tornillo (2) para pared - 7 -...
- Page 26 PIEZAS Y CARACTERÍSTICAS La boquilla motorizada y la herramienta combinada pueden insertarse o en la aspiradora de mano o en la vara. Escuchará un clic si la boquilla motorizada se inserta correctamente. Herramientas combinadas El cepillo combinado puede usarse como herramienta para grietas o como cepillo para quitar polvo.
-
Page 27: Instrucciones De Montaje
Antes de ensamblar la aspiradora, revise la LISTA DE EM PAQ UE (Página 2). Use esta lista para asegurarse de haber recibido todos los componentes de su nueva aspiradora inalámbrica de vara Kenmore CSV G o. 1. Inserte la aspiradora de mano en la 4. - Page 28 CARGA La batería tarda unas 4 horas en cargarse ADVERTEN CIA completamente. M ientras la unidad esté cargándose, el anillo indicador de la batería Antes de cargarla, asegúrese de que la pulsará de color azul. Cuando la batería unidad esté apagada. esté...
-
Page 29: Instrucciones De Uso
IN STRUCCION ES DE USO CUIDADO ¡Piezas móviles! Para reducir el riesgo de lesiones personales, NO toque el cepillo giratorio mientras la aspiradora esté en uso. Tocar el cepillo mientras está girando puede cortar, golpear o provocar otras lesiones. Apague siempre el producto antes de repararlo. Tenga cuidado al usarlo cerca de niños o mascotas. - Page 30 USO DE LA ASPIRADORA Para encender la aspiradora, oprima el una vez más. botón de encendido/ apagado. Una vez Para lograr el mejor desempeño cuando encendida, se encenderá el indicador del esté aspirando alfombras de plush, utilice el nivel de la batería. modo ECO.
-
Page 31: Mantenimiento Y Cuidado De La Aspiradora
MAN TEN IMIEN TO Y CUIDADO DE LA ASPIRADORA CUIDADO Para reducir el riesgo de descarga eléctrica, saque el cargador de la unidad y asegúrese de que permanezca apagada durante cualquier trabajo de mantenimiento. VACIADO DEL CONTENEDOR DE POLVO Y LIMPIEZA DEL FILTRO Vaciado del contenedor de polvo 2. - Page 32 EMPTYIN G DUST CUP AN D CLEAN IN G FILTER prefiltro se deben secar completamente antes de volver a usarlos. Botón de liberación del filtro 4. Coloque el canasto prefiltro nuevamente en el contenedor de polvo, luego coloque el filtro HEPA de vuelta en el canasto prefiltro.
- Page 33 LIMPIEZA DE LA BOQUILLA MOTORIZADA Y BLOQUEOS El cepillo de rodillo puede acumular residuos como hilos, pelos y fibras. Este tipo de sedimentos puede enrollarse en el cepillo y reducir su capacidad de limpiar efectivamente. CUIDADO: Riesgo de lesiones. El cepillo podría encenderse inesperadamente.
- Page 34 LIMPIEZA DE LA BOQUILLA MOTORIZADA Y BLOQUEOS Restablecimiento del cepillo de 2. Q uite cuidadosamente cualquier rodillo sedimento o bloqueo del interior de la manguera. Reinstale la boquilla Si el rodillo se bloquea o sobrecarga, motorizada en la vara. la unidad dejará de funcionar 3.
-
Page 35: Resolución De Problemas
RESOLUCIÓN DE PROBLEMAS Revise la tabla de soluciones en relación a problemas de rendimiento menores. Cualquier reparación necesaria, que no sean los mantenimientos descritos en esta G uía de uso y cuidado, deben ser realizados por un técnico de servicio calificado. ADVERTEN CIA Desconecte el suministro eléctrico antes de realizar mantenimiento a la aspiradora. - Page 36 RESOLUCIÓN DE PROBLEMAS Los desechos se acumulan en los contactos metálicos que conectan Q uite los sedimentos y reinstale siguiendo las el contenedor de polvo y el cuerpo instrucciones de la página 14. principal de la aspiradora de mano. El contenedor de polvo está Reinstale el contenedor de polvo siguiendo las instalado incorrectamente.