Table of Contents
Advertisement
Quick Links
Advertisement
Table of Contents

Related Manuals for Fisher & Paykel DD60DCHX9


Summary of Contents for Fisher & Paykel DD60DCHX9
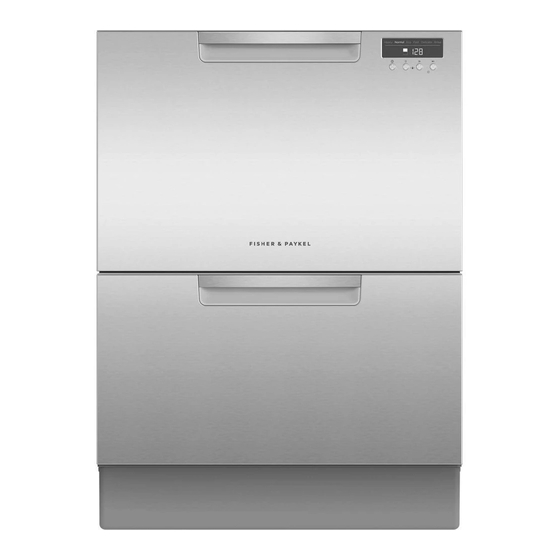
- Page 1 DOUBLE DISHDRAWER™ DISHWASHER CONTEMPORARY DD60DCHX9 INSTALLATION GUIDE...
-
Page 3: Safety And Warnings
SAFETY AND WARNINGS WARNING! WARNING! Electric Shock Hazard Tip Hazard Failure to follow this advice may result in Failure to follow this advice may result in electrical shock or death. injury or product damage. • Before installing the DishDrawer, remove the •... -
Page 4: Installation
SAFETY AND WARNINGS WARNING! Ensure the product is not plugged in when fitting custom panels. Installation of custom panels requires basic mechanical and electrical skills. To reduce the risk of fire, injury to persons or damage when using the appliance, follow the Installation must comply with your local building and electricity regulations. -
Page 5: Parts Supplied
TOOLS AND COMPONENTS PARTS SUPPLIED TOOLS REQUIRED Keep all packing materials until the unit has been inspected. Not supplied Inspect the product to ensure there is no shipping damage. If any damage is detected contact the dealer or retailer you bought the product from to report the damage. Fisher &... -
Page 6: Product Dimensions
PRODUCT DIMENSIONS – DD60DC MODELS DD60DC PRODUCT DIMENSIONS A Overall height* 820 – 880 B Overall width C Overall depth D Height of chassis E Depth of chassis F Height of upper door panel G Height of lower door panel PLAN ISOMETRIC H Depth of door panel I Ventilation gap between door panels J Depth of toe kick recess**... -
Page 7: Cabinetry Dimensions
CABINETRY DIMENSIONS CLEARANCES Connections can be located in an adjacent cabinet on either side of the DishDrawer*** PLAN ISOMETRIC CABINETRY DIMENSIONS CABINETRY CLEARANCES A Minimum inside height* A Minimum clearance to adjacent cupboard door B Inside width 600 – 610 B Minimum clearance to corner cupboard C Minimum inside depth** D Recommended height of adjacent cabinetry E Height of toe kick area***... -
Page 8: Left Side
PLUMBING & ELECTRICAL CONSIDERATIONS Hose and cord lengths Your services can be installed to either the left-hand or right-hand side of the product in an adjacent cabinet. Refer to ‘Cabinetry preparation’ for service access requirements. If the drain hoses supplied are not long enough to reach your services, you may purchase a Fisher &... - Page 9 CABINETRY PREPARATION SERVICE ACCESS MOISTURE PROTECTION We recommend locating the service holes on either side of the DishDrawer as shown below. If the holes are created through wood, ensure the edges are smooth and rounded If the holes are created through metal, ensure an edge protector is fitted. Align the supplied moisture protection tape to the cabinetry as illustrated Ensure this area is free of debris before carefully...
- Page 10 SECURE TO CABINETRY VIA BRACKETS (METHOD A) Secure all four side brackets to the DishDrawer™ Dishwasher, aligning Partially open one of the drawers and bracket A with slot A and bracket B remove the first screw cover from the with slot B. trim moulding.
- Page 11 SECURE TO CABINETRY VIA DRAWER REMOVAL (METHOD B) Using your hand or the supplied hex socket and a screwdriver, level the DishDrawer™ Dishwasher as required. Optionally, fit the two top brackets. Rotate clockwise to increase the height Ensure the ends of the brackets are not of each leg and anticlockwise to lower.
-
Page 12: Install Toe Kick
INSTALL TOE KICK Measure toe kick height. Where Snap excess + smooth edges. the toe kick meets the bottom of the tub is the recommended Snap both end tabs. cut-off point. Slide toe kick onto the mounting rails and secure Carefully score toe kick at Do not over tighten the screws. - Page 13 PLUMBING & ELECTRICAL CONNECTION Ø38MM STANDPIPE INSTALLATION SINK TRAP/WASTE TEE INSTALLATION Install the drain hose support to the Install the drain hose support to the back wall, as close to the underside of back wall, as close to the underside of the countertop as possible.
-
Page 14: Installer Checklist
INSTALLER CHECKLIST TO BE COMPLETED BY THE INSTALLER Installation Electrical … Check all parts are installed correctly and are secure. … Ensure all electrical tests have been conducted in accordance with local regulations. … Ensure all clearance gaps have been maintained. Test operation …... -
Page 15: Troubleshooting
TROUBLESHOOTING No program indicator lights up when the drawer is opened DISPLAY POSSIBLE CAUSE WHAT TO DO Ensure power is connected and is switched on. Water 1 Ensure the water supply is turned on. may need to be activated. Refer to your user guide for details. AUTO POWER-ON Supply fault. - Page 16 FISHERPAYKEL.COM © Fisher & Paykel Appliances 2021. All rights reserved. The models shown in this guide may not be available in all markets and are subject to change at any time. The product specifications in this guide apply to the specific products and models described at the date of issue.