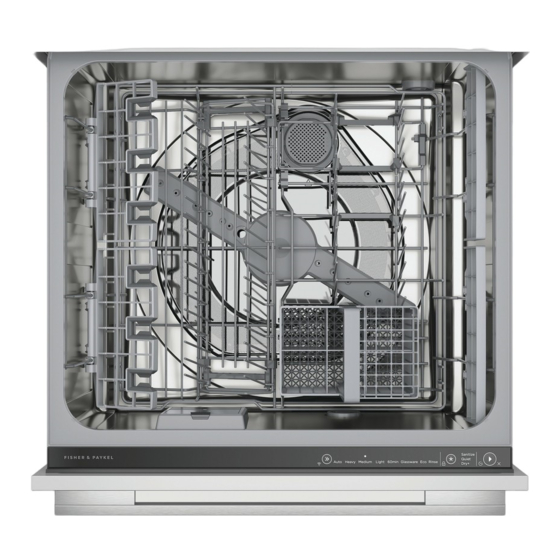
Summary of Contents for Fisher & Paykel SINGLE DISHDRAWER DD60STX6I1
- Page 1 SINGLE DISHDRAWER™ DISHWASHER INTEGRATED DD60STX6I1, DD60STX6HI1 INSTALLATION GUIDE NZ AU BI...
-
Page 3: Safety And Warnings
SAFETY AND WARNINGS WARNING! WARNING! Electric Shock Hazard Electric Shock Hazard Failure to follow this advice may result in Failure to follow this advice may result in electrical shock or death. electrical shock or death. • Fitting an integrated panel requires access to •... - Page 4 SAFETY AND WARNINGS WARNING! To reduce the risk of fire, injury to persons or damage when using the appliance, follow the important safety instructions listed below. Read all the guidance before using the appliance. Servicing Do not repair or replace any part of the appliance unless specifically recommended in this guide.
-
Page 5: Tools And Components
TOOLS AND COMPONENTS PARTS SUPPLIED TOOLS REQUIRED Keep all packing materials until the unit has been inspected. Not supplied Inspect the product to ensure there is no shipping damage. If any damage is detected contact the dealer or retailer you bought the product from to report the damage. Fisher &... -
Page 6: Product Dimensions
PRODUCT DIMENSIONS PRODUCT DIMENSIONS A Overall height B Overall width C Overall depth* D Depth of chassis PLAN ISOMETRIC E Front panel depth** 16-20 F Max. drawer extension*** *based on front panel thickness of 18mm **refer to ‘Custom panel dimension’ for more information ***excluding custom panel and handle FRONT PROFILE... -
Page 7: Standard Install
CABINETRY STANDARD INSTALL ASSISTED OPENING INSTALL The assisted opening unit should be installed at the centre front of the cavity. For more information on assisted opening installations, refer to fisherpaykel.com Connections can be located in an adjacent cabinet on either side of the DishDrawer™... - Page 8 CLEARANCES PLAN CABINETRY CLEARANCES A Minimum clearance to adjacent cabinetry B Minimum clearance to corner cabinetry...
-
Page 9: Custom Panel Dimensions
CUSTOM PANEL DIMENSIONS Material specifications Standard installation illustrated Maximum weight of panel must not exceed 9kg (including handle) The panel should be adequately sealed to withstand moisture (50°C @ 80% RH). The back and sides of the panel should be completely sealed with a waterproof vapour barrier, such as polyurethane, to prevent damage. -
Page 10: Left Side
PLUMBING & ELECTRICAL CONSIDERATIONS Hose and cord lengths Your services can be installed to either the left-hand or right-hand side of the product in an adjacent cabinet. Refer to ‘Cabinetry preparation’ for service access requirements. If the drain hoses supplied are not long enough to reach your services, you may purchase a Fisher &... -
Page 11: Service Access
CABINETRY PREPARATION SERVICE ACCESS MOISTURE PROTECTION Service holes can be created on either side of the DishDrawer™ Dishwasher cavity as shown below. If the hole is created through wood, ensure the edges are smooth and rounded If the hole is created through metal, ensure the supplied edge protector is fitted. Align the supplied moisture protection tape to the cabinetry as illustrated Ensure this area is free of debris. - Page 12 EXTERNAL VENTING PREPARATION To prevent the build up of condensation produced by your DishDrawer™ Dishwasher, the external venting kit must be installed via one of the following options: THROUGH SAME CABINET THROUGH ADJACENT CABINET THROUGH FLOOR FRAMELESS FRAMED FRAMELESS FRAMED FRAMED &...
- Page 13 FIT THE TRIM BRACKET PREPARE EXTERNAL VENTING We recommend fitting the trim bracket when installing your DishDrawer™ Dishwasher into a FIT THE VENTING HOSE TO THE DISHDRAWER™ DISHWASHER 480mm cavity to conceal any visible gap left between the countertop and chassis. Rotate the elbow at the rear of the Align the bracket to the chassis ensuring product to either the left or right...
- Page 14 PUSH THE PRODUCT INTO THE CAVITY SECURE THE VENTING HOSE TO CABINETRY VENTING THROUGH CABINETRY If securing via bracket method: Secure all four side brackets to the DishDrawer™ Dishwasher, aligning bracket A with slot A and bracket B Unframed cabinetry with slot B.
- Page 15 FIT THE CUSTOM PANEL Attach the Knock-to-Pause module to the panel as shown. Ensure the Knock-to-Pause module is Remove both side pins from the drawer. oriented correctly and is not in contact with the bracket before securing. Carefully pull the bracket out from DishDrawer™...
- Page 16 SECURE TO CABINETRY VIA BRACKETS (METHOD A) SECURE TO CABINETRY VIA DRAWER REMOVAL (METHOD B) Partially open the drawer and remove Open the drawer and press both locking the first screw cover from the trim tabs back to release. moulding. Lift the drawer off the runners and set aside on a protected surface.
- Page 17 PLUMBING & ELECTRICAL CONNECTION Ø38MM STANDPIPE INSTALLATION SINK TRAP/WASTE TEE INSTALLATION Install the drain hose support to the Install the drain hose support to the back wall, as close to the underside back wall, as close to the underside of the benchtop as possible. Refer to of the benchtop as possible.
-
Page 18: Installer Checklist
INSTALLER CHECKLIST TO BE COMPLETED BY THE INSTALLER Electrical … Ensure all electrical tests have been conducted in accordance with local regulations. Installation … Check all parts are installed correctly and are secure. Test operation … Ensure DishDrawer™ Dishwasher is secure and drawer opens and closes freely with no …... -
Page 19: Troubleshooting
TROUBLESHOOTING fault: excess water remaining above the filter plate after the rinse cycle Drawer doesn’t close properly Ensure nothing is obstructing the drawer from closing such as hoses or drawer latches. Ensure hose support is correctly installed and drain hoses are routed correctly, refer to ‘Plumbing &... - Page 20 FISHERPAYKEL.COM © Fisher & Paykel Appliances 2021. All rights reserved. The models shown in this guide may not be available in all markets and are subject to change at any time. The product specifications in this guide apply to the specific products and models described at the date of issue.


