Citizen CMP-10 User Manual
Citizen systems mobile thermal printer user's manual
Hide thumbs
Also See for Citizen CMP-10:
- Command reference manual (80 pages) ,
- User manual (40 pages) ,
- Command reference (5 pages)
Table of Contents
Advertisement
Advertisement
Table of Contents

Related Manuals for Citizen Citizen CMP-10


Summary of Contents for Citizen Citizen CMP-10
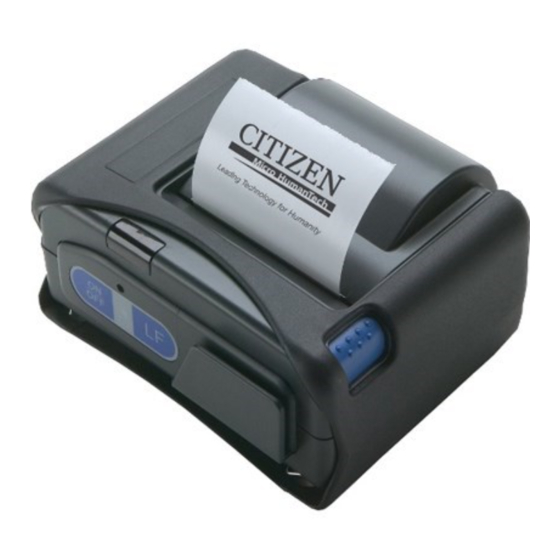
- Page 1 MOBILE THERMAL PRINTER MODEL CMP-10 CMP-10BT User’s Manual...
-
Page 2: Declaration Of Conformity
Declaration of Conformity This printer conforms to the following Standards: Low Voltage Directive 73/23/EEC, 93/68/EEC, EMC Directive 89/336/EEC, 92/31/EEC, 93/68/EEC. : EN60950 : EN55022 EN61000-3-2 EN61000-3-3 EN55024 R&TTE: EN300328 This declaration is applied only for 230V model. For Unites States... -
Page 3: General Precautions
G Reproduction or transfer of part or all of this document in any means is prohibited without permission from CITIZEN SYSTEMS. G Note that CITIZEN SYSTEMS is not responsible for any operation results regardless of missing, error, or misprinting in this manual. -
Page 4: Safety Precautions
SAFETY PRECAUTIONS About Pictogram Precautions and notices necessary to follow for preventing hazards to the user or other person or their properties are defined as shown below. Hazards and degrees of damage that may be caused by ignoring the instructions are categorized as shown below. - Page 5 Deterioration or discoloration may occur. Use a dry, soft cloth for cleaning. G Do not move the printer or give any shock or vibration to it while the printer is in operation or in standby operation. The printer power may be disconnected and the print data may be lost.
- Page 6 Precautions on Using Printer G Do not touch the print head or paper cutter while replacing print paper. Heated print head may cause burn. The cutter may cause injury to the hand. G Use of print paper other than specified may result in not only deteriorated print quality but shortened life of print head (printing portion).
- Page 7 Precautions on Using Battery G Entering battery liquid may result in loss of eyesight. Immediately wash eyes with fresh water and get medical care. G Keep the following in mind when handling battery. Otherwise, liquid leakage, heat generation, and explosion may result. •...
- Page 8 G If any abnormality is found while the battery is in use, stop the operation and carry the battery in local sales agent. G The battery in the printer is shipped partially charged. Please fully charge the battery prior to using the printer.
- Page 9 • Avoid exposure to high temperature, humidity, liquid, or sunlight. • When keeping the printer thermal paper on a board, do not use paste, adhesive, or adhesive tape containing volatile organic solvent. • For long-time storage, use thermal paper of high storage type or copy it with plain paper copier.
- Page 10 G Do not connect to the power receptacle where multiple connections are used. G Do not step on, tap, or put any object, on the cable of the AC adapter. G Before connecting or disconnecting AC adapter, turn the printer power OFF. Do the operation securely. WARNING CAUTION CAUTION —...
-
Page 11: Table Of Contents
1.2 Included and Optional Accessories ... 12 1.3 Type Classification ... 12 2. GENERAL SPECIFICATIONS ... 13 3. EXPLANATION OF PRINTER PARTS ... 16 3.1 LED Indicators ... 16 3.2 Communication Port and Switch ... 17 3.3 Inside of Paper Cover ... 18 3.4 Buzzer ... - Page 12 6. LIST OF COMMANDS ... 33 7. MAINTENANCE AND SERVICE ... 35 8. APPENDIX HANDLING BELT CLIP KIT ... 36 8.1 How to Mount Belt Clip ... 36 8.2 Mounting Rubber Feet ... 36 — 10 —...
-
Page 13: Introduction
1. INTRODUCTION CMP-10 is a compact, full featured portable line thermal printer, which can be used in a large variety of job environments ranging from door- to-door sales through small and mid-sized catering establishments, car-rentals, parking lots, field services to on-board sales on land, sea and air. -
Page 14: Included And Optional Accessories
1.2 Included and Optional Accessories When unpacking the package, confirm the availability of: G Printer unit: G Sample paper roll: G AC adapter: G User’s manual: E (European) model G Belt clip kit (Belt clip, 2 × screws, 2 × rubber feet) Please refer to the Appendix for how to mount belt clip and rubber feet. -
Page 15: General Specifications
Total dots: 384 Dot density: 8 dots/mm Printing width: 48 mm ESC/POS commands plus extra commands for specific printer features ASCII Code, Alphanumeric characters, International characters, Windows Code page FONT A: 32 characters/line, FONT B: 42 characters/line FONT A: 12H × 24V, FONT B: 9H × 16V... - Page 16 Hypothetical interference distance: 10 m Transfer rate: 723.2k/57.6k bps (Transfer rate between Bluetooth module only) The communication speed between Bluetooth and the printer is 115.2kbps. Transfer capacity: Up to +4 dBm (Class 2 & Class 3) Coding: 128 bit Security level: Link...
- Page 17 Feature Power supply monitoring AC adapter Operating environment Storage environment Reliability Safety standard and EMI Dimensions Weight Options Parameters Auto Power OFF (programmable - from 1 to 60 min.) Low battery monitoring included. Model: 10AD-JU (for Japan, USA, and Canada) 10AD-E (Europe) Input voltage 90 V - 264 V AC Output voltage 9.0 V DC 1.0 A...
-
Page 18: Explanation Of Printer Parts
• When waiting for reading mag stripe card (When card reading is finished or after 10 seconds, it lights green.) • While pressing and holding the Power switch to turn the printer off (When releasing the switch after the LED changes to green, the printer power is turned OFF.) -
Page 19: Communication Port And Switch
For the method of communication with cable and connecting cable, refer to 4.4. (5) Power switch (ON/OFF) Press and hold the Power switch for 1 second to turn the printer power ON. To turn OFF the printer, press and hold the Power switch till the Power LED changes from red to green. -
Page 20: Inside Of Paper Cover
3.3 Inside of Paper Cover (11) (10) Paper feed roller Feeds paper through the printing mechanism. (11) Printing (thermal) head Records print data on the thermal paper. 3.4 Buzzer The built-in buzzer sounds in the following cases. When low battery is detected (sounds 3 times) When magnetic card was successfully read (sounds once) When buzzer command is sent (the number of sounding times is controllable) -
Page 21: Bottom Surface And Battery Cover
3.5 Bottom Surface and Battery Cover (13) (12) Belt clip Attaches to the printer on your belt. (Not installed at the time of shipment. To use the belt clip, please install the belt clip by yourself.) (13) Strap holder Metals for holding a strap. -
Page 22: Dimensions And Views
3.6 Dimensions and Views (Unit: mm) DC Jack — 20 —... -
Page 23: Operation
Open Paper Cover (2). Place the new paper roll as shown on illustration and pull out enough paper to reach the control panel of the printer (3). Close the Paper Cover. If data to be printed still exists, press the LF switch to resume printing. -
Page 24: Method Of Charging
To charge the battery, plug the connector of the AC adapter to the DC jack of the printer and the AC adapter to the AC outlet. The charge LED lights red. If the LED changes to green, charging has completed. -
Page 25: Communication By Irda
4.3 Communication by IrDA For IrDA communication, DIP switch setting needs to be set for IrDA. Set the infrared port of the device to face straight to the printer’s infrared port. Communication is available in the range of 15° up, down, left, and right. -
Page 26: Communication Via Serial Port (Cable)
For communication via serial (RS-232C) interface, use Citizen CA10-01 serial cable. When the printer is OFF, open the serial port rubber cover and while holding the connector with the “PUSH” sign facing upward, gently insert the connector into the serial port. -
Page 27: Communication By Bluetooth
When CMP-10BT connects through the Bluetooth interface, the host machine may require a pin code. The last 4 characters of the Bluetooth Address that prints on the printer self test are the pin code that should be entered in to the host machine. -
Page 28: Removing The Battery Pack
4.7 Removing the Battery Pack 1. Set the printer Power switch to OFF and unplug the AC adapter from printer. 2. Remove the battery cover by (1) pressing the battery cover as shown in the figure, lift it upward. 3. Remove cover as shown in the illustration. -
Page 29: Installing The Battery Pack
Confirm that the battery connector is seated deeply. 3. Insert the battery into its compartment. 4. Place battery cover back by sliding it from the back of the printer. Battery Connector CAUTION! Be sure to place the battery cover firmly in its position after installing the new battery pack! —... -
Page 30: Dip Switch Setting
4.9 DIP Switch Setting Either Bluetooth or IrDA function of CMP-10BT have to be chosen by DIP switches. DIP switches are located under the battery. Function allocation of DIP switch is as follows. Bluetooth IrDA * Default setting of CMP-10BT There are no “No. -
Page 31: Setup Menu Function (Firmware After Ver 2.20En)
4.10 Setup menu function (Firmware after Ver 2.20EN) Make sure the printer power is off. Press ON/OFF switch and keep pressed for about 5 seconds until .LED is changed to red and leave the switch. Then buzzer beeps and printer prints current setting and goes to setup menu as follows. -
Page 32: Memory Switches
The list of choice in the setup menu Top question items CHANGE DISCOVERABILITY ? SET DISCOVERABILITY CHANGE PAIRING INFO SAVING ? PAIRING INFO SAVING CHANGE MEMORY SWITCHES ? (See the table below) CHANGE BAUD RATE ? CHANGE AUTO POWER OFF TIME ? CHANGE PRINT DENSITY ? CHANGE IrDA MAX SPEED ? -
Page 33: Function
5.1 Auto Power OFF Power is automatically cut off after a specified period of time, during which no command is sent to the printer and the LF switch has not been pressed. The default setting of this time duration is 10 minutes, however, the period can be custom set by the user with a special command to the printer. -
Page 34: Monitoring The Print Head Overheating
If the temperature exceeds 65°C for some reason, the printer automatically stops printing with Power LED indication of “Error” to protect the print head. If the head temperature returns to 60°C or below, the printer is ready for printing. 5.5 Self Testing and Internal Settings ●... -
Page 35: List Of Commands
Selecting Code table Setting serial interface communication speed Printing Diagnostic information Specifying/Canceling 90°-right- turned Characters Specifying print density Returning diagnostic information Specifying the relative positions Setting the printer in default state Returning the battery voltage and Printer Head temperature — 33 —... - Page 36 * indicates a unique command or a non-compatible command. Aligning the characters Enabling/Disabling Panel Switches Printing and Feeding the paper by n lines Transmitting the printer status Selecting the time interval for automatically switching Off the printer Specifying/Canceling the Inverted Characters...
-
Page 37: Maintenance And Service
7. MAINTENANCE AND SERVICE For the information on maintenance and service, please contact our dealer. — 35 —... -
Page 38: Appendix Handling Belt Clip Kit
8. APPENDIX HANDLING BELT CLIP KIT This kit consists of a belt clip, two screws, and two rubber feet. 8.1 How to Mount Belt Clip Mount the belt clip in the square frame using the two screws supplied. The direction of the belt clip should be as per the drawing below. Note: Do not use screws without mounting the belt clip. - Page 39 MEMO — 37 —...
- Page 40 WEEE MARK — 38 —...
- Page 41 2.10E-0612 Printed in Korea...