Advertisement
Quick Links
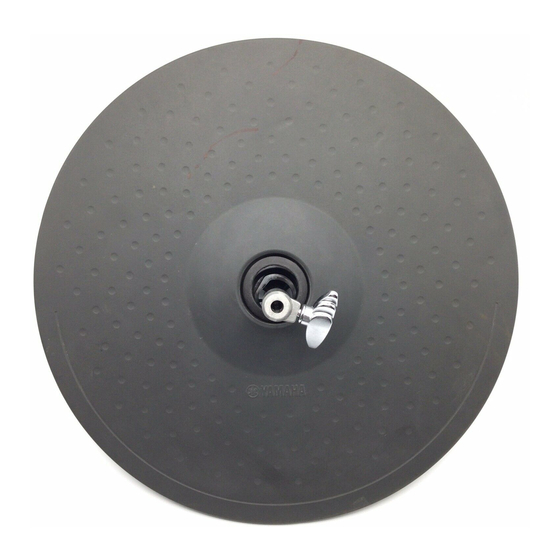
RHH130
OWNER'S MANUAL
INTRODUCTION
Thank you for purchasing the Yamaha RHH130 Real Hi-Hat Pad. The RHH130 is a trigger pad, which
incorporates a hi-hat control function, designed for use in an electronic drum system. The RHH130
can be attached to your hi-hat stand just as you would a regular hi-hat and offers greater realism
in performance when compared to previous hi-hat controller/pad combinations. To get the most
out of your RHH130, please read this Owner's Manual thoroughly. Also, after reading the manual,
keep it in a safe place for future reference.
■ Handling Precautions
• Do not disassemble or alter the product. Doing so may result in damage or deterioration to the product.
• Do not step on or place heavy objects on the product. It may result in damage.
• Do not use or keep the product in places with extremely high temperature (places in direct sunlight, close to a heater, in a
closed car, etc.) or damp (bathroom, outside on a rainy day, etc.). It may result in deformation, discoloration, damage or
deterioration.
• To clean the product, please wipe with a soft cloth or a damp cloth that been wrung out thoroughly, If the product is soiled, use
a neutral detergent on a cloth then wipe with a damp cloth that has been wrung out thoroughly to remove any remaining
detergent. Do not use benzine, thinner or alcohol as it may result in discoloration or deformation. Also pay close attention so as
not to let the water and detergent come into contact with the cushions used in the product, it may result in deterioration.
• Make sure you hold onto the plug, not the cable, when connecting or disconnecting the cable. Also, never place any heavy or
sharp objects on the cable. Applying excessive force to the cable may result in damage to the cable such as cutting the wires,
etc.
■ Inside This Package
Before setup, please make sure that all of the items listed below are present and ac-
counted for. If anything is missing, please contact the dealer from whom you purchased
the unit.
* To customers who purchased a pads set (DTPK95MSP, etc.), please refer to the attached " Accesso-
ries List" sheet included with each pads set when confirming package contents.
◆ RHH130
• RHH130 Main Unit
(Clamp Base Ass'y included) x1
Main Unit
Clamp Base Ass'y
保 証 書
この度はヤマハ ・ リアルハイハットパッドRHH130をお買上げ戴きましてありがと
うございます。 本書は、 本書記載内容で修理を行なう事をお約束するものです。 お買
上げの日から下記期間中に故障が発生した場合は、 本書をご提示の上お買上げの販
売店または最寄りのヤマハ電気音響製品サービス拠点に修理をご依頼ください。
持 込 修 理
品 名 / 品 番
リアルハイハットパッドRHH130 製番
保 証 期 間
本 体:お買い上げの日から6ヶ月
※お買上げ日
年 月 日
住 所 〒
お
客
様
お名前 様
電 話 ( )
※
店 名
販
住 所
売
店
電 話
( )
無償修理規定
1. 正常な使用状態 (取扱説明書、 本体貼り付けラベルなどの注意書に従った使用状態) で故障した場合には、 お買上げの販売店
が無料修理を致します。
2. 保証期間内 (6ヶ月間) に故障して無料修理をお受けになる場合は、 お買上げの販売店に商品と本書をご持参のうえご依頼く だ
さい。
3. ご贈答品、 ご転居後の修理についてお買上げ販売店にご依頼できない場合には、 最寄りのヤマハ電気音響製品アフターサー
ビス拠点にお問い合わせく ださい。
4. 保証期間内 (6ヶ月間) でも次の場合は有料となります。
(1) 本書のご提示がない場合。
(2) 本書にお買上げの年月日、 お客様、 お買上げの販売店の記入がない場合、 及び本書の字句を書き替えられた場合。
(3) 使用上の誤り、 他の機器から受けた障害または不当な修理や改造による故障及び損傷。
(4) お買上げ後の移動、 輸送、 落下などによる故障及び損傷。
(5) 火災、 地震、 風水害、 落雷、 その他の天災地変、 公害、 塩害、 異常電圧などによる故障及び損傷。
(6) 消耗部品の交換。
(7) お客様のご要望により出張修理を行なう場合の出張料金。
5. この保証書は日本国内においてのみ有効です。
This warranty is valid only in Japan.
6. この保証書は再発行致しませんので大切に保管してく ださい。
※ この保証書は本書に示した期間、 条件のもとにおいて無料修理をお約束するものです。 したがってこの保証書によってお客
様の法律上の 権利を制限するものではあり ませんので、 保証期間経過後の修理などについてご不明の場合は、 お買上げの
販売店、 ヤマハ電気音響製品アフターサービス拠点にお問い合わせく ださい。
• Stereo Phone Cable x2
The connector has two black
rings. (The monaural type
connector has one black
ring.)
• Owner's Manual (this sheet) x1
ご販売店様へ ※印欄は必ずご記入の上お渡しください。
印
■ Part Names
Pad
Clamp Base
Open Clamp
Edge
■ Setting Up
Before setting up the RHH130, prepare a hi-hat stand (such as one of the Yamaha HS
Series stands, etc.), then follow the procedures below to setup the RHH130.
Make sure the stand is setup in a stable and secure manner. If the clamp bolts, etc are not
tightened securely, the pad or stand can fall over causing injury. Also, placing the rack or stand
on an unstable surface, etc., can cause the pad or stand to fall over, resulting in injury.
Since hi-hat stands made by other manufacturers may not be compatible with the RHH130,
we recommend that a Yamaha hi-hat stand be used. (Recommended: HS650, HS740)
1
Attach the clamp base to the RHH130
main unit. First, loosen the nut on the
clamp base and remove the open
clamp.
2
Set the hi-hat stand on a stable surface.
Remove the hi-hat clutch and cymbal
support (rubber, felt, etc.) that came
with the hi-hat stand.
If the stand is equipped with an angle
adjustment screw, loosen the screw so
that its end is not sticking out from the
cymbal support plate.
■ Output Level Adjustment
Controls the level of the trigger output from the RHH130. Use a small screwdriver, etc. to
rotate the level adjustment knob.
Rotate the knob to the right (+) to increase the output level, or to the left (–) to decrease
output level. The pad's output level should be adjusted in regards to how hard you hit the
pad, to adjust the pad's dynamic range, or to better match the pad to the type of DTX
Series Drum Trigger Module (DTXPRESS/DTX/DTXTREME) you are using.
NOTE: When the RHH130 is used with a DTX Series Drum Trigger Module (DTXTREME/DTX/
DTXPRESS), enter the module's Trigger Edit Mode and set the [PAD Gain] (pad input level)
parameter so that the display reads 90-95% when the pad is struck ff (fortissimo). Refer to the
Owner's Manual that came with your module for more information.
If the output level is too high, the pad's dynamic range (the difference between loud and soft
tone) will be reduced and trouble such as double triggers (multiple triggers being produced by
a single stroke) may occur.
Do not put excessive pressure on the level adjustment knob, it may result in damage.
Adjusting the Voice Volume
To change the volume of the voice assigned to the RHH130 pad, use the [VOICE]
edit mode in the DTX Series Drum Trigger Module. Please refer to the Owner's
Manual that came with your module for more information.
■ Replacing Worn Pads
• After extended use, some of the parts used on the RHH130 will wear out or their
quality will deteriorate (pad rubber, connecting jacks, etc.). The life of these parts will
vary depending upon the circumstances under which the RHH130 is used.
• Please ask the dealer from whom you purchased the device about replacing worm
parts.
Clutch Base
Wing Bolt
Level Adjustment Knob
Output Jack
Output Jack
RHH130 Main Unit
Clamp Base
Nut
Open Clamp
Hi-Hat Clutch
Remove
(The clutch is not needed when
using the RHH130 however,
keep it in a safe place for future
use. )
Cymbal Support
Plate
Angle Adjustment
Screw
Hi-Hat Stand
Level Adjustment Screw
Advertisement

Related Manuals for Yamaha RHH130


Summary of Contents for Yamaha RHH130
- Page 1 Output Jack Output Jack Thank you for purchasing the Yamaha RHH130 Real Hi-Hat Pad. The RHH130 is a trigger pad, which incorporates a hi-hat control function, designed for use in an electronic drum system. The RHH130 can be attached to your hi-hat stand just as you would a regular hi-hat and offers greater realism Open Clamp in performance when compared to previous hi-hat controller/pad combinations.
- Page 2 ENVIRONMENTAL ISSUES: Yamaha strives to produce products that are both user safe and environmentally friendly. We sincerely believe that our products and the production methods used to produce them, meet these goals. In keeping with both the letter and the spirit of the law, we want you to be aware of the following: Warning: Do not attempt to disassemble.