Table of Contents
Advertisement
Advertisement
Table of Contents

Related Manuals for Yamaha RY9


Summary of Contents for Yamaha RY9
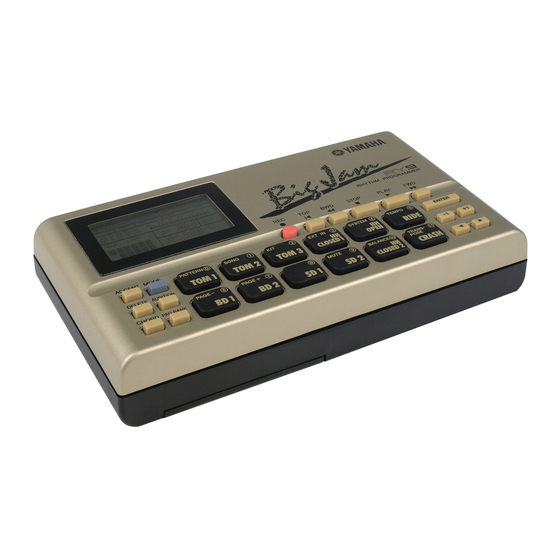
- Page 1 RHYTHM PROGRAMMER OWNER’S MANUAL BEDIENUNGSANLEITUNG MODE D’EMPLOI...
- Page 2 This product should be used only with the components supplied or; a cart, rack, or stand that is recommended by Yamaha. If a cart, etc., is used, please observe all safety markings and instructions that accompany the accessory product.
- Page 3 1. IMPORTANT NOTICE: DO NOT MODIFY THIS UNIT! This product, when installed as indicated in the instructions contained in this manual, meets FCC requirements. Modifications not expressly approved by Yamaha may void your authority, granted by the FCC, to use the product.
- Page 4 Yamaha service personnel. • Use the specified adaptor (PA-3B or an equivalent recommended by Yamaha) only. Using the wrong adaptor can result in damage to the instrument or overheating.
- Page 5 It will also be retained long enough to exchange an old set of batteries for a new set. If you have important data in the RY9 which you don’t want to lose, please take care to keep fresh batteries inserted in (or keep an AC power adaptor connected to) the RY9, and to regularly save it to an external MIDI data storage device.
- Page 6 Whether you’re a professional or amateur guitarist, a serious songwriter or simply a music hobbyist, you’ll find the RY9 a unique and powerful addition to your arsenal of music tools. You’ll be surprised by its full, dynamic stereo sound quality when played through a high quality audio monitoring system.
- Page 7 CONVENTIONS USED IN THIS MANUAL. In order to keep confusion to a minimum, there are a few basic conventions used in the feature explanations in this manual, as follows: Names of key features are written in the cap-low style; e.g., Pattern Mode, Song Record Mode, System Mode Sync function, User patterns, etc.
-
Page 8: Before You Begin
A brief overview of the RY9’s capabilities and system structure, as well as descriptions of all panel features—everything you need to know before you begin using the RY9 in order to put its many features and capabilities into proper context. -
Page 9: Table Of Contents
BEFORE YOU BEGIN 1. THE RY9 ...2 2. RY9 SYSTEM STRUCTURE 3. TOP PANEL ...7 4. SIDE & REAR PANELS GETTING STARTED ...12 5. SETUP & POWER-ON 6. PLAYING THE DEMO SONG 7. PLAYING THE DRUM PADS 8. PLAYING THE PRESET PATTERNS 9. -
Page 10: The Ry9
200 Preset rhythm patterns with matching accompaniment backing encompassing many different popular music styles, and 50 Preset songs and 12 Preset drum kits suitable for any type of music situation. The RY9 also features powerful programming capabilities that let you do the following: Create Your Own Rhythm Patterns Record your own one-measure User patterns in step-time or real-time. - Page 11 28-note polyphony, stereo outputs, headphone jack, and a large LCD screen which always lets you know what mode and status you’re currently in. Hence, the RY9 is the ideal music tool that’s useful in practically any music situation. You can use it as: A Practicing Companion Plug a guitar directly into the RY9 and play along with the patterns and songs.
-
Page 12: Ry9 System Structure
2. RY9 SYSTEM STRUCTURE The RY9 is primarily a power ful rhythm programmer, but with the added dimension of automatic backing accompaniment, song programming capability and a guitar synthesizer. The key components that make up the RY9’s operating system are the AWM voices, the drum kits, the patterns, and the songs. - Page 13 There are 12 Preset drum kits and 4 User drum kits. Although there are only 12 pads on the top panel of the RY9, each drum kit is made up of 24 drum voices, organized in two “Pad Banks”—a “Drum Pad Bank” and a “Percussion Pad Bank”—with 12 drum voices assigned to each Pad Bank.
- Page 14 THE MODES AND FUNCTIONS. The RY9’s features are for the most part organized into nine modes accessible by holding [MODE] and pressing one of the drum pads (the names of the modes are printed on the various pads). All modes except Tempo Mode and Transpose Mode contain several pages of functions which you can select by holding [MODE] and pressing [PAGE-] and [PAGE+].
-
Page 15: Top Panel
3. TOP PANEL SONG PART MEAS BEAT CLOCK SONG ACCENT MODE PATTERN TOM1 DELETE AUDITION PAGE CHORD PAD BANK 1 LCD SCREEN High contrast, easy-to-read Liquid Crystal Display (LCD) provides large-content visual feedback to always let you know exactly what mode and status you’re currently in. - Page 16 SONG PART MEAS BEAT CLOCK SONG ACCENT MODE PATTERN TOM1 DELETE AUDITION PAGE CHORD PAD BANK 5 [STOP] BUTTON For stopping the song or pattern playback or realtime recording. 6 [PLAY] BUTTON For starting song or pattern playback or realtime recording from the current measure location.
- Page 17 ) [DELETE] BUTTON For deleting individual drum beats in Pattern Record Mode. Simply hold [DELETE] and press [ENTER] or the appropriate drum pad to delete the drum voice at the current cursor location. When Chord Assign is active, holding [DELETE] and pressing [ENTER] will delete the chord at the current cursor location.
-
Page 18: Side & Rear Panels
OUTPUT L/MONO 3 [OUTPUT] JACKS For connecting the RY9 to a mixer, or a stereo amplifier, or amplified speakers. In the case of mono output, use the [L/MONO] jack. 4 [MIDI] JACKS For connecting the RY9 to other MIDI devices such as a synthesizer or music sequencer, or to a MIDI data storage device (or another RY9) for bulk dumping of User song, pattern and kit data. -
Page 19: Battery Compartment
Even when the switch is in the “STANDBY” position, electricity is still flowing to the instrument at a minimum level. When not using the RY9 for an extended period of time, be sure to unplug the AC power adaptor from the wall AC outlet. -
Page 20: Getting Started
It will also be retained long enough to exchange an old set of batteries for a new set. If you have important data in the RY9 which you don’t want to lose, please take care to keep fresh batteries inserted in (or keep an AC power adaptor connected to) the RY9, and to regularly save it to an external MIDI data storage device. -
Page 21: Using Batteries
Open the battery compartment cover. Open the battery compartment cover—located on the bottom panel of the RY9—by carefully pressing down on the grooved area of the cover and sliding it outward, in the direction of the arrow as indicated on the cover itself, and as shown below. -
Page 22: When To Replace The Batteries
WARNING! NEVER MIX OLD AND NEW BATTERIES, AND NEVER MIX DIFFERENT TYPES OF BATTERIES (SUCH AS ALKALINE AND MANGANESE)! To prevent possible damage due to battery leakage, remove the batteries from the RY9 if the instrument is not to be used for an extended period of time. - Page 23 Monitoring by an Audio System Another simple setup for monitoring the RY9’s sound is to plug a pair of audio cables from the RY9’s [OUTPUT] jacks to the inputs of either a mixer, or a stereo amplifier, or a pair of amplified keyboard speakers. Carefully adjust the RY9’s [VOLUME] slider in relation to the input and output levels on the mixer...
-
Page 24: Midi Settings
RY9 and play along with the patterns and songs, or use the RY9 as a guitar tuner, or even use the RY9 as a guitar synthesizer to “trigger” one of the 50 AWM normal voices by the notes you play on the guitar. - Page 25 Even when the switch is in the “STANDBY” position, electricity is still flowing to the instrument at a minimum level. When not using the RY9 for an extended period of time, be sure to unplug the AC power adaptor from the wall AC outlet.
-
Page 26: Playing The Demo Song
6. PLAYING THE DEMO SONG Before you begin using the RY9 or diving into its many features, you might want to hear the preprogrammed demo song which will give you an idea of just how powerful the RY9 is. To select the demo song, first you must enter Song Mode. -
Page 27: Playing The Drum Pads
7. PLAYING THE DRUM PADS At power-on, you can start hitting the drum pads right away. Try listening to the sounds of the currently selected drum kit. ACCENT MODE PATTERN TOM1 DELETE AUDITION PAGE CHORD PAD BANK The Drum Voice List and Drum Kit List are provided on pages 84 and 86. SELECTING THE PAD BANKS. - Page 28 SELECTING THE DRUM KITS. When the Chase function is on, the currently selected drum kit will depend on which pattern is selected. There are 16 drum kits—12 Preset drum kits and 4 User drum kits. To select a different kit, you must first enter Drum Kit Mode. To enter Drum Kit Mode, hold [MODE] and press [KIT].
-
Page 29: Playing The Preset Patterns
Chord 1 and Chord 2 tracks. There are 200 backings, covering many different popular styles of music. (For a list of the RY9’s pattern, see page 88.) The Preset rhythm patterns are organized in 50 music styles with four Sections for each style. - Page 30 Press [-1] and [+1] to select a Preset pattern (between #000 ~ #199). (The pattern numbers between #200 ~ #249 are for User patterns, i.e., patterns you create yourself; the User patterns for a new RY9 will contain no data.) To play the selected Preset pattern, press [PLAY]. The selected pattern will play repeatedly until you press [STOP].
-
Page 31: Changing The Tempo
CHANGING THE TEMPO. You can change the tempo whether the pattern is playing or stopped. Each Preset pattern is programmed with an “initial tempo”. When you select a pattern, the pattern’s initial tempo will be loaded. To change the current tempo setting, hold [MODE] and press [TEMPO] to enter Tempo Mode. - Page 32 To select Chord Root or Chord Type, press [ E ] and [ F ]. The flashing indicator will be positioned above the currently selected one. To change the backing Chord Root or Chord Type, press [+1] and [-1], followed by [ENTER] to lock in the new chord. Chord Type Chord Root To exit Chord Assign, press [CHORD] again.
- Page 33 When the backing name is flashing, press and hold [-1] or [+1] to scroll through all the backings; the very last backing selection will be the “Backing Off” status. To turn the backing accompaniment off, choose the very last backing selection, indicated by the words “BKOFF”...
-
Page 34: Playing The Preset Songs
Bass Track Mute (“B”) is the first function, Chord 1 Track Mute (“C1”) is the second function, and Chord 2 Track Mute (“C2”) is the third function in Mute Mode. The words “MUTE B (or C1 or C2) OF” will appear on the LCD to indicate that you have accessed the desired Track Mute function, and that it is turned off. - Page 35 [FWD] to designate a specific measure to start the song from. The RY9 has 28-note polyphony, which means the maximum number of notes that can sound at one time is 28. In some cases, some of the voices may be “truncated”, or cut off, or may not sound at all.
- Page 36 CHANGING THE PATTERNS AND BACKING ACCOMPANIMENT. You can easily change the patterns and backing accompaniment of the selected song—either while the song is stopped or while it is playing. After you’ve switched into the Song Mode Song Select function and selected a song, when you press [PLAY] to start the song playback, the flashing cursor position will change from “SONG”...
- Page 37 To change the backing accompaniment, press [ E ] or [ F ] to position the flashing cursor over the name of the backing accompaniment. The backing name will begin flashing, indicating that you can select a different accompaniment backing to play with the currently selected rhythm. Then press [-1] and [+1] to select a backing accompaniment.
-
Page 38: Modes & Functions
10. PATTERN MODE Pattern Mode is one of the two main operating modes of the RY9 (the other being Song Mode). It consists of both Pattern Play and Pattern Record Modes. The Preset Pattern List is provided on page 88. - Page 39 THE BEAT/CLOCK POSITION INDICATORS The pattern beat/clock position indicators appear in the upper right area of the LCD, where large inverted triangles represent each beat in the measure, and small inverted triangles represent each clock where rhythm data may exist. (The number of beat and clock position triangles in the measure depends on the designated meter of the pattern.) During playback, each beat position indicator flashes according to the current beat location, with all beat positions flashing on the first beat of...
- Page 40 SELECTING A “NEXT” PATTERN - To specify the “Next” pattern to play immediately after the current pattern finishes, press [+1] and [-1] while the current pattern is playing to specify the Next pattern number. The word “NEXT” will display in the LCD until the Next pattern is engaged. CHANGING THE BACKING - To temporarily select a different backing to hear how it sounds with the current rhythm pattern (either while the pattern is playing or is stopped), press [ E ] once to position the flashing cursor over...
- Page 41 ASSIGNING A SWING FACTOR TO THE PATTERN - Hold [MODE] and press [PAGE-] or [PAGE+] once or more to access the Swing function. The word “SWING” will appear in the LCD, as will the current Swing setting (OFF, E1 ~ E9, S1 ~ S5).
- Page 42 User patterns or songs. (Be sure to save any important User data first, offloading it to an external storage device such as the Yamaha MDF3 MIDI Data Filer.) ASSIGNING A BACKING TO A USER PATTERN - You can assign any of the 200 backing accompaniments to play with a User pattern.
-
Page 43: Pattern Record Mode
User patterns or songs. (Be sure to save any important User data first, offloading it to an external storage device such as the Yamaha MDF3 MIDI Data Filer.) ENTERING PATTERN RECORD MODE - First hold [MODE] and press [PATTERN] to enter Pattern Mode. - Page 44 DESIGNATING THE METER - If you want to create a pattern from scratch with a specific time signature, you must first designate the meter for an empty User pattern while still in Pattern Record Standby Mode—i.e., before initiating the Step or Realtime recording operation. Hold [MODE] and press [PAGE+].
- Page 45 Current Beat Location The RY9 automatically prevents the sounding of illogical drum notes—such as a closed and open high-hat playing at the same time. The drum voice assigned to the higher pad number will always take precedence.
- Page 46 ENTERING REALTIME RECORD MODE - From within Pattern Record Standby Mode, simply pressing [PLAY] will initiate the realtime recording operation. A count-in metronome click will begin (the number of count-in beats will appear on the screen, and will depend on the designated meter), after which realtime recording will commence.
- Page 47 ADDING ACCENTS TO THE RHYTHM You can record and delete accents the same way as recording and deleting drum beats—by using the [ACCENT] button. (You can assign accent levels to the pads for User drum kits. For details, see page 59.) ADDING AN ACCENT - In Pattern Play Mode, you can add an accent as you play the pads in realtime, by holding [ACCENT] and pressing a drum pad.
- Page 48 ASSIGNING A BACKING - You can assign any of the 200 backing accompaniments to play with a User pattern. (For details, see page 34.) EXCEEDING THE MAXIMUM NOTE POLYPHONY - The RY9 has 28-note polyphony, which means the maximum number of notes that can sound at one time is 28.
-
Page 49: Song Mode
11. SONG MODE Song Mode is one of the two main operating modes of the RY9 (the other being Pattern Mode). It consists of both Song Play and Song Record Modes. SONG PLAY MODE. In Song Play Mode, you can select and play Preset and User songs, as well as turn the Repeat and Chain functions on and off, clear a User song, and copy a Preset or User song to a User song location. - Page 50 SELECTING A FUNCTION - Hold [MODE] and press [PAGE+] and [PAGE-] to step through the various functions. The LCD will display information about the status of each function as you step through them. SELECTING A SONG - When you enter Song Play Mode, you can go ahead and select a song.
- Page 51 CHANGING THE PATTERN - To temporarily specify a different pattern to hear how it sounds with the song, press [ E ] or [ F ] to position the flashing cursor over the abbreviation “PTN” (Pattern). Then press [+1] and [-1] to specify the pattern number.
- Page 52 If you turn both the Repeat and Chain functions on and then press [PLAY], the User songs will play from the top to the end repeatedly, until you press [STOP]. CLEARING A USER SONG - When the song is stopped, hold [MODE] and press [PAGE-] or [PAGE+] to access the Song Clear function.
-
Page 53: Song Record Mode
Likewise, you can insert or delete a chord without affecting the pattern track. When constructing a song, you can take advantage of the RY9’s song Sections to create a professional sounding tune that flows naturally from part to part. - Page 54 User patterns or songs. (Be sure to save any important User data first, offloading it to an external storage device such as the Yamaha MDF3 MIDI Data Filer.) ENTERING SONG RECORD MODE - First, enter Song Mode and select a User song location.
- Page 55 ENTERING REALTIME RECORD MODE - From within Song Record Standby Mode, first, press [-1] or [+1] to select the pattern number that you want to be the first part in the song. Then, simply pressing [PLAY] will initiate the realtime recording operation. A count-in metronome click will begin (the number of count-in beats will appear on the screen, and will depend on the meter of the specified pattern), after which realtime recording will commence.
- Page 56 The pattern and chord tracks are independent! When deleting a pattern, the succeeding parts will be moved up by one part. Therefore, take care that your pattern deletions don’t alter your song structure in relation to the chord track. INSERTING A PATTERN - After recording a song, you can go back and insert a pattern at any time.
- Page 57 RECORDING CHORD CHANGES To record chord changes in the chord track at specific clock locations in the song, first you must access the Chord Assign feature. ACCESSING CHORD ASSIGN - From within Step Record Mode, press [CHORD]. The words “BEAT” and “CLOCK”—which display the current beat and clock location of the currently selected measure—will appear in the lower left area of the LCD, and a small inver ted triangle will appear over the Chord Root in the upper left area of the LCD.
- Page 58 DESIGNATING A CHORD ROOT AND TYPE - After selecting the measure and specifying the clock, press [ E ] twice to position the flashing cursor over the Chord Root, and press [-1] and [+1] to select the Chord Root. Next, press [ F ] once to position the flashing cursor over the Chord Type, and press [-1] and [+1] to select the Chord Type.
- Page 59 CHORD TYPES (Key of C) LCD DISPLAY DEFINITION (Blank) Major Minor sus4 Minor Major Seventh Suspended Fourth Sixth Minor Sixth m add9 Minor Added Ninth Seventh Ninth 7 11 m7 9 Seventh Sharp Minor Seventh Ninth Eleventh Seventh Minor Seventh 7sus4 m7 5 Seventh Suspended...
- Page 60 DELETING A CHORD BY PART - After recording a song, you can go back and delete an unwanted chord at any time at a specific part, or measure location. First, in Song Record Mode, press [CHORD] to access Chord Assign. Next, locate the measure containing the chord you want to delete, by pressing [FWD] and [BWD].
- Page 61 Song Record Mode and follow the procedure outlined above in “CHANGING A PATTERN”. EXCEEDING THE MAXIMUM NOTE POLYPHONY - The RY9 has 28-note polyphony, which means the maximum number of notes that can sound at one time is 28. Depending on the song you have created, several drum beats may fall on a specific location where many bass and chord notes exist.
-
Page 62: Drum Kit Mode
12. DRUM KIT MODE In Drum Kit Mode you can select a Preset or User drum kit, assign voices to the pads in a User kit, and designate various settings for the pads in a User kit, including specifying output and accent levels and setting the stereo pan positioning and pitch tuning for each drum pad. - Page 63 PLAYING THE PADS AND SELECTING KITS. You can generally play the drum pads in real-time regardless of the mode you’re in. From within some of the Drum Kit Mode functions, pressing the pad buttons will also display information about the various settings for each pad. SELECTING THE PAD BANKS - Each of the twelve drum pads has two drum voices assigned to it.
- Page 64 SELECTING THE DRUM KITS - The currently selected drum kit will depend on which pattern is chosen, since each Preset pattern uses a specific drum kit. There are 16 drum kits in all—12 Preset kits (#00 ~ #11) and 4 User drum kits (#12 ~ #15).
- Page 65 CREATING A USER DRUM KIT. One of the keys to the RY9’s flexibility is that you can create up to four of your own User drum kits by assigning any of the 128 AWM drum voices to the 12 Drum Pad Bank pads and 12 Percussion Pad Bank pads, as well as specify output level, accent level, pan position and pitch tuning for each drum voice.
- Page 66 ASSIGNING DRUM VOICES TO THE PADS - You can assign any of the 128 AWM drum voices to the pads in a User drum kit. Hold [MODE] and press [PAGE+] or [PAGE-] to access the voice Assign function. The word “ASSIGN” will display in the lower left area of the LCD, and the name of the drum voice which is assigned to the currently selected pad will be flashing.
- Page 67 SETTING THE OUTPUT LEVELS - You can designate the output level for each pad in a User drum kit. Hold [MODE] and press [PAGE+] or [PAGE-] to access the output Level function. The word “LEVEL” will appear in the lower left area of the LCD, and the level setting of the currently selected pad will be flashing.
- Page 68 SETTING THE STEREO PAN POSITIONS - You can designate the stereo pan position for each pad in a User drum kit. Hold [MODE] and press [PAGE+] or [PAGE-] to access the Pan function. The word “PAN” will appear in the lower left area of the LCD, and the pan setting of the currently selected pad will be flashing.
-
Page 69: External In Mode
(For details about connecting a guitar, see page 16.) So the amount of music that can come from the RY9 at one time is the drums, bass and two chord parts from the patterns/songs, plus a guitar signal and the synthesized External In voice. - Page 70 ENTERING EXTERNAL IN MODE - Hold [MODE] and press [EXT IN] to enter External In Mode. ACCENT MODE PATTERN SONG TOM1 TOM 2 DELETE AUDITION PAGE PAGE CHORD PAD BANK BD 2 SELECTING A FUNCTION - Hold [MODE] and press [PAGE+] and [PAGE-] to step through the various functions.
- Page 71 USING THE RY9 AS A GUITAR SYNTHESIZER - When a guitar is plugged into the [EXT IN] jack, you can use the guitar to trigger an External In voice in a variety of ways. There are two steps to setting up the RY9 as a guitar synthesizer: Designating the guitar synthesizer status.
- Page 72 For a list of the AWM normal voices, see page 91. The RY9 can only recognize single notes that you play on the guitar; i.e., it cannot recognize block chords. Recognizing the specific notes you play on the guitar and in turn triggering a voice to play in the same pitch is a rather sophisticated technological feat.
- Page 73 [EXT IN] jack, turn up the volume, access the External In Mode Tuner function, and play a string. The RY9 will sense the pitch of the string you play, and will display the pitch in the upper left area of the screen.
- Page 74 “440” and “445”. From within the Tuner function, press [+1] and [-1] to set the basic pitch. The basic pitch setting determines the overall system tuning for the RY9. This area displays whether the pitch is in tune, or sharp or flat.
-
Page 75: System Mode
14. SYSTEM MODE In System Mode you can designate Internal or MIDI sync clock, assign the MIDI transmit and receive channel for the drum voices, assign the MIDI channel for receiving program change messages, assign the MIDI transmit channel for the External In voice and the Harmony voice, activate bulk dump operations, and designate the note table and assign the note numbers for the drum kit. - Page 76 DESIGNATING THE SYNC CLOCK - You can connect an external sequencer to the RY9 and synchronize, or “sync” the two devices together so that their clocks will play in perfect time with each other. The RY9 may be designated as the “master” device, which means you should set its sync clock to Internal, and the external sequencer’s clock to MIDI.
- Page 77 RY9 respond to program change messages from an external MIDI keyboard or sequencer. For example, by pressing the voice selectors on your keyboard, you can select the RY9’s drum kits. To do so, you must assign the RY9’s program change receive channel to the same program change channel number as the transmitting device.
- Page 78 3”, page 63) in order to play an external tone generator. To do so, you must assign the RY9’s Harmony voice channel to the same MIDI receive channel number as the tone generator. Hold [MODE] and press [PAGE+] once or more to access the Harmony Channel function.
- Page 79 When the operation is finished, the word “END” will appear briefly on the LCD. BULK DUMP RECEIVE - As long as the RY9 is in the Select function of Song Play Mode or Pattern Play Mode, and the song or pattern is not playing, it can automatically receive a bulk dump initiated from an external storage device.
- Page 80 When playing the RY9’s drum voices from an external keyboard or sequencer, the drum voices will play according to the RY9’s note table assignments. The RY9 has both a Preset note table, which you cannot modify, and a User note table, which you can modify using the Note Number function (see below).
-
Page 81: Tempo Mode
15. TEMPO MODE In Tempo Mode you can set the tempo for the song or pattern playback or recording. You can switch into Tempo Mode and change the playback tempo as the pattern or song is playing. Each Preset pattern and song has an “initial tempo” assigned to it. Whenever you select a Preset pattern and press [PLAY], the initial tempo will be activated. -
Page 82: Mute Mode
16. MUTE MODE In Mute Mode you can mute (i.e., switch off) any or all of the backing accompaniments, even while the song or pattern is playing. ENTERING MUTE MODE - Hold [MODE] and press [MUTE] to enter Mute Mode. The word “MUTE” will appear in the lower left area of the LCD, along with the currently selected backing track and its present status—“ON”... -
Page 83: Balance Mode
17. BALANCE MODE Balance Mode is in effect an on-board “sound mixer” that lets you balance the relative levels of the normal voices. In Balance Mode you can balance the volume output levels for the Bass, Chord 1, and Chord 2 backing voices, as well as the output of the External In and Harmony voices, even while the pattern or song is playing. -
Page 84: Transpose Mode
SETTING A BALANCE LEVEL - Select either the Bass, Chord 1, Chord 2, External In or Harmony voice and press [-1] and [+1] to set the balance level for the selected voice. The volume level of the guitar itself can only be determined by the setting of the guitar’s volume knob. -
Page 85: Appendix
19. RECALLING THE FACTORY DEFAULT SETTINGS You can reset all RY9 settings to their initial default settings at any time. Doing so will clear all the User patterns, songs and drum kits you have created. Before initiating the factory default setting operation, be sure to save any important User data using an external MIDI data storage device (such as the Yamaha MDF3 MIDI Data Filer). -
Page 86: Display Messages
20. DISPLAY MESSAGES During operation the RY9 will display various error and other messages in the LCD. Below is a list and description of each display message. DISPLAY BACKUP ERROR If the batteries are dead (or are not installed), when you turn... -
Page 87: Troubleshooting
Clear the destination pattern memory location and try again. 21. TROUBLESHOOTING If you encounter one of the problems listed below, please check the possible causes and solutions before you assume that your RY9 is faulty. PROBLEM No power Check if the batteries are dead. - Page 88 System Mode. Check if the RY9 System Mode Sync function is set to MIDI clock. The RY9 will not play when the sync is set to MIDI clock, since it is designated to act as a “slave” to an external clock source.
-
Page 89: Specifications
Specifications and descriptions in this owner’s manual are for information purposes only. Yamaha Corp. reserves the right to change or modify products or specifications at any time without prior notice. Since specifications, equipment or options may not be the same in every locale, please check with your Yamaha dealer. -
Page 90: Index
23. INDEX [+1] and [-1] buttons ...9 [ E ] and [ F ] buttons ...9 Accent ...39, 55, 59 Assign (drum voice) ...58 Audition...38, 39 Backing accompaniment...24 Backing assign ...34, 40 Backing chord ...23, 32 Balance mode ...75 Basic pitch ...66 Beat/clock position indicators..31... - Page 91 MEMO...
-
Page 92: Lists & Charts
23. LISTS & CHARTS DRUM VOICE LIST LCD DISPLAY DRUM VOICE NAME KDry1 BD Dry 1 KDry2 BD Dry 2 KDry3 BD Dry 3 KRom1 BD Room 1 KRom2 BD Room 2 KRom3 BD Room 3 KAmbi BD Ambience KHard BD Hard KHevy BD Heavy... - Page 93 LCD DISPLAY DRUM VOICE NAME TAna2 Tom Analog 2 TAna3 Tom Analog 3 TAna4 Tom Analog 4 TAna5 Tom Analog 5 TAna6 Tom Analog 6 BongH Bongo H BongL Bongo L CongH Conga H CongM Conga Mute CongL Conga L TmblH Timbale H TmblL...
-
Page 94: Drum Kit List
DRUM KIT LIST DRUM PAD BANK - Pad Numbers 0 ~ 11 Note Number / Note 41 / F1 Pad Number 36 / C1 PERCUSSION PAD BANK - Pad Numbers 12 ~ 23 47 / B1 58 / A 2 Preset Kit Number / Drum Kit Name Drum Kit Number/Program Change Number 0. - Page 95 6. HipH(o)p DRUM PAD BANK TSft3 TSft4 TSft6 HCls2 KLof2 KLof1 SLof1 SLof4 PERCUSSION PAD BANK CongM CongH CongL ScrH HighQ Clap SLof2 SLof3 7. Anal (o)g DRUM PAD BANK TAna1 TAna3 TAna4 HCAn1 KAna2 KAna1 SAna2 SAna1 PERCUSSION PAD BANK AnCgH AnCgM AnCgL...
-
Page 96: Preset Pattern List
PRESET PATTERN LIST Rock PATTERN STYLE NAME DISPLAY Rck1A Rock 1 8-beat Rock 1 Rck1B Rck1C Rck1D Rck2A Rock 2 8-beat Rock 2 Rck2B Rck2C Rck2D Rck3A Rock 3 Slow 8-beat Rock 1 Rck3B Rck3C Rck3D Rck4A Rock 4 Slow 8-beat Rock 2 Rck4B Rck4C Rck4D... - Page 97 Vintage Rock PATTERN STYLE NAME DISPLAY VRk1A Vintage Rock 1 60's Hard Rock 1 VRk1B VRk1C VRk1D VRk2A Vintage Rock 2 60's Hard Rock 2 VRk2B VRk2C VRk2D VRk3A Vintage Rock 3 70's Rock VRk3B VRk3C VRk3D VRk4A Vintage Rock 4 70's Rock&Roll VRk4B VRk4C...
- Page 98 Dance PATTERN STYLE NAME DISPLAY Hip A Hip Hop Hip Hop Soul Hip B Hip C Hip D HousA House Pop House HousB HousC HousD Jazz PATTERN STYLE NAME DISPLAY Fsn1A Fusion 1 Funk Fusion Fsn1B Fsn1C Fsn1D Fsn2A Fusion 2 Pop Fusion Fsn2B Fsn2C...
-
Page 99: Normal Voice List
NORMAL VOICE LIST LCD DISPLAY VOICE NAME Piano Grand Piano ChoPf Chorus Piano A&EP1 Aco.& El.Piano 1 A&EP2 Aco.& El.Piano 2 EPno1 Electric Piano 1 EPno2 Electric Piano 2 EPno3 Electric Piano 3 Clavi Clavi Vibes Vibraphone Organ Electric Organ AcGtr Acoustic Guitar ClGt1... -
Page 100: Midi Data Format
MIDI DATA FORMAT MIDI Reception MIDI Reception Block Diagram <MIDI Reception Condition> <SW1> MIDI IN <SW2> <SW3> F0H, F7H <SW4> <SW5> <SW1> Transmit/Receive Channel <SW2> Program Change Receive Channel <SW3> Pattern/Song Select Mode <SW4> Song Select Mode <SW5> MIDI Synchronization Reception Data 1. -
Page 101: Midi Transmission
MIDI Transmission MIDI Transmission Block Diagram <MIDI Transmission Condition> <SW1> NOTE ON/OFF <SW2> PITCH BEND CHANGE BULK DUMP F0H, F7H <SW3> SONG SELECT <SW4> TIMING CLOCK START CONTINUE STOP ACTIVE SENSING <SW1> Transmit Channel <SW2> Transmit Channel <SW3> Transmit in Song Select Mode <SW4>... - Page 102 MIDI IMPLEMENTATION CHART...
- Page 104 For details of products, please contact your nearest Yamaha or the authorized distributor listed below. Pour plus de détails sur les produits, veuillez-vous adresser à Yamaha ou au distributeur le plus proche de vous figurant dans la liste suivante. NORTH AMERICA CANADA Yamaha Canada Music Ltd.