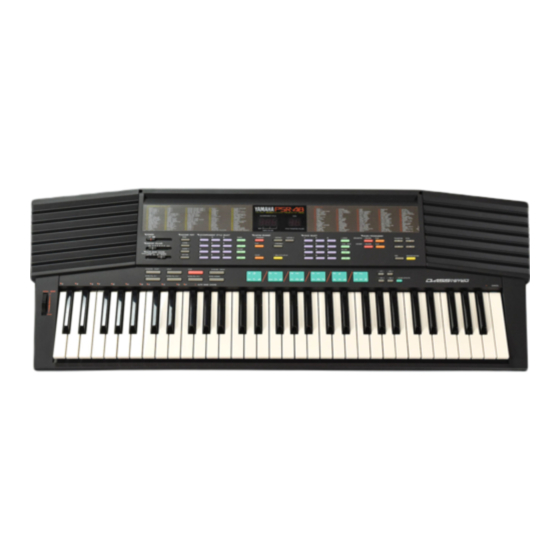
Yamaha PSR-48 Authorized Product Manual
Portatone
Hide thumbs
Also See for PSR-48:
- Owner's manual (46 pages) ,
- Owner's manual (45 pages) ,
- Owner's manual (45 pages)
Table of Contents
Advertisement
Quick Links
Advertisement
Table of Contents

Related Manuals for Yamaha PSR-48


Summary of Contents for Yamaha PSR-48
- Page 1 YAMAHA AUTHORIZED PRODUCT MANUAL...
- Page 2 Owner’s Guide Spielanleitung Mode d‘emploi Manual de1 Propietario...
- Page 3 Congratulations! You are the proud owner of a Yamaha PortaTone. Your PortaTone is a high-quality musical instrument that incorporates advanced Yamaha digital technology and many versatile features. In order to obtain maximum performance and enjoyment from your PortaTone, we urge you to read this Owner’s Guide thoroughly...
-
Page 4: Table Of Contents
CONTENTS 1. BEFORE YOU BEGIN ....4 Power Supply ......4 Using Batteries ......4 Using an Optional Power Adaptor ........5 Remove the Protective Film ..5 Setting Up the Music Stand ..5 Taking Care of Your PortaTone ......5 2. - Page 5 Setting the Tempo ....28 Selecting Playback of Specific Parts ........28 Fingered Accompaniment ..29 Solo Styleplay ......32 6. PSR-48 PERCUSSION ..Manual Percussion with the Percussion Pads ...... 33 The Synchro Break Function ........ 34 The Custom Drummer ....35 Creating an Original Rhythm Pattern ........
-
Page 6: Before You Begin
BEFORE YOU BEGIN Power Supply Your PSR-48 will run either from batteries or the optional power adaptor. Follow the instructions below according to the power source you intend to use. Using Batteries Six 1.5V SUM–1, “D” size, R-20 or equivalent alkaline batteries (sold separately) must first be installed in the PSR-48 battery compartment. -
Page 7: Using An Optional Power Adaptor
Setting Up the Music Stand Insert the two pegs protruding from the bottom edge of the music stand into the two holes located at the top of the PSR-48 control panel. Taking Care of Your PortaTone Your PortaTone will remain in excellent playing condition if care is taken concerning the following. - Page 8 2 . Connections made between the PortaTone and any other device should be made with both units turned off. 3. DO not set the MASTER VOLUME control at MAX when you connect the PotaTone to a stereo system. Use the stereo system’s volume control to adjust the sound level.
-
Page 9: Nomenclature
NOMENCLATURE Top Panel Controls POWER Switch (page 10) MASTER VOLUME Control (page 10) AUTO BASS CHORD Selector (page 18, 26 and 29) ACCOMPANIMENT PART Buttons (page 28) ACCOMPANIMENT STYLE SELECT Buttons (page 21) TEMPO Controls (page 22) Accompaniment VOLUME Controls (page 22) CUSTOM DRUMMER Buttons (page 35) - Page 10 LOWER Button (page DUAL VOICE Button (page 14) Voice VOLUME Buttons (page 72) MUSIC PROGRAMMER Buttons (page 40 and 45) TRANSPOSE Buttons (page 16) PITCH Buttons (page 17) MIDI Button (page 50) DEMONSTRATION Button (page 10) SYNCHRO START Button (page 23) START Button (page 23) STOP Button (page 25) SYNCHRO BREAK Button (page 34)
-
Page 11: Rear Panel Connectors
The DC output cord from the optional Yamaha PA-4/ PA-40 Power Adaptor should be plugged in here when the PSR-48 is to powered from the AC mains supply (refer to “Power Supply” on page 4 for more details). AUX. OUT Jack... -
Page 12: Enjoy The Demonstration
ENJOY THE DEMONSTRATION To give you an idea of the PSR-48’s sophisticated capabilities, it is programmed with a demonstration sequence which play automatically while demonstrating a number of the instrument’s voices. 1. Switch ON Slide the POWER switch to the ON position. -
Page 13: Selecting And Playing Voices
SELECTING AND PLAYING VOICES Selecting a Voice The PSR-48 provides two methods of selecting any of its 100 voices: 1) Choose one of the 100 voices — numbered “00” through “99" — shown on the VOICE LIST... -
Page 14: Adjusting The Volume
The selected voice can now be played on the instrument’s keyboard. * When the power is initially turned ON, the PIANO 1 voice is automatically selected and its number (“00") is shown on the VOICE display Adjusting the Volume Adjust the MASTER VOLUME control while playing to set the desired overall volume level. -
Page 15: Adding Effects
The above mentioned features all reduce the number of available notes. Adding Effects SUSTAIN: The PSR-48 offers two sustain effects – SUSTAlN 1 and SUSTAIN 2. Press the SUSTAIN 1 or SUSTAIN 2 button once the corresponding indicator will light) and... - Page 16 ENSEMBLE: The ensemble effect combines two slightly pitch-shifted notes to produce a “thick,” slightly wavering sound. Press the ENSEMBLE button once (it’s indicator will light) to turn the ensemble effect ON, and a second time (the ENSEMBLE indicator will go out) to turn the ensemble effect OFF.
- Page 17 DUAL VOICE cannot be applied to accompaniment or rhythm. When DUAL VOICE is ON, the number of notes that can be played simultaneously is reduced by half. If DUAL VOICE is used when the SPLIT mode is selected (see page 18), the effect applies to both the upper and lower voices.
-
Page 18: Transposition: Shifting Pitch In Semitone Steps
"Transposing" the pitch of the PSR-48 keyboard makes it easier to play in difficult key signatures, and you can simply match the pitch of the keyboard to the range of a singer or other instrumentalist. -
Page 19: Tuning: Fine Pitch Control
Tuning: Fine Pitch Control Pitch control makes it possible to tune the PSR-48 over a ±50–cent range in approximately 3-cent intervals. A hundred "cents" equals one semitone, so the tuning range provided allows fine tuning of overall pitch over a range of approximately a semitone. -
Page 20: The Split Mode: Separate Left-And Right-Hand Voices
The SPLIT Mode: Separate Left-and Right-hand Voices allows The PSR-48 you to play two voices at once — one with the left hand and one with the right. The lower voice can be p!ayed on the Auto Bass Chord keys, up to one the "]"... - Page 21 4. To Select an Upper Keyboard Voice Press the LOWER button so that the LOWER button LED goes out, then select the desired upper voice (if the DUAL effect is selected, you can select two voices one after the other). 5.
-
Page 22: Using The Accompaniment Section
AUTO BASS CHORD Selector: SPLIT position Upper Voice: 30 Clarinet Lower Voice: 67 Slap Bass Melody Bass USING THE ACCOMPANIMENT SECTION Rhythm Accompaniment Selecting an Accompaniment Style The PSR-48 provides two methods of selecting any of its 100 accompaniment styles:... - Page 23 1) Choose one of the 100 accompaniment styles — numbered "00" through "99" — shown on the ACCOMPANIMENT STYLE LIST then enter its number using the numbered ACCOMPANIMENT STYLE SELECT buttons select GOSPEL (number 28), for example, first press “2” and then “8.” The number “28”...
-
Page 24: Adjusting The Accompaniment Volume
Adjusting the Accompaniment Volume Although the MASTER VOLUME control can be used to set the overall volume level, the ACCOMPANIMENT VOLUME ù buttons can also be used to ü adjust the volume of the selected accompaniment in relation to the performance voice. -
Page 25: Starting The Accompaniment
accompaniment style has a different "normal" tempo which is automatically set whenever a new style is selected (but not when a new style is selected while the accompaniment is playing). The normal tempo for the currently selected accompaniment style can be recalled at any time by pressing both the TEMPO ù... -
Page 26: Starting The Accompaniment With An Introduction
Starting the Accompaniment with an Introduction Any of the PSR-48 accompaniment patterns can be started with a 1-measure introductory pattern by pressing either the INTRO./ FILL IN 1, INTRO./ FILL IN 2 or INTRO./ FILL IN 3 button... -
Page 27: Adding Fill-Ins
Adding Fill-ins To add a fill-in (rhythm variation) at any time while the accompaniment is playing, press the INTRO./ FILL IN 1, INTRO./ FILL IN 2 or INTRO./ FILL IN 3 button fill-ins have a maximum length of one measure, but the actual length depends on precisely when in the current measure you press a FILL IN button (i.e. -
Page 28: Auto Bass Chord Accompaniment
Auto Bass Chord Accompaniment The PSR-48 includes a sophisticated Auto Bass Chord accompaniment system that can provide automated bass and chordal backing in a number of ways. * The maximum number of notes that can be played simultaneously on the PSR- 48 keyboard is reduced when the Auto Bass Chord feature is used. - Page 29 3. Start the Accompaniment Press the START button SYNCHRO START button or one of the INTRO. buttons to determine how the accompaniment will be started. lf you press the START button, the rhythm will begin playing immediately without chordal accompaniment. 4.
-
Page 30: Setting The Accompaniment Volume
* The automatic accompaniment will continue playing even if you lift your fingers from the Auto Bass Chord keys You only need to press the Auto Bass Chord keys when changing cords. 5. Stop the Auto Accompaniment Press the STOP button or INTRO./ ENDING button to stop the... -
Page 31: Fingered Accompaniment
buttons are all ON. If you press any of these buttons, turning its indicator OFF, hat part will be muted and will not be heard until the button is pressed again (turning its indicator LED back ON). For example, if press the BASS button, the BASS LED will go out and the bass line will not be heard. - Page 32 Auto Bass Chord keys. When changing chords, be sure to release all keys before playing a new chord. The PSR-48 will accept the following chord types, although the resultant accompaniment pattern will either major, minor or seventh:...
- Page 33 Major Minor Major seventh Sixth Minor sixth Minor seventh Minor seventh flat five Seventh Seventh flat five Seventh suspended fourth Minor major seventh Augmented Diminished Sixth, minor sixth and seventh flat five chords will only be properly detected if they are played in the “root position”. For diminished and augmented chords, the lowest key pressed is assumed to be the root of the chord.
-
Page 34: Solo Styleplay
“round” or “call and answer” type effect. * Only a single note can be played at a time on the PSR-48 upper keyboard section when the SOLO STYLEPLAY feature is used. 1. Select the Desired Auto Bass... -
Page 35: Psr-48 Percussion
The percussion pads can also be played while one of the PSR-48 accompaniments is playing. Each percussion pad is capable of producing five different sounds, depending on whether the VAR. -
Page 36: The Synchro Break Function
VOLUME buttons The Synchro Break Function This function allows you to create your own fill-ins using the percussion pads while one of the PSR-48 accompaniment styles is playing. When the SYNCHRO BREAK button pressed and its LED Iit, playing on the percussion pads causes the accompaniment rhythm to stop playing so you can create your own fill-in. -
Page 37: The Custom Drummer
The Custom Drummer The PSR-48 Custom Drummer feature allows you to create an original rhythm pattern in addition to the 100 preset accompaniment styles. Your original rhythm pattern can be selected and played at any time, just like the presets. - Page 38 3. Set the Appropriate Tempo and Volume To make programming as easy as possible, set up an appropriate tempo and volume before you begin. It might be easier to program your rhythm pattern if you set a relatively slow tempo. The MASTER VOLUME control and ACCOMPANIMENT VOLUME buttons...
- Page 39 Specified beats of your pattern can be accented simply by pressing the accent key (the second from highest key on the PSR-48 keyboard – with the ">" mark above it) at the appropriate time. To accent the third beat of the first measure, for example, simply press the accent key on the third beat of the first measure.
-
Page 40: Playing Back Your Custom Rhythm Pattern
Auto Bass Chord FINGERED or SINGLE FINGER accompaniment. THE MUSIC PROGRAMMER The PSR-48 MUSIC PROGRAMMER allows you to “record” and play back anything you play on the keyboard — along with auto accompaniment if required. You can record the... -
Page 41: Recording
Any other setting changes made while recording, however, will have a large effect on the total capacity. * Material recorded using the MUSIC PROGRAMMER will be lost as soon as the PSR-48 POWER switch is turned OFF. Recording Recording Accompaniment and Performance Simultaneously 1. - Page 42 3. Set Up All Necessary Parameters Before actually beginning to record, you should make sure that you select the desired voice, engage any required effects, adjust the accompaniment and voice volume levels for the appropriate balance, and adjust the tempo to match the piece you are about to record.
-
Page 43: Recording The Accompaniment And Performance Separately
6. Start Recording If you haven’t already started recording as in step 5, above, recording will begin automatically as soon as you begin playing. While playing, you can change accompaniment styles, voices, tempo and other parameters. Such changes will be recorded and reproduced when the recording is played back. -
Page 44: Playback
record the performance part while listening to accompaniment part you recorded first. Except for operation of the RECORD and PLAY buttons, the record procedure is exactly the same as described above. Playback 1. Engage the Start Ready Mode Press both the ORCHESTRA and ACCOMPANIMENT PLAY buttons (causing their indicators to flash) if you want to play back both the... - Page 45 You can also adjust the tempo and even change accompaniment styles during playback. 4. Play Along If You Like Play along on the PSR-48 keyboard if you like. 5. Stop Playback Playback will stop automatically when the end of the recorded piece is reached.
- Page 46 Try recording this piece using the MUSIC PROGRAMMER function. (When The Saints Go Marching In) Record the chords in ACCOMPANIMENT and the obbligato in ORCHESTRA, then play the melody on the keyboard as the ACCOMPANIMENT and ORCHESTRA play back. Chords can be played using either the Single Finger or Fingered method.
-
Page 47: Midi Functions
The PSR-48 MIDI Connectors The PSR-48 MIDI IN connector receives MIDI data from an external MIDI device which can be used to control the PSR-48. The MIDI OUT connector transmits MIDI data generated by the PSR-48 (e.g. note and velocity data produced by playing the keyboard). -
Page 48: Simple Midi Control
The result is that you can effectively play two instruments at once, providing thick multi-instrument sounds. The PSR-48 also transmits “program change” data when one of its voices is selected. Depending on how the receiving device is set up, the corresponding voice... -
Page 49: Midi Sequence Recording
The PSR-48 is capable of receiving the same MIDI data, so a second MIDI keyboard connected to the PSR-48 MIDI IN connector can be used to remotely play the PSR-48 and select voices as required. MIDI Sequence Recording The same type of musical information transfer described above is used for MIDI sequence recording. -
Page 50: Functions
PSR-48 MIDI Settings & Functions MIDI Operations Summary Function Step 1 (While holding the MIDI button) Step 2 (While holding the MIDI button) Display/ Control Range 1. Remote control/standard voice mode Press VOICE SELECT button 0. selection. 2. MIDI transmit channel—selection. - Page 52 PSR-48 can only receive on a single MIDI channel. The Standard Voice mode should be used when the PSR-48 is to be used as a tone generator, for example, receiving data from a second MIDI device (such as a sequencer). In this...
- Page 53 * This function has no effect when the PSR-48 is used for reception only. * This function cannot be used when the Standard Voice mode is selected. * When the power is initially turned ON, the Split Transmission Mode is automatically turned OFF.
- Page 54 6. External/ Internal Clock Selection This function determines whether the PSR-48 rhythm and accompaniment timing is controlled by the PSR-48’s own internal clock or an external MIDI clock signal received from external equipment connected to the MlDI IN connector. The Clock Mode is automatically set to INTERNAL when the power is initially turned ON.
- Page 55 48's internal voices, an external tone generator can be played from the PSR-48 keyboard. Local Control is automatically turned ON when the power is initially turned ON. * This function has no effect when the PSR-48 is being used for reception only...
- Page 56 8. Rhythm Receive Channel Selection This function is used to select the MIDI receive channel that will be used to receive rhythm data (the channel selected using the MIDI Channel Selection function described earlier applies to non-rhythm parts and voices). The Rhythm Receive Channel must be matched to the transmit channel of the device from which the rhythm data is to be received.
-
Page 57: Optional Accessories
This lightweight, portable stand provides a sturdy, convenient support for your PSR-48. Bench (BC-6) Stereo Connection Cord (PSC-3) Use this cord to connect your PSR-48 to a stereo hi-fi system. Stereo Conversion Plug (PCP-1) Converts stereo pin jacks to a stereo phone plug. -
Page 58: Specifications
SPECIFICATIONS keyboard 61 keys (C1-C6) Voices (00-99) Piano 1, Piano 2, Honky-Tonk Piano, Elec. Piano 1, Elec. Piano 2, Harpsichord, Clavi, Synth Clavi, Calesta, Toy Piano, Vibes, Chimes, Xylophone, Marimba. Bamboo Marimba, Timpani, Sleel Drum, Kalimba, Gamelan, Music Box, Strings, Pizz. Strings, Synth Strings 1, Synth Strings 2, Violin, Cello, Harp, Flute, Pan Flute, Recorder, Clarinet, Oboe, Bassoon, Saxophone, Harmonica, Accordion, Bagpipe, Trumpet, Mute... - Page 59 Custom Drummer Controls Program Button, Play Button, Clear Button Percussion Controls: Percussion Pads, Percussion Variation Buttons(Var. 1-4, Sound Effects), Synchro Break Button, Percussion Accent Key (>). Percussion Cancel Key Auto Barr Chord Controls: Auto Bass Chord Selector (Off, Single Finger, Fingered, Split), Music Programmer Controls: Orchestra Record Button, Orchestra Play Button,...
- Page 60 YAMAHA [ Portatone ] Date : 03/29 1990 Version : 1.0 Model PSR-48 MIDI Implementation Chart Transmitted Remarks Recognized Function Basic Default Channel Changed 1-16 1-16 Remote Control Mode Default Mode Messages OMNI on, OMNI off ************** Altered Note 36-96...
- Page 61 STANDARD VOICE MODE OUTPUT VOICE NUMBER CHART Voice number not enclosed in boxes are common panel and standard voices.
- Page 62 STANDARD VOICE MODE INPUT VOICE NUMBER CHART Voice number not enclosed in boxes are common panel and standard voices...
- Page 63 STANDARD VOICE MODE RHYTHM INSTRUMENT CHART Voice numbers not enclosed in boxes are common PSR-48 and standard voices.
- Page 64 "ON", please try to eliminate the problem by using one of the by the FCC, to use the product. following measures: This applies on to products distributed by Yamaha Canada Music Ltd.. IMPORTANT : Relocate either this product or the device that is being affected by When connecting this product to accessories and/or another product use only high quality shielded cables.
- Page 65 Model No. PSR-48 Serial No. Concerning the Warranty This product was made for international distribution,...
- Page 66 YAMAHA Yamaha Corporation of America 6600 Orangethorpe Avenue, P.O. Box 6600, Buena Park, CA 90622-6600...