
Related Manuals for Hoover U8371900


Summary of Contents for Hoover U8371900
- Page 1 ® Owner’s Manual English pages 3-20 ESPAÑOL pág 20-31 Thank You for choosing HOOVER ® www.hoover.com...
-
Page 2: Table Of Contents
• Use extra care when cleaning on stairs. Save these instructions © 2006 The Hoover Company www.hoover.com To reduce the risk of fire, electric shock, or injury: • Do not put any object into openings. -
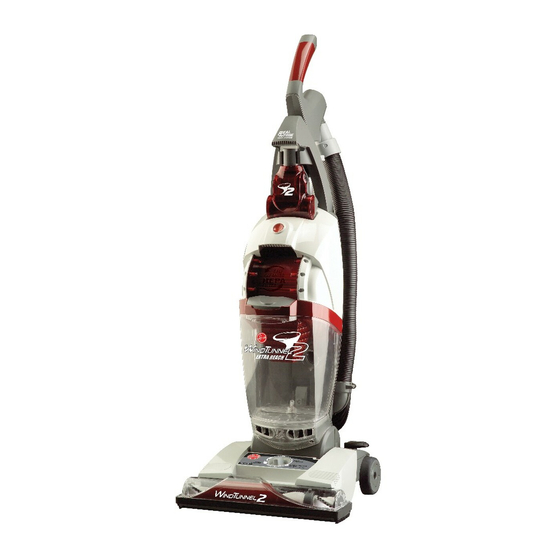
Page 3: Unpacking
Unpacking your cleaner Carton contents A. or B. Cleaner body and Hose C. Telescoping handle/wand D. Tag Along™ grip E. Hose clip and (2) Tag Along™ handle screws Attach Tag Along™ grip Slide the Tag Along™ grip (A) onto the back of the cleaner. Push screws into holes on back of handle. -
Page 4: Attach Hose
Position handle The telescoping handle/wand (C) needs to be positioned and secured in place. Align the telescop- ing handle/wand with the recesses on the upper handle. Push the wand all the way down into the cup (D) until the handle/wand release latches (E) snap into position. -
Page 5: Cleaner Description
Cleaner description Features Use the following to identify the parts and features of your cleaner. Your model will resemble one of the two illustrations shown below. 1. Soft grip handle/wand assembly 2. Tag Along™ grip 3. Powered pet hair cleaning tool 4. -
Page 6: Using The Cleaner
Using the cleaner DO NOT USE CLEANER OUTDOORS OR ON DAMP OR WET SURFACES. POWER button The POWER button (A) is located at the top of the cleaner body. Plug cord into electrical outlet. To turn cleaner ON, press button once. To turn cleaner OFF, press button again. -
Page 7: Cleaning Rugs
Carrying cleaner The cleaner can be carried by placing hand under the carrying handle and lifting. Cleaning lightweight flexible rugs Stand on one end of rug and move cleaner toward other end. Before reaching edge, push down on handle. This will lift up the nozzle and will pre- vent the rug from clinging to the cleaner. -
Page 8: Using Tools
Using the tools Tools allow for cleaning surfaces above the floor and for reaching hard to clean areas. The cleaner is ready for tool use when the handle is in the upright posi- tion. Note: When handle is in upright posi- tion, agitator brush roll is automatically OFF. -
Page 9: How To Empty
How to clean tools To clean the hose and the powered hand tool, wipe off dirt with a cloth dampened in a mild detergent. Rinse with a damp cloth. Do not submerge powered pet hair cleaning tool in water. Cleaning tools may be washed in warm water with a detergent. -
Page 10: Filters
Troubleshooting section. If you feel that this filter needs replacement, take your cleaner to an Authorized Hoover Sales and Service Center. Depress button (C) on back of dirt cup to release door (D). Empty dirt cup into trash receptacle. Close door firmly to latch. -
Page 11: Replacing Headlight
(A). Lift out filter (B) and replace. Replace lens and screws. Should you want to replace this filter, ask for HOOVER part no. 38769032. Pull old bulb straight out of socket. Push new bulb straight into socket until locked in place. Do not twist bulb. -
Page 12: Agitator Brush Roll Belt
What to buy When purchasing a new agitator brush roll, ask for HOOVER part no. 48414140. How to replace Turn cleaner ON and rotate mode con- trol dial to HARD FLOOR. Turn cleaner OFF and disconnect from electrical out- let. Place handle in upright position and turn cleaner over so bottom side is up. - Page 13 Agitator brush roll When agitator brush roll brushes on the powered pet hair cleaning tool are worn, the agitator brush roll should be replaced. Ask for HOOVER part No. 48414088. How to replace 1. Remove tool from hose and turn it so bottom faces up. Press the latches on either side of tool and remove bottom plate (A).
-
Page 14: Replacing Powered Pet Hair Cleaning Tool Brush Roll . 14-15 Replacing Powered Pet Hair Cleaning Tool Belt
(see “Service” section. Replace belt When replacing belt, ask for HOOVER part No. 38528037. 1. Remove bottom plate, belt guard and agitator brush roll as described in Figs. 46 through 48. 2. Grasp turbine (E) and pull firmly to remove. -
Page 15: Clearing Blockages
Clearing blockages Disconnect cleaner from electrical outlet. Low suction or pick up may be due to a blockage in the system. Refer to the fol- lowing steps to check for blockages con- tinuing with each step until the blockage is found: Turn cleaner OFF and disconnect from electrical outlet. -
Page 16: Lubrication
Calling 1-800-944-9200 for an automated referral of authorized service outlet locations (U.S. only) Do not send your cleaner to Hoover in North Canton, Ohio for service; this will only result in delay. If further assistance is needed, contact the Hoover Consumer Response Center, Phone: 330-499-9499. -
Page 17: Troubleshooting
Troubleshooting If a minor problem occurs, it usually can be solved quite easily when the cause is found by using the check list below. What’s the problem? Cleaner won’t turn on. What’s the cause? Not firmly plugged in. No voltage in wall plug. What’s the problem? Agitator brush roll brushes aren’t turning. -
Page 18: Warranty
For an automated referral of authorized service outlets in the U.S.A., phone 1-800-944-9200 OR visit Hoover on-line at www.hoover.com This warranty does not cover pick up, delivery, or house calls; however, if you mail your appliance to a Hoover Sales and Service Center for warranty service, transportation will be paid one way. -
Page 19: Salvaguardias Importantes
Hoover o a un Concesionario autorizado de servicio de garantía de Hoover. • Use la aspiradora solamente para lo que ha sido diseñada según se describe en las instrucciones. • Use solamente los accesorios recomendados por Hoover; el uso de otros accesorios puede ser peligroso. ¡Guarde estas instrucciones! www.hoover.com... -
Page 20: Desempaque
Use estas instrucciones en español junto con las figuras provistas en el manual de inglés. Desempaque la aspiradora Contenido de la caja A. or B. Cuerpo y manguera de la aspiradora C. Mango/tubo de extensión telescópico D. Asidero Tag Along™ E. -
Page 21: Uso De La Aspiradora
Para APAGAR la aspiradora, oprima el botón de nuevo. NOTA: LA ASPIRADORA ES ENVIADA DE LA FÁBRICA CON EL SELECTOR DE CONTROL EN LA POSICIÓN PARA HARD FLOOR (PISOS DE SUPERFICIE DURA). ANTES DE COMENZAR A LIMPIAR ALFOMBRAS, GIRE EL SELECTOR DE CONTROL DE HARD FLOOR A UNA POSICIÓN PARA “CARPET”... -
Page 22: Uso De Los Accesorios
vestir, interiores de automóviles y escaleras alfombradas. C. El accesorio turboaccionado para eliminar el pelo de las mascotas se usa para muebles tapizados, escaleras alfombradas y lugares de difícil acceso. D. El accesorio para hendiduras se puede usar en espacios estrechos, esquinas y en los bordes de lugares como cajones de cómodas, muebles tapizados, escaleras y zócalos. -
Page 23: Filtros
Si piensa que hay que reemplazar dicho filtro, lleve su aspiradora a un Centro autorizado de ventas y servicio de Hoover. Cuando la aspiradora esté funcionando, la malla del antefiltro (A) evitará que los residuos de mayor tamaño entren a la cámara del filtro... -
Page 24: Accesorio Turboaccionado Para Eliminar
Centro autorizado de ventas y servicio de Hoover. No trate de sacar la correa del rodillo de escobillas del agitador. Accesorio... -
Page 25: Lubricación
Servicio para su aspiradora Para obtener el servicio aprobado HOOVER y piezas genuinas HOOVER, localice el Centro de ventas y servicio de Hoover o el Concesionario autorizado de servicio de garantía de Hoover (Depósito) más cercano, ya sea: Consultando la sección “Service”... -
Page 26: Identificación Y Solución De Problemas
Identificación y solución de problemas Si ocurre un problema menor, generalmente puede resolverse con bastante facilidad cuando se halla la causa, usando la siguiente lista de verificación. ¿Cuál es el problema? ¿Cuál es la causa? No está bien enchufada. No hay voltaje en la toma de corriente de la pared. -
Page 27: Garantía
Esta garantía no cubre la recogida, la entrega, ni las visitas a domicilio; sin embargo, si envía su aparato por correo a un Centro de ventas y servicio de Hoover para obtener un servicio bajo garantía, se pagará el transporte en una sola dirección. -
Page 28: Reorder Form
Extra reach hose ADD YOUR APPLICABLE STATE TAX + Replacement parts and accessory items may be purchased from your Authorized Hoover Dealer, Leading Retailers, Hoover Sales & Service Centers, on-line at www.hoover.com, or by completing this order form. Mail orders limited to U.S. residents only. -
Page 29: Formulario Para El Pedido Por Correo De Piezas Y Accesorios
AÑADA SU IMPUESTO ESTATAL CORRESPONDIENTE + Las piezas y accesorios de repuesto se pueden comprar a través del concesionario autorizado de Hoover, las prin- cipales tiendas, los Centros de ventas y servicio de Hoover, en Internet en www.hoover.com, o rellenando este for- mulario de pedido. - Page 35 HOOVER and are registered trademarks ® HOOVER y son marcas registradas ® R2 6-06 U8341-/8347-/8351-/8361-/8371-900 Printed in Mexico/Impreso en Mexico 56511-C48...