Table of Contents
Advertisement
Owner's Manual
Operating and Servicing Instructions
www.hoover.com
Dual V™ Carpet Cleaner
English pp. 1-23
Español pàg. 24-39
HOOVER and
are registered trademarks
Please review this manual before operating your Hoover® product.
HOOVER y
son marcas registradas
©2008 Healthy Gain Investments, Ltd. All rights reserved. #56518217. 6/08
Advertisement
Table of Contents

Related Manuals for Hoover F7412900


Summary of Contents for Hoover F7412900
- Page 1 Dual V™ Carpet Cleaner English pp. 1-23 Español pàg. 24-39 HOOVER and are registered trademarks Please review this manual before operating your Hoover® product. HOOVER y son marcas registradas ©2008 Healthy Gain Investments, Ltd. All rights reserved. #56518217. 6/08...
-
Page 2: Table Of Contents
Service ..............23 If you need assistance: Visit our website at hoover.com. Follow the service center link to find the service outlet nearest you OR Call 1-800-944-9200 for an automated referral of authorized service outlet locations (U.S. -
Page 3: Important Safety Instructions
READ ALL INSTRUCTIONS BEFORE USING THIS APPLIANCE WARNING: • To avoid internal component damage, use only Hoover cleaning products intended for use with this Appliance. (See Cleaning Products section of this manual.) • Use only on surfaces moistened by the cleaning process or small spills. Do not immerse product. -
Page 4: Parts Needed For Assembly
C. Pernos y tuercas del mango (Puede haber tres pueden comprarse por separado, visitando www. tuercas en la bolsa, pero sólo se necesitan dos hoover.com, o su Centro de servicio local de para el ensamblaje. Los pernos y las tuercas se HooVER. -
Page 5: Attach Handle
4. Llene el contenedor para detergente usándolo como se describe a continuación. con Detergente para alfombras/tapizados HOOVER de acuerdo con las instrucciones de 1. Conecte la manguera y el tubo de solución la Fig. 2.11. como se indica desde la Fig. 3.14 hasta la 3.15. - Page 6 Guarde los accesorios instructions. Vea el manual del propietario para obtener las instrucciones completas. www.hoover.com en su lugar. 4. Enchufe con fuerza el tubo de solución en el orificio de conexión para la solución (B). 3.14 Para retirar la manguera 1.
-
Page 7: Helpful Reminders
Desenchufe la aspiradora antes de hacer lo siguiente. Use HOOVER brand detergents; • others may foam too much or cause leaking. Use detergentes de marca HOOVER, otros pueden producir demasiada espuma o causar fugas. Use extra dry strokes to aid in faster •... -
Page 8: Grounding Instructions
Canadian Electrical Code. www.hoover.com 2. Llene el contenedor para detergente con Limpiador para suelos duros HOOVER de acuerdo con las instrucciones para la Aspira- dora de suelos sin alfombra de la Fig. 2-11. 3. Deslice el selector de posiciones de cepil los a Gentle Scrub (Fregado suave) o a OFF (Apagado). -
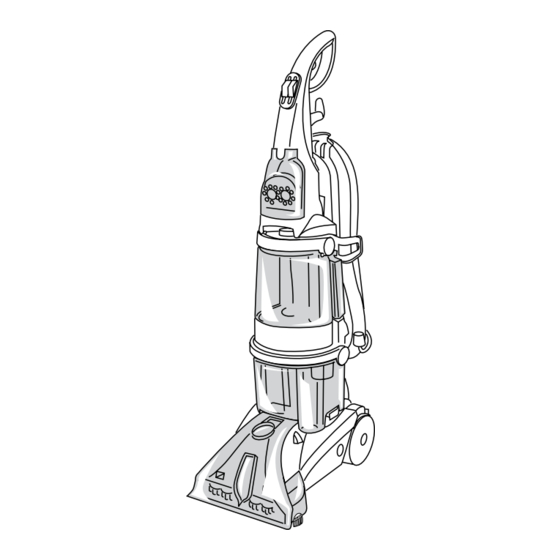
Page 9: Cleaner Description
Cómo conectar el accesorio para suelos sin Fig. 2.9 hasta la 2.11. alfombra (Disponible a un costo adicional, si no viene incluido con su aspiradora). www.hoover.com 2. How to use Cleaner description Operate cleaner only at voltage specified on data plate on bottom of cleaner. -
Page 10: Handle Release Pedal
Handle does not lock into a A. Aspire bien. En el caso de alfombras, use single position but una aspiradora Hoover con un agitador para “floats” to allow obtener los mejores resultados. Limpie los convenient opera- tapizados con una aspiradora que tenga ac- tion. -
Page 11: The Tanks
SteamVac™ cleaner. Replace con- tainer cap and tighten. NOTE: Use only HOOVER SteamVac™ detergents. They are specially formulated for use with your SteamVac™ cleaner. Non-Hoover clean- ing solutions may harm the machine and void the warranty. - Page 12 SteamVac™ HOOVER. Estos están especialmente formulados para uso con su aspiradora SteamVac™. Las soluciones de limpieza que no sean Hoover pueden dañar la máquina y anular la garantía. PRECAUCIÓN: Los detergentes contienen surfactantes aniónicos y no iónicos. Evite el contacto con los ojos y la piel.
-
Page 13: Before You Begin
Check clean water tank also; it may need to be refilled. Do not use without float and float retainer in place. If broken or dis- lodged, take to an Authorized Hoover Service Center or Dealer for repair. 3. How to clean Before you begin cleaning a. -
Page 14: Carpet Cleaning
Read “Before you begin cleaning” instructions on page 13. 1. Fill clean water tank according to instruc- tions for Figs. 2.8-2.10 2. Fill detergent container with Hoover Carpet/Upholstery Detergent according to instructions for Figs. 2.10-2.12 3. Select proper SpinScrub™ mode (see pg. 10). -
Page 15: Cleaning Hard Floors
Centro de ventas y de servicio de Hoover o a un Concesionario autorizado de servicio de garantía de Hoover. - Page 16 Si necesita ayuda: es seem to be Visite nuestro sitio web en hoover.com. Siga el enlace del centro de servicio para encontrar el centro de rotating slowly, dis- servicio más cercano o llame al 1-800-944-9200 para que le indiquen de manera automática la ubicación connect cleaner de los centros autorizados de servicio (únicamente en los EE.
-
Page 17: Removable Brushes
Manual del Propietario Instrucciones de Funcionamiento y Servicio Por favor, lea este manual antes de hacer funcionar su producto Hoover®. ©2008 Healthy Gain Investments, Ltd. Todos los derechos reservados. N°56518217. 6/08 To clean nozzle If lint or other debris becomes... -
Page 18: Using The Tools
OR - • calling 1-800-944-9200 for an automated referral of authorized service outlet locations (U.S. only). Do not send your cleaner to Hoover, Inc., Company in Glenwillow for service, this will only result in delay. 3.17 If further assistance is needed, contact The Hoover Consumer Response Center, Phone: 1-800-263-6376. - Page 19 2. Place handle in upright position. 3. Fill clean water tank according to instruc- tions for Figs. 2.9 to 2.10. 4. Fill detergent container with HOOVER Hard Floor Cleaning Solution according to instructions for Fig. 2.11. 5. Attach tool to end of hose.
-
Page 20: Cleaning Carpeted Stairs
Rinse and let air dry. Pad must be completely dry before reattaching to module. Replavcement pads may also be purchased. Ask for HOOVER part no. 40308001. Cleaning carpeted stairs 3.23 Read “Before you begin cleaning” instruc- tions on page 13.