Table of Contents
Advertisement
Available languages
Available languages
Quick Links
Advertisement
Table of Contents

Related Manuals for AgfaPhoto Realishot WP8000


Summary of Contents for AgfaPhoto Realishot WP8000
-
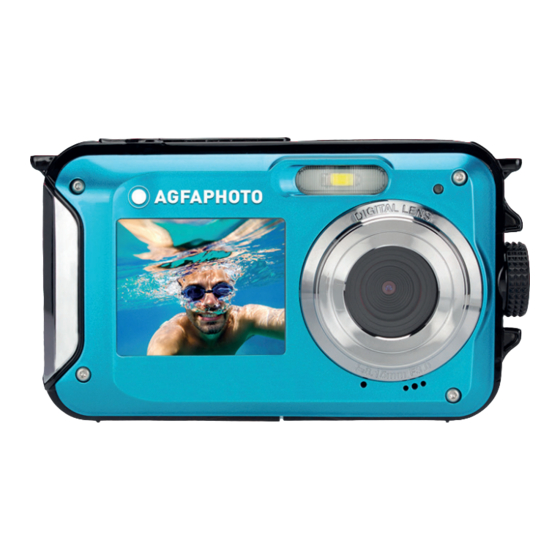
Page 2: Main Features
MAIN FEATURES • Up to 3 meters watertight • Underwater photo capture and video recording • Video resolution: 2.7K 2688x1520, FHD 1920x1080, HD 1280x720P • Maximum image resolution: 48 MP • Dual screens: a 1.8" front screen and a 2.7" TFT rear screen •... -
Page 3: Preparation Before Use
PREPARATION BEFORE USE: Lithium battery installation Please install the lithium battery supplied with the camera before using it according to the following instructions. 1. Slide the battery cover on the bottom of the camera to the left to access the battery compartment: Install lithium... -
Page 4: Computer System Requirements - Macintosh
Computer system requirements - Windows 7/XP3 If you want to transfer photos and videos to a Windows 7/XP3 computer, the computer must be set up as follows: Pentium processor compatible with Windows 7/XP3 or higher RAM of at least 128 MB with at least 150 MB of available disk space ... -
Page 5: Camera Description
Camera description:... - Page 6 Icons: Battery charging Self-timer Self-timer 10s Fully charge battery Medium charged battery Self-timer 5s Low battery Self-timer 2s Quality Self-timer off Digital zoom Common Fine Protection Super Fine Flash Protection on Anti-shake Flash on Auto flash Anti-shake on Anti-Shake off Flash off Scenes Mode...
-
Page 7: Memory Card Installation
Memory card installation The camera supports micro SD memory cards up to 128 GB (not included). The internal memory of the camera can only store one photo for test purposes. It is necessary to insert a micro SD card into the micro SD card slot before using the camera, which is located below the lithium battery slot. -
Page 8: Digital Zoom
displayed on the screen indicates how many more photos you can take based on the current settings and the size of the memory card inserted in the camera. A message appears on the screen when the memory card is full. To continue, you need to transfer all data on the memory card to your computer or insert a new memory card. -
Page 9: Image Quality
3. Press the Up / Down keys to select the scene you need. 4. Press the SET key again to confirm. Image resolution selection 1. Press the SET key. 2. Press the Left / Right keys to select the icon 3. -
Page 10: Face Detection
Anti-shake This setting allows you to stabilize shooting to avoid taking blurry pictures: 1. Press the SET key. 2. Press the Left / Right keys to select the icon 3. Press the Up / Down keys to choose: On / Off. 4. -
Page 11: Color Effect
Color effect This parameter allows you to give a fancy effect to your photos by changing their color. 1. Press the SET key. 2. Press the Left / Right keys to select Color effect. 3. Press the Up / Down keys to select: Standard / Sepia / Monochrome / Vivid. 4. -
Page 12: Silent Mode
1. Press the SET key. 2. Press the Left / Right keys to select Metering. 3. Press the Up / Down keys to select: Center / Multi / Spot. 4. Press the SET key again to confirm. Language The camera supports many languages. 1. -
Page 13: Auto Power Off
Auto power off The default setting for camera auto power off is 3 minutes, to change it, simply follow the steps below: 1. Press the SET key. 2. Press the Left / Right keys to select Auto power off. 3. -
Page 14: Video Recording Mode
5. If you select No, press the SET key to confirm. The camera will return to photo mode. 6. Otherwise press Yes and then press the SET key to restore the default settings. Note: All settings previously defined will be lost unless they are defaults settings. ... -
Page 15: Playback Mode Functions
Playback mode functions: First select a photo to rotate, protect, delete or print. Delete You can delete unwanted photos and videos to gain more memory. You can do this file by file or delete all unprotected photos and movies stored on the memory card. In photo/video recording mode, press the Delete key (or Left one) to delete the last photo/video. - Page 16 5. Press the SET key again to confirm. 6. When you view photos or videos, a lock icon will be displayed on the screen for each protected file. Print Photos can be printed using any printer with the PictBridge function: 1.
- Page 17 Uploading photos and videos on your computer 1. Turn on the camera. 2. Select the playback mode. 3. Then connect the camera to your computer with the supplied USB cable. 4. The actions window of the removable disk corresponding to the camera will appear on your computer screen.
-
Page 18: Technical Specifications
TECHNICAL SPECIFICATIONS: Sensor CMOS SONY (48M) 8000x6000, (30M) 6400x4800, (24M) 5600x4200, (20M) 5200x3900, (16M) 4608x3456, (12M) 4000x3000, Photo resolution (8M) 3264x2448, (7MHD) 3648x2048, (5M) 2592x1944, (3M) 2048x1536, (2MHD) 1920x1080 Video resolution 2.7K 2688X1520, FHD1920x1080, HD1280x720P Dual screens 2.7" back screen, 1.8" front screen Intern memory Micro SD card max. -
Page 19: Common Problems And Solutions
COMMON PROBLEMS AND SOLUTIONS Q: I took pictures but my computer doesn't recognize my camera. What should I do? A: First of all, make sure you took photos. Take a few photos as a test, and then try downloading them to your computer by connecting the camera to it via the USB charging cable. -
Page 20: Principales Caractéristiques
PRINCIPALES CARACTÉRISTIQUES • Jusqu’à 3 mètres d’étanchéité • Capture photo et enregistrement vidéo sous l’eau • Résolution vidéo : 2.7K 2688x1520, FHD 1920x1080, HD 1280x720P • Résolution d’image maximale : 48 MP • Double écrans : un écran avant de 1.8" et un écran arrière TFT de 2.7" •... - Page 21 PRÉPARATION AVANT USAGE : Installation de la batterie lithium Veuillez procéder à l’installation de la batterie lithium fournie avec l’appareil photo avant de l’utiliser selon les instructions suivantes. 1. Faites glisser sur la gauche le couvercle de la batterie situé en dessous de l’appareil photo pour accéder à...
- Page 22 Configuration requise pour système d’exploitation Windows 7/XP3 Si vous souhaitez transférer des photos et des vidéos sur ordinateur Windows 7/XP3, celui-ci doit être configuré comme suit : Processeur Pentium compatible avec Windows 7/XP3 ou supérieur RAM d’au moins 128 MB avec au moins 150 MB d'espace disque disponible ...
-
Page 23: Description De L'appareil Photo
Description de l’appareil photo :... -
Page 24: Zoom Digital
Icônes : Chargement de la batterie Retardateur Retardateur 10 secondes Batterie complètement chargée Batterie moyennement chargée Retardateur 5 secondes Batterie faible Retardateur 2 secondes Qualité Retardateur désactivé Zoom digital Normale Fine Protection Super Fine Flash Protection activée Stabilisateur Flash manuel Flash automatique Stabilisateur activé... -
Page 25: Mode Photo
Installation de la carte mémoire L'appareil photo prend en charge les cartes mémoire micro SD allant jusqu'à 128 GB maximum (non incluse). La mémoire interne de l'appareil photo ne peut stocker qu'une seule photo à des fins de test. Il est nécessaire d’insérer une carte micro SD dans la fente y étant dédiée avant d’utiliser l’appareil photo, celle-ci se trouve en dessous de l’emplacement de la batterie lithium. - Page 26 Prise de vue Pour prendre une photo, il suffit d’appuyer sur le bouton obturateur situé sur le dessus de l’appareil photo. L’enregistrement de la photo sur la carte mémoire prend ensuite quelques secondes. Après chaque capture, le nombre affiché à l'écran indique combien de photos supplémentaires vous pouvez encore prendre compte tenu des paramètres actuels et de la taille de la carte mémoire installée dans l'appareil.
-
Page 27: Qualité De L'image
Appuyez sur le bouton d’alimentation pour allumer l’appareil photo, l’icône s'affiche en haut à gauche de l'écran LCD. 1. Appuyez sur le bouton SET. 2. Appuyez sur les boutons Gauche / Droite pour sélectionner l’icône 3. Appuyez sur les boutons Haut / Bas pour sélectionner la scène correspondant à vos besoins. 4. -
Page 28: Stabilisateur D'image
Arrêt. 4. Appuyez de nouveau sur le bouton SET pour confirmer. 5. L’icône correspondant à la durée de retardateur choisie s’affichera ensuite sur l’écran LCD. Remarque : Cette fonction se désactive automatiquement après chaque utilisation. Stabilisateur d’image Ce paramètre vous permet de stabiliser la prise de vue afin d’éviter de prendre des photos floues. -
Page 29: Balance Des Blancs
Balance des blancs Ce paramètre permet à l'appareil photo de régler la couleur de vos photos en fonction de la source de lumière. 1. Appuyez sur le bouton SET. 2. Appuyez sur les boutons Gauche / Droite pour sélectionner Balance des blancs. 3. - Page 30 ISO Il est préférable d’activer ce paramètre si la luminosité de la prise de vue est faible et qu’elle ne permet pas l’utilisation du Flash. 1. Appuyez sur le bouton SET. 2. Appuyez sur les boutons Gauche / Droite pour sélectionner ISO. 3.
-
Page 31: Mode Silencieux
Minute / Seconde / AM. - Appuyez sur les boutons Haut / Bas pour sélectionner les valeurs. 5. Appuyez de nouveau sur le bouton SET pour confirmer votre sélection. Mode silencieux Ce paramètre vous permet d'activer ou de désactiver le son qu’émettent les boutons de l’appareil photo. -
Page 32: Réglages Par Défaut
1. Appuyez sur le bouton SET. 2. Appuyez sur les boutons Gauche / Droite pour sélectionner Formater la carte mémoire. 3. Appuyez sur le bouton SET pour entrer dans le sous-menu. 4. Appuyez sur les boutons Haut / Bas pour sélectionner : Oui / Non. 5. -
Page 33: Mode Enregistrement Vidéo
MODE ENREGISTREMENT VIDÉO : Appuyez sur le bouton MODE pour sélectionner le mode d'enregistrement vidéo puis appuyer sur le bouton obturateur pour commencer à filmer. L'icône vidéo s'affichera en haut à gauche de l'écran LCD et le temps d'enregistrement écoulé en haut à droite. Le point rouge clignotant apparaîtra également à... - Page 34 Fonctions du mode lecture : Sélectionnez tout d’abord une photo à faire pivoter, protéger, supprimer ou imprimer. Supprimer Vous pouvez supprimez les photos et vidéos indésirables pour libérer plus de mémoire. Vous pouvez le faire fichier par fichier ou bien procéder à une suppression entière de l’ensemble des photos et vidéos non protégées stockées sur la carte mémoire.
-
Page 35: Lecture Des Fichiers Vidéo
Protéger / Verrouiller Vous pouvez protéger vos photos/vidéos contre toute suppression accidentelle. 1. Appuyez sur le bouton SET. 2. Appuyez sur les boutons Gauche / Droite pour sélectionner une photo puis appuyez sur SET pour valider. 3. Appuyez sur les boutons Gauche / Droite pour sélectionner Protéger / Verrouiller. 4. - Page 36 Téléchargement des photos et vidéos sur votre ordinateur 1. Mettre en marche l’appareil photo. 2. Sélectionnez le mode lecture. 3. Connectez ensuite l’appareil photo à votre ordinateur grâce au câble USB fourni. 4. La fenêtre d’actions associées au disque amovible correspondant à l’appareil photo apparaît alors sur l’écran de votre ordinateur.
-
Page 37: Caractéristiques Techniques
CARACTÉRISTIQUES TECHNIQUES : Capteur d’images CMOS SONY (48M) 8000x6000, (30M) 6400x4800, (24M) 5600x4200, (20M) 5200x3900, (16M) 4608x3456, (12M) 4000x3000, Résolution d’image (8M) 3264x2448, (7MHD) 3648x2048, (5M) 2592x1944, (3M) 2048x1536, (2MHD) 1920x1080 Résolution vidéo 2.7K 2688X1520, FHD1920x1080, HD1280x720P Écrans 2.7 pouces à l’arrière, 1.8 pouces à l’avant Mémoire externe Carte micro SD de 128 GB maximum (non incluse) Zoom digital... -
Page 38: Problèmes Courants Et Solutions
PROBLÈMES COURANTS ET SOLUTIONS Q : J'ai pris des photos mais mon ordinateur ne reconnaît pas mon appareil photo. Que dois-je faire ? A : Tout d'abord, assurez-vous de bien avoir pris des photos. Prenez quelques photos en guise de test, puis essayez de les télécharger sur votre ordinateur en y connectant l’appareil photo via le câble USB de chargement. - Page 39 FŐBB JELLEMZŐK • 3 méter vízálló, víz alatti fénykép és videó • Videó felbontás: 2.7K 2688x1520, FHD 1920x1080, HD 1280x720P • Fotó felbontás: 48 MP • Kényelmes kettős képernyő: 1.8 hüvelykes elülső képernyő, 2.7 hüvelykes TFT hátsó képernyő • Beépített LED vaku •...
- Page 40 ELŐKÉSZÍTÉS HASZNÁLAT ELŐTT: Lítium akkumulátor telepítése Az első használat előtt helyezze be a fényképezőgéphez kapott lítium akkumulátort az alábbiak szerint. 1. Csúsztassa balra az akkumulátor fedelét a fényképezőgép alján: Helyezze be a lítium akkumulátort az alábbiak szerint: 2. Helyezze be az akkumulátort a polaritás irányát figyelembe véve. 3.
- Page 41 Számítógépes követelmények - Windows 7/XP3 Ha fényképeket és videókat át szeretne vinni egy Windows 7/XP3 számítógépre, a számítógépet az alábbiak szerint kell beállítani: Pentium sorozatú processzor a Windows7/XP3 vagy újabb rendszerhez 128 MB RAM, legalább 150 MB szabad lemezterülettel ...
- Page 42 Kamera leírása:...
-
Page 43: Digitális Zoom
Ikonok: Akkumulátor töltés Önkioldő Önkioldó 10s Teljes Fele Önkioldó 5s Alacsony Önkioldó 2s Képminőség Önkioldó ki Digitális zoom Normál Tiszta Véd Szupertiszta Vaku Véd Rázásgátló Kézi vaku Auto vaku Rázásgátló be Rázásgátló ki Ki vaku Színhely Mód Auto Tájkép Portré... - Page 44 Memóriakártya telepítése A kamera 128 GB-os micro SD memóriakártyákat támogat (nem tartozék). A kamera belső memóriája teszt céljából csak egy fényképet tárolhat. A kamera használata előtt be kell helyezni a micro SD-kártyát a micro SD-kártya nyílásba. Ellenőrizze, hogy megfelelően van-e behelyezve, óvatosan csúsztatva a nyílásba, amíg a helyére nem kattan, hogy megbizonyosodjon arról, hogy reteszelt-e.
- Page 45 Fényképezés Kép készítéséhez egyszerűen nyomja meg a fényképezőgép tetején lévő exponáló gombot. Ezután néhány másodperc alatt eltartja a fénykép mentését a memóriakártyára. Minden egyes kép elkészítése után a képernyőn megjelenő szám jelzi, hogy hány további fényképet készíthet az aktuális beállítások és a kamerába helyezett memóriakártya mérete alapján. Amikor a memóriakártya megtelt, megjelenik egy üzenet a képernyőn.
- Page 46 A kamera bekapcsolásához nyomja meg a bekapcsoló gombot, az ikon megjelenik az LCD kijelző bal felső sarkában. 1. Nyomja meg a SET gombot. 2. A Bal / Jobb gombbal válassza ki a ikon. 3. A Fel / Le gombokkal válassza ki a kívánt jelenetet. 4.
- Page 47 5. A kiválasztott önkioldó idejének megfelelő ikon megjelenik az LCD képernyőn. Megjegyzés: Ez a funkció minden használat után automatikusan kikapcsol. Rázásgátló Ez a beállítás lehetővé teszi a fényképezés stabilizálását az elmosódott képek elkerülése érdekében: 1. Nyomja meg a SET gombot. 2.
- Page 48 1. Nyomja meg a SET gombot. 2. Nyomja meg a Bal / Jobb gombbal válassza az Fehéregyensúly. 3. Nyomja meg a Fel / Le gombbal válassza ki: Auto / Nappali fény / Felhős / Fluoreszkáló / Vakító fény. 4. Nyomja meg ismét a SET gombot a választás megerősítéséhez. ...
- Page 49 2. Nyomja meg a Bal / Jobb gombbal válassza az ISO. 3 Nyomja meg a Fel / Le gombbal válassza ki az ISO értéket: Auto/100/200/400. 4. Nyomja meg ismét a SET gombot a választás megerősítéséhez. 5. Az ISO ikon ezután megjelenik az LCD képernyőn. ...
-
Page 50: Automatikus Kikapcsolás
Néma mód Ez a beállítás lehetővé teszi a kamera hangjának be- vagy kikapcsolását. 1. Nyomja meg a SET gombot. 2. Nyomja meg a Bal / Jobb gombbal válassza az Néma mód. 3. Nyomja meg a Fel / Le gombbal válassza ki a Be / Ki. 4. - Page 51 formázásának megerősítéséhez. Megjegyzés: Kérjük, legyen óvatos a formázásnál. A memóriakártya formázása után az abban tárolt fájlok véglegesen törlődnek. Nagyon ajánlott, hogy formázása előtt minden fotót és videót vagy más fontos fájlt átvigyen a számítógépére. Alapbeállítás Ez a beállítás lehetővé teszi a fényképezőgép beállításainak visszaállítását a gyári alapértékekre.
-
Page 52: Lejátszási Üzemmód
LEJÁTSZÁSI ÜZEMMÓD: A lejátszási mód használatával megnézheti a memóriakártyára jelenleg mentett fotó- és videofájlokat. Elforgathatja, védheti, törölheti, kinyomtathatja és elindíthatja a diavetítést. Aktiválásához nyomja meg a MODE gombot, és egy ikon jelenik meg az LCD képernyőn, amely jelzi, hogy a lejátszás mód be van kapcsolva. Megjegyzés: 1. - Page 53 / Mégse. 4. Nyomja meg ismét a SET gombot. 5. Nyomja meg a Fel / Le gombbal válassza ki: Igen / Nem. 6. Ha a Nem lehetőséget választja, nyomja meg a SET gombot a megerősítéshez. A kamera visszatér fotó módba. 7.
- Page 54 5. Nyomja meg ismét a SET gombot a választás megerősítéséhez. 6. Ha a vezeték nélküli nyomtatás sikertelen, kérjük, csatlakoztassa a fényképezőgépet a nyomtatóhoz USB-kábellel. Videofájlok lejátszása Válassza ki a megtekinteni kívánt AVI videofájlt, és nyomja meg az exponáló gombot a lejátszáshoz.
-
Page 55: Műszaki Specifikáció
MŰSZAKI SPECIFIKÁCIÓ: Érzékelő SONY CMOS Fotó felbontás (48M) 8000x6000, (30M) 6400x4800, (24M) 5600x4200, (20M) 5200x3900, (16M) 4608x3456, (12M) 4000x3000, (8M) 3264x2448, (7MHD) 3648x2048, (5M) 2592x1944, (3M) 2048x1536, (2MHD) 1920x1080 Videó felbontás 2.7K 2688X1520, FHD 1920x1080, HD 1280x720P Kijelzők 2,7 hüvelykes hátsó képernyő, 1,8 hüvelykes első képernyő Külső... - Page 56 KÖZÖS PROBLÉMÁK ÉS MEGOLDÁSOK Q: Készítettem néhány fényképet, de a számítógép nem ismeri fel a kamerámat. Mit tegyek? A: Először ellenőrizze, hogy fényképeket készített-e. Készítsen néhány fényképet tesztelésre, majd töltse le őket a számítógépére. Alternatív megoldásként próbáljon behelyezni a memóriakártyát közvetlenül a számítógépkártya-olvasóba (ha rendelkezésre áll), vagy használjon külső...