LG WM3400C Series Owner's Manual
Hide thumbs
Also See for WM3400C Series:
- Owner's manual (141 pages) ,
- Owner's manual (91 pages) ,
- Owner's manual (43 pages)
Table of Contents
Advertisement
Quick Links
OWNER'S MANUAL
WASHING MACHINE
Read this owner's manual thoroughly before operating the
appliance and keep it handy for reference at all times. The
complete owner's manual can be found on the LG website at:
http://gscs-manual.lge.com/Total/DFZ/NA/FL/Victor/main.html
or by scanning the QR code. LG is working to create a sustainable
tomorrow by publishing parts of this manual online only.
Small actions can have big results!
ENGLISH
WM3400C* / WM3600H*A / WM4000H*A
www.lg.com
MFL71693724
Copyright © 2022 LG Electronics Inc. All Rights Reserved.
Rev.00_041522
Advertisement
Table of Contents

Related Manuals for LG WM3400C Series


Summary of Contents for LG WM3400C Series
- Page 1 LG website at: http://gscs-manual.lge.com/Total/DFZ/NA/FL/Victor/main.html or by scanning the QR code. LG is working to create a sustainable tomorrow by publishing parts of this manual online only. Small actions can have big results!
-
Page 2: Table Of Contents
Connecting the Drain Hose Leveling the Washer Final Installation Check 17 OPERATION Before Use Loading the Washer Options and Extra Functions 20 SMART FUNCTIONS Using LG ThinQ Application Smart Diagnosis Function 24 MAINTENANCE Regular Cleaning Periodic Maintenance Care in Cold Climates 30 TROUBLESHOOTING... -
Page 3: Important Safety Instructions
IMPORTANT SAFETY INSTRUCTIONS IMPORTANT SAFETY INSTRUCTIONS READ ALL INSTRUCTIONS BEFORE USE Safety Messages Your safety and the safety of others are very important. We have provided many important safety messages in this manual and on your appliance. Always read and follow all safety messages. - Page 4 • Use this appliance only for its intended purpose. • If the product has been submerged in water, sitting in standing water, or waterlogged, do not come in contact with the product and immediately contact an LG Electronics Customer Information Center for instructions before resuming use.
- Page 5 IMPORTANT SAFETY INSTRUCTIONS • Do not store or use gasoline or other flammable vapors and liquids in the vicinity of this or any other appliance. • Do not mix chlorine bleach with ammonia or acids such as vinegar. Follow package directions when using laundry products.
-
Page 6: Caution Statements
IMPORTANT SAFETY INSTRUCTIONS CAUTION STATEMENTS CAUTION • To reduce the risk of minor or moderate injury to persons, malfunction, or damage to the product or property when using this product, follow basic precautions, including the following: Installation • Install the product on a firm and level floor. Operation •... -
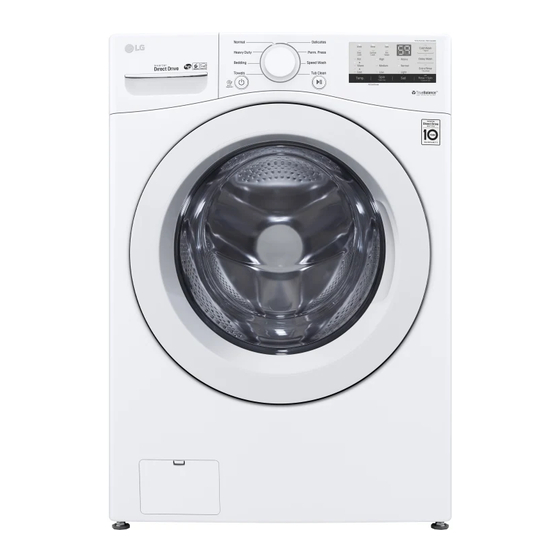
Page 7: Product Overview
• For your safety and for extended product life, use only authorized components. The manufacturer is not responsible for product malfunction, property damage or bodily injury caused by the use of separately purchased unauthorized components, parts, or non-LG products. Front View... - Page 8 PRODUCT OVERVIEW Accessories Hot and Cold Water Hoses Optional Accessories (sold separately) Included Accessories Non-skid Pads † Pedestal Hole Caps † Pedestal Washer Wrench Stacking Kit Tie Strap † Check the width of the pedestal before Elbow Bracket (for securing drain hose) purchasing to make sure that it matches the width of your appliance (27"...
-
Page 9: Installation
INSTALLATION INSTALLATION Before Installing Installation Overview Please read the following installation instructions first after purchasing this washer or transporting it to another location. Choosing the Proper Location Unpacking and Removing Shipping Material Connecting the Inlet Hoses Connecting the Drain Hose Leveling the Washer Final Installation Check WARNING... -
Page 10: Choosing The Proper Location
10 INSTALLATION WARNING • Certain internal parts are intentionally not grounded and may present a risk of electric shock only during servicing. Service personnel- Do not contact the following parts while the appliance is energized: pump, valve, motor, control board. Tools Needed •... -
Page 11: Unpacking And Removing Shipping Material
INSTALLATION Unpacking Shipping Material Dimensions and Clearances *Some models do not ship with drum support. 27'' (70 cm) Lift the washer off the foam base. 1/4'' (0.5 cm) • After removing the carton and shipping material, lift the washer off the foam base. Stacking or Pedestal Installation •... -
Page 12: Connecting The Water Inlet Hoses
• Do not reuse old hoses. Use only new hoses faucet. when installing the washer. Old hoses could leak or burst causing flooding and property damage. Contact an LG Customer Information Center for assistance in buying hoses. NOTE • Periodically check the hoses for cracks, leaks, and wear, and replace the hoses every five years. -
Page 13: Connecting The Drain Hose
INSTALLATION • Let the water drain into a bucket, and check beyond 66" (168 cm), the drain function will be the water temperature to make sure you’ve increasingly affected. connected the hoses to the correct faucets. • Never create an airtight seal between the hose and the drain with tape or other means. -
Page 14: Leveling The Washer
14 INSTALLATION Leveling the Washer hoses with the provided tie strap (ribbed side on inside). The drum of the washer spins at very high speeds. To minimize vibration, noise, and unwanted movement, the floor must be a solid, level surface. CAUTION 24 - 96 "... -
Page 15: Final Installation Check
INSTALLATION Adjust the leveling feet. leveling feet, place them under the back leveling feet. • Turn all 4 leveling feet in one direction to raise the washer or the other direction to lower it. This side up Remove backing Recheck the washer’s levelness. Check the level again. - Page 16 16 INSTALLATION WARNING • Do not use an adapter or extension cord. Doing so may result in serious injury, fire, electric shock, or death. • For best performance, plug the appliance into its own individual outlet. This helps prevent overloading house wiring circuits which could cause a fire hazard from overheated wires.
-
Page 17: Operation
OPERATION OPERATION Before Use WARNING • To reduce the risk of fire, electric shock, or injury to persons, read the SAFETY INSTRUCTIONS before operating this appliance. Operation Overview Sort laundry and load the washer. • Sort laundry by fabric type, soil level, color and load size as needed. Open the door and load items into the washer. -
Page 18: Loading The Washer
The complete owner’s manual can be found on the • The washer can be fully loaded, but the drum LG website at: http://gscs-manual.lge.com/ should not be tightly packed with items. The door of the washer must close easily. -
Page 19: Options And Extra Functions
OPERATION Total/DFZ/NA/FL/Victor/main.html or by scanning the QR code. • Sorting Laundry • Adding Cleaning Products • Control Panel • Wash Cycles • Cycle Modifiers • Options and Extra Functions Options and Extra Functions Your washer includes several additional cycle options to customize cycles to meet your individual needs. -
Page 20: Smart Functions
Internet service provider or refer to your • Settings wireless router manual. - Set various options on the appliance and in the • LG ThinQ is not responsible for any network application. connection problems or any faults, malfunctions, or errors caused by network connection. - Page 21 Start a cycle from the LG ThinQ application on radio communications. However, there is no your smartphone. guarantee that interference will not occur in a particular installation.
-
Page 22: Smart Diagnosis Tm Function
FCC RF Radiation Exposure LG Electronics will also provide open source code Statement to you on CD-ROM for a charge covering the cost of performing such distribution (such as the cost of... - Page 23 SMART FUNCTIONS troubleshooting data to a smartphone using the LG ThinQ application. • Launch the LG ThinQ application and select the Smart Diagnosis feature in the menu. Follow the instructions provided in the LG ThinQ application. Using Audible Diagnosis to...
-
Page 24: Maintenance
24 MAINTENANCE MAINTENANCE • Wipe with a damp cloth. WARNING • Do not touch the surface or the display with • To reduce the risk of fire, electric shock, or injury sharp objects. to persons, read this entire owner’s manual, including the SAFETY INSTRUCTIONS, before operating this appliance. - Page 25 MAINTENANCE Leaving the Door Open • Do not exceed the maximum fill line when adding bleach or powdered cleaners. After you finish using the washer, leave the door Powdered cleaners may remain in the drum open overnight to allow air to circulate and dry the after cleaning.
- Page 26 26 MAINTENANCE Replace the drawer. CAUTION • Do not use the washer without the inlet filters. Doing so will cause leaks and malfunction. • If you use the washer in an area with hard water, the inlet filter may clog due to lime buildup and require more frequent cleaning.
- Page 27 MAINTENANCE Cleaning the Drain Pump Filter The washer fails to drain if the drain pump filter is clogged. Periodically clean the drain filter to prevent clogging with foreign objects. WARNING • Opening the drain filter will result in water overflowing if there is water in the drum. Use a bucket if the drum is not completely drained before you open the drain filter.
-
Page 28: Care In Cold Climates
28 MAINTENANCE Care in Cold Climates Dry the drum interior with a soft cloth, and close the door. Storing the Washer Store the washer in an upright position. If the washer will not be used for an extended period of time and is in an area that could be exposed to freezing temperatures, follow these Remove the inserts from the dispenser. - Page 29 MAINTENANCE When the Drain Hose is Frozen Pour hot water in the washer drum and close the door. Wait for 1 - 2 hours. Press the Power button. Press the Spin button to operate spin only cycle for draining and spinning. Press the Start/Pause button to make sure the water drains.
-
Page 30: Troubleshooting
30 TROUBLESHOOTING TROUBLESHOOTING Before Calling for Service The washer is equipped with an automatic error-monitoring system to detect and diagnose problems at an early stage. If the washer does not function properly or does not function at all, check the following before you call for service. - Page 31 TROUBLESHOOTING Problem Possible Cause & Solution The load is too small. • Add additional items to allow the washer to balance the load. UNBALANCE ERROR Heavy articles are mixed with lighter items. • Always try to wash articles of somewhat similar weight to allow the washer to evenly distribute the weight of the load for spinning.
- Page 32 32 TROUBLESHOOTING Problem Possible Cause & Solution Vibration sensor malfunctions. • Call for service. VIBRATION SENSOR ERROR Wi-Fi Problem Possible Cause & Solution Trouble connecting The password for the Wi-Fi network was entered incorrectly. appliance and • Delete your home Wi-Fi network and begin the connection process again. smartphone to Wi-Fi network Mobile data for your smartphone is turned on.
-
Page 33: Limited Warranty
Should your LG Washer (“Product”) fail due to a defect in materials or workmanship under normal and proper use, during the warranty period set forth below, LG will, at its option, repair or replace the Product. This limited warranty is valid only to the original retail purchaser of the Product (“You”) and applies only when purchased lawfully and used within the United States including U.S. - Page 34 Or by mail: LG Electronics, P.O. Box 240007, Huntsville, AL 35813 ATTN: Customer Service PROCEDURE FOR RESOLVING DISPUTES: ALL DISPUTES BETWEEN YOU AND LG ARISING OUT OF OR RELATING IN ANY WAY TO THIS LIMITED WARRANTY OR THE PRODUCT SHALL BE RESOLVED EXCLUSIVELY THROUGH BINDING ARBITRATION, AND NOT IN A COURT OF GENERAL JURISDICTION.
- Page 35 Notice of Dispute. In the event you intend to commence an arbitration proceeding, you must first notify LG in writing at least 30 days in advance of initiating the arbitration by sending a letter to LG at LG Electronics, USA, Inc. Attn: Legal Department-Arbitration 111 Sylvan Avenue, Englewood Cliffs, NJ 07632.
- Page 36 (b) the date on which the product was purchased; (c) the product model name or model number; and (d) the serial number (the serial number can be found (i) on the product; or (ii) online by accessing https:// www.lg.com/us/support/repair-service/schedule-repair-continued and clicking on “Find My Model & Serial Number”).
-
Page 37: Canada
ARE NOT PERMITTED. PLEASE SEE THE SECTION TITLED “PROCEDURE FOR RESOLVING DISPUTES” BELOW. Should your LG Washer ("Product") fail due to a defect in materials or workmanship under normal and proper use, during the warranty period set forth below, LG Electronics Canada, Inc. ("LGECI") will, at its option, repair, replace or pro rate the Product upon receipt of proof of the original retail purchase. - Page 38 (ASC), as determined by LG Canada. If your Product is located outside a 150 km radius from a ASC, as determined by LG Canada, it will be your responsibility to bring the Product, at your sole expense, to the ASC for in-warranty repair.
- Page 39 If you and LG are unable to resolve the dispute within 30 days of LG’s receipt of the Notice of Dispute, the dispute shall be resolved by binding arbitration in accordance with the procedure set out herein.
- Page 40 Except as otherwise provided for, LG waives any rights it may have to seek attorneys’ fees and expenses from you if LG prevails in the arbitration.
- Page 41 Memo...
- Page 42 42 Memo...
- Page 43 Memo...
- Page 44 LG Customer Information Center For inquiries or comments, visit www.lg.com or call: U.S.A. 1-800-243-0000 1-888-542-2623 CANADA Register your product Online! www.lg.com...