Table of Contents
Advertisement
Quick Links
ECCELLENZA MOMENTUM CLEANING & STARTUP PROCEDURE
This procedure demonstrates how to properly clean
This procedure should take approximately 60 minutes
Tools Needed
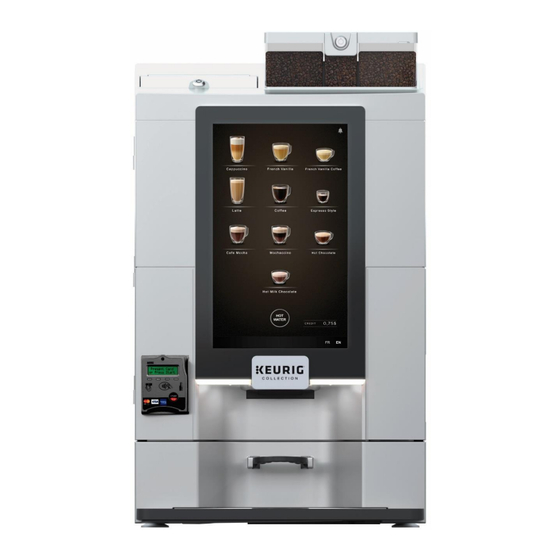
Keurig
Large bucket or container
Available sink
Phillips screwdriver
Key to main door
Small paint brush
and sanitize the Eccellenza Momentum brewer
®
Bean to Cup Deep Cleaning kit (if available)
1
Advertisement
Table of Contents

Related Manuals for Keurig ECCELLENZA MOMENTUM


Summary of Contents for Keurig ECCELLENZA MOMENTUM
- Page 1 ECCELLENZA MOMENTUM CLEANING & STARTUP PROCEDURE This procedure demonstrates how to properly clean and sanitize the Eccellenza Momentum brewer This procedure should take approximately 60 minutes Tools Needed ® Keurig Bean to Cup Deep Cleaning kit (if available) ...
-
Page 2: Table Of Contents
Table of Contents Disconnecting & Draining ………………………………………………. Pg. 3 Removing the Brewer Assembly ………………………………………. Pg. 4 Removing the Coffee Hopper ………………………………………….. Pg. 5 Removing the Powder System ………………………………………… Pg. 6 - 9 Cleaning Interior Components …………………………………………. Pg. 10 Cleaning & Sanitizing Procedure ……………………………………… Pg. 11 Reinstalling the Powder System ………………………………………. -
Page 3: Disconnecting & Draining
Disconnecting & Draining Turn the power switch to the O position and Using key, unlock main door, remove waste unplug from grounded outlet. container and open main door. Locate the drain hose on the main door, Stow drain hose back into location on main open valve and drain hot water into a large 5 door... -
Page 4: Removing The Brewer Assembly
Removing the Brewer Assembly Remove the brewer assembly by pressing Remove the coffee spout from the front of the button and turning clockwise while brewer assembly. lifting. Carefully remove the wiper and thoroughly clean the exterior of both parts. NOTE: Brewer assembly cleaning instructions can be found on page 20. -
Page 5: Removing The Coffee Hopper
Removing the Coffee Hopper If locked, using key, unlock and remove the Locate and remove the two screws below the coffee hopper lid coffee hopper. Lift the coffee hopper from machine and remove. If necessary, discard coffee beans. Wipe down or thoroughly clean the hopper. NOTE: See cleaning instructions on page 11. -
Page 6: Removing The Powder System
Removing the Powder System Unlock and remove the mixing chambers. Disconnect the hoses to mixing chambers. Remove the mixing disks by sliding forward Remove the locking rings by turning clockwise from the whipper motor shaft. and dislodging from tab.. - Page 7 Removing the Powder System cont. Lift the powder lid. Grab the powder drawer and pull towards you to remove. NOTE: If locked, use key to unlock. Remove the powder hopper caps. Carefully remove the powder hopper liner. ...
- Page 8 Removing the Powder System cont. Locate screw underneath the spout support, unscrew and remove the spout support. Remove and empty the powder hoppers. 8 ...
- Page 9 Cleaning & Sanitizing procedure on page 11. ® ® NOTE: We recommend cleaning and sanitizing all parts with Urnex products from the Keurig Bean to Cup Deep Cleaning Kit, but comparable agents may also be used. 9 ...
-
Page 10: Cleaning Interior Components
Cleaning Interior & Exterior Components Wipe the interior area around the brewer mo- Using a small brush, sweep out any powder ® tor with a clean cloth dipped in Urnex Com- residue present around the powder hoppers. plete Café sanitizing solution. ®... -
Page 11: Cleaning & Sanitizing Procedure
Cleaning & Sanitizing Procedure Cleaning Solution ® 1. Prepare solution by adding 8 oz ( ) of Urnex Rinza concentrate to 1 gallon ( ) of warm tap water ( 240 ml 3.5 L or equiva- lent dilution 2. Mix well and use immediately. 3. -
Page 12: Reinstalling The Powder System
Reinstalling the Powder System NOTE: Prior to reinstalling powder components, please make sure all components are completely dry. Install the three powder hoppers Carefully reinstall the powder hopper liner and caps. NOTE: Start from one side and move across ... - Page 13 Reinstalling the Powder System cont. Carefully reinstall the mixing disks. Install the mixing bowls and lock into place. NOTE: Align arrow with flat spot on motor shaft. NOTE: Ensure each mixing chamber is secured by checking the tabs at the left & right are not protruding. ...
-
Page 14: Reinstalling The Brewer Assembly
Reinstalling the Brewer Assembly With wiper reinstalled, place the brewer as- Press the button and turn counterclock- sembly with red button slightly turned to 7:00 wise until a “click” sound is heard. position. Reattach the spout. NOTE: Ensure that spout is inserted fully past both O-rings to prevent leakage and is firmly against brewer assembly body. -
Page 15: Reinstalling The Coffee Hopper
Reinstalling the Coffee Hopper NOTE: ® If available, prior to reinstalling the coffee hopper, the grinder can be cleaned using Urnex SuperGrindz ® If available, add 1 cap full ( ) of Urnex Carefully lower the coffee hopper onto grinder. 26 grams SuperGrindz on top of the grinder. -
Page 16: Restarting & Refilling
Restarting & Refilling Close and lock the main door. Reinsert the waste container. Carefully plug the GFCI power cord into a If disconnected, re-connect the water line to grounded outlet. machine and turn power switch to — position. ... -
Page 17: Cleaning External Components
External Cleaning ® We recommend using the Urnex Complete Café sanitizing solution noted on Page 11 on all external surfaces ONLY. Any household or commercial certified disinfectant wipe can be used. (following manufacturer's instructions). ® NOTE: If available, Urnex Café Wipz can be used on all external surfaces ONLY. ... -
Page 18: How To Perform Both Cleanings & Rinses
How to Perform Both Cleanings & Rinses Enter code: 345678 Press the top left of screen and hold for 3 seconds. A faint square will light up under your finger. Press the 3 lines at top left of screen. Select Maintenance. - Page 19 Performing a Grinder Cleaning NOTE: Please reference page 14 prior to performing the following steps. Place a 16 cup on the drip tray and press Grinder cleaning. Carefully follow the screen instructions. 19 ...
- Page 20 Performing a Brewer Cleaning NOTE: If a "Brewer Assembly Cleaning Procedure" was done skip following step. 1. Remove waste container. 2. Unlock and open main door. ® 3. Add 1 Urnex Tabz Z61 cleaning tablet to the top of the brewer assembly. 4.
- Page 21 Performing a Brewer Cleaning cont. Carefully follow the screen instructions. Carefully discard hot liquid. CAUTION WATER MAY BE VERY HOT 21 ...
- Page 22 Performing a Mixers Rinse Place a 16 cup on drip tray and press Mixers Rinse NOTE: Check powder components for any leaks This option runs a rinse cycle (to clean all three of the powder whipper systems) by sending hot water through each of the whipper units, while at the same time activating each of the whipper motors.
-
Page 23: Performing Test Brews
NOTE: Do NOT overfill or pack powder hoppers. 3. Place a 16oz cup on the cup stand and perform a test brew by brewing both a coffee and cappuccino. Procedure Complete! ® If you have any questions, please contact Keurig Commercial Technical Support: 888-287-2739 option 5 23 ...