Table of Contents
Advertisement
Available languages
Available languages
Quick Links
USING THE AIR CONDITIONER
Controls . . . . . . . . . . . . . . . . . . . . . . . . . . . . . .4
Air Filter . . . . . . . . . . . . . . . . . . . . . . . . . . . . . .7
Outdoor Coils . . . . . . . . . . . . . . . . . . . . . . . . .7
Normal Operating Sounds . . . . . . . . . . . . . 16
Write the model and serial
numbers here:
Model # _________________
Serial # _________________
You can find the rating label on the
side of the air conditioner.
GE is a trademark of the General Electric Company. Manufactured under trademark license.
. . . . . . . . .3
. . . . . . . . . . . . . . . . . . . . 8
. . . . . . 16
. . . . . . . . . . . . . . . . . . . . . . 17
. . . . . . . . . . . . . 19
. . . . . . . . . . . 20
OWNER'S MANUAL
AND INSTALLATION
INSTRUCTIONS
AEG14
AEG18
AEG24
49-5000434 Rev. 1 12-19 GEA
Advertisement
Chapters
Table of Contents

Related Manuals for GE AEG18


Summary of Contents for GE AEG18
-
Page 1: Table Of Contents
Write the model and serial numbers here: Model # _________________ Serial # _________________ You can find the rating label on the side of the air conditioner. GE is a trademark of the General Electric Company. Manufactured under trademark license. 49-5000434 Rev. 1 12-19 GEA... - Page 2 THANK YOU FOR MAKING GE APPLIANCES A PART OF YOUR HOME. Whether you grew up with GE Appliances, or this is your first, we’re happy to have you in the family. We take pride in the craftsmanship, innovation and design that goes into every GE Appliances product, and we think you will too.
-
Page 3: Safety Information
DO NOT use equipment certified for R22 refrigerant only. Turn the unit OFF and unplug your air conditioner before cleaning. GE Appliances does not support any servicing of the air conditioner. We strongly recommend that you do not attempt to service the air conditioner yourself. WARNING USE OF EXTENSION CORDS RISK OF FIRE. -
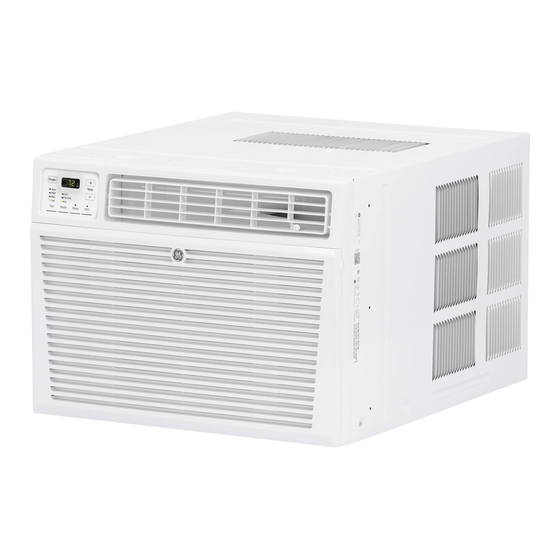
Page 4: Controls
Controls Do Not Operate in Freezing Outdoor Conditions This cool-only air conditioner was not designed for freezing outdoor conditions. It must not be used in freezing outdoor conditions. Features and appearance will vary. Air Conditioner Controls Remote Control Power Temp Auto High Cool... - Page 5 Using the Air Conditioner Control Display On and Off Sleep Pad To reduce brightness during sleeping hours, this The SLEEP mode sets the unit to gradually change air conditioner control display has an automatic settings over an 8 hour period to allow for some off feature where the control display will turn off increased energy efficiency during sleep hours.
- Page 6 Using the Air Conditioner ECO Mode This mode optimizes the cooling power of your air ECO ON—Helps minimize electricity use. It is normal conditioner, thereby saving you energy. Once the set for the fan to cycle off and then back on in this mode. point temperature has been reached, the fan will cycle off to save energy.
-
Page 7: Care And Cleaning
Care and Cleaning Grille and Case Turn the air conditioner off and remove the plug from the To clean, use water and a mild detergent. Do not use wall outlet before cleaning. bleach or abrasives. Air Filter CAUTION The air filter behind the front grille should be checked and DO NOT operate the air conditioner cleaned at least every 30 days or more often if necessary. -
Page 8: Installation Instructions
Installation Instructions Questions? Call 800.561.3344 or Visit our Website at: GEAppliances.com BEFORE YOU BEGIN TOOLS YOU WILL NEED Read these instructions completely and carefully. IMPORTANT – • Save these instructions for local inspector’s use. IMPORTANT – • Observe all governing codes and ordinances. Phillips head screwdriver •... - Page 9 Foam top window gasket (1) Top rail gasket (1) mounting Left accordion Right accordion rail panel panel Side rail (2) For Models: AEG14, AEG18 Window Sill angle V-supports (2) locking bracket (2) Type C bracket (2) screws (2) screws (4)
- Page 10 Grasp the lower corners of the grille while pressing in on the case sides with your finger Model tips. Pull out to release and lift it up. AEG14, AEG18 26”- 41” NOTE: Do not pull the bottom edge toward you AEG24 30”- 41”...
- Page 11 Installation Instructions 3. PREPARE THE AIR 4. PREPARE THE CASE CONDITIONER (continues) Slide each side retainer onto the edge of each according panel. The figure shows the orientation . Remove the ground screw from the left side of of each accordion panel and side retainer the case.
- Page 12 Installation Instructions 5. PREPARE THE WINDOW AND 5. PREPARE THE WINDOW AND INSTALL THE CASE INSTALL THE CASE (continues) Cut the window sash seal to the proper length. Position the V-supports on Peel off the backing and attach the seal to the the case bottom so that they underside of the window sash.
- Page 13 Installation Instructions 5. PREPARE THE WINDOW AND 6. INSTALL THE AIR CONDITIONER INSTALL THE CASE (continues) IN THE CASE A. Slide the air conditioner into the case by the base pan. Do not push on the controls, foam bracket on top of the bottom window. air discharge housing or the finned coils.
- Page 14 Installation Instructions 6. INSTALL THE AIR CONDITIONER IN THE CASE (continues) Replace the 1 screw removed earlier, one on each side of the case. Reinstall the control to the panel housing by replacing the 2 screws you removed earlier. Install Screws Attach the front grille to the case by inserting the tabs on the grille into the slots on the front top of the case.
- Page 15 Through-the-Wall Installation Instructions—Optional 1. IMPORTANT The case may be installed through-the-wall in (cont.) both existing and new construction. D. Secure with 14 wood screws anchored at least Read completely, then follow step-by-step. an inch into the wall support structure. NOTE: Obtain all materials locally for mounting NOTE: Drill pilot holes, if necessary, for proper the air conditioner through-the-wall.
-
Page 16: Troubleshooting Tips
Troubleshooting Tips... Save time and money! Review the charts on the following pages first and you may not need to call for service. Problem Possible Causes What To Do Air conditioner does The air conditioner is unplugged. Make sure the air conditioner plug is pushed completely into not start the outlet. -
Page 17: Wifi Setup
GE Appliances U+ Connect Enabled* If your Air Conditioner (AC) has a Connected Appliance Information label located on the outside as shown below, your AC is GE Appliances U+ Connect Enabled. A WiFi communication card is built into the product allowing it to communicate with your smart phone for remote monitoring, control and notifications. - Page 18 WiFi Setup REGULATORY INFORMATION • Increase the separation between the equipment and FCC/IC Compliance Statement: receiver. This device complies with Part 15 of the FCC Rules. • Connect the equipment into an outlet on a circuit Operation is subject to the following two conditions: different from that to which the receiver is connected.
-
Page 19: Limited Warranty
- One-Year Limited Warranty All warranty service provided by our Factory Service Centers, or an authorized Customer Care® technician. To schedule service, visit us on-line at ge.com, or call 800.561.3344 Have serial number and model number available when calling for service. -
Page 20: Consumer Support
Have a question or need assistance with your appliance? Try the GE Appliances Website 24 hours a day, any day of the year! You can also shop for more great GE Appliances products and take advantage of all our on-line support GEAppliances.com... - Page 21 # de Modelo _____________ # de Serie _______________ Puede encontrar estos números en una etiqueta en el costado del acondicionador de aire. GE es una marca registrada de General Electric Company. Fabricado bajo licencia de marca. 49-5000434 Rev. 1 12-19 GEA...
- Page 22 GRACIAS POR HACER QUE GE APPLIANCES SEA PARTE DE SU HOGAR. Ya sea que haya crecido usando GE Appliances, o que ésta es su primera vez, nos complace tenerlo en la familia. Sentimos orgullo por el nivel de arte, innovación y diseño de cada uno de los electrodomésticos de GE Appliances, y creemos que usted también.
-
Page 23: Seguridad
INFORMACIÓN IMPORTANTE DE SEGURIDAD LEA TODAS LAS INSTRUCCIONES ANTES DE USAR Para su seguridad, siga las instrucciones de este manual a fin de minimizar riesgos de ADVERTENCIA incendio, descargas eléctricas o heridas personales. como se describe en el Manual del Propietario. acondicionador de aire. -
Page 24: Controle
Controles No use en las condiciones externas debajo el punto de congelación condiciones externas debajo el punto de congelación. Las luces al lado de las teclas de toque en el panel de control del acondicionador de aire indicarán los ajustes seleccionados. Las funciones y el aspecto pueden variar. - Page 25 Controles Tecla de Sleep (Dormir) El modo SLEEP Pantalla de Control Encendida y Apagada configura la unidad para que gradualmente cambie las A fin de reducir el brillo durante las horas de sueño, la pantalla de control de este acondicionador de aire cuenta permitir cierto incremento de eficiencia energética durante con una función de apagado automático, donde la las horas de inactividad.
- Page 26 Controles ECO Mode (Modo de ahorro de energía) Este modo optimiza el nivel de potencia para enfriar de su ECO ON (Ahorro de Energía Activado)—Ayuda a minimizar el uso de electricidad. Es normal que el ciclo del ventilador alcanzada la temperatura configurada, el ventilador finalizará quede en Apagado y luego nuevamente en encendido en este el ciclo para ahorrar energía.
-
Page 27: Cuidado Y Limpieza
Cuidado y Limpieza Rejilla y caja Apague el acondicionador de aire y retire el enchufe del tomacorriente de la pared antes de limpiar. materiales abrasivos. Filtro de aire El filtro de aire detrás de la rejilla frontal debe inspeccionarse y PRECAUCIÓN NO OPERE el acondicionador de necesario. -
Page 28: Instrucciones De Instalación
Instrucciones de instalación ¿Preguntas? Llame 800.561.3344 o visite nuestra página en la red en: GEAppliances.com ANTES DE INICIAR PRECAUCIÓN Lea estas instrucciones completa y cuidadosamente. IMPORTANTE • — Guarde estas instrucciones para uso del inspector local. acondicionador de aire. IMPORTANTE •... - Page 29 Panel de sellado del riel Panel de acordeón de montaje acordeón derecho izquierdo superior Para modelos: AEG14, AEG18 Trabas para Soporte angular para Tipo C Para modelo: AEG24 Tipo A Perno tipo Perno tipo F con 2...
- Page 30 Instrucciones de instalación 3. PREPARE EL ACONDICIONADOR DE 1. REQUISITOS PARA LA VENTAN AIRE Estas instrucciones son para una ventana estándar frontal levantándolo hacia arriba en un ángulo. proceso para otros tipos de ventanas. paneles de acordeón para ajustarse a una ventana más estrecha.
- Page 31 Instrucciones de instalación 3. PREPARE EL ACONDICIONADOR 4. PREPARE LA CARCASA DE AIRE correspondiente. La figura muestra la orientación de cada panel de acordeón y junta de soporte lateral una ubicación segura. relativos a la caja desde una vista superior de la NOTA: Asegúrese de guardar esto tornillo.
- Page 32 Instrucciones de instalación 5. PREPARE LA VENTANA E 5. PREPARE LA VENTANA E INSTALE LA CAJA INSTALE LA CAJA Enlace el soporte en V y la ficha del soporte en V con la longitud apropiada. Pele la parte trasera y añada el una tuerca y un tornillo Tipo F.
- Page 33 Instrucciones de instalación 5. PREPARE LA VENTANA E 6. INSTALE EL ACONDICIONADOR EN INSTALE LA CAJA LA CARCASA cerradura de la ventana en la parte superior de la ventana inferior. controles, carcasa de poliestireno de la descarga PRECAUCIÓN de aire o las serpentinas de aletas. Verifique que el acondicionador de aire se encuentre firmemente asentado.
- Page 34 Instrucciones de instalación 6. INSTALE EL ACONDICIONADOR EN LA CARCASA Vuelva a instalar lo tornillo quitados antes, en lado Reinstale el control en el espacio del panel reemplazando los 2 tornillos que retiró previamente. Reinstale tornillos Sujete la parrilla frontal a la carcasa introduciendo las lengüetas de la parrilla dentro de las ranuras de la parte superior frontal de la carcasa.
- Page 35 Instrucciones de Instalación a Través de la Pared—Opcional IMPORTANTE La carcasa puede instalarse a través de la pared en construcciones existentes y nuevas. Lea por completo y luego siga todos los pasos. menos una pulgada dentro de la estructura de NOTA: Con excepción de los montajes de soportes en V soporte de la pared.
-
Page 36: Solucionar Problemas
Solucionar problemas ¡Ahorre tiempo y dinero! Primero revise los cuadros que aparecen en las siguientes páginas y es posible que no necesite solicitar reparaciones. Problema Causas posibles Qué hacer El acondicionador de aire El acondicionador de aire está Cerciórese de que el acondicionador de aire está enchufado no enciende desconectado. -
Page 37: Configuración Wifi
GE Appliances WiFi Connect (Conexión WiFi de GE Appliances) (Para clientes en Estados Unidos) GE Appliances U+ Connected Habilitado* Si su acondicionador de aire posee una etiqueta de Información del Electrodoméstico Conectado ubicada en la parte externa como se muestra a continuación, su acondicionador de aire cuenta con del mismo con su teléfono inteligente para el monitoreo remoto, control y notificaciones. - Page 38 Configuración WiFi INFORMACIÓN REGULATORIA • Reoriente o reubique la antena receptora. Declaración de Cumplimiento con FCC/IC: • Aumente la separación entre el equipo y el receptor. • Conecte el equipo a un tomacorriente de un circuito diferente 2. Este dispositivo debe aceptar cualquier interferencia al tomacorriente al cual se encuentra conectado el receptor.
-
Page 39: Garantía Limitada
GE Appliances, podría tener que hacerse cargo de los costes de envío o bien podría solicitársele que lleve el producto a una centro de servicio de GE Appliances autorizado para realizar la reparación. En Alaska, la garantía limitada excluye el costo de envío o las visitas de servicio a su casa. - Page 40 Contáctenos Si no se encuentra satisfecho con el servicio que recibió de GE Appliances, comuníquese con nosotros a través de nuestro sitio Web con todos los detalles, incluyendo su número telefónico, o escriba a: GEAppliances.com/contact...