GE AEZ10 Owner's Manual And Installation Instructions
Hide thumbs
Also See for AEZ10:
- Owner's manual and installation instructions (48 pages) ,
- Owner's manual and installation instructions (15 pages) ,
- Owner's manual and installation instructions (28 pages)
Advertisement
Available languages
Available languages
Quick Links
GEAppliances.com
Safety Instructions
. . . . . . . . . . . . . .2, 3
Recycle Information . . . . . . . . . . . . . . . . . . . 3
Operating Instructions
Air Filter . . . . . . . . . . . . . . . . . . . . . . . . . . . . . 6
Outdoor Coils . . . . . . . . . . . . . . . . . . . . . . . . 6
Normal Operating Sounds . . . . . . . . . . . 11
Consumer Support
Consumer Support . . . . . . . . . . Back Cover
Warranty . . . . . . . . . . . . . . . . . . . . . . . . . . . .14
Write the model and serial numbers here:
Model # _________________________
Serial # __________________________
Find these numbers on a label on the side of
the air conditioner.
. . . . . . . . . 4, 5
. . . . . 7-10
. . . . . . . . . . . 11
La sección en español empieza en la página 15
Owner's Manual and
Installation Instructions
AEW10
AEZ10
AEW12
AEZ12
Acondicionador
de aire
Manual del propietario
e instrucciones de
instalación
49-7748
10-15 GE
Advertisement
Chapters

Related Manuals for GE AEZ10


Summary of Contents for GE AEZ10
-
Page 1: Table Of Contents
Operating Instructions ..4, 5 AEW10 AEZ10 Care and Cleaning AEW12 Air Filter ......6 AEZ12 Outdoor Coils . - Page 2 Turn the unit OFF and unplug your air conditioner before cleaning. GE does not support any servicing of the air conditioner. We strongly recommend that you do not attempt to service the air conditioner yourself.
- Page 3 GEAppliances.com WARNING HOW TO CONNECT ELECTRICITY Do not, under any circumstances, cut or remove the third Where a 2-prong wall outlet is encountered, it is your (ground) prong from the power cord. For personal safety, personal responsibility and obligation to have it replaced this appliance must be properly grounded.
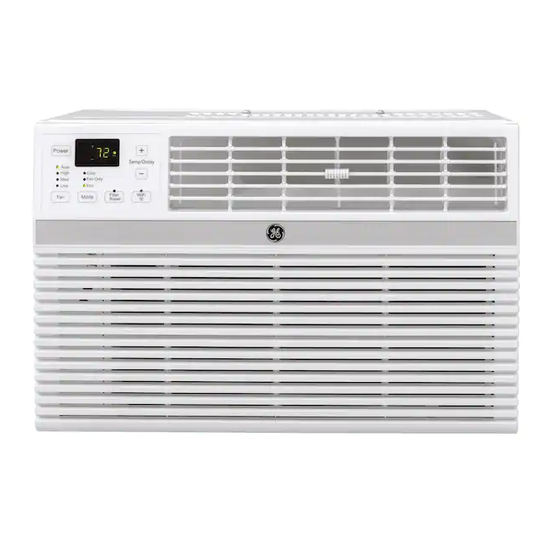
- Page 4 About the controls on the air conditioner. Features and appearance will vary. Lights next to the touch pads on the air conditioner control panel indicate the selected settings. Light indicates the unit is in the Light indicates the temperature or delay time Set mode. delay timer is set.
- Page 5 GEAppliances.com Do Not Operate in Freezing Outdoor Conditions This cool-only air conditioner was not designed for freezing outdoor conditions. It must not be used in freezing outdoor conditions. Remote Control To ensure proper operation, aim the remote control at the The remote control signal has a range of up to 20 feet.
-
Page 6: Care And Cleaning
About the controls on the air conditioner Additional important information. Air Direction Use the lever to adjust the air direction left and right only. Care and cleaning of the air conditioner. Grille and Case Turn the air conditioner off and remove the plug from To clean, use water and a mild detergent. -
Page 7: Installation Instructions
Installation Air Conditioner Instructions Questions? Call 800.GE.CARES (800.432.2737) or visit our Website at: GEAppliances.com In Canada, call 1.800.561.3344 or visit www.GEAppliances.ca CAUTION: BEFORE YOU BEGIN Do not, under any circumstances, cut or remove the third (ground) prong from the power cord. - Page 8 Installation Instructions PARTS INCLUDED Right Left (Appearance may vary) accordion Window accordion panel sash seal panel Foam top window gasket conditioner Window locking Frame locking Screw (6) bracket (1) bracket (2)
- Page 9 Installation Instructions WINDOW REQUIREMENTS PREPARE THE AIR CONDITIONER • These instructions are for a standard double-hung Hold the accordion panel in one hand and window. You will need to modify them for other types gently pull back to free the open end. of windows.
- Page 10 Installation Instructions PREPARE THE WINDOW INSTALL SUPPORT BRACKET AND FOAM TOP WINDOW GASKET Cut the window sash seal to the proper length. Peel off the backing and attach the seal to the CAUTION: underside of the window sash. To prevent broken glass or Vinyl damage to windows, on vinyl or other similarly...
-
Page 11: Troubleshooting Tips
Troubleshooting Tips. GEAppliances.com Problem Possible Causes What To Do Air conditioner The air conditioner • Make sure the air conditioner plug is pushed does not start is unplugged. completely into the outlet. The fuse is blown/circuit • Check the house fuse/circuit breaker box and replace breaker is tripped. - Page 12 Notes.
- Page 13 Notes. GEAppliances.com...
-
Page 14: Warranty
7 to 10 business days after your unit is received. You will be asked to provide your name, address, date of purchase, model and serial number. GE will arrange for a carton to be sent to your home to recover the product. What Is Not Covered: Customer instruction. - Page 15 Garantía ....... .26 Servicio al consumidor ....27 AEW10 AEZ10 AEW12 AEZ12 Escriba los números de modelo...
- Page 16 R22. Apague la unidad y desenchufe su acondicionador de aire antes de limpiar. GE no está no apoya que se le proporcione ningún servicio al acondicionador de aire. Vehementemente recomendamos que usted no intente proporcionar...
- Page 17 GEAppliances.com WARNING CÓMO CONECTAR LA ELECTRICIDAD Bajo ninguna circunstancia, corte o remueva la tercera Pida a un técnico que inspeccione el tomacorriente y el púa (tierra) del cable eléctrico. En pos de la seguridad circuito para cerciorarse de que el tomacorriente está personal, este electrodoméstico debe siempre conectarse conectado a tierra de la manera apropiada.
- Page 18 Acerca de los controles en el acondicionador de aire Las luces al lado de las teclas de toque en el panel de control del acondicionador de aire indicarán los ajustes seleccionados. La luz indica que la unidad está en el La luz indica que el modo de Ajuste de temperatura o de temporizador de retardo...
- Page 19 GEAppliances.com No use en las condiciones externas debajo Este acondicionador de aire no es diseñado para usar en temperaturas externas debajo el punto de el punto de congelación congelación. No use en las condiciones externas debajo el punto de congelación. Control remoto Para garantizar una operación apropiada, oriente El receptor de señal tiene un rango máximo de...
-
Page 20: Cuidado Y Limpieza
Acerca de los controles en el acondicionador de aire Dirección del aire Utilice las palancas para ajustar la dirección del aire, hacia la izquierda y hacia la derecha. Aplique presión con la punta de los dedos en las lamas de distribución para ajustar la dirección del aire hacia arriba y hacia abajo. -
Page 21: Instrucciones De Instalación
Instrucciones Acondicionador de instalación de aire ¿Preguntas? Llame 800.GE.CARES (800.432.2737) o visite nuestra página en la red en: GEAppliances.com ANTES DE INICIAR REQUISITOS ELÉCTRICOS Algunos modelos requieren tomacorrientes de Lea estas instrucciones completa y 115/120 voltios de corriente alterna y 60 Hz cuidadosamente. - Page 22 Instrucciones para la instalación HERRAMIENTAS QUE NECESITARÁ Lápiz Un destornillador con hoja plana Tijeras o cuchilla Nivel Una regla o cinta métrica Un destornillador de estrella PARTES INCLUIDAS Sello del Panel de marco Panel de (Apariencia puede variar) acordeón de la ventana acordeón derecho izquierdo...
- Page 23 Instrucciones de instalación REQUISITOS PARA LA VENTANA PREPARE EL ACONDICIONADOR DE AIRE • Estas instrucciones son para una ventana estándar de Sostenga el panel de acordeón con una mano dos pliegues. Usted necesitará modificar el proceso para y suavemente retire hacia atrás para liberar el otros tipos de ventanas.
- Page 24 Instrucciones de instalación PREPARE LA VENTANA INSTALE UN SOPORTE DE CIERRE Y LA JUNTA DE ESPUMA SUPERIOR Corte el sello de la banda de la ventana a DE LA VENTANA la longitud apropiada. Despegue la parte posterior y pegue el sello a la parte inferior de la banda de la PRECAUCIÓN: ventana.
-
Page 25: Solucionar Problemas
Solucionar problemas. GEAppliances.com Problema Causas posibles Qué hacer El acondicionador de aire El acondicionador de aire • Cerciórese de que el acondicionador de aire está no enciende está desconectado. enchufado totalmente en el tomacorriente. El fusible se disparó / • Inspeccione los fusibles / caja de interruptores de la casa el cortacircuitos se disparó. -
Page 26: Garantía
GE hará arreglos para que se envíe una caja a su hogar a fin de que pueda recuperar el producto. Lo que no está cubierto: Instrucciones al cliente. -
Page 27: Servicio Al Consumidor
Póngase en contacto con nosotros GEAppliances.com Si no está satisfecho con el servicio que recibe de GE, póngase en contacto con nosotros en nuestra página Web indicando todos los detalles así como su número de teléfono o escríbanos a: General Manager, Customer Relations... - Page 28 1.800.561.3344. Contact Us In the U.S.A.: GEAppliances.com If you are not satisfied with the service you receive from GE, contact us on our Website with all the details including your phone number, or write to: General Manager, Customer Relations...