Table of Contents
Advertisement
Quick Links
Advertisement
Table of Contents

Related Manuals for FujiFilm ASK-400


Summary of Contents for FujiFilm ASK-400
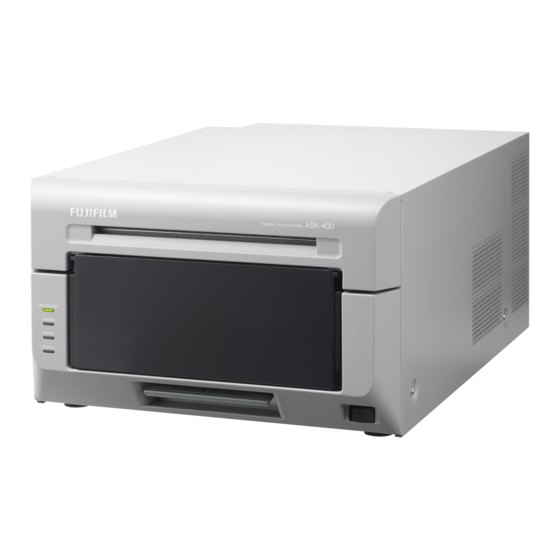
- Page 1 THERMAL PHOTO PRINTER ASK-400 User’s Manual Version 1.0.0 FUJIFILM Corporation...
- Page 2 WEEE Directive and is effective only within European Union. For details, consult your dealer. [This directive requirement] English Hereby, FUJIFILM Corporation declares that the radio equipment type ASK-400 is in compliance with Directive 2014/53/EU. The full text of the EU declaration of conformity is available at the following internet address: https://www.fujifilm.com/support/photofinishing/ask400 Frequency band in which the radio equipment operates;...
- Page 3 Por la presente, FUJIFILM Corporation declara que el tipo de equipo radioeléctrico ASK-400 es conforme con la Directiva 2014/53/UE. El texto completo de la declaración UE de conformidad está disponible en la dirección Internet siguiente: https://www.fujifilm.com/support/photofinishing/ask400 Banda o bandas de frecuencia en las que opera el equipo radioeléctrico; 13.56 MHz±7 kHz Potencia máxima de radiofrecuencia transmitida en la banda o bandas de frecuencia en las que...
- Page 4 Nederlands Hierbij verklaar ik, FUJIFILM Corporation, dat het type radioapparatuur ASK-400 conform is met Richtlijn 2014/53/EU. De volledige tekst van de EU-conformiteitsverklaring kan worden geraadpleegd op het volgende internetadres: https://www.fujifilm.com/support/photofinishing/ask400 polski FUJIFILM Corporation niniejszym oświadcza, że typ urządzenia radiowego ASK-400 jest zgodny z dyrektywą...
-
Page 5: Table Of Contents
Copyrights, trademarks or any other intellectual property rights whatsoever that pertain to documents, programs or other items provided with this product, are ascribed to FUJIFILM Corporation, or the respective other holders of rights� Except in cases permitted by applicable laws,... -
Page 6: Introduction
Introduction Thank you for purchasing this product� This document explains how to handle and operate this product� Please read this document carefully before use� Be sure to read “For Safe Operation” (P�6-8), and operate the product correctly� For Safe Operation Be sure to read this document before using the product�... - Page 7 For Safe Operation Warning • This unit has no power switch� When installing the unit, incorporate a readily accessible disconnect device in the fixed wiring, or connect the power plug to an easily accessible socket-outlet near the unit� If a fault should occur during operation of the unit, operate the disconnect device to switch the power supply off, or disconnect the power plug�...
- Page 8 For Safe Operation Caution • Do not install the product in dusty or humid places. This may cause fire or an electric shock, or damage the product� • Do not install the product on an unstable surface� It may fall and cause injury to the user or other people� • Do not allow foreign objects to enter into the product� They may cause an electric shock, a short circuit, a fire, or damage the product�...
-
Page 9: Caution For Installation
Caution for installation • Before using the product, read “For Safe Operation” carefully and observe the instructions therein� • Use care when moving the product� Never try to carry the product alone� Dropping it may cause injury or property damage� • Do not use or store the product near a fire, humid places, in direct sunlight, near an air conditioner or heater, or any other location with unusually high or low temperature, strong humidity, or excessive dust�... -
Page 10: Regulatory Compliance Statements
Economic Development Canada’s licence-exempt RSS(s). Operation is subject to the following two conditions: (1) This device may not cause interference. (2) This device must accept any interference, including interference that may cause undesired operation of the device. FUJIFILM Europe B.V. Oudenstaart 1,5047 TK Tilburg the Netherlands - 10 -... -
Page 11: Printer Installation
*Set in the printer� (for L and PC sizes) Remove the wrapping * The shape differs depending on the before using them� country, region or the application� THERMAL PHOTO PRINTER ASK-400 For Safe Operation English Start-up Guide Sicherheitshinweise Deutsch Leitfaden zur Inbetriebnahme Pour un fonctionnement sans risque français... -
Page 12: Name Of Components
Printer Installation Name of components Front of the unit Paper output Standby LEDs Scrap box ON/Standby switch Opening lever Back of the unit Vent USB port Power inlet Side of the unit Vent Caution • Be careful not to hurt yourself or damage anything on the edges of the printer� - 12 -... -
Page 13: Connecting The Power Cord And A Computer
Printer Installation Connecting the power cord and a computer Make sure that the ON/Standby switch of the printer unit is set to Standby� Standby ON/Standby Make sure that the power switch of the switch computer is set to OFF� Plug the connector of the power cord (supplied) into the printer power inlet�... -
Page 14: Paper And Ribbon
Printer Installation Paper and ribbon Prepare the media (paper, ribbon) with the following widths� Ribbon Paper Ribbon cassette Size Paper Ribbon (Ribbon cassette) L , 2L 127 mm in width 134 mm in width PC , A5 152 mm in width 159 mm in width Caution • Set the paper and ribbon without putting them directly on the work surface�... -
Page 15: Setting The Media (Paper, Ribbon)
Printer Installation Setting the media (paper, ribbon) Use the opening lever to open the lock, and then pull out the mechanism unit� Opening lever Lift the paper lever and raise the front cover� Paper Lever Front cover Hold the center of the scrap box and lift it up straight�... - Page 16 Printer Installation Remove the paper holder from the printer� • When removing the paper holders to change the paper roll etc�, make sure to place them on the clean surface� Never place them directly on the table or work spaces� If dust or dirt adheres to the media when setting the paper holder inside the printer unit , it may adversely affect the print quality.
- Page 17 Printer Installation Set the paper holder into the printer� Set the seal on the paper (→PULL) in the same direction as show on the right� While pressing the paper holder, rotate the paper in the direction of the arrow and advance the leading edge until the buzzer beeps� The flashing LED (orange) turns off. Set the scrap box and close the front cover�...
- Page 18 Printer Installation Remove the ribbon cassette from the printer unit� • When setting the media, make sure to use the plastic bag or sheet covering the media. Never put it directly on the table, floor or work spaces. Remove the old ribbon from the ribbon cassette and set the new ribbon� Take-up side Supply side Rotate in the direction of the arrow...
-
Page 19: Paper Tray Installation
Printer Installation Close the mechanism unit� When the mechanism unit is closed, the printer starts paper initialization� (Five blank sheets are output�) Paper initialization cuts off the outer layer of the paper that may be dirty� Note that paper initialization is not carried out if the printer ON/Standby switch is set to ON after the paper is set�... -
Page 20: Disposing Of Paper Scrap
Printer Installation Disposing of paper scrap Paper scraps generated when the paper is cut are collected in the scrap box� Be sure to empty the scrap box when replacing the paper� Release the opening lever, and pull out the mechanism unit� Lift the paper lever and raise the front cover�... -
Page 21: Troubleshooting
Troubleshooting Error display The LEDs condition (lit, flashing, off) indicates the product status. lit, flashing, off. LED display Status Condition Refer to POWER RIBBON Paper end Set a new roll of paper� P�15 PAPER ERROR POWER RIBBON Ribbon end Set a new ribbon� P�15 PAPER ERROR POWER Door is open Properly set the paper and then close RIBBON P�15... -
Page 22: Solving Errors
Troubleshooting Solving errors Release the opening lever, and pull out the mechanism unit� Remove the ribbon cassette front the printer unit� Perform the action corresponding to the error� “The printer is jammed with paper” (see this page), “The ribbon is caught in the printer” (see P�24), “The printer stopped with the paper partially cut”... - Page 23 Troubleshooting If the jam is not easily removed by above method, cut the damaged portion of the paper edge, remove and set the paper roll to the side� (Fig�C) Then remove any remaining paper from the feed path� If a portion of the paper remains in the printer, carefully reach into the printer unit and remove Fig�C the paper from the paper path by pulling the...
-
Page 24: The Ribbon Is Caught In The Printer
Troubleshooting The ribbon is caught in the printer Pull out the ribbon� Cut the ribbon� Remove the ribbon that remains in the printer unit carefully� Any pieces of ribbon left inside the printer may affect the print quality� In such cases, clean the platen roller� (see “Platen roller”... -
Page 25: The Printer Stopped With The Paper Partially Cut
Troubleshooting The printer stopped with the paper partially cut Set the ON/Standby switch to Standby and then ON again� The paper jam is released and the cutter blade returns to its standby position� • If you cannot release the paper, contact a service representative� Remove the partially printed part of paper from the printer�... -
Page 26: Cleaning
Cleaning Platen roller If indents appear at the same places on the printout at a regular interval (approximately every 50 mm), or if the back of the printout (white side) is dirty, clean the platen roller� There may be dust, dirt, adhesive, etc� from the ribbon or paper on the platen roller� Prepare a piece of gauze or other soft cloth Platen roller moistened with ethyl alcohol�... -
Page 27: Thermal Print Head
Cleaning Thermal print head If stains adhere to the thermal print head, unevenness or gaps may appear during printing� Prepare a piece of gauze or other soft Thermal print head cloth moistened with ethyl alcohol� Gently wipe the thermal head without touching it directly with your hands�... -
Page 28: Specifications
Specifications Print method Thermal dye sublimation transfer Width direction 11�8 dot/mm (300 dpi) Resolution High-speed 11�8 dot/mm (300 dpi) Paper feed direction High-quality 23�6 dot/mm (600 dpi) L ( 3�5×5 ) 89 mm × 127 mm PC ( 4×6 ) 101 mm ×... - Page 29 FUJIFILM Corporation 7-3, Akasaka 9-chome, Minato-ku, Tokyo 107-0052, Japan...