
Related Manuals for LG DM5660K


Summary of Contents for LG DM5660K
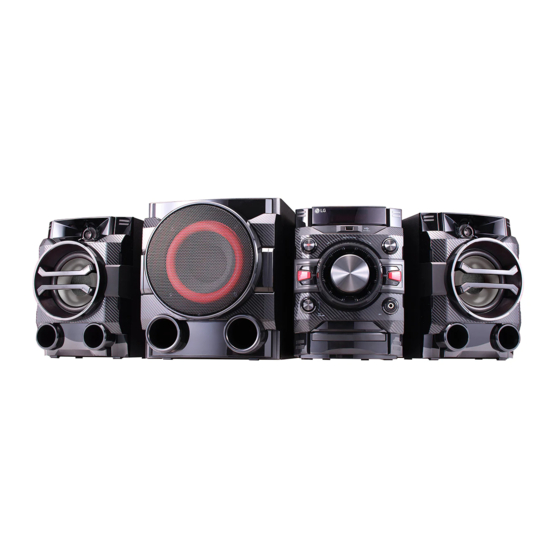
- Page 1 OWNER’S MANUAL DVD MINI HI-FI SYSTEM Please read this manual carefully before operating your set and retain it for future reference. MODEL DM5660K (DM5660K, DMS5660F, DMS5660W) *MFL69706804* www.lg.com...
- Page 2 Getting Started Safety Information CAUTION RISK OF ELECTRIC SHOCK CAUTION: This product employs a Laser System. DO NOT OPEN To ensure proper use of this product, please read CAUTION: TO REDUCE THE RISK OF ELECTRIC this owner’ s manual carefully and retain it for future SHOCK DO NOT REMOVE COVER (OR BACK) reference.
- Page 3 Getting Started This device is equipped with a portable battery or accumulator. Safety way to remove the battery or the battery from the equipment: Remove the old battery or battery pack, follow the steps in reverse order than the assembly. To prevent contamination of the environment and bring on possible threat to human and animal health, the old battery or the battery put it in the appropriate container at designated...
-
Page 4: Table Of Contents
Table of Contents Table of Contents Operating Using the Home Menu Basic Operations Using a BLUETOOTH® wireless technology Getting Started – Listening to music of a BLUETOOTH device Radio Operations Safety Information – Listening to the radio Unique Features – Improving poor FM reception –... - Page 5 Table of Contents Troubleshooting Troubleshooting Appendix Maintenance – Handling the Unit – Notes on Discs Area Code List Language code List Trademarks and Licenses Specifications...
-
Page 6: Getting Started
Getting Started Unique Features Full HD up-scaling Views Full HD picture quality with simple setup. BLUETOOTH® Listens to music stored on your Bluetooth device. USB Direct Recording Records music from CD to your USB device. -
Page 7: Introduction
Getting Started Introduction Symbols Used in this Manual DVD-Video, DVD±R/RW in Video mode or VR mode and finalized Playable Discs Audio CDs This unit plays DVD±R/RW and CD-R/RW that contains audio titles, MP3, WMA and/or JPEG files. Video files contained in the USB/ Some DVD±RW/DVD±R or CD-RW/CD-R cannot be Disc played on this unit due to the recording quality or... -
Page 8: Playable File Requirement
When setting the option to Live File System, within 32 to 48 kHz (WMA) you cannot use it on LG players.(Mastered/ Live File System : Disc format system for Windows y Bit rate : within 32 to 320 kbps (MP3), 40 to 192... -
Page 9: Remote Control
- You can control the sound Presetting the radio stations. level, input source, and power x RETURN : Moves backwards switching of LG TVs as well. in the menu or exits the setup Hold 1 (TV) and press PR/CH Replacement of menu. -
Page 10: Front Panel
Getting Started Front panel a Display window h USB Port You can play sound files by connecting the USB b 1/!(Standby/On) device. Turn the power on or off. i FUNCTION c U (Skip/Search) Select the function and input source. - Skips to the next track/file/chapter. - Tune in the desired radio station. -
Page 11: Rear Panel
Getting Started Rear panel a POWER IN b VIDEO OUT Connects to a TV with video inputs. c FM ANTENNA Connects the FM wired antenna d AUX IN (L/R) Connects to an external source with 2 channel audio outputs. e HDMI Connects to TV with HDMI inputs. -
Page 12: Connecting
Connecting > Caution Attaching the speakers y Be careful to make sure children do not put to the unit their hands or any objects into the *speaker duct. *Speaker duct : A hole for plentiful bass To connect the cable to the unit, press each plastic sound on speaker cabinet(enclosure). -
Page 13: Connections To Your Tv
Connecting Connections to your TV HDMI Connection If you have a HDMI TV or monitor, you can connect it to this unit using a HDMI cable (Type A, High Speed Make one of the following connections, depending on HDMI™ Cable). the capabilities of your existing equipment. -
Page 14: Video Connection
Connecting > Caution Video Connection y Changing the resolution when the connection Connect the VIDEO OUT jack on the unit to the video has already been established may result in in jack on the TV using a video cable. malfunctions. To solve the problem, turn off You can hear the sound through the system’... -
Page 15: Resolution Setting
Connecting Video Output Resolution Setting Resolution The unit provides several output resolutions for HDMI. You can change the resolution using [Setup] menu. Displayed resolution in display window and outputted 1. Press n HOME. resolution may different according to connection 2. Use W/S/A/D to select the [Setup] and type. -
Page 16: Optional Equipment Connection
Connecting Optional Equipment USB Connection Connection Connect the USB port of USB Memory (or MP3 player, etc.) to the USB port on the front of the unit. AUX (L/R) INPUT Connection Connect an output of auxiliary device (Camcorder, TV, Player, etc) to the AUX IN (L/R) connector. If your device has only one output for audio (mono), connect it to the left audio jack on the unit. - Page 17 Connecting Compatible USB Devices y MP3 Player : Flash type MP3 player. y USB Flash Drive : Devices that support USB2.0 or USB1.1. y The USB function of this unit does not support some USB devices. USB device requirement y Devices which require additional program installation when you have connected it to a computer, are not supported.
-
Page 18: System Setting
System Setting Adjust the setup To display and exit the Setup menu settings 1. Press n HOME. Displays the [Home Menu]. By using the Setup menu, you can make various adjustments to items such as picture and sound. You can also set a language for the subtitles and the Setup menu, among other things. -
Page 19: Language
System Setting Language Display Mode The Display Mode setting works only when the TV Aspect mode is set to 4:3. Menu Language Select a language for the Setup menu and on screen [Letterbox] display. Displays a wide picture with bands on the upper and lower portions of the screen. -
Page 20: Audio
System Setting Audio DRC (Dynamic Range Control) Make the sound clear when the volume is turned down (Dolby Digital only). Set to [On] for this effect. 2.1 Speaker Setup Make the following settings for the built-in 2.1 Vocal channel surround decoder. Select [On] to mix karaoke channels into normal 1. -
Page 21: Lock (Parental Control)
System Setting Lock (Parental Control) Password You can enter or change password. Initial Setting the Area Code 1. Select [Password] on the [Lock] menu and then press D . When you use this unit for the first time, you have to set the Area Code. -
Page 22: Operating
Operating Using the Home Menu Basic Operations 1. Press n HOME. 1. Insert the disc by using the B or connect the Displays the [Home Menu]. USB device to the USB port. 2. Press n HOME. Displays the [Home Menu]. 3. - Page 23 Operating Do this Do this Stop Press Z . In the pause mode, press c / v to select the required Press d MONO/STEREO on speed. (DVD Movie title only) Slowing down Playback the remote control or the playing the unit. speed In the pause mode, press v to select the required...
-
Page 24: Using A Bluetooth® Wireless Technology
XX:XX means the last four digits of BT address. For example, if your unit has a BT address In order to use Bluetooth wireless technology, such as 9C:02:98:4A:F7:08, you will see “LG devices must be able to interpret certain profiles. This MINI(F7:08)” on your Bluetooth device. - Page 25 Operating Note 3. When this unit is successfully connected with your Bluetooth device, “PAIRED” will be appear y The sound may be interrupted when the on the display window. connection interfered by the other electronic Note wave. y You cannot control the Bluetooth device with Depending on the Bluetooth device type, some this unit.
-
Page 26: Radio Operations
Operating Radio Operations Presetting the Radio Stations You can preset 50 stations for FM. Before tuning, make sure that you have turned down Listening to the radio the volume. 1. Press FUNCTION on the unit or P FUNCTION 1. Press FUNCTION on the unit or P FUNCTION on the remote control until FM appears in the on the remote control until FM appears in the display window. -
Page 27: Advanced Operations
Operating Advanced Operations 1.5 times speed playback The 1.5 speed allows you to watch the pictures and Displaying Disc Information on- listen to the sound quicker than playing at a normal speed. screen 1. During playback, press d MONO/STEREO to You can display various information about the disc play at 1.5 times speed. -
Page 28: Changing Subtitle Code Page
Operating Note 2. Select a desired music on the [List] by using the then press MARKER to appears the mark on y The resume point may be cleared when a the list. button is pressed (for example; 1 , B , etc). 3. -
Page 29: Viewing A Photo File
Operating Viewing a PHOTO file About help menu in the full screen Menu Buttons Operation This unit can play discs with photo files. m INFO/ Displaying the Option Menu 1. Select [Photo] on the [Home Menu] and press DISPLAY menu. b ENTER. -
Page 30: Sound Adjustment
Operating Sound adjustment ou can select a desired sound mode by using REGION EQ on the remote control. On Display Region Description Setting the surround mode FUNK, REGUETON, This system has a number of pre-set surround sound SAMBA, BANDA, fields. You can select a desired sound mode by using MERENGUE, AXE, Latin 9 SOUND EFFECT. -
Page 31: Recording To Usb
Operating Note Recording to USB y You can check the recording percentage rate You can record music or sound souce to USB device for the USB record on the screen during the by connecting in to the port on the unit. recording. -
Page 32: Other Operations
Operating Other Operations Last Scene Memory This unit memorizes last scene from the last disc that Sleep Timer Setting is viewed. The last scene remains in memory even if you remove the disc from the unit or switch off the Press SLEEP one or more times to select delay time unit. -
Page 33: Vocal Fader
Operating VOCAL FADER Using Microphone You can enjoy the function as karaoke, by reducing 1. Connect your microphone to the MIC jack. singer vocal of music in the various source. (MP3/ 2. Play the music you want. WMA/ CD/ etc.) Press VOCAL FADER, and “ON” will 3. -
Page 34: Setting The Clock
Operating Setting the Clock Using your player as an alarm clock 1. Turn the unit on. 1. Turn the unit on. 2. Press and hold CLOCK. 2. Press and hold ALARM. 3. Select time mode by pressing C/V on the 3. -
Page 35: Auto Power Down
Operating Auto power down Auto function change This unit recognizes input signals such as Bluetooth and then changes suitable function automatically. This unit will turn itself off to save electricity in the case were the main unit is not connected to an When you try to connect Bluetooth external device and is not used for 20 minutes. -
Page 36: Troubleshooting
Troubleshooting Troubleshooting PROBLEM CORRECTION y Turn off the power of this unit and the connected external device (TV, Woofer, DVD-player, Amplifier, etc.) and turn it on again. y Disconnect the power cord of this unit and the connected external The unit does not work properly device (TV, Woofer, DVD-player, Amplifier, etc.) and then try connecting again. - Page 37 Troubleshooting PROBLEM CORRECTION y The remote is not pointed directly at the unit. Point the remote directly at the unit. y The remote is too far from the unit. Use the remote within 23 feet (7 m) of the unit. The remote control doesn’t work well y There is an obstacle in the path between the remote control and / at all...
-
Page 38: Appendix
Appendix Maintenance Notes on Discs Handling Discs Handling the Unit Do not touch the playback side of the disc. Hold the disc by the edges so that fingerprints do not get on the surface. Never stick paper or tape on the disc. When shipping the unit Please save the original shipping carton and packing Storing Discs... -
Page 39: Area Code List
Appendix Area Code List Choose an area code from this list. Area Code Area Code Area Code Area Code Afghanistan Fiji Monaco Singapore Argentina Finland Mongolia Slovak Republic Australia France Morocco Slovenia Austria Germany Nepal South Africa Belgium Great Britain Netherlands South Korea Bhutan... -
Page 40: Language Code List
Appendix Language code List Use this list to input your desired language for the following initial settings: [Disc Audio], [Disc Subtitle] and [Disc Menu]. Language Code Language Code Language Code Language Code Afar 6565 French 7082 Lithuanian 7684 Sindhi 8368 Afrikaans 6570 Frisian... -
Page 41: Trademarks And Licenses
“DVD Logo” is a trademark of DVD Format/Logo Licensing Corporation. The Bluetooth® word mark and logos are owned by the Bluetooth SIG, Inc. and any use of such marks by LG Electronics is under license. Other trademarks and trade names are those of their respective owners. -
Page 42: Specifications
Appendix Specifications General Power requirements Refer to main label. Power consumption Refer to main label. Dimensions (W x H x D) Approx. 204.5 mm x 278 mm x 285.5 mm Operating temperature 5 °C to 35 °C Operating humidity 5 % to 90 % Inputs/ Outputs AUX IN 2.0 Vrms (1 kHz, 0 dB), 600 Ω... - Page 43 Appendix Front Type 2 Way 2 Speaker Impedance 4 Ω Rated Input Power 100 W Max. Input Power 200 W Dimensions (W x H x D) Approx. 203 mm x 284.5 mm x 200 mm Subwoofer Jenis 1 Way 1 Speaker 3 Ω...