Table of Contents
Advertisement
Quick Links
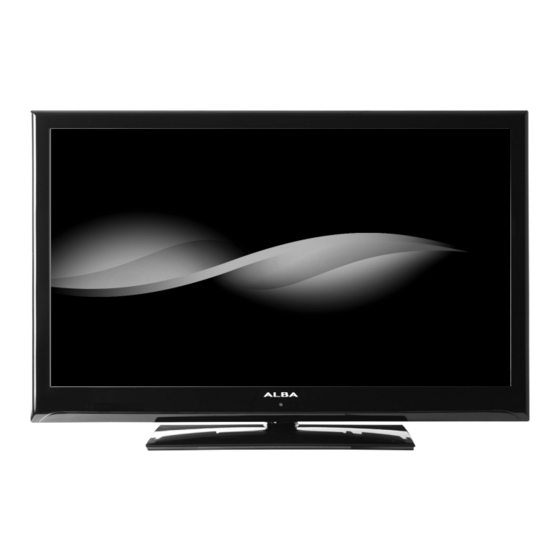
32" Combination LCD TV/DVD
Installation & Operating Instructions
IMPORTANT
- Please read these instructions fully before installing or operating
These instructions contain important information which will help you get the best from your
television and ensure safe and correct installation and operation.
For any help concerning set up and use of your TV please call the
Customer Helpline: 0845 604 0105
Lines open: 9am - 8pm Monday to Saturday and 10am - 4pm Sunday
For any help concerning set up and use of your TV please call the Customer Helpline: 0845 604 0105
- Please keep for future reference
0345 604 0105
529/9201
LCD32947DVDHDS
Issue 1 - 9/2/11
Advertisement
Table of Contents

Related Manuals for Alba LCD32947DVDHDS


Summary of Contents for Alba LCD32947DVDHDS
- Page 1 32” Combination LCD TV/DVD Installation & Operating Instructions - Please keep for future reference 529/9201 LCD32947DVDHDS IMPORTANT - Please read these instructions fully before installing or operating These instructions contain important information which will help you get the best from your television and ensure safe and correct installation and operation.
-
Page 2: Table Of Contents
Contents Connections 18-22 Contents Back connections explained Contents Left side connections explained Preparation HDMI Connections Intended Use SCART Connections Power source VGA Connections Positioning the TV Side AV Connections Power cord and plug Moisture and Water Using a Conditional Access Module Ventilation USB Connections Heat sources and Flames... -
Page 3: Contents
DISC MENU SUBTITLE DEFAULT DOWNMIX SURROUND STEREO PARENTAL PASSWORD SPDIF OUTPUT Other Information 37-40 Teletext Analogue Teletext Model number ALBA DVB-T LCD32947DVDHDS For any help concerning set up and use of your TV please call the Customer Helpline: 0845 604 0105... -
Page 4: Preparation
Safety Information IMPORTANT - Please read these instructions fully before installing or operating The lightning fl ash with arrowhead symbol, within an equilateral triangle, is intended to alert the CAUTION user to the presence of uninsulated “dangerous voltage” within the product’s enclosure that may RISK OF ELECTRIC SHOCK DO NOT OPEN be of suffi... -
Page 5: Moisture And Water
Safety Information IMPORTANT - Please read these instructions fully before installing or operating Moisture and Water Handling Discs • Do not use this TV in a humid or damp place (avoid • To keep the disc clean, bathrooms, the sink in the kitchen, etc. only handle the disc by its edge. -
Page 6: Replacement Parts
Safety Information IMPORTANT - Please read these instructions fully before installing or operating Replacement Parts Symbols in this Instruction Book When replacement parts are required, make sure that The following symbols are used in the Instruction the service technician has used replacement parts, Book as a marker for restrictions and precautions and which are specifi... -
Page 7: Getting Started
Getting Started The Argos Technical Helpline is here to help Technical experts are available 7 days a week • Simple help and advice on setting up your digital equipment (image). • Guidance on connecting other devices to your television such as a DVD player, Sky, home cinema system or a games console. -
Page 8: Tv - Features
Getting Started TV - Features DVD - Features • Remote controlled colour LCD TV. • DVD / CD / CD-R / CD-RW / MP3 / JPEG / MPEG playback. • Fully integrated Terrestrial digital TV (DVB-T - MPEG2, MPEG4) • NTSC / PAL playback (according to disc content). -
Page 9: Viewing Remote Control - Tv
Getting Started - TV Viewing remote control - TV Standby Image size Sleep timer INFO Number buttons Return / Exit / TXT Index SLEEP SCREEN SOURCE PRESETS Cursor up / TXT up page Cursor left Programme up / Page down (in DTV mode) Programme down / Page up (in DTV mode) -
Page 10: Viewing Remote Control - Dvd
Getting Started Viewing remote control - DVD Standby Number buttons Return back INFO Language selection (Set language) Display time / DVD menu Clear SLEEP SCREEN SOURCE PRESETS Stop No function Rapid Reverse Rapid advance Info Zoom Repeat RETURN Root MENU Title Menu Navigation Buttons... -
Page 11: Getting Started
Getting Started Attaching the Stand 1. Stand is placed on a fl at surface (fi g.1). fi g.1 2. To install the TV on the wall, fi rst of all, foot assembly should be removed. Unscrew the 4 screws that attach the foot assembly to the panel and remove the foot assembly from the panel (fi... -
Page 12: Getting Started
Getting Started TV - Control buttons (left side) 1. Standby ( ) button Turns the TV on when in standby mode or turns the TV off into standby mode. 2. TV/AV button Changes the operation of “Up” and “Down” buttons. 3. -
Page 13: Aerial Connection
Getting Started Aerial connection Connect the “aerial” or “cable TV” plug to AERIAL INPUT (ANT.) socket located on the back of the TV (fi g.1). Power connection IMPORTANT :The TV set is designed to operate on 220-240V AC, 50 Hz. Please note: After unpacking, allow the TV to reach ambient room temperature before connecting the TV to the mains power socket. -
Page 14: Operation Using Tv Control Buttons
Getting Started Operation using TV control buttons Operation using Remote control buttons The main menu OSD (On Screen Display) cannot The remote control is designed to control all the be displayed using the TV control buttons. functions of the model you selected. The “... -
Page 15: How To Watch A Dvd
Getting Started How to watch a DVD Notes on DVD Playback 1. Press the Power Button “” on the TV or remote a. No sound will be heard during Rapid advance control. or Rapid reverse. 2. Switch to DVD source using the “SOURCE” b. -
Page 16: Getting Started
Getting Started DVD Controls You can operate DVD, movie CD, music or picture CD’s content by using the correct buttons on your remote control. Below are main functions of commonly used remote control buttons. Buttons DVD Playback Movie Playback Picture Music Playback on Remote Playback... -
Page 17: Initial Set Up
Getting Started Initial set up When turned on for the fi rst time, language selection message is displayed (fi g.1). Press the “ ” or “ ” button to highlight the required language, press OK button to select. “First Time Installation” appears. Use“ ”... -
Page 18: Connections
Connections Back connections explained 1. SCART socket Inputs or outputs for external devices. Connect the SCART cable between the SCART socket on the TV and the SCART socket on the external device (decoder, VCR or DVD player) (see page 00). NOTE: If an external device is connected via the SCART socket, the TV will automatically switch to AV mode. -
Page 19: Left Side Connections Explained
Connections Left side connections explained 6. CI Slot Used to insert a CI card. A CI card allows you to view all the channels that you subscribe to. For more information, see “Conditional Access” section. USB Input To connect devices to the TV, providing fast data exchange. -
Page 20: Hdmi Connections
Connections HDMI Connections HDMI lets you enjoy high defi nition digital images and high quality sound by connecting the TV to external devices such as DVD players, set top HDMI Cable boxes or gaming equipment (fi g.1). (not supplied) Power off both the TV and the device before making any connections. -
Page 21: Side Av Connections
Connections Side AV Connections You can connect a range of optional equipment to your LCD TV. For connecting a camcorder, connect to the VIDEO IN socket and the AUDIO SOCKETS. Do not connect the camcoder to VIDEO IN socket at the same time since it can cause noise in the picture. -
Page 22: Usb Connections
Connections USB Connections 2.5” and 3.5” inch (hdd with external power supply) external hard disk drives are supported. IMPORTANT You should back up your files before making any connections to the TV set in order to avoid any possible data loss. Note that manufacturer will not be responsible for any fi... -
Page 23: Basic Features
Basic Features How to navigate menus - Selecting source Once you have connected external devices to the TV, you can select and change the input source required. To change Input Selection, use one of the following options: Option a: Press the SOURCE button on the remote control to directly select required source. -
Page 24: General Operation
Basic Features General Operation Displaying Subtitles NOTE: See Picture, Sound, Settings and With digital terrestrial broadcasting (DVB-T), some Installation Control sections on pages 16-18 for learning the functions of menu items. programmes are broadcasted with subtitles. Confi guring Date/Time Settings 1. -
Page 25: Basic Features
Basic Features Channel management 4. Select Yes if you want to move the channel and press OK. The TV sorts all stored stations in the Channel List. You can edit this channel list, set favourites or set active stations to be listed by using the Channel List options. Deleting a Channel Press MENU button to view main menu. -
Page 26: Dvd Mode Disc Playback
Basic Features DVD Mode Disc Playback When TV set is turned on, fi rst switch to DVD source by using the SOURCE button on the remote control. Switch on the TV and insert a disc to the loader ( fi g.1) 2. -
Page 27: Language Settings
Basic Features Language Settings You can operate the TV’s language settings using this NOTE: If the Country option is set to Denmark, menu. Sweden, Norway or Finland, the Language Settings Press “MENU” button and select the Settings icon by menu will function as described below: “... -
Page 28: Other Functions And Features
Basic Features Other Functions and Features “ ” or “ ” 4. Use button to set. The timer can be programmed between Off and 2.00 hours (120 minutes) Favourite Mode in steps of 30 minutes. You can create a list of favourite programmes using the favourites feature. -
Page 29: Picture Controls
Basic Features Picture Controls Reset: Resets the picture settings to factory default Confi guring Picture Settings settings. You can use different picture settings in detail. While in VGA (PC) mode, some items in Picture menu Press “MENU” button and select the Picture icon by will be unavailable. -
Page 30: Sound And Source Settings
Basic Features Sound and Source Settings Dynamic Bass: Dynamic Bass is used to increase bass Confi guring Sound Settings effect of the TV set. Sound settings can be confi gured according to your Surround Mode: Surround mode can be change as personal preferences. -
Page 31: Other Controls
Basic Features Other Controls You can enable or disable automatic upgrade by setting Automatic Scanning option. To view general confi guration preferences, select Other Settings in the Settings menu and press OK button. You can manually search for new software by selecting Scan for upgrade. -
Page 32: Advanced Features
Advanced Features Media Browser Only available when a USB device is plugged into View Style the TV. Sets default browsing mode. Sets default browsing Starting Media Browser mode as folder or fl at. Select “Directory” to display fi les in a folder or “Normal” to view fi les directly. 1. -
Page 33: Media Browser - Continued
Advanced Features Media Browser - continued Viewing Videos via USB Viewing Photos via USB 1. Select Photos from the Media Browser screen 1. Select Videos from the Media Browser screen and press OK button. and press OK button. 2. All photo fi les will be fi ltered and listed. 2. -
Page 34: Setting The Channels
Advanced Features Setting the channels “ ” or “ ” Select the desired “Search Type” using button. Manual search options will change accordingly. Accessing Installation Menu 3. Enter the multiplex (for digital manual search) or 1. Press “MENU” button on the remote control and frequency number (for analogue manual search) using “... -
Page 35: Parental Control
Advanced Features Parental Control To prohibit viewing of certain programmes, channels and Parental Settings Menu Operation & Items menus can be locked by using the parental control system. • Select an item by using “ ” or “ ” button. Use This function enables or disables the menu protection “... -
Page 36: Dvd Mode Confi Guration
Advanced Features DVD Mode Confi guration 1. While in DVD source, press DISPLAY button to Level can be adjusted to one of the eight levels. Level access DVD Setup menu. This is only possible if there “8 ADULT” adjustment let you watch all of the DVD titles is no playback. -
Page 37: Other Information
Other Information Teletext Analogue Teletext Digital Teletext (for the UK only) Teletext system transmits information such as news, 1. Press the “ ” button. The digital teletext sports and weather on your TV. Note that is the signal information appears on screen. degrades, for example in poor/adverse weather 2. -
Page 38: Specifi Cations
Other Information Specifi cations TV Broadcasting PAL/SECAM B/G D/K K’ I/I’ L/L’ Receiving Channels VHF (BAND I/III) - UHF (BAND U) - HYPERBAND Number of Preset Channels 1000 Channel Indicator On Screen Display RF Aerial Input 75 Ohm (unbalanced) Operating Voltage 220-240V AC, 50Hz. -
Page 39: Other Information
Other Information Plug replacement - UK and Ireland only Should you need to replace the plug; the wires Connect green/yellow in the power cable are coloured in the following lead to ‘E’ or - Earth way: Connect Blue – Neutral ‘N’ brown lead Brown –... -
Page 40: Other Information
Other Information The Argos Technical Helpline is here to help Technical experts are available 7 days a week • Simple help and advice on setting up your digital equipment (image). • Guidance on connecting other devices to your television such as a DVD player, Sky, home cinema system or a games console. -
Page 41: Product Support
Product Support Trouble shooting 2. Check the AV cables and connections if you have Image persistence - ghosting tried to connect a device. Please note that ghosting may occur while displaying The DVD picture quality is poor a persistent image (still or paused image). LCD TVs’ image persistence may disappear after a short time. -
Page 42: Dvd Mode Supported Fi Le Formats
Product Support DVD Mode Supported fi le formats Media File Format Supported Extension (Maximum resolution/Bit rate etc.) Video Audio MPEG1 MPEG Layer . m p g / . d a t / . 1/2/3 MPEG2 MPEG2 XviD/3ivx PCM/MP3 XviD Version up to:1.1.2 Movie MPEG4 PCM/MP3... -
Page 43: Compatible Disc Types
Product Support Compatible disc types Disc Recording Disc Size Max. Playing Time Characteristics Types Types (Logos) Audio 12cm Single sided; 240 min. DVD contains excellent sound and video due to Dolby Digital and MPEG-2 System. Double sided; 480 Video min. Various screen and audio functions can be easily selected through the on screen menu. -
Page 44: Supported File Formats For Usb Mode
Product Support Supported File Formats for USB Mode Format Remarks File Media Extension Video Audio (Maximum resolution/Bit rate etc.) .mpg, .mpeg MPEG1, 2 MPEG Layer 1/2/3 .dat MPEG1, 2 MPEG2 .vob MPEG2 .mkv H.264, MPEG1,2,4 EAC3 / AC3 MAX 1920x1080 @ 30P 20Mbit/sec MPEG4, Xvid 1.00, Movie Xvid 1.01, Xvid 1.02,... -
Page 45: Pc Input Typical Display Modes
Product Support PC Input Typical Display Modes The display has a maximum resolution of 1360x768. The following table is an illustration of some of the typical video display modes. Your TV may not support different resolutions. Supported resolution modes are listed below. If you switch your PC to an unsupported mode, a warning OSD will appear on the screen. -
Page 46: Defi Nition Of Important Terms - Dvd
Product Support Defi nition of important terms - DVD Angle Track Number Recorded onto some DVD discs are scenes, which have These numbers are assigned to the tracks, which are been simultaneously shot from a number of different recorded on Audio CDs. They enable specifi c tracks to angles (the same scene is shot from the front, from be located quickly. -
Page 47: Defi Nition Of Important Terms - Tv
Product Support Defi nition of important terms - TV Aspect Ratio The European TV standard for scanning television signals. This refers to the ratio of the width to the height of a Scart picture. A 21-pin audio/video connector found primarily on European televisions. -
Page 48: Software Upgrade
Product Support Software Upgrade Licence Notifi cations Your TV is capable of fi nding and updating new software This product incorporates copyright protection upgrades over broadcast channels. technology that is protected by U.S. patents and other intellectual property rights. Use of this copyright For broadcast channels search, TV looks the available protection technology must be authorized by Rovi channels stored in your settings. -
Page 49: Guarantee
Guarantee Product Guarantee This product is guaranteed against manufacturing defects for a period of Year This product is guaranteed for twelve months from the date of original purchase. Any defect that arises due to faulty materials or workmanship will either be replaced, refunded or repaired free of charge where possible during this period by the dealer from whom you purchased the unit. - Page 50 50206719 For any help concerning set up and use of your TV please call the Customer Helpline: 0845 604 0105 For any help concerning set up and use of your TV please call the Customer Helpline: 0845 604 0105...