Table of Contents
Advertisement
Quick Links
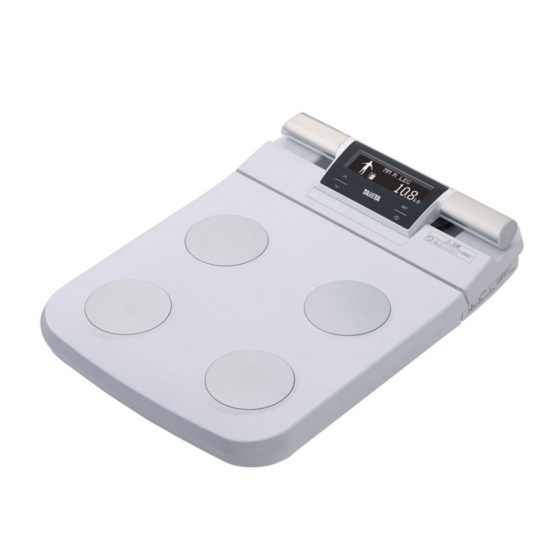
BODY COMPOSITION ANALYZER
<Usage Conditions>
: 5 to 35˚C/41 to 95˚F
Temperature Range
: 30 to 80% (non-condensing)
Relative Humidity Range
: 2,000m ASL/6500ft ASL
Max Altitude
Atmospheric Pressure Range : 86 to 106kPa
Instruction Manual
MC-580M
Please read this Instruction Manual carefully and keep it for
future reference.
Images in this manual are for illustration purposes only.
<Storage/Transport Conditions>
: -10 to 60˚C/14 to 140˚F
Temperature Range
: 10 to 90% (non-condensing)
Relative Humidity Range
Atmospheric Pressure Range : 70 to 106kPa
To avoid malfunctions, avoid storing the equipment in a place with direct sunlight,
significant temperature changes, a risk of dampness, a large amount of dust or a
risk of vibration or impact, or in the vicinity of flames.
Advertisement
Table of Contents

Related Manuals for Tanita MC-580M


Summary of Contents for Tanita MC-580M
- Page 1 Instruction Manual BODY COMPOSITION ANALYZER MC-580M Images in this manual are for illustration purposes only. <Usage Conditions> <Storage/Transport Conditions> : 5 to 35˚C/41 to 95˚F : -10 to 60˚C/14 to 140˚F Temperature Range Temperature Range : 10 to 90% (non-condensing)
- Page 2 Intended Use MC-580M is a medical device to measure body composition, such as the percentage of body fat (fat percentage), using a noninvasive method on Bioelectrical Impedance Analysis (BIA), intended for the following use - medical screening and health assessments...
-
Page 3: Table Of Contents
Contents Before Use For Your Safety ………………………………… 4 Part Names & Connection Procedure …………… 8 Power Supply ………………………………… 10 Preparations before Use ……………………… 11 How to Use Taking Measurements ……………………… 13 Taking Measurements without Registering …… 17 Measurement Results………………………… 20 Settings ………………………………………... -
Page 4: For Your Safety
The MC-580M is not diagnostic equipment. In order to make an accurate diagnosis, in addition to the result of MC-580M, the doctor in charge should conduct appropriate examinations and consider the results. - Page 5 Caution Do not allow the equipment to get wet. Avoid using on subjects with allergies to metals. Allergic reactions may be caused by the stainless steel used in the electrodes of this equipment. Do not jump on the equipment. Do not tilt the equipment. Do not use this equipment near other products that emit electromagnetic waves.
- Page 6 For Your Safety (continued) For Accurate Measurements Avoid measuring after strenuous exercise. This may cause inaccurate measurements. Please take measurements after sufficient rest. Avoid measuring after over-eating or over-drinking, or when severely dehydrated. This may cause inaccurate measurements. For greater accuracy, avoid using directly after waking up.
- Page 7 Regular Maintenance TANITA recommends that each facility conduct periodic checks of each unit. 1. Check the following at least daily: • Check that the unit is on a stable and level surface, e.g. on firm flooring, not on a thick carpet •...
-
Page 8: Part Names & Connection Procedure
Part Names & Connection Procedure Front Control Unit Grip Cable Warning Battery Box Battery Cover Be careful not to tangle the cable. Platform Electrodes×8 Display Screen Judgement Results Measurement results are judged based on five levels. Displayed Item Measurement Result Touch the icons on the touch switch to operate. - Page 9 Back Power RS-232C DC jack for AC adapter Adjustable feet × 2 *For further accuracy and security, please position the two adjustable feet on the base until they just make contact with the floor. Accessories ・Quick Start Guide ・Location Code ・AC adapter ・AC plug Symbols and their Meanings...
-
Page 10: Power Supply
Power Supply Connecting to the Power Supply When Using Batteries Note Batteries can also be used depending on the usage environment. Press the point and then slide the battery cover to remove it. *When using the AC adapter, please use it after removing the batteries. Insert batteries into the battery box. -
Page 11: Preparations Before Use
Preparations before Use Set Your Location Code When the power is first turned on with factory settings, the Location Code is displayed. Different locations across the world have varying gravitational pulls. This in turn affects the accuracy of weight readings on this product. By selecting the correct gravity setting according to your geographical location, you are guaranteed the most accurate weight readings. - Page 12 Preparations before Use Change Setting Make sure that the main power supply of the product is on. (See P.10) Press and hold the button for 5 seconds or more to display the settings screen. Press to choose the item you would like to set.
-
Page 13: Taking Measurements
Taking Measurements Pairing Note Make sure that the main power supply of the product is on before starting this operation. Bluetooth Up to three devices can be registered to this product. Turn the Bluetooth setting on, and download the app. ®... - Page 14 Taking Measurements Note Make sure that the main power supply of this product is on before starting this operation. Stepping onto the platform wakes up the LCD when it is in SLEEP mode. Launch the App Open the app on your mobile device. Start Measurements Make sure that the Control Unit displays then start measurements from the app.
- Page 15 Measure Body Weight Make sure the Control Unit reads then step barefoot onto the platform. Note Measurement results are not output to the app, printer or PC. Your weight is displayed when you hear the beeping sound. Note Do not grip the Control Unit until weight measurements are finished.
- Page 16 Taking Measurements Measurement Results while The displayed items can be switched by pressing measurement results are being displayed. Press to display the measurement results for individual parts Weight (balance of individual parts, left arm, right arm, left leg, right leg, trunk). (See P. 20) Muscle Mass Whole Body Fat Whole The measurement results are displayed after measurement is...
-
Page 17: Taking Measurements Without Registering
Taking Measurements without Registering This method is most convenient for one-time users as personal data and measurement results are not stored. Note Make sure that the main power supply of this product is on before starting this operation. Stepping onto the platform wakes up the LCD when it is in SLEEP mode. - Page 18 Taking Measurements without Registering Enter Personal Data Set personal data by selecting it with the buttons and setting it by pressing the button. Note Indicates whether “Standard mode or Athletic mode” is selected as the body type. Athletic Mode Recommended for those who are 18 years or older and meet the following conditions.
- Page 19 Measurement Results The displayed items can be switched by pressing while measurement results are being displayed. Press to display the measurement results for individual parts Weight (balance of individual parts, left arm, right arm, left leg, right leg, trunk). (See P.20) Muscle Mass Whole Note Body Fat Whole...
-
Page 20: Measurement Results
Measurement Results Measurement Results by Part The displayed items can be switched by pressing while measurement results are being displayed. Press to display the measurement results for individual parts (balance of individual parts, left arm, right arm, left leg, right leg, trunk). ■BODY FAT BALANCE ■BODY FAT Left ARM ■BODY FAT Right ARM... - Page 21 Judgment Results Review ratings for fat percentage and muscle mass for the whole body and by part. Total Body Fat Ratio Rating Underfat -Healthy +Healthy Overfat Obese Underfat -Healthy +Healthy Overfat Obese Body Fat Ratio Rating by Part Total Muscle Mass Rating -Average Average +Average...
-
Page 22: Settings
Settings Press and hold the button for 5 seconds or more to begin from the start screen. Select the item to be set with the buttons once the settings screen is displayed. Press the button to return to the measurement screen. Note Do not place anything on the platform while setting. - Page 23 Select the hour using the buttons then press the button. The product beeps to indicate this is completed. Select the minutes using the buttons then press the button. The product beeps to indicate this is completed. CLOTHES-WEIGHT Enter the preset tare value (clothes weight) The tare value range is 0.0 to 10.0kg / 0 to 20.0lb button when ...
- Page 24 Settings Setting LCD Auto-Sleep Set the amount of time to elapse before the LCD turns off and whether LCD SLEEP mode is enabled or disabled. Press the button when is displayed. Select the time before entering SLEEP mode using the buttons then press the button.
- Page 25 Setting Output Connect this product using an RS-232C cable to print or output measurement results to a PC. Press the button when is displayed. Use the buttons to enable or disable printer or PC output then press the button. The product beeps then proceeds to auto print settings.
- Page 26 Settings Setting Control Mode Select "PC" in "Control Mode" to send registered personal information from your PC when taking measurements. Press the button when is displayed. Select using the buttons then press the button. The product beeps to indicate this is completed. Note If you select "PC"...
-
Page 27: Troubleshooting
Troubleshooting If you are experiencing problems, please check the following before asking for repairs. Problem Solution •Hold the handgrips and electrodes firmly with fingers and palms. Impedance •Stand barefoot on the platform when measuring. measurement •If the soles of the feet are dry, use a dropper to Error apply about 0.5 mL of water onto the platform before measurement. -
Page 28: Specifications
Specifications MC-580M Model number Classification MDD: Class IIa CONTINUOUS OPERATION AC adapter (Class II) Input: 100-240V AC 50-60Hz 0.32-0.19A Output: 9V DC 1.2A Power source 6V DC Battery LR6 (AA alkaline battery) ×4 (Not included) Electric current range 25VA Measurement system... - Page 29 Female/Male Gender Body type Standard/Athletic* 5 to 99 years Input items 90.0 to 249.9cm (0.1cm increments)/ Height 3'0.0" to 7'11.5" (0.5inch increments) 0.0 to 10.0kg (0.1kg increments) Clothes weight 0.0 to 20.0lb (0.2lb increments) 0.1kg/0.2lb increments Total & Segmental Muscle Mass Total &...
- Page 30 Specifications The following data can be output using a supported app. Date Time Standard/Athletic* Body Type Female/Male Gender 5 to 99 years 90.0 to 249.9cm (0.1cm increments)/ Height 3'0.0" to 7'11.5" (0.5inch increments) 0.0 to 10.0kg (0.1kg increments) Clothes Weight 0.0 to 20.0lb (0.2lb increments) 2.0 to 270.0kg (0.1kg increments)/ Weight...
- Page 31 ® scrapping the apparatus, the batteries should be removed from it and Bluetooth SIG, Inc. and any use of such marks by TANITA Corporation is under deposited at the collecting points as well. license. Other trademarks and trade names are those of their respective owners.