Table of Contents
Advertisement
Quick Links
Advertisement
Table of Contents

Related Manuals for Lenovo ThinkPad T14s


Summary of Contents for Lenovo ThinkPad T14s
- Page 1 T14s Gen 2 and X13 Gen 2 User Guide...
- Page 2 • Setup Guide First Edition (March 2021) © Copyright Lenovo 2021. LIMITED AND RESTRICTED RIGHTS NOTICE: If data or software is delivered pursuant to a General Services Administration “GSA” contract, use, reproduction, or disclosure is subject to restrictions set forth in Contract No. GS-...
-
Page 3: Table Of Contents
Connect to a Bluetooth-enabled device ..Call Lenovo ....Use a smart card (for selected models) .. - Page 4 T14s Gen 2 and X13 Gen 2 User Guide...
-
Page 5: About This Documentation
• Depending on the model, some optional accessories, features, software programs, and user interface instructions might not be applicable to your computer. • Documentation content is subject to change without notice. To get the latest documentation, go to https:// pcsupport.lenovo.com © Copyright Lenovo 2021... - Page 6 T14s Gen 2 and X13 Gen 2 User Guide...
-
Page 7: Chapter 1. Meet Your Computer
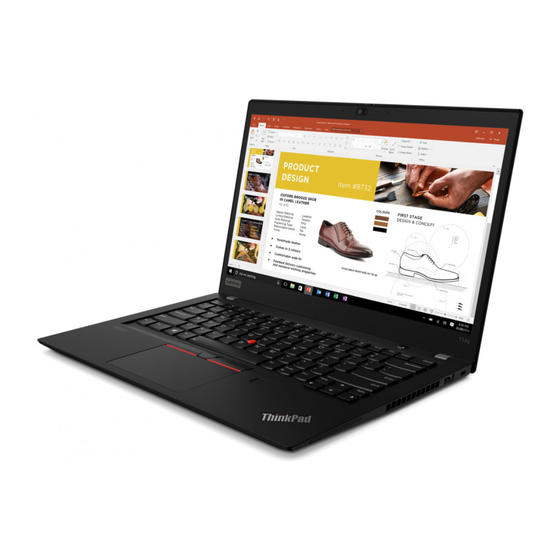
Chapter 1. Meet your computer ThinkPad T14s Gen 2 and ThinkPad X13 Gen 2 might be shipped with different microprocessors, namely ® Intel and Advanced Micro Devices (AMD). Hereby Intel models and AMD models are used to distinguish computer models with different microprocessors. - Page 8 Trackpad Near field communication (NFC) mark* Speaker TrackPoint buttons * for selected models Webcam privacy shutter: Slide Webcam privacy shutter to cover or uncover the camera lens. It is designed to protect your privacy. T14s Gen 2 and X13 Gen 2 User Guide...
-
Page 9: Side View
Side view Intel models: AMD models: ® USB-C (Thunderbolt™ 4) power USB-C (3.2 Gen 2) power connector connector USB-C (Thunderbolt 4) connector USB-C (3.2 Gen 2) connector Chapter 1 Meet your computer... - Page 10 Ethernet extension connector Gen 2 HDMI™ connector Always On USB 3.2 connector Gen 1 Audio connector Smart-card slot* USB 3.2 connector Gen 1 Security-lock slot * for selected models Notes: • For Intel models, the Ethernet extension connector Gen 2 and the adjoining USB-C (Thunderbolt 4) connector cannot be used simultaneously.
-
Page 11: Bottom View
Bottom view Emergency-reset hole Emergency-reset hole If the computer stops responding and you cannot turn it off by pressing the power button, reset your computer: 1. Disconnect your computer from ac power. 2. Insert a straightened paper clip into the hole to cut off power supply temporarily. 3. -
Page 12: Rear View
Rear view Nano-SIM-card tray* * for selected models T14s Gen 2 and X13 Gen 2 User Guide... -
Page 13: Usb Connectors
• Connect to USB-C accessories to help expand your computer • USB-C (3.2 Gen 2) connector functionality. To purchase USB-C accessories, go to https:// www.lenovo.com/accessories • Thunderbolt 3 connector (USB-C) • Thunderbolt 4 connector (USB-C) Statement on USB transfer rate... - Page 14 T14s Gen 2 and X13 Gen 2 User Guide...
-
Page 15: Chapter 2. Get Started With Your Computer
Your computer helps you connect to the world through a wired or wireless network. Connect to Wi-Fi networks 1. Click the system menu arrow on the top right. A list of available wireless networks is displayed. © Copyright Lenovo 2021... -
Page 16: Connect To The Wired Ethernet
To connect your computer to a local network, you need a ThinkPad Ethernet Extension Adapter Gen 2. The Ethernet extension adapter is available as an option and shipped with some computer models. You can purchase one from Lenovo at https://www.lenovo.com/accessories. Notes: •... -
Page 17: Use The Trackpoint Pointing Device
Enable / disable speakers Decrease volume Increase volume Enable / disable microphones Darken display Brighten display Manage external displays Enable / disable wireless Open Settings window Enable / disable Bluetooth Invoke the special function printed as an icon on each key or standard function of F1–F12 function keys. - Page 18 Use the TrackPoint pointing device 1. Pointing stick Use your index finger or middle finger to apply pressure to the pointing-stick nonslip cap in any direction parallel to the keyboard. The pointer on the screen moves accordingly but the pointing stick itself does not move.
-
Page 19: Use The Trackpad
Use the trackpad The entire trackpad surface is sensitive to finger touch and movement. You can use the trackpad to perform all the pointing, clicking, and scrolling functions of a traditional mouse. Tap on the surface of the trackpad with one finger to perform the left-click action, with two fingers to perform the right-click action. Use the touch gestures Tap anywhere on the trackpad with one finger to select or open an item. -
Page 20: Use The Touch Screen (For Selected Models)
Use the touch screen (for selected models) If your computer display supports the multi-touch function, you can navigate the screen with simple touch gestures. Note: Some gestures might not be available when you are using certain apps. Tap once to single click Tap twice quickly to double-click Tap and hold to right-click Slide to scroll through items... -
Page 21: Connect To An External Display
Swipe from the right: open action center Swipe from the left: view all open windows Drag Swipe downwards shortly: show title bar Swipe downwards: close the current app Maintenance tips: • Turn off the computer before cleaning the touch screen. •... - Page 22 2. Select the display that you want to configure. 3. Change display settings of your preference. You can change the settings for both the computer display and the external display. For example, you can define which one is the main display and which one is the secondary display. You also can change the resolution and orientation.
-
Page 23: Chapter 3. Explore Your Computer
• For Intel models, both Thunderbolt 4 connectors (USB-C) on the computer feature the Lenovo-unique P- to-P 2.0 charging function. • For AMD models, both USB-C (3.2 Gen 2) connectors on the computer feature the Lenovo-unique P-to-P 2.0 charging function. -
Page 24: Connect To A Bluetooth-Enabled Device
B. • When ac power is available: Note: The actual charging speed using the Lenovo-unique P-to-P 2.0 charging function varies depending on many factors, such as the remaining battery power of the computers, the wattage of the ac power adapter, and whether you are using the computers. -
Page 25: Enabling Nvidia Proprietary Drivers In Fedora (For Selected Models)
Purchase options Lenovo has a number of hardware accessories and upgrades to help expand the capabilities of your computer. Options include memory modules, storage devices, network cards, port replicators or docking stations, batteries, power adapters, keyboards, mice, and more. -
Page 26: Docking Station
: You can remove the system lock from the system-lock slot. Note: The ThinkPad Basic Docking Station does not ship with a system lock installed. You can contact Lenovo sales to purchase a system lock with the option part number 4XE0Q56388. 2. Key lock indicator This indicator turns on when the system lock key is in the locked position. - Page 27 6. Docking-station connector Connect the computer to the docking station. Hold and secure the computer to the docking station. 7. Hooks Slide the latch to attach or detach the computer. 8. Latch Rear view Figure 1. ThinkPad Basic Docking Station Figure 2.
- Page 28 Connectors ThinkPad Basic Docking ThinkPad Pro Docking ThinkPad Ultra Docking Station Station Station 12. Always On USB 3.2 √ connector Gen 2 13. USB 3.2 connector Gen √ Note: The security-lock slot supports cable locks that conform to the Kensington MicroSaver lock standards (using T-bar locking technology) or MiniSaver lock standards (using Cleat locking technology).
- Page 29 4. Align the top-left corner of the computer with the guide post of the docking station. Attach your computer to the docking station as shown until you hear a click. Slide the latch in the direction as shown 5. Check the docking status indicator. The docking status indicator turns on when the computer is successfully docked.
- Page 30 1. Turn the system lock key to the unlocked position ( 2. Slide the latch in the direction as shown to release the computer, and then grasp both sides of the computer to remove it Connect multiple external displays You can connect multiple external displays to a supported docking station. To ensure that the multiple displays work correctly, observe the following guidelines and connect the external displays to the appropriate connectors.
-
Page 31: Chapter 4. Secure Your Computer And Information
Note: The slot supports cable locks that conform to the Kensington NanoSaver lock standards using Cleat™ locking technology. You are responsible for evaluating, selecting, and implementing the locking device and security feature. Lenovo is not responsible for the locking device and security feature. You can purchase the cable locks at https://smartfind.lenovo.com Use the fingerprint reader (for selected models) If your computer comes with a fingerprint reader, you can use it to enroll your fingerprints. -
Page 32: Use Privacy Protection (For Selected Models)
Depending on the model, your computer might support the PrivacyGuard feature which keeps you secure without compromising your viewing experience. https://support.lenovo.com/solutions/featurevideo Use the PrivacyGuard feature When the feature is enabled, it darkens screen and reduces visibility from side angles to protect screen content against visual hacking. -
Page 33: Set, Change, And Remove A Password
Note: When you are prompted to enter the password, enter the correct supervisor password if a supervisor password has been set, or enter the correct system management password if no supervisor password has been set. Otherwise, you cannot change the configurations in the following steps. 2. -
Page 34: Use Power Loss Protection Function (For Selected Models)
5. In the Changes have been saved window, press Enter. 6. Press F10 to save changes and exit the UEFI BIOS menu. • If you have not set a supervisor password, contact a Lenovo authorized service provider to have the power-on password removed. -
Page 35: Chapter 5. Configure Advanced Settings
Note: No bootable device is displayed if the computer cannot start from any devices or the operating system cannot be found. 3. Set the startup sequence as desired. 4. Press F10 to save the changes and exit. To change the startup sequence temporarily: © Copyright Lenovo 2021... -
Page 36: Set The System Date And Time
Download and install the latest UEFI BIOS update package by one of the following methods: • Use the fwupdmgr or software utility to check LVFS for firmware updates. • Go to https://pcsupport.lenovo.com and select the entry for your computer. Then, follow the on-screen instructions to download and install the latest UEFI BIOS update package. -
Page 37: Chapter 6. Cru Replacement
If you intend on installing a CRU, Lenovo will ship the CRU to you. CRU information and replacement instructions are shipped with your product and are available from Lenovo at any time upon request. You might be required to return the defective part that is replaced by the CRU. -
Page 38: Replace A Cru
2. Turn off the computer and disconnect the computer from ac power and all connected cables. 3. Close the computer display and turn over the computer. Removal procedure for ThinkPad T14s Gen 2 T14s Gen 2 and X13 Gen 2 User Guide... - Page 39 Installation procedure for ThinkPad T14s Gen 2 Removal procedure for ThinkPad X13 Gen 2 Chapter 6 CRU replacement...
-
Page 40: M.2 Solid-State Drive
Installation procedure for ThinkPad X13 Gen 2 Troubleshooting If the computer does not start up after you reinstall the base cover assembly, disconnect the ac power adapter and then reconnect it to the computer. M.2 solid-state drive Prerequisite Before you start, read and print the following instructions. - Page 41 Removal procedure for the long M.2 solid-state drive and its bracket (if any) • Type 1 • Type 2 Chapter 6 CRU replacement...
-
Page 42: Wireless-Wan Card (For Selected Models)
The following information is only for the computer with user-installable modules. Ensure that you use only a Lenovo-authorized wireless module specifically tested for this computer model. Otherwise, the computer will generate an error-code beep sequence when you turn on the computer. - Page 43 • Type 2 • Type 3 Note: During installation, ensure that you connect the cables with different colors to the corresponding connectors on the card according to the illustrations above: the orange cable to the connector labeled Chapter 6 CRU replacement...
-
Page 44: Keyboard (For Thinkpad X13 Gen 2)
ORANGE, the blue cable to the connector labeled BLUE, the white and grey cable to the connector labeled WHITE GREY, and the black and grey cable to the connector labeled BLACK GREY. Keyboard (for ThinkPad X13 Gen 2) Prerequisite Before you start, read Generic Safety and Compliance Notices and print the following instructions. For access, do the following: 1. - Page 45 Installation procedure Note: You might be instructed to slide the keyboard frame forward or backward in some of the following steps. In this case, ensure that you do not press or hold the keys while sliding the keyboard frame. Otherwise, the keyboard frame cannot be moved. Chapter 6 CRU replacement...
- Page 46 T14s Gen 2 and X13 Gen 2 User Guide...
-
Page 47: Chapter 7. Help And Support
2. In the Touchpad section, turn off the Touchpad control. Use the Software application to check for updates. It should notify when new Where can I get the latest device firmware is available on LVFS ( https://fwupd.org/ drivers and UEFI BIOS? © Copyright Lenovo 2021... -
Page 48: Error Messages
Error messages If you see a message that is not included in the following table, record the error message first, then shut down the computer and call Lenovo for help. See “Lenovo Customer Support Center” on page 46. Message Solution The computer turned off because the battery power is low. -
Page 49: Beep Errors
Beep errors Lenovo SmartBeep technology enables you to decode beep errors with your smartphone when a black screen occurs with beeps from your computer. To decode the beep error with Lenovo SmartBeep technology: 1. Go to or scan the following QR Code. -
Page 50: Self-Help Resources
The LLW also is preinstalled on the computer. To access the LLW, go to /opt/Lenovo If you cannot view the LLW either from the Web site or from your computer, contact your local Lenovo office or reseller to obtain a printed version of the LLW. -
Page 51: Call Lenovo
General Public License and/or the Lesser General Public License (or any other license requiring us to make a written offer to provide corresponding source code to you) from Lenovo for a period of three years without charge except for the cost of media, shipping, and handling, upon written request to Lenovo. This offer is valid to anyone in receipt of this Device. -
Page 52: Lenovo Customer Support Center
• Lenovo hardware repair - If the problem is determined to be caused by Lenovo hardware under warranty, trained service personnel are available to provide the applicable level of service. -
Page 53: Purchase Additional Services
• https://www.lenovo.com/warranty/llw_02 • https://pcsupport.lenovo.com/warrantylookup Purchase additional services During and after the warranty period, you can purchase additional services from Lenovo at https:// pcsupport.lenovo.com/warrantyupgrade Service availability and service name might vary by country or region. Chapter 7 Help and support... - Page 54 T14s Gen 2 and X13 Gen 2 User Guide...
-
Page 55: Appendix A. Ergonomic Information
It might not be possible to observe the best ergonomic practices when you are using your computer while on the move or in a casual setting. Regardless of the setting, try to observe as many of the tips as possible. © Copyright Lenovo 2021... - Page 56 Many product solutions are available to help you modify and expand your computer to best suit your needs. You can find some of these options at https://www.lenovo.com/accessories Explore your options for docking solutions and external products that provide the adjustability and features that you want.
-
Page 57: Appendix B. Compliance Information
ThinkPad T14s Gen 2 HPD** ThinkPad T14s Gen 2 LTE1** ThinkPad T14s Gen 2 LTE2** ThinkPad T14s Gen 2 5G** ThinkPad T14s Gen 2 LTE1 HPD** ThinkPad T14s Gen 2 LTE2 HPD** ThinkPad T14s Gen 2 5G HPD** ThinkPad X13 Gen 2... - Page 58 Wireless WAN antenna (MIMO 1)* * for selected models Federal Communications Commission (FCC) Supplier’s Declaration of Conformity The following information refers to ThinkPad T14s Gen 2 and ThinkPad X13 Gen 2. T14s Gen 2 and X13 Gen 2 User Guide...
- Page 59 • Connect the equipment into an outlet on a circuit different from that to which the receiver is connected. • Consult an authorized dealer or service representative for help. Lenovo is not responsible for any radio or television interference caused by using other than recommended cables and connectors or by unauthorized changes or modifications to this equipment. Unauthorized changes or modifications could void the user’s authority to operate the equipment.
- Page 60 국가 보고 및 테스트 요구 사항과 네트워크 대역에 따라 다를 수 있습니다. 본 장치 는 사람의 신체에서 20mm 이상의 거리에서 사용할 수 있습니다. Operating environment Maximum altitude (without pressurization) 3048 m (10 000 ft) Temperature • Operating: 5°C to 35°C (41°F to 95°F) •...
-
Page 61: Appendix C. Notices And Trademarks
Lenovo representative for information on the products and services currently available in your area. Any reference to a Lenovo product, program, or service is not intended to state or imply that only that Lenovo product, program, or service may be used. Any functionally equivalent product, program, or service that does not infringe any Lenovo intellectual property right may be used instead. - Page 62 Furthermore, some measurements may have been estimated through extrapolation. Actual results may vary. Users of this document should verify the applicable data for their specific environment. This document is copyrighted by Lenovo and is not covered by any open source license, including any ® Linux agreement(s) which may accompany software included with this product.