Table of Contents
Advertisement
Quick Links
Advertisement
Table of Contents

Related Manuals for Lenovo V55t Gen 2


Summary of Contents for Lenovo V55t Gen 2
- Page 1 Lenovo V55t Gen 2 Hardware Maintenance Manual...
- Page 2 First Edition (July 2021) © Copyright Lenovo 2021. LIMITED AND RESTRICTED RIGHTS NOTICE: If data or software is delivered pursuant to a General Services Administration “GSA” contract, use, reproduction, or disclosure is subject to restrictions set forth in Contract No. GS-...
-
Page 3: Table Of Contents
Diagnostics ....Safety inspection guide ... . . 3 Lenovo diagnostic tools ..Handling electrostatic discharge-sensitive UEFI diagnostic program . - Page 4 Notices and trademarks ..1 System board ....Lenovo V55t Gen 2 Hardware Maintenance Manual...
- Page 5 Use this manual along with the advanced diagnostic tests to troubleshoot problems. Important: This manual is intended only for trained service technicians who are familiar with Lenovo computers. Use this manual along with the advanced diagnostic tests to troubleshoot problems effectively.
-
Page 7: Chapter 1. Important Safety Information
Avoid contact with hot components inside the computer. During operation, some components become hot enough to burn the skin. Before you open the computer cover, turn off the computer, disconnect power, and wait approximately 10 minutes for the components to cool. © Copyright Lenovo 2021... -
Page 8: Electrical Safety
• Do not touch live electrical circuits with the reflective surface of a plastic dental mirror. The surface is conductive; such touching can cause personal injury and machine damage. Lenovo V55t Gen 2 Hardware Maintenance Manual... -
Page 9: Safety Inspection Guide
• Do not service the following parts with the power on when they are removed from their normal operating places in a machine: – Power supply units – Pumps – Blowers and fans – Motor generators and similar units. (This practice ensures correct grounding of the units.) •... -
Page 10: Handling Electrostatic Discharge-Sensitive Devices
The caution and danger safety notices in this section are provided in the following languages: • English • Arabic • Brazilian/Portuguese • Chinese (simplified) • Chinese (traditional) • French • German • Hebrew Lenovo V55t Gen 2 Hardware Maintenance Manual... - Page 11 • Italian • Korean • Spanish DANGER Electrical current from power, telephone and communication cables is hazardous. To avoid a shock hazard: • Do not connect or disconnect any cables or perform installation, maintenance, or reconfiguration of this product during an electrical storm. •...
- Page 12 The device also might have more than one power cord. To remove all electrical current from the device, ensure that all power cords are disconnected from the power source. Lenovo V55t Gen 2 Hardware Maintenance Manual...
- Page 13 Chapter 1 Important safety information...
- Page 14 ≥18 kg (37 lb) ≥32 kg (70.5 lb) ≥55 kg (121.2 lb) Lenovo V55t Gen 2 Hardware Maintenance Manual...
- Page 15 PERIGO A corrente elétrica proveniente de cabos de alimentação, de telefone e de comunicações é perigosa. Para evitar risco de choque elétrico: • Não conecte nem desconecte nenhum cabo ou execute instalação, manutenção ou reconfiguração deste produto durante uma tempestade com raios. •...
- Page 16 O dispositivo também pode ter mais de um cabo de alimentação. Para remover toda a corrente elétrica do dispositivo, assegure que todos os cabos de alimentação estejam desconectados da fonte de alimentação. Lenovo V55t Gen 2 Hardware Maintenance Manual...
- Page 17 Chapter 1 Important safety information...
- Page 18 Lenovo V55t Gen 2 Hardware Maintenance Manual...
- Page 19 Chapter 1 Important safety information...
- Page 20 (sauf instruction contraire mentionnée dans les procédures d'installation et de configuration). • Lorsque vous installez, que vous déplacez, ou que vous manipulez le présent produit ou des périphériques qui lui sont raccordés, reportez-vous aux instructions ci-dessous pour connecter et déconnecter les différents cordons. Lenovo V55t Gen 2 Hardware Maintenance Manual...
- Page 21 Connexion Déconnexion 1. Mettez les unités HORS TENSION. 1. Mettez les unités HORS TENSION. 2. Commencez par brancher tous les cordons sur les 2. Débranchez les cordons d'alimentation des prises. unités. 3. Débranchez les câbles d'interface des connecteurs. 3. Branchez les câbles d'interface sur des 4.
- Page 22 • Die Signalkabel nach Möglichkeit einhändig anschließen oder lösen, um einen Stromschlag durch Berühren von Oberflächen mit unterschiedlichem elektrischem Potenzial zu vermeiden. • Geräte niemals einschalten, wenn Hinweise auf Feuer, Wasser oder Gebäudeschäden vorliegen. Lenovo V55t Gen 2 Hardware Maintenance Manual...
- Page 23 • Die Verbindung zu den angeschlossenen Netzkabeln, Telekommunikationssystemen, Netzwerken und Modems ist vor dem Öffnen des Gehäuses zu unterbrechen, sofern in den Installations- und Konfigurationsprozeduren keine anders lautenden Anweisungen enthalten sind. • Zum Installieren, Transportieren und Öffnen der Abdeckungen des Computers oder der angeschlossenen Einheiten die Kabel gemäß...
- Page 24 Mit dem Netzschalter an der Einheit und am Netzteil wird die Stromversorgung für die Einheit nicht unterbrochen. Die Einheit kann auch mit mehreren Netzkabeln ausgestattet sein. Um die Stromversorgung für die Einheit vollständig zu unterbrechen, müssen alle zum Gerät führenden Netzkabel vom Netz getrennt werden. Lenovo V55t Gen 2 Hardware Maintenance Manual...
- Page 25 Chapter 1 Important safety information...
- Page 26 PERICOLO La corrente elettrica proveniente dai cavi di alimentazione, del telefono e di comunicazione può essere pericolosa. Per evitare il rischio di scosse elettriche: Lenovo V55t Gen 2 Hardware Maintenance Manual...
- Page 27 • Non collegare o scollegare qualsiasi cavo oppure effettuare l'installazione, la manutenzione o la riconfigurazione del prodotto durante un temporale. • Collegare tutti i fili elettrici a una presa di alimentazione correttamente cablata e dotata di messa a terra. • Collegare alle prese elettriche appropriate tutte le apparecchiature che verranno utilizzate per questo prodotto.
- Page 28 Il pulsante di controllo dell'alimentazione presente sull'unità e l'interruttore dell'alimentatore non disattivano l'alimentazione corrente fornita all'unità. E' possibile che l'unità disponga di più cavi di alimentazione. Per disattivare l'alimentazione dall'unità, accertarsi che tutti i cavi di alimentazione siano scollegati dalla fonte di alimentazione. Lenovo V55t Gen 2 Hardware Maintenance Manual...
- Page 29 Chapter 1 Important safety information...
- Page 30 • Cualquier equipo que se conecte a este producto también debe conectarse a tomas de corriente debidamente cableadas. • Siempre que sea posible, utilice una sola mano para conectar o desconectar los cables de señal. Lenovo V55t Gen 2 Hardware Maintenance Manual...
- Page 31 • No encienda nunca un equipo cuando hay señales de fuego, agua o daños estructurales. • Desconecte los cables de alimentación, los sistemas de telecomunicaciones, las redes y los módems conectados antes de abrir las cubiertas de los dispositivos, a menos que se indique lo contrario en los procedimientos de instalación y configuración.
- Page 32 Además, el dispositivo podría tener más de un cable de alimentación. Para suprimir toda la corriente eléctrica del dispositivo, asegúrese de que todos los cables de alimentación estén desconectados de la toma de corriente. Lenovo V55t Gen 2 Hardware Maintenance Manual...
-
Page 33: Chapter 2. Important Service Information
• Do not drop a system board or apply any excessive force to it. • Avoid rough handling of any kind. • Avoid bending a system board and hard pushing to prevent cracking at each Ball Grid Array (BGA) chipset. © Copyright Lenovo 2021... -
Page 34: How To Use Error Codes
Dynamic Configure To Order (CTO) model This model provides the ability for a customer to configure a Lenovo solution from a Web site, and have this configuration sent to fulfillment, where it is built and shipped directly to the customer. The machine label and eSupport will load these products as the 4-character MT, 4-character model, and 2-character country code. -
Page 35: Chapter 3. Product Overview
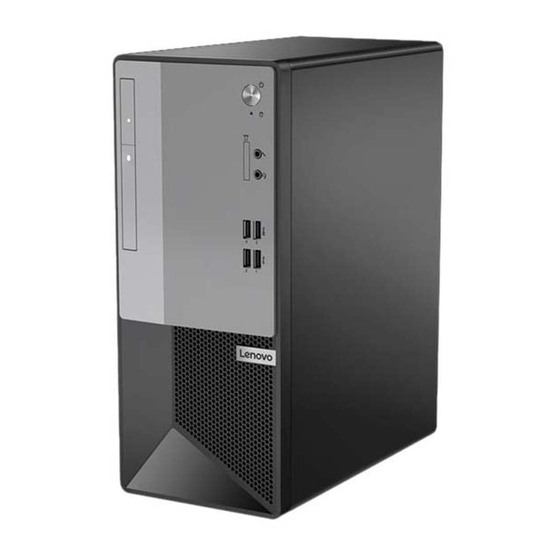
4. Power button with power indicator 5. Storage drive activity indicator 6. Microphone connector 7. SD-card slot* 8. Headset connector 9. USB 3.2 connectors Gen 1 10. USB 3.2 connectors Gen 2 * for selected models © Copyright Lenovo 2021... -
Page 36: Rear
4. Ethernet connector 5. USB 2.0 connectors 6. Power cord connector 7. Smart cable clip slots* 8. Serial connector* 9. PCI Express card area 10. Padlock loop* 11. Security-lock slot* * for selected models Lenovo V55t Gen 2 Hardware Maintenance Manual... -
Page 37: Chapter 4. Service Checkout And Symptom-To-Fru Index
• Machine type and model • Processor or hard disk drive upgrades • Failure symptom – Do diagnostics indicate a failure? – What, when, where, single, or multiple systems? – Is the failure repeatable? – Has this configuration ever worked? © Copyright Lenovo 2021... -
Page 38: Symptom-To-Fru Index
The start-up drive is not in the boot sequence in Check the configuration and ensure that the start-up drive configuration. is in the boot sequence. No operating system installed on the boot drive. Install an operating system on the boot drive. Lenovo V55t Gen 2 Hardware Maintenance Manual... -
Page 39: Power Supply Problems
Error FRU/Action The boot sector on the startup drive is corrupted. The drive must be formatted. Do the following: 1. Attempt to back up the data on the failing hard disk drive. 2. Using the operating system programs, format the hard disk drive. -
Page 40: Post Error Codes
Press F10 to exit. 1762 Storage device configuration change This error message is displayed has occurred when a hard disk drive change or an optical drive change has been made. Press F10 to exit. Lenovo V55t Gen 2 Hardware Maintenance Manual... -
Page 41: Miscellaneous Error Conditions
8998 Not enough shadow RAM resources This error message is displayed for OPTION ROM, not all devices when the shadow RAM resources initialized. Suggest to remove some for option ROM are insufficient. add-on cards, or change to UEFI If the legacy option ROM is mode in BIOS setup. - Page 42 1. Check the startup sequence. 2. Check the network adapter LED status. Serial or parallel connector device failure (system board 1. External Device Self-Test OK? connector) 2. External Device 3. Cable 4. System Board Lenovo V55t Gen 2 Hardware Maintenance Manual...
-
Page 43: Undetermined Problems
Message/Symptom FRU/Action Serial or parallel connector device failure (adapter 1. External Device Self-Test OK? connector) 2. External Device 3. Cable 4. Alternate Adapter 5. System Board Some or all keys on the keyboard do not work 1. Keyboard 2. Keyboard Cable 3. - Page 44 Lenovo V55t Gen 2 Hardware Maintenance Manual...
-
Page 45: Chapter 5. Troubleshooting, Diagnostics, And Recovery
4. Run the diagnostic program. See “Diagnostics” on page 47. 5. Recover your operating system. See “Recovery” on page 48. 6. If the problem persists, contact Lenovo. Troubleshooting Use the troubleshooting information to find solutions to problems that have definite symptoms. -
Page 46: Startup Problems
– Ensure that the Optane memory is not damaged. Check the Optane memory using diagnostic tools. The computer beeps multiple times before Ensure that no keys are stuck. the operating system starts up. Lenovo V55t Gen 2 Hardware Maintenance Manual... -
Page 47: Audio Problems
Audio problems Problem Solution • If you are using powered external speakers that have an On/Off control, ensure that: – The On/Off control is set to the On position. – The speaker power cable is connected to a properly grounded, functional ac electrical outlet. - Page 48 • Enable the Wi-Fi feature in Windows Settings. 1. Open the Start menu. 2. Click Settings ➙ Network & Internet ➙ Wi-Fi. 3. Enable the Wi-Fi feature. • Update or reinstall the Wi-Fi driver. Lenovo V55t Gen 2 Hardware Maintenance Manual...
- Page 49 Problem Solution • Enable the Bluetooth feature in UEFI BIOS. • Enable all Bluetooth devices. 1. Right-click the Start button to open the Start context menu. 2. Click Device Manager. Type the administrator password or provide confirmation if prompted. 3. Expand Bluetooth to display all Bluetooth devices. Right-click each Bluetooth device, and then click Enable device.
-
Page 50: Performance Problems
Change or Uninstall. • Right-click a blank area on the taskbar and open Task Manager. The free memory space is insufficient. Then, end some tasks you are not performing. • Install additional memory modules. Lenovo V55t Gen 2 Hardware Maintenance Manual... -
Page 51: Storage Drive Problems
Storage drive problems Problem Solution • Ensure that the signal cables and power cables for all the storage drives are connected correctly. • Ensure that the computer is configured correctly to support the storage drives. Some or all storage drives are missing from –... -
Page 52: Serial Connector Problems
Refer to the documentation that comes with the USB device for more information. • Disconnect and reconnect the USB connector to reset the USB device. • Ensure that the Smart USB Protection function is disabled in UEFI BIOS. Lenovo V55t Gen 2 Hardware Maintenance Manual... -
Page 53: Software Problems
Use diagnostic solutions to test hardware components and report operating-system-controlled settings that interfere with the correct operation of your computer. Lenovo diagnostic tools For information about Lenovo diagnostic tools, go to: https://pcsupport.lenovo.com/lenovodiagnosticsolutions UEFI diagnostic program A UEFI diagnostic program is preinstalled on the computer. It enables you to test memory modules and internal storage devices, view system information, and check and recover bad sectors on internal storage devices. -
Page 54: The Vantage App
If you are unable to isolate and resolve the problem after running the Vantage app, save and print the log files created by the program. You might need the log files when you speak to a Lenovo technical support representative. -
Page 55: Use Advanced Options
Windows recovery programs are damaged. If you did not create a recovery USB drive as a precautionary measure, you can contact Lenovo Customer Support Center and purchase one from Lenovo. For a list of the Lenovo Support phone numbers for your country or region, go to: https://pcsupport.lenovo.com/supportphonelist Create a recovery USB drive Attention: The creation process deletes anything stored on the USB drive. -
Page 56: Update The Device Driver
• From Windows Update: Note: The device drivers provided by Windows Update might not be tested by Lenovo. It is recommended that you get device drivers from Lenovo. 1. Open the Start menu. -
Page 57: Chapter 6. Hardware Removal And Installation
Common tool Isolated tweezers Common tool Hexagonal socket Common tool Silicone grease Consumable tool Polyamide tape Consumable tool Mylar tape Consumable tool Eraser Consumable tool Electrical tape Consumable tool Double-sided tape Consumable tool Conductive tape Consumable tool © Copyright Lenovo 2021... -
Page 58: Major Frus And Crus
• FRUs: Refer to parts that must be installed or replaced only by trained service technicians. If customers choose to replace the FRUs by themselves, the product warranty might be affected. Lenovo V55t Gen 2 Hardware Maintenance Manual... - Page 59 Number Description Self-service CRU Optional-service CRU Heat sink and fan assembly Memory module Microprocessor System board Coin-cell battery Wi-Fi card* Wi-Fi card shield* M.2 solid-state drive* Hard disk drive cable Front Wi-Fi antenna and cable* Thermal sensor Card reader* Card reader bracket* Front I/O bracket Optical drive cable* Internal speaker*...
- Page 60 For detailed FRU and CRU information, such as the FRU part numbers and supported computer models, go http://www.lenovo.com/serviceparts-lookup Lenovo V55t Gen 2 Hardware Maintenance Manual...
-
Page 61: System Board
System board 4-pin power connector Microprocessor fan connector Memory slot (DIMM2) Memory slot (DIMM4) Power button connector Internal speaker connector 10-pin power connector 4-pin SATA power connectors Auxiliary fan connector SATA 3.0 connectors M.2 solid-state drive slot M.2 Wi-Fi card slot Clear CMOS /Recovery jumper Thermal sensor connector Dot LED... -
Page 62: External Options
1. Turn off the computer and remove all connected devices and cables. 2. Disconnect all power cords from electrical outlets and disconnect all cables from the computer. 3. Unlock any locking device that secures the computer cover. Removal steps Lenovo V55t Gen 2 Hardware Maintenance Manual... -
Page 63: Front Bezel
Front bezel Prerequisite Before you start, read Generic Safety and Compliance Notices, and print the following instructions. For access, do the following: 1. Remove the computer cover. See “Computer cover” on page 56. Replacing steps Optical drive Prerequisite Before you start, read Generic Safety and Compliance Notices, and print the following instructions. Chapter 6 Hardware removal and installation... -
Page 64: Drive Bay Assembly
Before you start, read Generic Safety and Compliance Notices, and print the following instructions. For access, do the following: 1. Remove the computer cover. See “Computer cover” on page 56. 2. Remove the front bezel. See “Front bezel” on page 57. Lenovo V55t Gen 2 Hardware Maintenance Manual... -
Page 65: Hard Disk Drive
Removal steps Hard disk drive Prerequisite Before you start, read Generic Safety and Compliance Notices, and print the following instructions. Attention: The internal storage drive is sensitive. Inappropriate handling might cause damage and permanent loss of data. When handling the internal storage drive, observe the following guidelines: •... -
Page 66: Memory Module
Removal steps Memory module Prerequisite Before you start, read Generic Safety and Compliance Notices, and print the following instructions. Ensure that you follow the installation order for memory modules shown in the following illustration. Lenovo V55t Gen 2 Hardware Maintenance Manual... - Page 67 For access, do the following: 1. Remove the computer cover. See “Computer cover” on page 56. 2. Remove the front bezel. See “Front bezel” on page 57. 3. Remove the drive bay assembly. See “Drive bay assembly” on page 58. Replacement steps Chapter 6 Hardware removal and installation...
-
Page 68: Coin-Cell Battery
Coin-cell battery Prerequisite Before you start, read Generic Safety and Compliance Notices, and print the following instructions. Lenovo V55t Gen 2 Hardware Maintenance Manual... -
Page 69: Pci Express Card
Your computer has a special type of memory that maintains the date, time, and settings for built-in features, such as parallel connector assignments (configurations). A coin-cell battery keeps this information active when you turn off the computer. The coin-cell battery normally requires no charging or maintenance throughout its life; however, no coin-cell battery lasts forever. -
Page 70: M.2 Solid-State Drive And Heat Sink
• Before replacing the M.2 solid-state drive, make a backup copy of all the data that you want to keep. • Do not touch the contact edge of the M.2 solid-state drive. Otherwise, the M.2 solid-state drive might get damaged. Lenovo V55t Gen 2 Hardware Maintenance Manual... - Page 71 • Do not apply pressure to the M.2 solid-state drive. • Do not make the M.2 solid-state drive subject to physical shocks or vibration. Put the M.2 solid-state drive on a soft material, such as cloth, to absorb physical shocks. For access, do the following: 1.
- Page 72 – Type 2 – Type 3 Lenovo V55t Gen 2 Hardware Maintenance Manual...
-
Page 73: M.2 Solid-State Drive Bracket
Note: Remove the film that covers the thermal pad (if any) when installing the M.2 solid-state drive and the heat sink. M.2 solid-state drive bracket Prerequisite Before you start, read Generic Safety and Compliance Notices, and print the following instructions. For access, do the following: 1. -
Page 74: Power Supply Assembly
2. Remove the front bezel. See “Front bezel” on page 57. 3. Remove the drive bay assembly. See “Drive bay assembly” on page 58. 4. Disconnect the power supply assembly cables from the system board. Removal steps Lenovo V55t Gen 2 Hardware Maintenance Manual... -
Page 75: Wi-Fi Card
Wi-Fi card Prerequisite Before you start, read Generic Safety and Compliance Notices, and print the following instructions. For access, do the following: 1. Remove the computer cover. See “Computer cover” on page 56. 2. Remove the front bezel. See “Front bezel” on page 57. 3. -
Page 76: Internal Speaker
For access, do the following: 1. Remove the computer cover. See “Computer cover” on page 56. 2. Remove the front bezel. See “Front bezel” on page 57. 3. Disconnect the thermal sensor cable from the system board. Lenovo V55t Gen 2 Hardware Maintenance Manual... -
Page 77: Front Fan
Removal steps Front fan Prerequisite Before you start, read Generic Safety and Compliance Notices, and print the following instructions. For access, do the following: 1. Remove the computer cover. See “Computer cover” on page 56. 2. Remove the front bezel. See “Front bezel” on page 57. 3. -
Page 78: Rear Fan
2. Remove the front bezel. See “Front bezel” on page 57. 3. Remove the drive bay assembly. See “Drive bay assembly” on page 58. 4. Disconnect the rear fan cable from the system board. Replacement steps Lenovo V55t Gen 2 Hardware Maintenance Manual... -
Page 79: Front Wi-Fi Antenna And Cable
Front Wi-Fi antenna and cable Prerequisite Before you start, read Generic Safety and Compliance Notices, and print the following instructions. For access, do the following: 1. Remove the computer cover. See “Computer cover” on page 56. 2. Remove the front bezel. See “Front bezel” on page 57. 3. -
Page 80: Cover Presence Switch
Before you start, read Generic Safety and Compliance Notices, and print the following instructions. For access, do the following: 1. Remove the computer cover. See “Computer cover” on page 56. 2. Disconnect the cover presence switch cable from the system board. Lenovo V55t Gen 2 Hardware Maintenance Manual... -
Page 81: Front I/O Bracket And Card Reader
Removal steps Front I/O bracket and card reader Prerequisite Before you start, read Generic Safety and Compliance Notices, and print the following instructions. For access, do the following: 1. Remove the computer cover. See “Computer cover” on page 56. 2. Remove the front bezel. See “Front bezel” on page 57. 3. - Page 82 Lenovo V55t Gen 2 Hardware Maintenance Manual...
-
Page 83: Heat Sink And Fan Assembly
Heat sink and fan assembly Prerequisite Before you start, read Generic Safety and Compliance Notices, and print the following instructions. The heat sink might be very hot. Before you open the computer cover, turn off the computer and wait several minutes until the computer is cool. -
Page 84: Microprocessor
• Touch only the edges of the microprocessor. Do not touch the gold contacts on the bottom. • Do not drop anything onto the microprocessor socket while it is exposed. The socket pins must be kept as clean as possible. Lenovo V55t Gen 2 Hardware Maintenance Manual... - Page 85 System board Prerequisite Before you start, read Generic Safety and Compliance Notices, and print the following instructions. The heat-sink-and-fan assembly and microprocessor might be very hot. Before you open the computer cover, turn off the computer and wait several minutes until the computer is cool. For access, do the following: 1.
- Page 86 • Your microprocessor sockets and socket covers might look slightly different from the illustrations in this topic. • Do not touch the pins on the microprocessor socket or the gold contacts on the microprocessor. Removal steps Lenovo V55t Gen 2 Hardware Maintenance Manual...
- Page 87 Lenovo representative for information on the products and services currently available in your area. Any reference to a Lenovo product, program, or service is not intended to state or imply that only that Lenovo product, program, or service may be used. Any functionally equivalent product, program, or service that does not infringe any Lenovo intellectual property right may be used instead.
- Page 88 Actual results may vary. Users of this document should verify the applicable data for their specific environment. This document is copyrighted by Lenovo and is not covered by any open source license, including any Linux agreement(s) which may accompany software included with this product. Lenovo may update this document at any time without notice.