Table of Contents
Advertisement
Quick Links
Advertisement
Table of Contents

Related Manuals for Lenovo ThinkVision Creator Extreme 62A6


Summary of Contents for Lenovo ThinkVision Creator Extreme 62A6
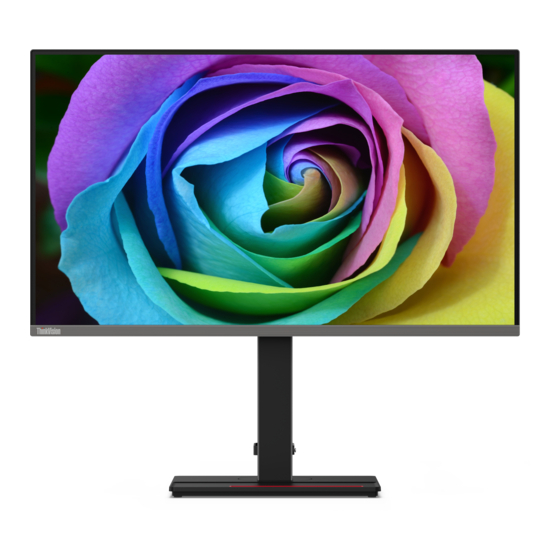
- Page 1 ThinkVision Creator Extreme User Guide Machine Types: 62A6...
- Page 2 © Copyright Lenovo 2020. LENOVO products, data, computer software, and services have been developed exclusively at private expense and are sold to governmental entities as commercial items as defined by 48 C.F.R. 2.101 with limited and restricted rights to use, reproduction and disclosure.
-
Page 3: Table Of Contents
Contents Safety Information ..............................iii General safety guidelines ���������������������������������������������������������������������������������������������������������������������������������������������������������������������������������iii Safety and Maintenance Guidelines ����������������������������������������������������������������������������������������������������������������������������������������������������������������� iv Chapter 1. Getting Started ..........................1-1 Shipping contents �������������������������������������������������������������������������������������������������������������������������������������������������������������������������������������������1-1 Notice for use �������������������������������������������������������������������������������������������������������������������������������������������������������������������������������������������������1-2 Product overview �������������������������������������������������������������������������������������������������������������������������������������������������������������������������������������������1-2 Adjustment type ����������������������������������������������������������������������������������������������������������������������������������������������������������������������������������������1-2 Tilt �������������������������������������������������������������������������������������������������������������������������������������������������������������������������������������������������������������1-2 Swivel �������������������������������������������������������������������������������������������������������������������������������������������������������������������������������������������������������1-3 Height Adjustment ������������������������������������������������������������������������������������������������������������������������������������������������������������������������������������1-3 Monitor Pivot ��������������������������������������������������������������������������������������������������������������������������������������������������������������������������������������������1-3 Shading Hood installation �������������������������������������������������������������������������������������������������������������������������������������������������������������������������1-4 Monitor controls����������������������������������������������������������������������������������������������������������������������������������������������������������������������������������������1-4 Cable lock slot�������������������������������������������������������������������������������������������������������������������������������������������������������������������������������������������1-4... -
Page 4: Safety Information
Safety Information General safety guidelines For tips to help you use your computer safely, go to: http://www�lenovo�com/safety Before installing this product, read the Safety Information� í í í Safety Information... -
Page 5: Safety And Maintenance Guidelines
■ Do not open your monitor cabinet or attempt to service this product yourself. If your monitor is not operating properly or has been dropped or damaged, contact your Lenovo authorized dealer, reseller, or service provider. ■ Adjust only those controls that are described in the operating instructions. -
Page 6: Chapter 1. Getting Started
This User Guide provides detailed operation instructions for the user� For quick instruction overview, please see the Setup Poster for brief information� ThinkVision Creator Extreme supports “Lenovo Display Control Center”- ThinkColor� Shipping contents The product package should include the following items: •... -
Page 7: Notice For Use
Notice for use To set up your monitor, please see the illustrations below� Note: Do not touch the screen of the monitor� The screen is made of glass and can be damaged by rough handling or excessive pressure� 1� Carefully lay the monitor on a flat surface� 2�... -
Page 8: Swivel
Swivel With the built-in base, you can tilt and rotate the monitor to get the best viewing angle� Height Adjustment To adjust the height, the user needs to press or lift the monitor� 135mm 135 mm Monitor Pivot - Adjust the screen position before rotating the monitor screen� (Make sure the monitor screen rises to its highest point and tilts back 35°�) - Then rotate clockwise until the monitor stops at 90°�... -
Page 9: Shading Hood Installation
Shading Hood installation By installing a special shading hood, the surrounding stray light and reflection can be shielded, so that the display content is clearer and the color accuracy is better� 1� Unfold the shading hood body and place its middle part on the top of the monitor� 2�... -
Page 10: Setting Up Your Monitor
Connect one end of the HDMI cable to the monitor HDMI connector and the other end to the computer� HDMI Note: Lenovo recommends that customers who require to use the HDMI input on their monitors purchase the “Lenovo HDMI to HDMI Cable OB47070” website: www�lenovo�com/support/monitoraccessories� Chapter 1 1-5... - Page 11 4� Connect one end of the DP cable to the DP input port of the monitor and the other end of the DP cable to the computer� Note: Lenovo recommends users who need to use the DP cable on their monitors to purchase the “Lenovo DisplayPort to DisplayPort cable 0A36537” website: www�lenovo�com/support/monitoraccessories�...
- Page 12 6� Connect one end of the USB Type-C cable to the USB Type-C port of the monitor and the other end to the USB Type-C port of the computer� Note: The USB Type-C port of this monitor provides data, video and power transmission� The host device must support DisplayPort Alt mode (video, charging and USB 3�1) via the USB Type-C interface�...
- Page 13 8� Connect the audio cable of the sound box and the audio jack of the monitor to transmit audio sources from DP, Type C and HDMI� Note: The audio outputs in DP, Type-C, HDMI modes� Please be aware that excessive and/or extreme volume might damage your hearing ability� 9�...
- Page 14 10� Plug the power cord into the monitor, and then plug the monitor power cord and computer cord into a grounded power outlet� Note: A certified power supply cord has to be used with this equipment� The relevant national (regional) installation and/or equipment regulations shall be considered� The certified power cord used should not be lighter than the ordinary PVC flexible cord specified by IEC 60227 (marking H05VV-F 3G 0�75mm2 or H05VVH2-F2 3G 0�75mm2)�...
-
Page 15: Registering Your Option
Thank you for purchasing this Lenovo™ product� Please take a few moments to register your Product and provide us with information that will help Lenovo to better serve you in the future� Your feedback is valuable to us in developing products and services, as well as in developing better ways to communicate with you�... -
Page 16: Chapter 2. Adjusting And Using The Monitor
In addition, use healthy work habits to maximize your performance and comfort while using your computer� For more detailed information on any of these topics, visit the Healthy Computing Website at: http://www�lenovo�com/healthycomputing/� Arranging your work area Use a work surface of appropriate height and sufficient working area to allow you to work in comfort�... -
Page 17: Quick Tips For Healthy Work Habits
Accessibility information Lenovo is committed to providing greater access to information and technology to people with disabilities� With assistive technologies, users can access information in the way most appropriate to their disability� Some of these technologies are already provided in your operating system; others can be purchased through vendors or accessed at: https://lenovo�ssbbartgroup�com/lenovo/request_vpat�php... -
Page 18: Adjusting Your Monitor Image
Adjusting your monitor image This section describes the control features to adjust your monitor images� Using direct access controls Direct access controls can be used when the On-Screen Display (OSD) is not displayed� Icon Name Description USB UFP switch Switch the USB upstream facing port� Press and hold for 10 seconds to enable or disable the DDC-CI DDC-CI function�... -
Page 19: Using On-Screen Display (Osd) Controls
Using On-Screen Display (OSD) controls To adjust the settings, the user controls can be viewed through the OSD� Using controls: 1� Press to open the main OSD menu� 2� to move among the icons� Select an icon and press to access the selected function� If there is a sub-menu, you can move among options using or , then press to select that... - Page 20 Table 2-1� OSD function OSD Icon on Controls and Submenu Description Main Menu Adjustments Brightness Adjusts overall brightness Contrast Adjusts difference between light and dark areas Monitor Controls Volume Adjust headphone output volume • Off Dynamic Contrast • On Response time enhancement� •...
- Page 21 Table 2-1� OSD function OSD Icon on Controls and Submenu Description Main Menu Adjustments It can make high dynamic range (HDR) get better color matching presentation� • Auto • HDR 1000 • HDR10 • HLG • Dolby Vision Bright • Dolby Vision Dark HDR* •...
- Page 22 Table 2-1� OSD function OSD Icon on Controls and Submenu Description Main Menu Adjustments Change the language of the menu� Language Note: The selected language only affects the language of the OSD� It has no effect on any software running on the computer� Menu Time Out Automatically turn off OSD after a preset period of time�...
-
Page 23: Usb Link
USB Link: With USB Link, you can share both mouse and keyboard between two computers and transfer data quickly� ● Switch Mouse and Keyboard You can control two PCs by moving your mouse across two sources� ● File transfer You can transfer data between two computers quickly simply through drag, copy, paste and other operations�... - Page 24 ● In single screen mode, you can click on the USB LINK in the lower right corner to open the “Location of Another Computer” to input settings for the other computer� You can set four directions - up, down, left, and right - to control the direction of the other PC when the cursor moves out of the screens�...
-
Page 25: Selecting A Supported Display Mode
Selecting a supported display mode The display mode that the monitor uses is controlled by the computer� Therefore, refer to your computer documentation on how to change display modes� The image size, position and shape might be changed when the display mode changes� This is normal and the image can be re-adjusted using automatic image setup and image controls�... -
Page 26: Understanding Power Management
Understanding power management Power management is invoked when the computer recognizes that you have not used your mouse or keyboard for a user-definable period� There are several states as described in the table below� For optimal performance, switch off your monitor at the end of each working day, or whenever you expect to leave it unused for long periods during the day�... -
Page 27: Caring For Your Monitor
Caring for your monitor Be sure to turn off the power before you perform any maintenance on the monitor� Do not: • Apply water or liquid directly to your monitor� • Use solvents or abrasives� • Use flammable cleaning materials to clean your monitor or any other electrical equipment� •... -
Page 28: Chapter 3. Reference Information
Chapter 3. Reference Information This section contains monitor specifications, instructions to manually install the monitor driver, troubleshooting information, and service information� Monitor specifications Table 3-1� 62A6-RAR3-WW model monitor specifications Depth 234�08 mm (9�22 inches) Size Height 593�4~458�8 mm (23�36~18�06 inches) Width 613�08 mm (24�14 inches) Tilt... - Page 29 Table 3-1� 62A6-RAR3-WW model monitor specifications Interface Type-C Input signal VESA TMDS (Panel Link™) Video input (Type-C) Horizontal addressability 3840 pixels (maximum) Vertical addressability 2160 lines (maximum) Clock frequency 300 MHz Communications VESA DDC Horizontal frequency 27 kHz - 136 kHz Supported Display Modes Vertical frequency 24 Hz - 60 Hz...
-
Page 30: Troubleshooting
Troubleshooting If you have a problem setting up or using your monitor, you might be able to solve it yourself� Before calling your dealer or Lenovo, try the suggested actions that are appropriate to your problem� Table 3-2� Troubleshooting Problem... - Page 31 Table 3-2� Troubleshooting Problem Possible cause Suggested action Reference The power indicator is The video signal cable Be sure the video cable “Connecting and amber, but there is no is loose or disconnected is connected with the turning on your image�...
-
Page 32: Manually Installing The Monitor Driver
Color Matching Profiles� Note: On LCD monitors, unlike CRTs, a faster refresh rate does not improve display quality� Lenovo recommends using either 3840 × 2160 at a refresh rate of 60 Hz, or 1920 × 1080 at a refresh rate of 60 Hz�... -
Page 33: Installing The Monitor Driver In Windows 10
Color Matching Profiles� Note: On LCD monitors, unlike CRTs, a faster refresh rate does not improve display quality� Lenovo recommends using either 3840 × 2160 at a refresh rate of 60 Hz, or 1920 × 1080 at a refresh rate of 60 Hz�... -
Page 34: Service Information
Scratches or punctures on monitor screens� Service parts The following parts are for use by Lenovo service, or Lenovo aurthorized dealers, to supprot the customer warranty� Parts are for service use only� The table below shows information for model 62A6-RAR3-WW�... -
Page 35: Appendix A. Service And Support
Product replacement assistance or exchange of defective components also is available during the warranty period� In addition, if your option is installed in a Lenovo computer, you might be entitled to service at your location� A Lenovo technical support representative can help you determine the best alternative�... - Page 36 Country or Region Telephone Number 0800-10-0189 Bolivia (Spanish) Calls made from within the Sao Paulo region: 11-3889-8986 Brazil Calls made from outside the Sao Paulo region: 0800-701-4815 (Portuguese) Dial 800-1111 Brunei Darussalam (English) 1-800-565-3344 Canada (English, French) Chile 800-361-213 (Spanish) Technical Support Line: 400-100-6000 China (Mandarin)
- Page 37 Country or Region Telephone Number Warranty service and support: 0800-500-4618 (toll-free) Germany (German) Lenovo Business Partner Greece (Greek) Dial 999-9190, wait for operator, and request to reach 877-404-9661 Guatemala (Spanish) Dial 800-0123 Honduras (Spanish) +36-13-825-716 Hungary (English, Hungarian) Primary: 1800-419-4666 (Tata)
- Page 38 (Dutch) 0508-770-506 New Zealand (English) 001-800-220-2282 Nicaragua (Spanish) 8152-1550 Norway (Norwegian) Lenovo Customer Support Center: 001-866-434 (toll-free) Panama (Spanish) 0-800-50-866 OPCION 2 Peru (Spanish) 1-800-8908-6454 (GLOBE subscribers) Philippines 1-800-1441-0719 (PLDT subscribers) (Tagalog, English) Laptops and tablets branded with logo Think: 48-22-273-9777...
- Page 39 Country or Region Telephone Number 444-04-26 Turkey (Turkish) Standard warranty support: 03705-500-900 (local toll calls) United Kingdom Standard warranty support: 08705-500-900 (English) 1-800-426-7378 (English) 000-411-005-6649 Uruguay (Spanish) 0-800-100-2011 Venezuela (Spanish) 120-11072 (Toll Free) Vietnam 84-8-4458-1042 (Standard Charges Apply) (Vietnamese, English) Appendix A A-5...
-
Page 40: Appendix B. Notices
Web sites� The materials at those Web sites are not part of the materials for this Lenovo product, and use of those Web sites is at your own risk�... -
Page 41: Recycling Information
Collecting and recycling a disused Lenovo computer or monitor If you are a company employee and need to dispose of a Lenovo computer or monitor that is the property of the company, you must do so in accordance with the Law for Promotion of Effective Utilization of Resources�...