
Related Manuals for U-Line Wine Captain ADA Series


Summary of Contents for U-Line Wine Captain ADA Series
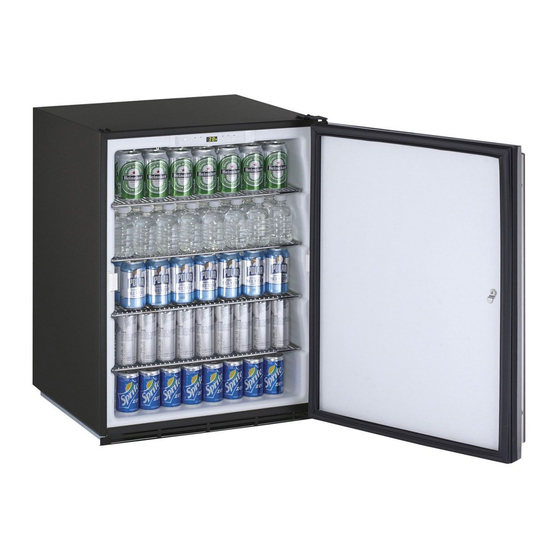
- Page 1 ® INSTALL GUIDE 1000, ADA & 29 Series Models ADA24R ADA24RG 1075BEV 1115R 1115WC 1175BEV 1075WC 1175R 1175WC The Built-In Undercounter Leader Since 1962 U-LINE.COM...
-
Page 2: Table Of Contents
1 Table of Contents Safety Precautions Safety Alert Definitions............................1 General Precautions ..............................1 Inspect & Plan Product Registration .............................2 Models Covered..............................2 Tools / Material Required ............................2 Exterior Cleaning ..............................2 Black and White Models:........................... 2 Stainless Models:............................2 Prepare Site Cut-Out Dimensions.............................3 1175, 1075 &... -
Page 3: Safety Precautions
Consult the installation guide before any installation begins. U-Line contact information appears on the rear WARNING cover of this guide. SHOCK HAZARD - Electrical Grounding Required. -
Page 4: Inspect & Plan
Product Registration • Minwax® Water-Based Wood Stain • Minwax® Polycrylic® Protective Finish You have received a carton containing your U-Line Wine Captain®, Refrigerator, or Beverage Center with a package inside • Foam Applicator and / or Synthetic Bristle Brush containing a Use and Care Guide and a Product Registration Card. -
Page 5: Prepare Site
4 Prepare Site Follow the cut-out drawing The 15-3/16" width allows 1/4" for Your U-Line product has been designed for either free-standing or ease in installation and removal of the unit. 24" is the cabinet depth built-in installation. When built-in, your unit does not require in most installations. -
Page 6: Product Dimensions
5 Product Dimensions 1115 Series 1175 Series 23 1/2” 23” 23 5/16” 34 1/8” 34 1/8” 34 1/8” 23-15/16" 3 9/16” 1175 Wine Captain® 3 9/16” 14 15/16" 24” 3 9/16” 1075 Series 1115 Refrigerator & Wine Captain® 1175 Refrigerator & 75FB Not Including Handle Not Including Handle Not Including Handle... -
Page 7: Ada24 Series
ADA24 Series ADA24R(GL)B Series ADA24R(GL)S Series Not Including Handle 23 1/16” 23 1/4” 32” 32” 24” 24” Stainless Refrigerator ADA24RS Refrigerator ADA24RB Not Including Handle 23 1/2” 23 1/4” 32” 32” 24” 24” Glass Refrigerator ADA24RGLB Stainless Glass Refrigerator ADA24RGLS Product Dimensions... -
Page 8: Door Swing Dimensions
6 Door Swing Dimensions ADA24R(GL)(SB) Series All units have a zero clearance for the door to open 90°. U-Line Wall Wall recommends a minimum door clearance of 2" to accommodate 1/4" Min. the handle if the unit is installed next to a wall or similar type of 2"... -
Page 9: Standard Doors
Other models will have a plate with Plug Hole Plug Hole three screws. 2. Remove corresponding screws on opposite side of cabinet. On Right Side Left Side Door Swing Door Swing U-Line Standrd Door Alignment and Reversal... - Page 10 5. Remove the plastic hinge bushing (2) and install in the corner opposite of where it was removed. Install grille: 6. Remove the U-Line nameplate (3) from door. This will reveal Install the grille, see MAINTENANCE section of this guide. mounting holes for the door actuator bracket.
-
Page 11: Wood Trim Finishing
Allow the final coat to dry for 24 hours before reinstalling the trim to the cabinet interior parts. Before reloading the rack, ensure proper operation of the travel stops in the left and right track rails by pulling the rack out gently until it completely stops. U-Line Wood Trim Finishing... -
Page 12: Door Panel Installation Custom 1/4'' Thick Door Panel Insert
8. Starting at the corners and working inward, push door gasket with Phillips head screwdriver. into place on door. Remove door by tilting 9. Place door on bottom hinge pin and install upper hinge screw. forward and lifting off bottom hinge pin. U-Line Door Panel Installationl... -
Page 13: Leveling Information
Installation 11 Installation 1. Plug in the powercord. Leveling Information 2. Gently push the unit into position. Be careful not to kink the It is recommended that the unit is level. water supply line or entangle the electrical cord. 1. Use a level to check 3. - Page 14 E-mail: onlineparts@u-line.com ABOUT U-LINE Building on 45 years, U-Line has captivated those with an appreciation for the finer things with exceptional design, inspired innovations and attention to even the smallest details. U-Line is synonymous with premium built-in under counter ice making, refrigeration and wine storage appli- ances, the U-Line Corporation is committed to luxury under the counter.