Table of Contents
Advertisement
Quick Links
Take the time to read through this instruction manual.
Familiarity with installation and operation procedures will help you obtain the best performance from your new
receiver.
For your records
Record the serial number, found on the top of the unit, in the spaces designated on the warranty card, and in the space
provided below. Refer to the model and serial numbers whenever you call upon your KENWOOD dealer for information or
service on the product.
Model DMX958XR / DMX908S / DMX9708S Serial number
US Residence Only
Register your KENWOOD product at www.kenwood.com/usa/
© 2021 JVCKENWOOD Corporation
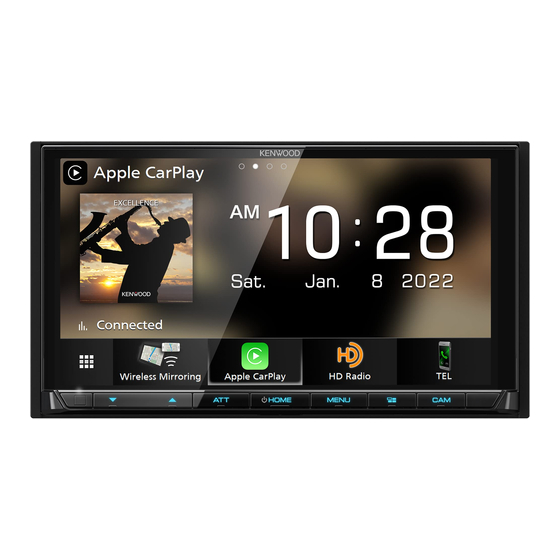
DMX958XR
DMX908S
DMX9708S
MONITOR WITH RECEIVER
INSTRUCTION MANUAL
• Updated information (the latest Instruction Manual, system updates, new
functions, etc.) is available from
<https://www.kenwood.com/cs/ce/>.
• The Instruction manual is subject to change for modification of
specifications and so forth. Be sure to download the latest edition of the
Instruction manual for reference.
<https://www.kenwood.com/cs/ce/>
Register Online
B5K-0858_ref_K_En_00
Advertisement
Table of Contents

Related Manuals for Kenwood DMX958XR


Summary of Contents for Kenwood DMX958XR
- Page 1 Record the serial number, found on the top of the unit, in the spaces designated on the warranty card, and in the space provided below. Refer to the model and serial numbers whenever you call upon your KENWOOD dealer for information or service on the product.
- Page 2 Important Notice on Software JVCKENWOOD Corporation, the original (English) of the license is presented. Ñ Software License on This EULA Product Ñ Software License Agreement The software embedded in this product comprises a number of independent software JVCKENWOOD Corporation (hereinafter called components, each of which is copyrighted by “Licensor”) holds either the copyright to the JVCKENWOOD Corporation or by a third party.
- Page 3 Article 3 (Terms of License) Article 8 (Cancellation of the Agreement) Licensor reserves the right to cancel this 1. In assigning this product, User may not retain agreement forthwith and claim compensation the original copy of the embedded Licensed from User for the damages caused by such Software (including associated literature, cancellation when User: updates and upgrades) and any duplicates...
-
Page 4: Table Of Contents
Memory Operation ..........36 Photo Frame Widget ..........18 Selecting Operation ..........36 Importing Image Files..........19 Bookmark ..............38 Widget SETUP ............19 Alert Message ............39 APPS Wireless Mirroring Operation .......20 Apple CarPlay Operation ........20 Android Auto Operation ........22 KENWOOD Traffic Powered By INRIX ....24... - Page 5 SiriusXM® Controlling Audio SiriusXM® Basic Operation ........40 3-way speaker system setup ........75 Storing Channels in Preset Memory ....42 Speaker / X’over setup ..........76 Preset select ...............42 Controlling General Audio ........78 Direct search ..............42 Equalizer Control ............78 Category/Channel search ........43 Volume Offset ............79 Replay ................43 Sound Effect ...............80 TuneMix™...
-
Page 6: Before Use
See User Interface Setup For best results while pairing with your (P.70). KENWOOD receiver, please be sure to close any • The Radio Broadcast Data System feature unused applications. won’t work in areas where the service is not supported by any broadcasting station. -
Page 7: Basic Operations
Basic Operations Basic Operations Functions of the Buttons on the Front Panel NOTE • The panels shown in this manual are examples used to provide a clear explanation of operations. For this reason, they may be different from the actual panels. Number Name Motion... -
Page 8: Turning On The Unit
Basic Operations Turning on the Unit Initial Settings Initial SETUP Press the [HOME] button. Perform this setup when you use this unit first time. Set each item as follows. h The unit is turned on. ● To turn off the unit Press the [HOME] button for 1 second. - Page 9 For details, see Camera Setup (P.64). Touch [SETUP]. [Maestro SETUP] ■ This function requires a commercial adaptor. Consult your KENWOOD dealer for details. [Vehicle Features] ■ This function requires a commercial adaptor. h SETUP Menu screen appears. Consult your KENWOOD dealer for details.
-
Page 10: Adjusting The Volume
Basic Operations Touch screen operations NOTE • Please set the date and time. If they are not set, To perform operations on the screen, you need some functions may not work. to touch, touch and hold, flick or swipe to select an item, display a setting menu screen Adjust the date and time manually or change pages. -
Page 11: Display The Home Screen
Basic Operations Display the HOME screen Popup menu Press the [HOME] button. Press the [MENU] button. h Popup menu appears. Touch to display the popup menu. h HOME screen appears. HOME screen descriptions Most functions can be performed from the HOME screen. -
Page 12: Source Selection Screen Description
Basic Operations Turn off the screen Select the playback source Press the [HOME] button. Select [Display OFF] on the popup menu. h HOME screen appears. Touch [ From the screen, you can select the following sources and functions. NOTE • Switches to the Apple CarPlay screen •... - Page 13 *2 DMX9708S only Touch [STANDBY]. *3 DMX958XR / DMX908S only *4 You can use the [AV-IN] source when a cable from a visual source except a camera is connected to the VIDEO input terminal, and a cable is connected to the AV Audio input terminal.
-
Page 14: Source Control Screen Descriptions
Basic Operations Source control screen Artwork & information descriptions You can select whether to display an artwork and song information or only song information There are some functions which can be in more detail. performed from most screens. Touching the artwork area switches to the VU meter. -
Page 15: List Screen
Basic Operations List screen etc. Keys with various functions are displayed here. There are some common function keys in the • : Plays all tracks in the folder containing list screens of most sources. the current track. The operation and the display screen are different for each source. -
Page 16: Widget
*1 You can receive INRIX weather forecast by connecting your iPhone or Android smartphone Drag the widget to the desired position. in which the “KENWOOD Traffic Powered By INRIX” application is installed. ● To delete the widget *2 Up to 3 pages can be set to the multi widget screen. - Page 17 Touch [ ] on the widget list popup. *1 You can receive INRIX weather forecast by h Confirmation message appears. connecting your iPhone or Android smartphone in which the “KENWOOD Traffic Powered By INRIX” Touch [Yes]. application is installed. h Current page is deleted.
-
Page 18: Weather Widget
Home screen. stored in your iPhone or Android smartphone on the Home screen. Preparation Ñ Preparation • See KENWOOD Traffic Powered By INRIX (P.24). • See Importing Image Files (P.19). • Select “ON” for Weather Widget. See Widget SETUP (P.19). -
Page 19: Importing Image Files
Touch [User Interface]. See Photo Frame Widget (P.18) and To register an original image (P.72). Preparation • Install the latest version of the “KENWOOD Portal h User Interface screen appears. APP” application on your iPhone or Android smartphone. Touch [Widget SETUP] in the User –... -
Page 20: Apps
APPS APPS Wireless Mirroring Operation Apple CarPlay Operation You can display the same screen of the Apple CarPlay is a smarter, safer way to use Android smartphone on the monitor of the your iPhone in the car. Apple CarPlay takes unit using the Wireless Mirroring function of the things you want to do with iPhone while the Android smartphone. - Page 21 APPS Ñ Operation keys and available Wireless connection Apps on the home screen of You can select the iPhone registered in [Device List] and use it as the Apple CarPlay device. Apple CarPlay See Register the Bluetooth device (P.53). You can use the Apps of the connected iPhone. Press the [HOME] button.
-
Page 22: Android Auto Operation
APPS Ñ Android Auto™ Operation Use Siri You can activate Siri. Android Auto enables you to use the functions Press the [ ] button for 1 second. of your Android smartphone convenient for driving. You can easily access route Press for 1 second guidance, make calls, listen to music, and access convenient functions on the Android smartphone while driving. - Page 23 APPS Ñ Ñ Connect Android smartphone Select an Android smartphone If two or more Android smartphones Wired connection have been registered, select the Android smartphone to be used as the Android Auto Connect an Android smartphone via the source. USB terminal. (P.94) See Switch the connected device (P.54).
-
Page 24: Kenwood Traffic Powered By Inrix
Press the [ ] button. Preparation • Install the latest version of the KENWOOD Traffic Powered By INRIX application on your iPhone or Android smartphone. – iPhone: Search for "KENWOOD Traffic Powered By INRIX" in the Apple App Store to find and install the most current version. -
Page 25: Usb
Connecting a USB device USB Basic Operation Most functions can be controlled from the Connect the USB device via the USB source control screen and playback screen. terminal. (P.93) NOTE • Set the remote controller mode switch to AUD mode before starting operation, see Switch the operation mode (P.83). - Page 26 • [ ] : Randomly plays all tracks in the current Indicator Items folder. Each time you touch the key, random • [VIDEO]: Identifies the video file. modes are switched in the following sequence: • [MUSIC]: Identifies the music file. File random ( ), Random off ( Track information...
-
Page 27: Search Operation
Ñ Search Operation Link search (Audio file only) You can search for a file of the same artist/ You can search music or video files by the album/genre as that in the current track. following operations. Touch [Link Search]. Touch [1]. Touch the desired tag type. -
Page 28: Ipod/Iphone
• Latest compatible list of iPod/iPhone. For details, as a Bluetooth device and do the profile setting for the connection beforehand. See Register see www.kenwood.com/cs/ce/ipod/. the Bluetooth device (P.53) and Switch the • By connecting your iPod/iPhone to this unit, you connected device (P.54) -
Page 29: Ipod/Iphone Basic Operation
iPod/iPhone ● Select the method of making connections Close the drawer for outputting sound from the iPod source Press the [MENU] button. Touch [SETUP]. h SETUP Menu screen appears. Touch [[AV]. h AV screen appears. Track information Touch [iPod Bluetooth Connection]. •... -
Page 30: Search Operation
iPod/iPhone Ñ Category search Content list You can search for a file by selecting a • Touch the right side of the screen to display category. the Content list. Touch again to close the list. • Displays the playing list. When you touch a Touch [Category List]. -
Page 31: Radio
Radio Radio (DMX9708S) Radio Basic Operation Information display • Displays the information on the current station: Most functions can be controlled from the Frequency source control screen. Touching [ ] allows you to switch between Content A and Content B. To listen to the Radio source, touch [Radio] Content A: PS name, Radio Text, Title &... -
Page 32: Memory Operation
Radio Memory Operation • [PTY] (FM only) : Searches for a program by program type. For details, see Search by program type (P.33). Ñ Auto memory • [MONO] (FM only) : Selects the Monaural You can store stations with good reception in reception mode. -
Page 33: Selecting Operation
Radio Selecting Operation Traffic Information (FM only) Ñ You can listen to and watch traffic information Preset select automatically when a traffic bulletin starts. You can list and select memorized stations. However, this feature requires a Radio Broadcast Data System that includes TI Touch [ ] on the right side of the screen. -
Page 34: Hd Radio™ Tuner
HD Radio™ Tuner HD Radio™ Tuner (DMX958XR / DMX908S) HD Radio Tuner Basic Information display Operation • Displays the information on the current station: Frequency and Channel Touching [ ] allows you to switch between Most functions can be controlled from the Content A, Content B and Content C. - Page 35 HD Radio™ Tuner Operation keys • [E] [F] : Tunes in a station. The method of switching frequencies can be changed (see Seek mode). • [CHS] [CHR] : Selects a channel. • [1] : Display the Channel List screen. See Channel search (P.37).
-
Page 36: Receive Mode
HD Radio™ Tuner Receive Mode Touch [ ] on the left side of the screen. Touch [AME]. You can set the radio broadcasts receive mode. Touch [ ] on the left side of the screen. Touch [RCV]. Touch [Yes]. Select a receive mode. h Auto memory starts. - Page 37 HD Radio™ Tuner Ñ Direct search Select the desired content from the list. You can tune in by entering the desired frequency or channel number. Touch [ ] on the left side of the screen. Touch [10key Direct]. NOTE • Touch [Info Change] in the channel list. Select the sequence of the list (Song title, artist name, album name).
-
Page 38: Bookmark
HD Radio™ Tuner Bookmark Stores tag information (title, artist, album, URL, and description) about the song you are listening to now. Detailed information and QR codes can be displayed according to the stored tag information. Ñ Bookmark registration Delete] ■ Deletes the bookmarks being displayed. -
Page 39: Alert Message
HD Radio™ Tuner Ñ Alert Message Display of the received Alert Message This function is to receive alert messages. First, You can read the received alert message you need to turn on the “Emergency Alerts”. afterward. (P.34) Touch [ ] on the left side of the screen. Ñ... -
Page 40: Siriusxm
SiriusXM® SiriusXM® Control screen SiriusXM® Basic Operation Only SiriusXM® brings you more of what you love to listen to, all in one place. Get over 140 channels, including commercial-free music plus the best sports, news, talk, comedy and entertainment. Welcome to the world of satellite radio. - Page 41 SiriusXM® • Change the text size of the information when • [Traffic & Weather] the "Small Audio Text" is set to "ON"/"OFF" in For SXV300 * the User Interface screen (P.70). Traffic & Weather Now™ allows you to access the latest report whenever you want to hear NOTE it.
-
Page 42: Storing Channels In Preset Memory
SiriusXM® Storing Channels in Preset Direct search Memory You can tune in a channel directly. You can store the current channel in memory. Touch [ ] on the left side of the screen. Touch [Direct Channel]. Tune in the channel you wish to store in the memory. -
Page 43: Category/Channel Search
SiriusXM® Category/Channel search Replay You can specify the desired category and You can replay the last 60 minutes of the select a channel. program from the current channel. Touch [1]. Touch [L] or [Replay] on the function panel. Select a category. ■... -
Page 44: Tunemix
SiriusXM® TuneScan™ To return to live music/content Touch the left side of the screen. TuneScan™ is a feature that plays samples from the starts of multiple buffered songs Touch [Live]. from each of the SmartFavorites channels that predominantly play music selections. TuneMix™... -
Page 45: Traffic & Weather Now
SiriusXM® Traffic & Weather Now™ Content Alerts Traffic & Weather Now™ allows you to access When a broadcast program related to the the latest report whenever you want to hear registered artist, song or team starts, an Alert it. First select your city in the set up menu. See Content List screen appears to allow you to switch the current channel to the relevant Select a City for Traffic &... -
Page 46: Sportsflash
SiriusXM® SportsFlash™ SiriusXM SETUP SportsFlash™ will notify you when a big play Touch [ ] on the left side of the screen. happens during a game with one of your Touch [SETUP]. favorite sports teams. Choose to tune in and hear the play unfold like it was live. - Page 47 SiriusXM® Ñ Ñ Parental code Parental Control You can set a SiriusXM parental code for Parental Control is a feature that provides the Parental Control. user with the ability to prevent unauthorized access to mature content and user selected Touch [Parental Code] on the SiriusXM channels.
- Page 48 SiriusXM® Touch each channel in the list and set to NOTE ON or OFF. • Touch [All-Channels] to display all channels. • To delete the parental lock channel setting, touch [Disable All] and then touch [YES] on the confirmation screen. Touch each channel on the list and set to ON or OFF.
- Page 49 SiriusXM® Touch each content list item you want to To select a Team check or uncheck. Get alerted when your favorite sports team is playing on another SiriusXM channel with GameAlert™ Touch [My Games]. NOTE Touch the desired league in the list. •...
- Page 50 SiriusXM® Ñ SportsFlash™ setup Touch [ ] twice. Activating SportsFlash Touch [SportsFlash] on the SiriusXM SETUP screen. h SportsFlash is turned on or off. Default is “ON”. Selecting SportsFlash Beep Touch [SportsFlash Beep] on the SiriusXM SETUP screen. h SportsFlash Beep is turned on or off. ■...
- Page 51 SiriusXM® Ñ TuneStart™ Touch [Done]. Touch [Tune Start] on the SiriusXM SETUP screen. The TuneStart is turned on or off. Default is “ON”. Ñ Reset Touch [SiriusXM Reset] on the SiriusXM NOTE SETUP screen. • Priority can be set on up to 5 teams. h Confirmation screen appears.
-
Page 52: Bluetooth Control
• While driving, do not perform complicated Sound codec operations such as dialing numbers, using DMX958XR: SBC / AAC / LDAC™ the phonebook, etc. When you perform these DMX908S / DMX9708S: SBC / AAC operations, stop your car in a safe place. -
Page 53: Register The Bluetooth Device
Bluetooth Control Register the Bluetooth device Touch [ ] on the Device List screen. It is necessary to register the Bluetooth audio device or smartphone/cell-phone in this unit before using the Bluetooth function. You can register up to 10 Bluetooth devices. NOTE •... - Page 54 Bluetooth Control NOTE NOTE • When registering the iPhone that is available for • If the icon is lighted, it means that the unit will Apple CarPlay wirelessly, a confirmation message use that device. appears. • You can confirm the connection status of –...
- Page 55 Bluetooth Control To switch the connected device to a To delete the registered device Bluetooth device You can delete the device that is registered in device list. Touch the icon area on the right side of the Bluetooth device name you want to Touch [ ] on the Device List screen.
-
Page 56: Playing The Bluetooth Audio Device
• [E] [F]: Searches for the previous/next LDAC-compatible device so that the intermittent content. sound problem is less likely to occur. (DMX958XR) Touch and hold to fast forward or fast backward. (It will be cancelled automatically after about 50 seconds.) - Page 57 • : Device used normally. When you touch a folder its contents are • : Device used for KENWOOD Music Mix displayed. Touch [ ] (white) on the left of the name Touch the desired item in the content list.
-
Page 58: Using The Hands-Free Unit
Bluetooth Control Using the Hands-Free Unit Select a dialing method. You can use the telephone function by connecting the Bluetooth telephone to this unit. NOTE • If you use the Hands-Free function frequently, move the TEL short-cut key (icon) to the Home screen. - Page 59 Bluetooth Control Call using call records Select the phone number from the list. Touch [ Select the phone number from the list. NOTE • You can sort the phone numbers in the list by last name or first name. For details, see Hands-Free Setup (P.63).
- Page 60 Bluetooth Control Ñ Ñ Voice Recognition Receive a call You can access the voice recognition function Touch [ ] to answer a phone call or of the smartphone/cell-phone connected to this unit. You can search the smartphone/cell- ] to reject an incoming call. phone phonebook by voice.
- Page 61 Bluetooth Control ● Adjust the receiver volume To end call Press the [S] or [R] button. While talking, touch [ Ñ Operations during a call ● Mute your voice Touch [ ] to mute or not to mute your voice. ●...
- Page 62 Bluetooth Control Ñ Phone number preset ■ [Delete] To delete a preset number, touch [Delete] You can register frequently used phone and then touch [OK] on the confirmation numbers in this unit. screen. Ñ Touch [ Phonebook transfer Touch [Edit]. You can transfer phonebook data from your Bluetooth smartphone using PBAP.
-
Page 63: Hands-Free Setup
Bluetooth Control Phonebook deletion Set each function as follows. Touch [ Touch the name to check. [Bluetooth HF/Audio] ■ Select the speakers to output the sound from the smartphone/cell-phone (such as phone call voice and ringing tone) and Bluetooth [þ All] ■... -
Page 64: Other External Components
Other External Components Other External Components View Camera Camera off Touch to exit the camera screen. Switching the Guideline * NOTE Touching each time turns on or off the • To connect a camera, see Connecting the guideline. camera (P.94). •... - Page 65 Select the item to set up. [Right] * [REAR VIEW CAMERA] (DMX958XR) ■ Assign right position to the view camera Change the HD camera picture quality connected to the selected input terminal.
-
Page 66: Use Dashboard Camera
Other External Components Adjusting the position of the selected [None] * mark. Assign no position to the view camera connected to the selected input terminal. *1 The [REAR VIEW CAMERA] and [FRONT VIEW CAMERA / DASH CAM] setting screens only. *2 Except the [REAR VIEW CAMERA] setting screen. -
Page 67: External Audio/Video Players
Other External Components External audio/video players Touch [Camera]. (AV-IN) Connect an external component to the VIDEO input terminal and the AV Audio input terminal. (P.92) Select [AV-IN] as the source. (P.12) Turn on the connected component and start playing the source. NOTE •... - Page 68 Other External Components Touch icon. • Displays the control screen of the Bluetooth Hands-Free function provided for the vehicle. • Displays information about the tire pressures of the vehicle. * • Displays the control screen of the satellite radio source provided for the vehicle. •...
-
Page 69: Setup
Setup Setup Monitor Screen Setup System Setup You can adjust the image quality of video, Press the [MENU] button. menu screen, etc. h Popup menu appears. Press the [MENU] button. Touch [SETUP]. h Popup menu appears. Touch [Screen Adjustment]. h Screen Adjustment screen appears. Adjust each setting as follows. -
Page 70: User Interface Setup
Setup User Interface Setup [Parking Assist Position] ■ Select where to display information about obstacles on the screen (left or right). You can setup user interface parameters. “Left”/“Right” (Default) Press the [MENU] button. This can be set when the iDatalink h Popup menu appears. -
Page 71: Special Setup
Setup Special Setup NOTE • For how to update the software, see the relevant You can setup special parameters. update procedure manual which comes with the software. Press the [MENU] button. h Popup menu appears. Display Setup Touch [SETUP]. h SETUP screen appears. Press the [MENU] button. - Page 72 Use [−] and [+] to adjust each color value. Touch [ To register an original image With “KENWOOD Portal APP” application installed on your iPhone or Android smartphone, you can upload image files to this unit and set an image as the wallpaper image.
-
Page 73: Av Setup
SETUP screen appears. [Vehicle Features] ■ Touch [AV]. This function requires a commercial adaptor. Consult your KENWOOD dealer for details. Connection Setup h AV screen appears. NOTE Set each parameter as follows. • Some items in the Connection Setup are disabled [Guidance/Voice Recognition Volume] ■... - Page 74 Setup Ñ Change the PIN Code [TEL SETUP] ■ You can change the settings for Hands-Free function. See Hands-Free Setup (P.63). Touch [PIN Code] on the Connection Setup screen. [Wi-Fi SETUP] ■ h Change PIN Code screen appears. You can change the device name for Wireless Mirroring and display the device address, Touch and hold [ password.
-
Page 75: Controlling Audio
Controlling Audio You can adjust various settings such as audio 3-way speaker system setup balance or subwoofer level. (DMX958XR / DMX908S) Press the [MENU] button. h Popup menu appears. Select the appropriate crossover network mode for the speaker system used (2-way or Touch [Audio]. -
Page 76: Speaker / X'over Setup
Controlling Audio Touch [Yes]. ■ [Speaker] You can select a speaker type and its size to NOTE get the best sound effects. • When the 3-way speaker system is selected, the When the speaker type and size are selected, following functions are disabled. the speaker crossover network is set –... - Page 77 Controlling Audio Touch the speaker to set up. When Speaker network is set to 3-way: Set each parameter as follows. [FREQ] (High Pass) ■ High Pass Filter adjustment. [HPF FREQ], [LPF FREQ] (Band Pass) ■ Band Pass Filter adjustment. (When Mid Range Speaker is selected on the Speaker [HPF FREQ] ■...
-
Page 78: Controlling General Audio
Controlling Audio Controlling General Audio Equalizer Control You can adjust equalizer by selecting the Press the [MENU] button. optimized setting for each category. h Popup menu appears. Press the [MENU] button. Touch [Audio]. h Popup menu appears. h Audio screen appears. Touch [Audio]. -
Page 79: Volume Offset
Controlling Audio Volume Offset [SW Level] ■ Adjust the subwoofer volume. This setting is not available when Subwoofer is set to Finely adjust the volume of the current source “None”. See Speaker / X’over setup (P.76). to minimize the difference in volume between different sources. -
Page 80: Sound Effect
Controlling Audio Sound Effect ■ [Realizer] Virtually make the sound more realistic using the Digital Signal Processor (DSP) system. You can set sound effects. Select the level from “OFF”/ “1”/ “2”/ “3”. Press the [MENU] button. [Stage EQ] ■ h Popup menu appears. You can adjust the height of speakers virtually to suit your listening position. -
Page 81: Listening Position / Dta
Controlling Audio Listening Position / DTA Touch [T] or [U] to adjust the delay time of the selected speaker. Listening Position / DTA allows you to improve the sound field depending on the position of the seat you sit. Listening Position / DTA allows you to set “Listening Position”... -
Page 82: Audio Setup Memory
Controlling Audio NOTE NOTE • When the 3-way speaker system is selected, front • To initialize the Delay and Level settings, touch focus feature is disabled. [Initialize] and [Yes] on the confirmation screen. Ñ Front Focus fine adjustment Audio Setup memory Touch [Adjust]. -
Page 83: Remote Control
Remote control Remote control This unit can be operated using the remote Functions of the Remote control KCA-RCDV340 (optional accessory). control Buttons # CAUTION Ñ Switch the operation mode • Put the remote control in a place where it will not move during braking or other operations. - Page 84 Not used. − Pauses the track or file, and resumes playing by pressing twice. For the Radio (DMX9708S only) and HD Radio (DMX958XR / DMX908S only) sources in AUD mode, switches the seek mode. Not used for the SiriusXM source.
- Page 85 AM–/FM+ Selects the folder to be played. For the Radio (DMX9708S only) and HD Radio (DMX958XR / DMX908S only) sources in AUD mode, selects FM/AM band to be received. For the SiriusXM source in AUD mode, selects the band to be received.
-
Page 86: Connection/Installation
Connection/Installation Connection/Installation This section is for the professional installer. • If your car’s ignition does not have an ACC position, connect the ignition wires to a power For safety’s sake, leave wiring and mounting to source that can be turned on and off with the professionals. - Page 87 Connection/Installation • Mount the unit so that the mounting angle is 30° or less. • Do not connect anything to the terminal (M5 x 8 mm) printed with "NC". "NC" means "Non Connection" or "No Connecting". If other signals are supplied to the terminal, the unit may not work properly.
-
Page 88: Installing The Unit
Connection/Installation Ñ Installing the unit GPS antenna GPS antenna is installed inside of the car. It should be installed as horizontally as possible Ñ Non-Japanese cars to allow easy reception of the GPS satellite signals. To mount the GPS antenna inside your vehicle: 1) Clean your dashboard or other surface. - Page 89 Connection/Installation Ñ Ñ Microphone unit Removing the trim plate 1) Check the installation position of the 1) Engage the catch pins on the extraction key microphone (accessory 4). (accessory 5) and remove the two locks on the lower level. 2) Clean the installation surface. Lower the trim plate (accessory 8) and pull it 3) Remove the separator of the microphone forward as shown in the figure.
- Page 90 Connection/Installation Ñ Removing the unit 1) Remove the trim plate. (P.89) 2) Insert the two extraction key (accessory 5) deeply into the slots on each side, as shown. 3) Lower the extraction key toward the bottom, and pull out the unit halfway while pressing towards the inside.
- Page 91 Connection/Installation Ñ Connecting wires to terminals Other cable : Not used. Fuse (15A) Speaker impedance: 4-8 Ω White To front left speaker White/Black Gray To front right speaker Gray/Black Green To rear left speaker Green/Black Connect to the vehicle’s Accessory 1 parking brake detection switch harness.
- Page 92 Connection/Installation Ñ Ñ 3-way speaker system setup Connecting the system and external components ● DMX958XR / DMX908S Subwoofer Preout Mid Range Preout Tweeter Preout Accessory 4: Microphone When connecting to an external amplifier, connect its ground wire to the car’s chassis to avoid damaging the unit.
- Page 93 Dashboard camera input terminal to use HD video. (DMX958XR only) Lightning Digital AV *2 Connect an HD camera to Rear view camera Adapter input terminal to use HD video. (DMX958XR only) Installation/removal of fixing bracket KCA-HD200 (1.8 m) When you connect the cable to HDMI terminal KCA-iP103 (0.8m)
- Page 94 Settings (P.64). CMOS-3xx series (optional accessory) or commercially available camera. For HD video, connect an HD camera to Rear view camera input terminal. (DMX958XR only) For HD video, connect an HD camera to Front view camera/Dashboard camera input terminal. (DMX958XR only)
-
Page 95: Troubleshooting
Turn the power off and on again. If the “Error 07−67” setup (P.76). message does not disappear, contact your nearest Ñ KENWOOD dealer. About audio operations No Device (USB device) Radio reception is poor. The USB device is selected as a source although no USB The car antenna is not extended. - Page 96 Troubleshooting Ñ SiriusXM Check Tuner A SiriusXM tuner is not connected to this unit. h Verify that the SiriusXM Connect Vehicle Tuner cable is securely connected to the radio. Subscription Updated - Press Return To Continue The SiriusXM subscription has been renewed. h Touching [Return] on the popup screen will clear the message.
-
Page 97: Appendix
Appendix Appendix Playable Media and Files You can play various kinds of media and files on this unit. Ñ About files The following audio and video files are supported. ■ Playable Audio files Format Bit rate Sampling frequency Bit count AAC-LC (.m4a) MPEG-2/MPEG-4 AAC LC 8 –... -
Page 98: Specifications
: 156.6 mm (W) × 81.6 mm (H) : 802.11 a/b/g/n/ac 6-3/16 × 3-3/16 inch Frequency Range Display System : Dual Band (2.4GHz/5GHz) DMX958XR: AAS LCD panel DMX908S / DMX9708S: TN LCD panel Channels : Auto(1-11ch)/Auto(149,153,157,161ch) Drive System : TFT active matrix system... - Page 99 : 10.2 dBf (1.13 μV/ 75 Ω) 180/220/250 Hz, Through Slope: -6/-12/-18/-24 dB/Oct. Frequency Response (± 3.0 dB) : 30 Hz – 15 kHz 3-way X'Over (DMX958XR / DMX908S) High pass filter S/N Ratio (dB) Frequency: 250/300/1k/1.6k/2.5k/4k/5k/6.3k/8k/ : 65 dB (MONO) 10k/12.5k Hz...
- Page 100 Output frequency band : 20 – 88,000 Hz Specifications are subject to change without Preout Level (V) prior notice. (DMX958XR / DMX908S) : 5 V/10 kΩ (DMX9708S) : 4 V/10 kΩ Preout Impedance : ≤ 300 Ω...
-
Page 101: About This Unit
Appendix About this Unit • Google, Android, Google Play and Android Auto are trademarks of Google LLC. • To use Android Auto on your car display, you’ll need ■ Copyrights an Android Auto compatible vehicle or aftermarket • The Bluetooth® word mark and logos are registered stereo, an Android phone running Android 6 or higher, and the Android Auto app. - Page 102 Appendix • THIS PRODUCT IS LICENSED UNDER THE VC-1 PATENT – Neither the name of the Xiph.org Foundation PORTFOLIO LICENSE FOR THE PERSONAL AND NON- nor the names of its contributors may be used to COMMERCIAL USE OF A CONSUMER TO ( i ) ENCODE endorse or promote products derived from this VIDEO IN COMPLIANCE WITH THE VC-1 STANDARD software without specific prior written permission.
- Page 103 – Increase the separation between the Products: MONITOR WITH RECEIVER equipment and receiver. Model Name: DMX958XR / DMX908S / – Connect the equipment into an outlet on a DMX9708S circuit different from that to which the receiver is connected. Responsible Party: JVCKENWOOD USA –...
- Page 104 Appendix ■ Información acerca de la eliminación ■ Informação sobre a eliminação de de equipos eléctricos y electrónicos pilhas al final de la vida útil (aplicable a los Este produto não deve ser eliminado como lixo doméstico geral. Devolva a pilha usada ao revendedor países que hayan adoptado sistemas ou entidade autorizada para que a mesma seja independientes de recogida de...
- Page 106 Hi-Res Audio logo and Hi-Res Audio Wireless logo are used under license from Japan Audio Society.