Table of Contents
Advertisement
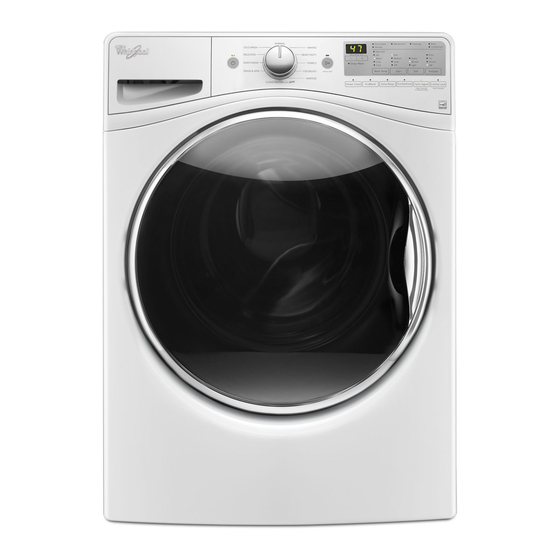
Use & Care Guide
Guide d'utilisation et d'entretien
Front-Loading Automatic Washer
Laveuse automatique à chargement frontal
W10775514C
W10775515C – SP
If you have any problems or questions, visit us at www.whirlpool.com
Pour tout problème ou toute question, consulter www.whirlpool.ca
Para obtener acceso al
Manual de uso y
cuidado en español, o para
obtener información adicional
acerca de su producto, visite:
www.whirlpool.com
Designed to use only HE
High Efficiency detergents.
Conçue pour l'utilisation
d'un détergent haute
efficacité seulement.
Advertisement
Table of Contents

Related Manuals for Whirlpool WFW85HEFW1


Summary of Contents for Whirlpool WFW85HEFW1
- Page 1 If you have any problems or questions, visit us at www.whirlpool.com Pour tout problème ou toute question, consulter www.whirlpool.ca Designed to use only HE High Efficiency detergents.
-
Page 2: Table Of Contents
Table of Contents Table de matières WASHER SAFETY ..............3 SÉCURITÉ DE LA LAVEUSE ..........33 ACCESSORIES ............... 4 ACCESSOIRES ..............34 CONTROL PANEL AND FEATURES ........5 TABLEAU DE COMMANDE ET CARACTÉRISTIQUES ..35 CYCLE GUIDE ................ 9 GUIDE DE PROGRAMMES ..........39 CHOOSING THE RIGHT DETERGENT ........12 CHOIX DU DÉTERGENT APPROPRIÉ........ -
Page 3: Washer Safety
Washer Safety... -
Page 4: Accessories
Accessories designed for your appliance: convenient storage. Customize your new washer and dryer with the following genuine Whirlpool accessories. For more information on options and ordering, call 1-866-698-2538 or visit us at: www.whirlpool.com/accessories. In Canada, call 1-800-688-2002 or visit us at www.whirlpool.ca. -
Page 5: Control Panel And Features
Control Panel and Features Not all features and cycles are available on all models. NOTES: The control panel features a sensitive surface that responds to a light touch of your finger. To ensure your selections are registered, touch the control panel with your fingertip, not your fingernail. When selecting a setting or option, simply touch its name. At cycle completion, your setting and option choices will be remembered for your next use of that cycle. - Page 6 POWER BUTTON Soil Touch to turn the washer on and off. Touch to stop/cancel Soil level (wash time) is preset for each wash cycle. When you change the soil setting, the cycle time will a cycle at any time. increase or decrease in the Estimated Time Remaining NOTE: Turning the Wash Cycle knob will also turn the display.
- Page 7 Cycle Signal ADDITIONAL OPTION Use this option to set the volume level or turn off the Drum Light (on some models) signal that sounds at end of cycle. Touch and hold EXTRA RINSE for 3 seconds to turn on With each touch of the Cycle Signal a number is the Drum Light.
- Page 8 CYCLE STATUS LIGHTS Done Once the cycle is complete, this light will come on. Remove the load promptly for best results. Delay Wash This will light when a delay time has been set. Sensing When the Start button is touched, the washer will first perform a self-test on the door lock mechanism and the sensing light will come on.
-
Page 9: Cycle Guide
Cycle Guide Settings and options shown in bold are default settings for that cycle. For best fabric care, choose the cycle, options, and settings that best fit the load being washed. Not all settings are available with each cycle, and some options cannot be used together. Not all cycles and options are available on all models. - Page 10 Items to wash using default Wash Spin Soil Available cycle settings: Cycle: Temperature:* Speed:*** Level: Options: Cycle Details: Clothing, Sanitize Extra Hot Extra Fast Extra Heavy Steam Clean** This cycle eliminates bedding and Fast Heavy FanFresh 99.99% of the most ®...
- Page 11 Items to wash using default Wash Spin Soil Available cycle settings: Cycle: Temperature:* Speed:*** Level: Options: Cycle Details: Extra Fast Swimwear, Drain & Extra Hot Extra Heavy FanFresh Select Drain & Spin; ® items that need Spin with Fast Heavy Delay Wash then select Extra rinsing...
-
Page 12: Choosing The Right Detergent
Choosing the Right Detergent Using the Dispenser Drawer (on some models) Use only High Efficiency detergents. The package will be marked “HE” or “High Efficiency.” Low-water washing creates excessive 1. Open the dispenser drawer. sudsing with a non-HE detergent. Using non-HE detergent 2. -
Page 13: Dispenser Drawer
Using the Load & Go Dispenser Drawer ™ (on some models) 1. Open the dispenser drawer. NOTES: 2. Add laundry products as described in steps 4–6 in the A small amount of water may remain in the dispensers from “Using Your Washer” section. the previous wash cycle. -
Page 14: Using Your Washer
Using Your Washer First wash cycle without laundry Turn knits inside out to prevent pilling. Separate lint-takers from lint-givers. Synthetics, knits, and corduroy fabrics will Before washing clothes for the first time, add liquid or powdered pick up lint from towels, rugs, and chenille fabrics. HE detergent to the detergent dispenser. - Page 15 Add HE detergent Load laundry into washer Load & Go™ Dispenser Drawer Single load Load & Go ™ powdered cartridge HE detergent Place a load of sorted items loosely in the washer. Items need Select detergent dispenser, based on type of HE detergent to move freely for best cleaning and to reduce wrinkling and used (either liquid or powdered).
- Page 16 Add liquid chlorine bleach Add liquid fabric softener to dispenser (if desired) to dispenser (if desired) Load & Go™ Dispenser Drawer Load & Go™ Dispenser Drawer Dispenser Drawer Dispenser Drawer Pour a measured amount of liquid fabric softener into liquid fabric softener compartment. Always follow Add liquid chlorine bleach to the bleach compartment.
- Page 17 Select CYCLE* Select any additional options* To add an option to the cycle, touch its name – Steam Clean, EcoBoost , FanFresh , Extra Rinse, Cycle Signal, or Control ™ ® Turn cycle knob to select your wash cycle. See “Cycle Guide” Lock.
- Page 18 Remove garments promptly Touch and hold Start button to begin after cycle is finished wash cycle Touch and hold the Start button for 3 seconds to start the wash cycle. To pause a cycle in progress, touch the Start button once, then touch and hold again to continue the cycle. Promptly remove garments after cycle To cancel a cycle, touch the Power button.
-
Page 19: Washer Maintenance
Washer Maintenance WATER INLET HOSES WASHER CARE (cont.) Replace inlet hoses after 5 years of use to reduce the risk 3. If stained areas or soil buildup are found, wipe down of hose failure. Periodically inspect and replace inlet hoses these areas of the seal using either of the following two if bulges, kinks, cuts, wear, or leaks are found. - Page 20 WASHER CARE (cont.) CLEAN WASHER CYCLE REMINDER 2. Chlorine Bleach Procedure: NOTE: Not all models have the Clean Washer with affresh ® a. Open the washer door and remove any clothing cycle reminder light. or items. The Clean Washer with affresh ®...
- Page 21 REMOVING THE DISPENSER (cont.) CLEANING LOAD & GO CARTRIDGE ™ (on some models) Dispenser Drawer It is recommended that you rinse out the Load & Go ™ Removing the Dispenser cartridge when changing detergent types or concentrations, or when the washer will not be used for an extended period. To remove: 1.
- Page 22 WINTER STORAGE CARE IMPORTANT: To avoid damage, install and store washer where it will not freeze. Because some water may stay in hoses, freezing can damage washer. If storing or moving during freezing weather, winterize your washer. To winterize washer: 1.
-
Page 23: Troubleshooting
Troubleshooting First try the solutions suggested here or visit our website at www.whirlpool.com/product_help – In Canada www.whirlpool.ca for assistance and to possibly avoid a service call. If you experience Possible Causes Solution Error Code Appears in Display (for 2 and 3 digit displays) Once any possible issues are corrected, touch the Power button once to clear the code. - Page 24 Troubleshooting First try the solutions suggested here or visit our website at www.whirlpool.com/product_help – In Canada www.whirlpool.ca for assistance and to possibly avoid a service call. If you experience Possible Causes Solution Error Code Appears in Display (for 2 and 3 digit displays) (cont.)
- Page 25 Troubleshooting First try the solutions suggested here or visit our website at www.whirlpool.com/product_help – In Canada www.whirlpool.ca for assistance and to possibly avoid a service call. If you experience Possible Causes Solution Vibration or Off-Balance Vibration, rocking, or Feet may not be in contact with the Front and rear feet must be in firm contact with floor, and “walking”...
- Page 26 Troubleshooting First try the solutions suggested here or visit our website at www.whirlpool.com/product_help – In Canada www.whirlpool.ca for assistance and to possibly avoid a service call. If you experience Possible Causes Solution Water Leaks (cont.) Water or suds leaking from Not using HE detergent or using too Only use HE detergent.
- Page 27 Troubleshooting First try the solutions suggested here or visit our website at www.whirlpool.com/product_help – In Canada www.whirlpool.ca for assistance and to possibly avoid a service call. If you experience Possible Causes Solution Washer not performing as expected (cont.) Washer won’t run or fill;...
- Page 28 Troubleshooting First try the solutions suggested here or visit our website at www.whirlpool.com/product_help – In Canada www.whirlpool.ca for assistance and to possibly avoid a service call. If you experience Possible Causes Solution Washer not performing as expected (cont.) Washer not draining/ Using cycles with a slower spin speed.
- Page 29 Troubleshooting First try the solutions suggested here or visit our website at www.whirlpool.com/product_help – In Canada www.whirlpool.ca for assistance and to possibly avoid a service call. If you experience Possible Causes Solution Washer not performing as expected (cont.) Load not rinsed (cont.) Washer not loaded as Avoid tightly packing the washer.
- Page 30 Troubleshooting First try the solutions suggested here or visit our website at www.whirlpool.com/product_help – In Canada www.whirlpool.ca for assistance and to possibly avoid a service call. If you experience Possible Causes Solution Washer not performing as expected (cont.) Not cleaning or Not using correct cycle for fabric type.
- Page 31 Troubleshooting First try the solutions suggested here or visit our website at www.whirlpool.com/product_help – In Canada www.whirlpool.ca for assistance and to possibly avoid a service call. If you experience Possible Causes Solution Washer not performing as expected (cont.) Fabric Damage (cont.) Liquid chlorine bleach may have Do not pour liquid chlorine bleach directly onto load.
-
Page 32: Warranty
DISCLAIMER OF REPRESENTATIONS OUTSIDE OF WARRANTY Whirlpool makes no representations about the quality, durability, or need for service or repair of this major appliance other than the representations contained in this Warranty. If you want a longer or more comprehensive warranty than the limited warranty that comes with this major appliance, you should ask Whirlpool or your retailer about buying an extended warranty. -
Page 33: Assistance Or Service
Avant de faire un appel pour obtenir de l’assistance ou un entretient, vérifier la section “Dépannage” ou consulter www.whirlpool.com/help. Cette vérification peut vous faire économiser le coût d’une visite de réparation. Si vous avez encore besoin d’aide, suivre les instructions ci-dessous.