
Related Manuals for Samsung BD-D6900


Summary of Contents for Samsung BD-D6900
- Page 1 BD-D6900M Blu-ray™ Disc Player user manual imagine the possibilities Thank you for purchasing this Samsung product. To receive a more complete service, please register your product at www.samsung.com/register...
-
Page 2: Key Features
Key features Smart Hub Blu-ray™ Disc Features You can download various for pay or free- Blu-ray Discs support the highest quality HD video of-charge applications through a network available in the industry - Large capacity means connection. These applications provide a range no compromise on video quality. -
Page 3: Safety Information
Safety Information Warning TO REDUCE THE RISK OF ELECTRIC SHOCK, DO NOT REMOVE THE COVER (OR BACK). NO USER-SERVICEABLE PARTS ARE INSIDE. REFER SERVICING TO QUALIFIED SERVICE PERSONNEL. CAUTION RISK OF ELECTRIC SHOCK DO NOT OPEN CAUTION: TO REDUCE THE RISK OF ELECTRIC This symbol indicates “dangerous voltage”... -
Page 4: Precautions
Safety Information CLASS 1 LASER PRODUCT 8. Do not install near any heat sources such as radiators, heat registers, stoves, or other This Compact Disc player is classified as a CLASS apparatus (including AV Receivers) that 1 LASER product. Use of controls, adjustments produce heat. -
Page 5: Viewing Using 3D Function
Viewing using 3D function Disc Storage & Management IMPORTANT HEALTH AND SAFETY Disc Handling INFORMATION FOR 3D PICTURES. Read and understand the following safety Disc Shape information before using the 3D function. • Some viewers may experience discomfort while • Use discs with regular viewing 3D TV such as dizziness, nausea, and shapes. - Page 6 • Be sure to remove the disc and turn off the product. product after use. • Samsung cannot guarantee that this product • Disconnect the AC power cord from the AC will play every disc bearing the Blu-ray Disc, outlet when you don’t intend to use the product DVD or CD logo because disc formats evolve, for long periods of time.
-
Page 7: Table Of Contents
Contents KEy FEATURES Blu-ray™ Disc Features Blu-ray Disc Player Features SAFETy INFORMATION Warning Precautions Important Safety Instructions Viewing using 3D function Disc Storage & Management Disc Handling GETTING STARTED Before using the User Manual Disc Types and Contents your product can play Disc types your product cannot play Blu-ray Disc Compatibility Disc Types... - Page 8 Settings Display Audio Channel Network System Language Security General Support Contact Samsung BASIC FUNCTIONS Playing a Video Playback 3D Converter Disc Structure Using the Disc Menu/Title Menu/Popup Menu Using the Disc Menu Using the Title Menu Playing the Title List...
- Page 9 BASIC FUNCTIONS Using the Search and Skip Functions Searching for a Desired Scene Skipping Chapters Slow Motion Play/Step Motion Play Slow Motion Play Step Motion Play Using the TOOLS button Moving to a Desired Scene Directly Repeating the Title or Chapter Repeating a Section Selecting the Picture Settings Selecting the Audio Language...
- Page 10 Using Smart Hub Starting Smart Hub for the First Time The Settings Menu - BLUE (D) The Edit Mode Menu - YELLOW (C) The Sort Menu - GREEN (B) Samsung Apps For Pay Apps BD-LIVE™ Using the AllShare Function APPENDIx...
-
Page 11: Getting Started
Getting Started Before using the User Manual Disc Types and Contents your product can play Term Logo Icon Definition Indicates a function available on a BD-ROM or BD-RE/-R disc recorded in the BD-RE format. VIDEO Indicates a function available on a DVD-VIDEO or recorded DVD+RW/ DVD-RW(V)/DVD-R/+R discs that have been recorded and finalized. -
Page 12: Blu-Ray Disc Compatibility
Please note that this is not a defect in the product. • When switching from the first layer to the ` Samsung cannot guarantee that this product will second layer of a dual-layered DVD-VIDEO disc, play every disc bearing the Blu-ray Disc, DVD or CD... -
Page 13: Region Code
Copyright © 2011 Samsung Electronics Co.,Ltd. All rights reserved; No part or whole of this user’s manual may be reproduced or copied without the prior written permission of Samsung Electronics Co.,Ltd. English... -
Page 14: Supported File Formats
USB card reader from damage or loss of data. SAMSUNG is • Does not support if a folder or file name is not responsible for any data file damage or longer than 128 characters. - Page 15 Video File Support File Frame rate Bit rate Container Video Codec Resolution Audio Codec Extention (fps) (Mbsp) DivX 3.11/4.x/5.1/6.0 1920x1080 6 ~ 30 H.264 BP/MP/HP 1920x1080 6 ~ 30 *.avi LPCM MPEG4 SP/ASP 1920x1080 6 ~ 30 ADPCM Motion JPEG 1920x1080 6 ~ 30 DTS Core...
-
Page 16: Connect A Usb Device Before Using The Time Shift And Recorded Tv Functions
- Supports DTS Core (5.1 ch, 16 bit, 48kHz) only from damage or loss of data. SAMSUNG is - Does not support APDCM MULAW, ALAW not responsible for any data file damage or ƒ... -
Page 17: Logos Of Discs The Product Can Play
Logos of Discs the Product Can Play Blu-ray Disc 3D Blu-ray Disc DTS-HD Master Audio DivX PAL broadcast System in U.K., BD-LIVE Dolby TrueHD Java France, Germany, etc. Accessories Check for the supplied accessories below. POWER POWER 2D 3D BD-HDD/TV TTX/MIX DISC MENU TITLE MENU... -
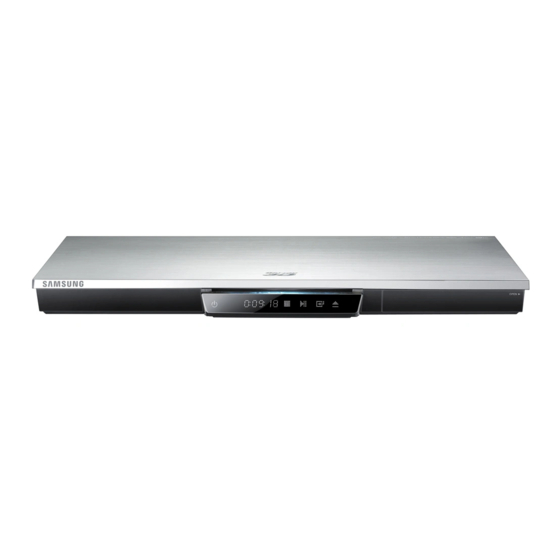
Page 18: Front Panel
Getting Started Front Panel d ef g REMOTE CONTROL SENSOR Detects signals from the remote control. POWER BUTTON Turns the product on and off. DISC SLOT Inserts a disc. DISPLAY Displays the playing status, time, etc. STOP BUTTON Stops disc playback. PLAY/PAUSE BUTTON Plays a disc or pauses playback. -
Page 19: Rear Panel
` When removing the “CI CAM with CI or CI+ CARD”, carefully pull it out with your hands since dropping the “CI CAM with CI or CI+ CARD” may cause damage to it. ` Insert the “CI CAM with CI or CI+ CARD” in the direction marked on the card. ` The location of the CI card slot may be different depending on the model. -
Page 20: Remote Control
Getting Started Remote Control Tour of the Remote Control Turn the TV on and off. POWER POWER (To operate your TV, please refer to pages Turn the product on and off. 21~22) Press this to operate a TV. Press to eject a disc. BD-HDD/TV TTX/MIX Press this to operate Blu-ray Disc Player. -
Page 21: Setting The Remote Control To Operate Your Tv
Setting the Remote Control to In case of Samsung TV, below buttons are also Operate Your TV compatible with this remote control. Button Function To determine whether your television is MENU Used to move to the TV menu. compatible, follow the instructions below. -
Page 22: Tv Control Codes
Getting Started TV Control Codes Brand Code Brand Code TV POWER+01, +02, +03, +04, +05, NEWSAN TV POWER+68 SAMSUNG +06, +07, +08, +09 NOBLEX TV POWER+66 AIWA TV POWER+82 NOKIA TV POWER+74 TV POWER+10, +11, +12, +13, +14, NORDMENDE TV POWER+72, +73, +75... -
Page 23: Connections
Connections Connecting to a TV with an Audio/Video cables and RF cable 1. Connect the RF cable as shown. 2. Using video/audio cables, connect the VIDEO OUT (yellow) / AUDIO OUT (white and red) terminals on the rear of the product to the VIDEO IN (yellow) / AUDIO IN (white and red) terminals of your TV. -
Page 24: Connecting To A Tv
Connections Connecting to a TV Case 1 : Connecting to a TV with an HDMI Cable - Best Quality (Recommended) 1. Using an HDMI cable, connect the HDMI OUT terminal on the rear of the product to the HDMI IN terminal of your TV. -
Page 25: Case 2 : Connecting To A Tv With A Component Cable - Better Quality
Case 2 : Connecting to a TV with a Component Cable - Better Quality - You can connect the product to your TV using Component video cables. - You will enjoy high quality images with accurate colour reproduction. Component video separates the picture element into black and white (Y), blue (P ) and red (P ) signals to present clear and clean... -
Page 26: Case 3 : Connecting To A Tv With An Audio/Video Cable - Good Quality
Connections Case 3 : Connecting to a TV with an Audio/Video cable - Good Quality 1. Using an Audio/Video cable, connect the VIDEO OUT (yellow) / AUDIO OUT (white and red) terminals on the rear of the product to the VIDEO IN (yellow) / AUDIO IN (white and red) terminals of your TV. -
Page 27: Connecting To An Audio System
Connecting to an Audio System • Please turn the volume down when you turn on the AV receiver. A sudden loud sound may cause damage to the speakers and your ears. • Set the audio output format according to the capabilities of your AV receiver. (See pages 38~41) • The position of HDMI input terminals may vary depending on your AV receiver. -
Page 28: Case 2 : Connecting To An Audio System
Connections Case 2 : Connecting to an Audio Case 3 : Connecting to an Audio System (AV receiver with Dolby System (Stereo Amplifier) Digital or DTS decoder) - Better - Good Quality Quality 1. Using the audio cables, connect the AUDIO OUT (white and red) terminals on the rear of 1. -
Page 29: Connecting To The Network
NOTE ✎ ` Internet access to Samsung’s software update server may not be allowed, depending on the router you use or your ISP’s policy. For more information, contact your ISP (Internet Service Provider). ` For DSL users, please use a router to make a network connection. -
Page 30: Wireless Network
Connections Wireless Network Your product has built in Wi-Fi capability. You can connect to a network through a Wireless IP sharer (a router or modem). To set the network options, see pages 43~47. Broadband service Wireless IP sharer Networking with PC for AllShare function NOTE ✎... -
Page 31: Before Starting (Plug & Play)
Setup Before Starting (Plug & Play) 5. Press the ▲▼ buttons to select the desired Antenna Source, then press the ENTER button. 1. Turn on your TV after connecting the product. • If you select Air : Press the ▼ button to When you connect the product to a TV for the select the Search, then press the ENTER first time, product turns on automatically and... -
Page 32: Watch Tv
` When the product is connected to a network, select a Antenna c Programme View < Ch. Mode " Watch ƒ Page Smart Hub from the Home menu. Download the desired content from Samsung Apps. Shows the stored channels. (See pages 76~77) - Page 33 Channel Manager Using the TOOLS button Press the ▲▼ buttons to select the desired You can manage the stored channels. channel, then press the TOOLS button. Channel Manager Screen Channel Manager 1/2 Pages Selected item: 1 Channel number Tools 801 xxxxxxxx 801 xxxxxxxx xxxxxxxx Watch...
-
Page 34: Settings
Setup Settings NOTE ✎ ` Depending on the content and the position of the 1. Press the MENU button. picture on your TV screen, you may see vertical black bars on the left side, right side, or both sides. The home menu will be displayed. 2. - Page 35 TV Aspect When you connect a Samsung product and a Samsung TV with BD Wise to each other via HDMI, Depending on the type of television you have, you and BD Wise is on in both the product and TV, the may want to adjust the screen size setting.
- Page 36 Setup Resolution according to the output mode ƒ Blu-ray Disc/E-contents/Digital Contents playback HDMI / connected HDMI / not connected HDMI Mode Component Mode Output Component/ Setup E-contents/ E-contents/ VIDEO Mode VIDEO Mode Blu-ray Disc Digital Blu-ray Disc Digital contents contents Resolution of BD Wise 1080p...
- Page 37 ƒ DTV View HDMI connected HDMI not connected Output Component/ Resolution Component Mode VIDEO Mode HDMI Mode VIDEO MODE BD Wise 1080p 576i/480i DTV Smart Resolution Resolution of “Auto” Broadcast stream Auto 576i/480i Max Resolution of DTV Smart Resolution “Off” TV input 1080p 1080p...
-
Page 38: Audio
Setup Audio • RGB (Standard) : Select this to output the normal RGB colour gamut. • RGB (Enhanced) : If you have connected Digital Output the product to a DVI display device such as a monitor, select this to output the enhanced RGB You set the Digital Output to match the capabilities colour gamut. - Page 39 Digital Output Selection Bitstream Bitstream Bitstream Setup (Re-encoded (Re-encoded (Unprocessed) DTS) Dolby D) HDMI HDMI HDMI supported HDMI supported Connection supported Optical supported Optical AV receiver or AV receiver or AV receiver AV receiver Optical Optical Up to PCM Re-encoded PCM 2ch PCM 2ch Re-encoded DTS...
- Page 40 Setup Decodes the main Decodes the main feature audio and feature audio and BONUSVIEW audio Outputs only the main BONUSVIEW audio stream together Decodes the main feature feature audio stream so that stream together into PCM audio and audio and BONUSVIEW your AV receiver can decode Definition for into PCM audio and...
-
Page 41: Channel
DTS Neo:6 Mode Country You can enjoy multi-channel sound from an Audio Select this to change the country. CD (CD-DA). Enter the desired 4-digit password using the • Off : Outputs a 2-channel audio signal through number buttons. the front speakers only. 1. - Page 42 Setup Edit Channel Number NOTE ✎ ` If you select Quick, you can set up the Network, Select this to edit the channel number in the Network ID, Frequency, Modulation and Symbol channel manager. (See page 33) Rate manually by pressing the button on the remote • Disable : Select disable if you do not want to control.
-
Page 43: Network
3. Insert the CAM with the “CI CAM with CI or Wired Network CI+ CARD” into the common interface slot, ƒ Setting Up a Wired Connection - Auto in the direction of the arrow so that it aligns parallel with the slot. 1. - Page 44 Setup NOTE Wireless Network ✎ ` Depending on your Windows version, the information You can setup a wireless network three ways: may differ. • Wireless (general) • Using WPS(PBC) To enter the Network settings into your product, • One Foot Connection follow these steps: Wireless (general) includes both Automatic and 1.
- Page 45 4. On the Security screen, enter your network’s Windows 7 Pass Phrase. Enter numbers directly using your 1. Click the Network icon on the bottom right of remote control. the Windows desktop. To select a letter, press the ▲▼◄► buttons to 2.
- Page 46 2. Press the ENTER button. network connection is verified. 3. Place the Samsung Wireless Router within 25 WPS(PBC) cm (10 inches) of your product to connect. The easiest way to set up the wireless network 4.
-
Page 47: System
CEC. ` The Internet connection may be restricted while you ` If your Samsung TV has an Anynet+ logo, then it are using BD-LIVE contents. supports the Anynet+ function. -
Page 48: Language
Setup DivX® Video On Demand 1. In Stop mode, connect the external storage device to the USB port on the front panel of View DivX® VOD Registration Codes to purchase the product. and play DivX® VOD contents. 2. Select the Device Format, and then press the ENTER button. -
Page 49: Security
Security Change PIN Change the 4-digit password used to access This function works in conjunction with Blu-ray security functions. Disc/DVDs that have been assigned an age rating or numeric rating that indicates the maturity level If you forgot your password of the content. -
Page 50: Support
4. Start the application on your portable device. during the update process. The application should find your product and ` Samsung Electronics shall take no legal responsibility display it on a list. for product malfunction caused by an unstable 5. Select the product. -
Page 51: Contact Samsung
Download in Standby Mode To upgrade by Disc, follow these steps: You can set the Download in Standby Mode 1. Visit www.samsung.com/bluraysupport. function so that the product downloads new 2. Download the latest disc software upgrade upgrade software when it is in Standby mode. In zip archive to your computer. -
Page 52: Basic Functions
Basic Functions Playing a Video 3. You can toggle between 2D and 3D by pressing the 2D3D button repeatedly. If you are playing 3D contents in the 3D Playback mode, you cannot use this function. NOTE ✎ 1. Push a disc into the Blu-ray Disc player with ` You can’t convert 2D contents into 3D or use the the disc’s label facing up. -
Page 53: Disc Structure
Disc Structure Using the Disc Menu/Title Menu/ Popup Menu The content of discs are usually divided as shown below. Using the Disc Menu • Blu-ray Disc, DVD-VIDEO title 1 title 2 chapter 1 chapter 2 chapter 1 chapter 2 chapter 3 1. -
Page 54: Using The Popup Menu
Basic Functions Using the Popup Menu Skipping Chapters hzZ�� 1. During playback, press the POPUP • During playback, press the SKIP ( MENU button on the remote control. button. If you press the SKIP ( 2. Press the ▲▼◄► buttons or ENTER ) button, the disc moves to the next chapter. -
Page 55: Using The Tools Button
Using the TOOLS button 4. To return to normal play, press the TOOLS button again. During playback, you can operate the disc 5. Press the ▲▼ buttons to select Repeat Mode. menu by pressing the TOOLS button. 6. Press the ◄► buttons to select Off, then press the ENTER button. -
Page 56: Selecting The Audio Language
Basic Functions Selecting the Subtitle Language • Dynamic : Choose this setting to increase Sharpness. • Normal : Choose this setting for most hZ� viewing applications. • Movie : This is the best setting for watching You can also operate this function by pressing the AD/SUBTITLE button on movies. -
Page 57: Setting Bonusview
Setting BONUSVIEW Listening to Music o� Playing an Audio CD (CD-DA)/MP3 The BONUSVIEW feature allows you to view additional content (such as commentaries) in a small screen window while the movie is playing. 1. Insert an Audio CD (CD-DA) or an MP3 Disc. This function is only available if the disc has the • For an Audio CD (CD-DA), the first track BONUSVIEW feature. -
Page 58: Repeat An Audio Cd (Cd-Da)/Mp3
Basic Functions Repeat an Audio CD (CD-DA)/MP3 Audio CD 1/2 Page Music Selected Items : 3 1. During the Playlist playback, press the TRACK 001 TRACK 002 TOOLS button. 00:43 03:56 TRACK 003 TRACK 004 04:41 04:02 TRACK 005 TRACK 006 2. -
Page 59: Playing Back A Pictures
Playing back a Pictures • Picture Settings : Select this if you want to adjust the picture quality. • Information : Shows the picture information including the name and size, etc. Playing JPEG files NOTE ✎ ` To enable the background music function, the photo 1. -
Page 60: Playing Back A Usb Storage Device
Basic Functions Playing back a USB Storage Device You can use the USB connection to play multimedia files (MP3, JPEG, DivX, etc) located from a USB storage device. 1. Move to the Home menu. Watch TV Guide Schedule Manager Channel List Channel Manager My Devices My Contents... -
Page 61: Dtv Functions
DTV Functions Display Screen Using the TOOLS button Press the TOOLS button while you are 1. After Tuning is completed, you can watch TV viewing a channel. channel. 2. To change TV channels, press the PROG • Tools Menu Screen (,/.) button. -
Page 62: Selecting The Dual I Ii
DTV Functions Selecting the Dual I II Add to Favourites 1. Press the TOOLS button while you are You can also operate this function by viewing a channel. pressing the AUDIO button on the 2. Press the ▲▼ buttons to select the Add to remote control. -
Page 63: Viewing The Guide Screen
• Subtitle : You can set it to On or Off. Displays the channel screen. If you select On, the Subtitle Mode and Subtitle Language will be activated. Displays the channel information. • Subtitle Mode : Select the desired subtitle Displays the current date and time. -
Page 64: To Cancel Or Edit Schedule
DTV Functions Viewing DTV with the 3D effect 4. Press the ▲▼◄►buttons to select the channel you want to set Timer Recording (or Timer Viewing), press the RED (A) button. You can experience 3D effect with all live TV programme and recorded TV programme. 5. -
Page 65: Using The Teletext Service
Using the Teletext Service 2 (page up) : Displays the next Teletext page. POWER POWER 2D 3D If DTV programme supports teletext signal, you 3 (page down) : Displays the previous Teletext BD-HDD/TV can use teletext service. For Teletext information page. -
Page 66: Advanced Functions
Advanced Functions To stop recording Recording 1. Press the STOP ( This player can record in external devices. ) button to stop a recording in progress. The message Before recording “Recording completed.”will appear. You must format the connected device to Playback control during recording recording TV programme by using Device Format menu. -
Page 67: Time Shift Function
Time Shift information When Disc is not loaded 1. Insert a disc into Disc Slot. You can see current information about Time Shift 2. Disc will be loaded and played while keeping function. recording. 1. Press the ENTER button on your remote NOTE while Time Shift function is enabled. -
Page 68: Playing The Recorded Title
Advanced Functions 6. PAUSE ( ) button : Pause the scene while keeping Time shift operation. 7. STOP ( ) button : If you are watching the past scene, playback point will jump to the same scene with Live TV. If you are watching the same scene with Live TV, the Time shift function will be stopped. -
Page 69: Network Services
Network Services 3. The Smart Hub screen appears. You can enjoy various network services such as Smart Hub or BD-LIVE by connecting the product In a few cases, the Country screen appears to your network. immediately after. 4. If the Country screen has appeared, press the Read the following instructions before using any ▲▼... - Page 70 • For easy access, use the SEARCH button on the remote control. • For instructions to use search function, please visit www.samsung.com. Samsung Apps : You can download various for pay or free-of-charge application services. Recommended : Displays recommended contents managed by Samsung.
- Page 71 To create an account, follow these steps: Shift Delete 1. Press the RED (A) button on your remote b Input Method / Language: English Search Your Video Samsung Apps Contents 1 Contents 2 Contents 3 Contents 4 Login Recommended Smart TV ID...
-
Page 72: The Settings Menu - Blue (D)
Network Services 8. When done, press the ENTER button to 3. Select your ID from the list that appears, and select OK, and then press the ENTER button then press the ENTER button. The Create again. The Create Account screen re-appears. Account screen re-appears. - Page 73 Service Accounts that NOTE ✎ you registered on the Register Service Account ` If you have a Samsung apps account and you want screen. to use the Samsung Apps function in Smart Hub, you Deactivate Account must register your Samsung Apps account here.
- Page 74 Network Services 3. After a few moments, Smart Hub automatically The functions in the Edit Mode Menu bar are resets. The screen may go black, then Smart described below. Hub re-appears. In a few moments, it starts NOTE ✎ the re-initialization procedure. ` Some menu items may not appear on the screen.
- Page 75 Rename Folder To Access Applications in a Folder 1. Close the Edit Mode menu. The Rename Folder function lets you rename 2. In My Applications, press the ▲▼◄► to folders. To use the Rename Folder function, follow select a folder, and then press the ENTER these steps: button.
- Page 76 Released window appears confirming the lock To download for pay apps, you need to create a has been release, and then closes. Samsung Apps account and add a credit card to the account. Delete To create a Samsung Apps account, please visit www.samsung.com...
- Page 77 My Account 4. Press the ▲▼◄► buttons to select an application or service, and then press the My Account gives you access to your Samsung ENTER button. The Application Details screen Apps order and download history, and to the My appears describing the service or application.
- Page 78 AllShare software on your PC. If you have a DLNA compatible mobile phone or NAS, you can use AllShare without any additional software. You can download the PC software and get detailed instructions for using AllShare from the Samsung.com web site. English...
- Page 79 Appendix Troubleshooting Before requesting service, please check the following. PROBLEM SOLUTION No operation can be performed with the • Check the batteries in the remote control. They may need replacing. remote control. • Operate the remote control at a distance of no more than 6.1m. • Remove batteries and hold down one or more buttons for several minutes to drain the microprocessor inside the remote control to reset it.
- Page 80 • Go to the contents and find the section of the user manual that contains the explanations regarding the current problem, and follow the procedure once again. • If the problem still cannot be solved, please contact your nearest Samsung authorized service centre. The picture is noisy or distorted • Make sure that the disc is not dirty or scratched.
- Page 81 We will provide you with the amount of the administration fee before we make a home visit or begin any work on your product. We recommend you read this manually thoroughly, search for a solution on line at www.samsung.com, or contact Samsung Customer Care before seeking to repair your product.
- Page 82 32~33 PCM Downsampling Wired Network 43~44 Plug & Play Wireless Network 44~47 Popup Menu Camera Angle Progressive Mode Channel Manager Contact Samsung Zoom Recording 66~68 Region Code Digital Output 38~40 Remote Control Digital TV Remote Control Sensor Disc Menu Resolution...
- Page 83 Specifications Weight 1.8 Kg Dimensions 430 (W) X 256 (D) X 37 (H) mm General Operating Temperature Range +5°C to +35°C Operating Humidity Range 10 % to 75 % BD (Blu-ray Disc) Reading Speed : 4.917 m/sec. Reading Speed : 3.49 ~ 4.06 m/sec. DVD (Digital Versatile Disc) Approx.
- Page 84 • Samsung cannot assure that this product will play every disc bearing the BD-ROM, BD-RE/-R, DVD-VIDEO, DVD-RW/-R, DVD+RW/+R and CD-RW/-R logos, and this product may not respond to all operating commands or operate all features of every disc.
- Page 85 CONTENT OR SERVICE BY YOU OR ANY THIRD PARTY, EVEN IF ADVISED OF THE POSSIBILITY OF SUCH DAMAGES. Third party services may be terminated or interrupted at any time, and Samsung makes no representation or warranty that any content or service will remain available for any period of time. Content and services are transmitted by third parties by means of networks and transmission facilities over which Samsung has no control.
- Page 86 Appendix Licence • Manufactured under licence from Dolby Laboratories. Dolby and the double-D symbol are trademarks of Dolby Laboratories. • Manufactured under licence under U.S. Patent #’s : 5,451,942; 5,956,674; 5,974,380; 5,978,762; 6,226,616; 6,487,535; 7,212,872; 7,333,929; 7,392,195; 7,272,567 & other U.S. and worldwide patents issued & pending. DTS and the Symbol are registered trademarks, &...
- Page 87 - This Blu-ray works with CI and CI+ CAM but it is not Certify from DGTVi association. Recommendation - EU Only • Hereby, Samsung Electronics, declares that this BD Player is in compliance with the essential requirements and other relevant provisions of Directive 1999/5/EC.
- Page 88 EIRE UNITED KINGDOM This Samsung product is warranted for the period of 4. This product is not considered to be defective in twelve (12) months from the original date of materials nor workmanship by reason that it purchase, against defective materials and requires adaptation in order to conform to workmanship.
- Page 89 Contact SAMSUNG WORLD WIDE If you have any questions or comments relating to Samsung products, please contact the SAMSUNG customer care centre. Area Contact Centre Web Site Area Contact Centre Web Site ` North America 0700 Samsung (0700 726 Serbia www.samsung.com...
- Page 90 English Português Nota da Cinavia: Esse produto usa tecnologia Cinavia Notice : This product uses Cinavia technology to limit the use of unauthorized copies of some commercially-produced Cinavia para limitar o uso de cópias não autorizadas de filmes e vídeos film and videos and their soundtracks.
- Page 91 Français Avis de Cinavia : Ce produit utilise la technologie Español Aviso de Cinavia : Este producto utiliza tecnología Cinavia para limitar el uso de copias no autorizadas de algunas películas Cinavia pour limiter l'utilisation de copies non autorisées de certains films et vidéos commerciaux ainsi que leurs bandes son.
- Page 92 Suomi Česky Upozornění k technologii Cinavia : Tento Cinavia-ilmoitus: Tämä tuote käyttää Cinavia- přístroj využívá technologii Cinavia k omezení použití neoprávněných tekniikkaa rajoittaakseen joidenkin kaupallisesti tuotettujen elokuvien ja videoiden sekä niiden ääniraitojen luvattomien kopioiden käyttöä. Kun kopií některých komerčních filmů a videí a jejich zvukových stop. Při luvattoman kopion kielletty käyttö...
- Page 93 Polski Български Komentarz Cinavia : Urządzenie to korzysta z Бележка за Cinavia : Този продукт използва technologii Cinavia w celu ograniczenia wykorzystania nieupoważnionych технологията Cinavia, за да ограничи използването на неоторизирани kopii pewnych filmów i obrazów wideo wyprodukowanych w celach копия...
- Page 94 Hrvatski Русский Obavijest o tehnologiji Cinavia : ovaj proizvod rabi Уведомление о Cinavia: Данный продукт оснащен tehnologiju Cinavia kako bi se ograničila uporaba neovlaštenih kopija технологией Cinavia, которая не позволяет использовать незаконно сделанные nekih komercijalno proizvedenih filmova i videozapisa i njihovih zvučnih копии...
- Page 95 Thai 繁體中文 Cinavia 聲明:本產品使用 Cinavia 技術來限制 ประกาศเกี ่ ย วกั บ Cinavia : ผลิ ต ภั ณ ฑ์ น ี ้ ใ ช้ เ ทคโนโลยี Cinavia เพื ่ อ จำกั ด การใช้ ง านแผ่ น 使用某些商業製造的電影和視訊及其聲道的未經授權副本。當偵測 ที ่ ไ ม่ ไ ด้ ร ั บ อนุ ญ าตของฟิ ล ์ ม และวิ ด ี โ อและแทร็ ก เสี ย งที ่ ผ ลิ ต ม 到禁止使用的未經授權副本時,將會顯示一則訊息,並且播放或複...
- Page 96 Tiếng Việt Thông bá o củ a Cinavia: Sả n phẩ m nà y sử dụ n g công nghệ Cinavia để hạ n chế việ c sử dụ n g cá c bả n sao trá i phé p mộ t số bộ phim và video đượ c sả n xuấ t thương mạ...
- Page 97 Correct disposal of batteries in this product (Applicable in the European Union and other European countries with separate battery return systems.) This marking on the battery, manual or packaging indicates that the batteries in this product should not be disposed of with other household waste at the end of their working life.