
Related Manuals for Omega OBES6781


Summary of Contents for Omega OBES6781
- Page 1 INSTALLATION, OPERATION & MAINTENANCE INSTRUCTIONS FOR EVERDURE 73L, 60CM BUILT-IN ELECTRIC OVENS Models Included: OBES6781 OBES61 INSTALLATION, OPERATION AND MAINTENANCE INSTRUCTIONS EASY DECISION...
-
Page 2: Table Of Contents
INSTALLATION, OPERATION AND MAINTENANCE INSTRUCTIONS FOR EVERDURE 73L BUILT-IN ELECTRIC OVEN RANGE OBES6781 BUILT-IN ELECTRIC OVEN CONGRATULATIONS Welcome to the Everdure Kitchen Community and thank you for choosing one of our many fantastic built in ovens. We are confident that you will now be able to meet your cooking needs. -
Page 3: Important Safety Instructions
IMPORTANT SAFETY INSTRUCTIONS IMPORTANT: Read the assembly instruction section and safety precautions of this booklet carefully before removing the contents of this carton. This appliance is not intended for use by persons (including children) with reduced physical, sensory or mental capabilities, or lack of experience or knowledge, unless they have been given supervision or instruction concerning the use of the appliance by a person responsible for their safety. -
Page 4: Appliance Details
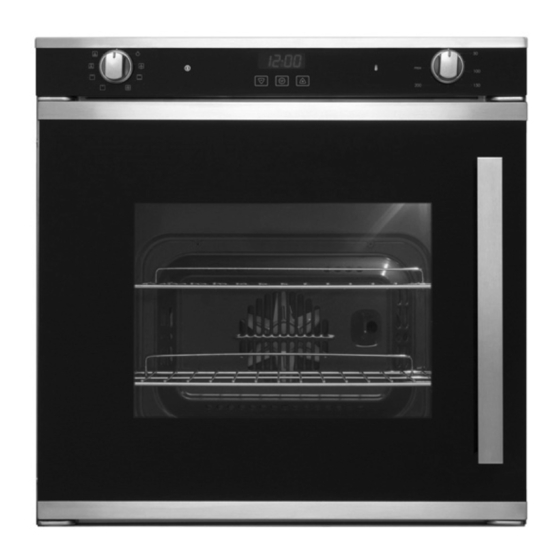
OVENS: Rated Voltage: 220 to 240 Vac 50 Hz Max Rated Inputs: OBES6781: 2970-3540W, Supply Connection: OVENS - 15A plug. This information can be found on the rating plate (data label) affixed to the inside of the door jamb. SIZES:... - Page 5 OVEN LAMP REPLACEMENT The appliance must first be disconnected from the power outlet or turned off at your isolation switch. Unscrew the glass cover attached to the lamp holder; anti-clockwise. Unscrew the lamp and replace it with another high-temperature lamp with the following characteristics: Type: E 14 Voltage: AC220V-240V...
-
Page 6: Installation
INSTALLATION The adjacent furniture must be able to withstand a minimum temperature rise of 85°C above the ambient temperature of the room it is located in, during periods of use. The power supply to the appliance must be cut off before any adjustments or maintenance work is done on it. PREPARATION FOR INSTALLATION AND USE Manufactured with best quality parts and materials, this modern, functional and practical oven will meet your needs in all respects. - Page 7 CABINET DIMENSIONS & VENTILATION REQUIREMENTS The figure opposite shows the ventilation and cut-out requirements for the installation of the appliance into a standard kitchen cabinet. The figure opposite shows the ventilation and cut-out requirements for the installation of the appliance into a tall housing unit.
-
Page 8: Operating Instructions
OPERATING INSTRUCTIONS ACCESSORIES It is recommended that you use the containers indicated depending on the food you will cook in your oven. You can also use glass containers, cake pans and special oven trays suitable for use in your oven (available in kitchenware shops). - Page 9 CONTROLS 01) Oven Function Selection Knob. 04) Thermostat Indicator. 02) Power Indicator. 05) Oven Thermostat Control Knob. 03) Oven Timer Buttons (“-”, program, “+”). 06) LED Display. OVEN FUNCTION SELECTION KNOB The oven function selection knob is used to select the different functions possible (see table). Each is explained in detail.
- Page 10 OVEN FUNCTION CONTROL CHART Please note: To run the oven without using the timer, the oven must be set to “Manual Mode”. The Manual Mode indicator (8) must be lit on the display (the Auto Mode indicator should not be lit). Note: Oven shelves are numbered from 7 at the top down to 1 at the bottom when referring to the food cooking chart.
- Page 11 OVEN FUNCTION CONTROLS Light Only Function When the function selector knob is in any position other than the “off” position, the oven light will comes on. Turn the function knob to the first function indicator clockwise to turn the oven light on only. Defrost Function: You can start the defrost operation by putting the frozen food into oven and bringing the function control knob to the indicated mark.
- Page 12 Mid-Grill Function: This function is used for grilling. Adjust the function control knob so it indicates the Mid-Grill function symbol and adjust the oven timer to the recommended time for cooking. Set the oven’s thermostat control knob to the required temperature. After a preheating period of 10 minutes, put your food into the oven.
- Page 13 Fan Assist with Lower Heat Function This Fan Assist with Lower Heat function functions similarly to the Fan Forced with Lower Heat Function. It is different due to the absence of the rear element located in the back of the oven. This function will cook food in a slower more delicate process than the Fan Forced equivalent and is recommended for finishing off the cooking of food (in baking dishes or trays) which is already superficially well-cooked and golden on the top but still soft inside.
- Page 14 USING THE DIGITAL TIMER Time of Day Adjustment: The time must be adjusted before starting to use the oven. Following power supply to the oven, the decimal point will flash. While the decimal point is flashing, use the (+) and (-) buttons to adjust the current time (24 hour clock).
- Page 15 Setting the cooking end time function: The cooking end time function allows you to set the oven to cook until a pre-set time, after which the oven will turn off. Select the desired temperature & oven functions with the control knobs (the oven will start to work).
-
Page 16: Cleaning
CLEANING NOTE: Cleaning and maintenance operations must only be carried out when the oven is cool. The appliance should be disconnected from the power outlet or turned off at your isolation switch before commencing any cleaning process. Cleaning the oven exterior: Before starting to clean your oven, be sure that all control buttons are off and your appliance has cooled off. -
Page 17: Recommended Cooking Times
RECOMMENDED COOKING TIMES LOWER-UPPER HEAT – (Conventional) LOWER-UPPER HEAT + FAN (Fan Assist) FOOD Thermostat Rack Cooking Period Thermostat Rack Cooking Period pos. (°c) pos. (min) pos (°c) pos. (min) Scones Plain or fruit 10-15 10-15 Cake - Butter cake (deep) Cake - Sponge 25-30... -
Page 18: Cooking Guides
COOKING GUIDES For optimum cooking keep edges of baking dishes and pans at least 4cm from the sides of the oven. This allows free heat circulation and ensures even cooking. Were possible remove large cuts of meat 1kg or over from the fridge 1 hour prior to cooking. Allow, to stand covered and away from direct sun/heat. -
Page 19: Transportation
Grilling Cooking times may vary according to the nature of the foods, their homogeneity and their volume. When cooking a certain food for the first time, it is advisable to choose the lowest temperature and then increase temperature as required. Cakes and Baking Organize the oven shelves while the oven is cold and before preparing a recipe. - Page 20 A division of Shriro Australia Pty Ltd 104 Vanessa Street, Kingsgrove NSW 2208 AUSTRALIA: 1300 355 541 www.everdure.com NEW ZEALAND: (09) 415 6000 www.everdure.co.nz IM Ref: OBES6781 24/2017/01FC FO R INDO OR USE ONLY EASY DECISION...