Table of Contents
Advertisement
Quick Links
Advertisement
Table of Contents

Related Manuals for TP-Link TP601A


Summary of Contents for TP-Link TP601A
- Page 1 1910100107 REV1.0.0...
-
Page 2: Table Of Contents
Contents About this guide Chapter 1 Get started 1. 1 Overview ..............1 1. - Page 3 5. 3 Manage conversations ........... . 17 Chapter 6 Contacts 6.
- Page 4 12. 1 View files(PIC, MUSIC, VIDEO, DOC, APK, ZIP) ....... 32 12.
- Page 5 18. 5 Storage ..............43 18.
-
Page 6: About This Guide
About this guide This guide provides details of each function and shows how to configure the smart phone appropriate to your needs. Conventions In this guide, the following conventions are used: Description Convention Smart phone/phone Stands for C5L without any explanation. Parameters provided in the screenshots are just references for configuring the smart phone, which may differ Parameters from the actual situation. -
Page 7: Chapter 1 Get Started
Get started This chapter introduces the smart phone’s hardware information and guides you how to assemble your phone when you get started on using your new phone. • Overview • Assemble your device • Power on • Charge your device 1. -
Page 8: Power On
Insert Micro SIM cards and MicroSD card (optional) Carefully slide the cards into the card slots with the gold contacts facing down. Since your phone is a dual SIM phone, you can use one or two SIM cards by putting them in the corresponding card slots. Note: The device uses Micro SIM cards. - Page 9 When the battery is full, unplug the power adapter from the power outlet and remove the USB cable from your phone. Get started Chapter 1...
-
Page 10: Chapter 2 Basics
Basics This chapter introduces the smart phone’s basic feature. • Touchscreen gestures • Unlock and lock the screen • Home screen • Status icons • Quick settings panel • Notification panel • Enter a text 2. 1 Touchscreen gestures Touch: Simply tap an item to select or launch it. Touch and hold: Touch and leave your finger on the screen for 2 seconds or more to activate onscreen items. - Page 11 Swipe: Place your finger on the screen, and drag your finger to the direction you want. For example, you can swipe to scroll through the Home screen or a menu. Drag: To drag, touch and hold an item and then move it to a new position. For example, you can rearrange a widget on the home screen.
-
Page 12: Unlock And Lock The Screen
Zoom out: Pinch two fingers together on the screen. For example, pinch two fingers together to zoom out while viewing a picture or a web page. 2. 2 Unlock and lock the screen Use the screen lock features to secure your phone. •... -
Page 13: Home Screen
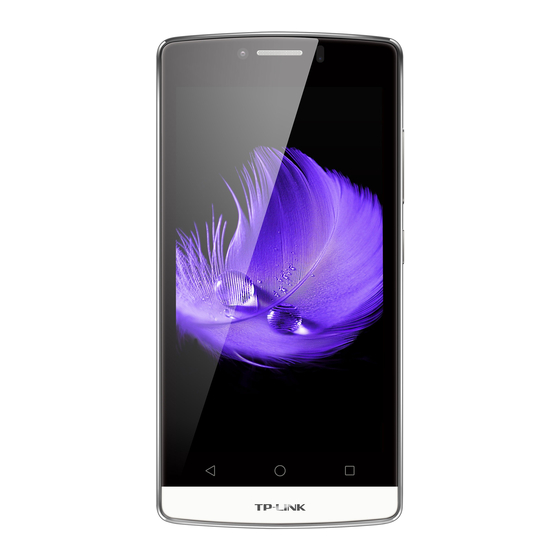
2. 3 Home screen Status bar Widget APP screen indicator APP shortcuts Status bar: Status and notification icons are displayed in the status bar. Widget: Self-contained applications that run on the Home screen (not shortcuts). APP screen indicator: Indicates which Home screen is being displayed. APP shortcuts: Shortcuts to your favorite applications. -
Page 14: Quick Settings Panel
Airplane mode enabled Bluetooth enabled Download status Uploading data Synchronizing data GPS enabled Alarms enabled Call in progress Missed calls New messages New emails Headset plugged in System update is available. 2. 5 Quick settings panel Swipe down from the top of any screen twice to open the quick settings panel. Note: On the lock screen, swipe only once to open the quick settings panel. -
Page 15: Notification Panel
Bluetooth: Tap to enable bluetooth. For more information, see Bluetooth. Brightness slider: Use this slider to adjust the brightness of the screen. 10. Settings: Tap to configure the settings. 2. 6 Notification panel Swipe down from the top of any screen to open the notification panel. Tap an item to view the details. - Page 16 Tap to switch between lowercase and uppercase letters. Tap and hold or quickly tap twice to enable caps lock. Tap to switch to numbers and symbols. Tap to enter a comma. Tap and hold to open the input options menu. Tap to enter a space.
-
Page 17: Chapter 3 Connection
Connection This chapter contains the following sections. • Connect to WLAN • Connect to mobile data • Connect to computer • Bluetooth • Tethering & portable hotspot 3. 1 Connect to WLAN Option One Swipe down from the top of any screen (except for the Lock screen) twice to open the quick settings panel. -
Page 18: Tethering & Portable Hotspot
Tap the device you want to connect. Then follow the pop-up prompts to complete the connection. Option Two On the Home screen, tap Settings -> Bluetooth. Tap the switch to turn it on. Tap the device you want to connect. Then follow the pop-up prompts to complete the connection. Note: Your phone is visible to nearby devices while Bluetooth settings is open. -
Page 19: Chapter 4 Calls
Calls This chapter contains the following sections. • Make a call • Answer & end a call • Options during a call • Call log • Call settings 4. 1 Make a call Dial directly by entering numbers On the Home screen, tap Phone ->... -
Page 20: Answer & End A Call
After connected, tap -> Add call to call the second participant. The first participant will be placed on hold. When the second participant is connected, tap -> Merge calls to start a conference call. Make a call using speed dial Using speed dial, you can call someone quickly by dialing a shortcut number instead of the original number. -
Page 21: Call Log
Place a new call while in a call You can make another call while a call is in progress. While making a call with others, tap Add call on the calling screen. -> Enter another phone number or choose another contact, and then tap to dial. -
Page 22: Call Settings
Add a call to the reject list If you have added a caller to your Reject list, future calls from this caller will be sent directly to your voicemail. Go to Phone -> Contacts, tap the contact that you want to add to the Reject list. ->... -
Page 23: Chapter 5 Messages
Messages This chapter contains the following sections. • Type of messages • Send & receive messages • Manage conversations 5. 1 Type of messages Text Messages (SMS) The Short Messages Service (SMS) lets you send and receive text messages to and from other mobile phones. Multimedia Messages (MMS) The Multimedia Messaging Service (MMS) lets you send and receive multimedia messages (such as pictures, videos, and audio messages) to and from other mobile phones. - Page 24 Forward messages On the Home screen, tap Messages. In the list of message threads, tap a contact name or phone number to view the conversation thread. Tap and hold the message you want to forward and then tap . Enter a phone number directly or tap to select a contact, then tap to send out the message.
-
Page 25: Chapter 6 Contacts
Contacts This chapter contains the following sections. • Manage contacts • Import/Export contacts • Groups • Contacts settings 6. 1 Manage contacts Add a contact On the Home screen, tap Contacts. Enter the contact’s information. Add new contact to save. Edit a contact On the Home screen, tap Contacts. -
Page 26: Groups
Select vCard files on storage Export contacts to storage On the Homc screen, tap Contacts. Tap CONTACTS -> Import/export. Tap Export to storage device. Select the contacts you want to export and tap Share contacts On the Home screen, tap Contacts. - Page 27 • Sort by: You can make the contacts sort by first name or surname. • Name format: You can choose the name format (fisrt name first/ last name first). Contacts Chapter 6...
-
Page 28: Chapter 7 Emails
Emails This chapter contains the following sections. • Set up your email accounts • Send and check emails • Email settings 7. 1 Set up your email accounts Set up your email accounts to manage your email more conveniently. Add an email account On the Home screen, tap Emails. -
Page 29: Email Settings
7. 3 Email settings Use the Email settings to configure your email preferences. -> Settings to configure: • Patterned password: You can draw your own patterned password. • Confirm before deleting: If you turn on this function, every time before you delete an email, a confirmation prompt will prompt out. -
Page 30: Chapter 8 Camera And Video
Camera and video This chapter contains the following sections. • Get to know camera • Take a photo • Record a video • Gallery • Video Player 8. 1 Get to know camera Launch the camera app • On the Home screen: Tap Camera. -
Page 31: Take A Photo
Tap to take a photo. View the photos and videos you have taken. Switch to video mode. 8. 2 Take a photo to choose Photo, then tap the or press volume button to take photos. If you want to take a selfie, please tap to switch to selfie mode. -
Page 32: Video Player
You can: • Tap Edit to crop or rotate the photo • Tap Special effects to select a filter. • Tap Beauty to add beautifying effects to face. • Tap Sticker to add stickers to the photo. • Tap Photo frame to add a frame to the photo. •... -
Page 33: Chapter 9 Calendar
Calendar This chapter contains the following sections. • Use the calendar • Calendar settings 9. 1 Use the calendar View the calendar On the Home screen, tap Calendar. at the top of the screen to select Day, Week, Month and Agenda to switch the calendar view. Create an event On the Home screen, tap Calendar. -
Page 34: Chapter 10 Clock
Clock This chapter contains the following sections: • Alarm • Clock • Timer • Stopwatch 10. 1 Alarm Create an alarm On the Home screen, tap Clock -> Alarm -> to create a new alarm. Scroll down to configure: • Time: Choose a time for the alarm. •... -
Page 35: Stopwatch
Tap Start to start the countdown. You can tap Stop and Continue to control the timing, or tap Reset to finish the countdown. 10. 4 Stopwatch Stopwatch contributes to recording the precise time. On the Home screen, tap Clock -> Stopwatch. Tap Start to start counting. -
Page 36: Chapter 11 Browser
Browser This chapter contains the following sections. • Go to a webpage • Browser tabs • Bookmarks • History 11. 1 Go to a webpage View a website Browser, then tap the address bar on top of the page and enter the web address you want to visit. Then tap Do more options about the web page (such as save or share the page) and choose the option that you want to configure. -
Page 37: Bookmarks
Open a new tab -> Enter a new web address in the address bar and visit the webpage. To close a tab and drag the tab left or right to close. Incognito tabs Pages that you view with incognito tabs will not appear in your browser history or search history, and they will not leave other traces (such as cookies) on your device after you close the incognito window. -
Page 38: Chapter 12 File Explorer
File Explorer This chapter contains the following sections. • View files(PIC, MUSIC, VIDEO, DOC, APK, ZIP) • Manage your files • Options for selected files or folders 12. 1 View files(PIC, MUSIC, VIDEO, DOC, APK, ZIP) On the Home screen, tap File Explorer. - Page 39 Cut a folder File Explorer -> Phone. Find the folder you want to remove. Tap and hold the folder and tap . Select the folder you want to store into and tap Delete a folder File Explorer -> Phone. Find the folder you want to remove. Tap and hold the folder and tap ->...
-
Page 40: Chapter 13 Weather
Weather This chapter contains the following sections. • Add a city • Check the weather • Remove a city • Update the weather 13. 1 Add a city Add a city to check its real-time weather information. On the Home screen, tap Weather to log into the Weather interface. -
Page 41: Chapter 14 Music
Music This chapter contains the following section. • Get to know music 14. 1 Get to know music Launch the Music app On the Home screen, Tap Music. The music library will scan each song on your phone storage and SD card and then displays them in Song, Album, Artist and Playlist. - Page 42 Enter the playlist name and tap Save. Select the songs you want to add in this playlist. Tap Done to complete it. Music library settings On the Home screen, tap Music. • Shake: Tap to turn it on, then you can shake your phone to switch songs. •...
-
Page 43: Chapter 15 Notes
Notes This chapter contains the following sections. • Compose a note • Note options 15. 1 Compose a note On the Home screen, tap Notes -> and begin composing your new note. When finishing composing, tap Done to save the note. 15. -
Page 44: Chapter 16 Applications
Applications This chapter contains the following sections. • Manage applications • Google applications 16. 1. Manage applications Download applications from • Play Store • Phone browser • Computer browser Install an application On the Home screen, tap File Explorer. Tap APK to view all the application files. Select the application you want to install and follow the pop-up prompts. - Page 45 Drive Use Drive to open, view, rename, and share your Google Docs and files. Play Music With Google Play Music, you can play music from local file or copied from your computer. Play Movies & TV Watch movies and TV shows purchased from Google Play. You can stream them instantly, or download them for viewing when you’re not connected to the Internet.
-
Page 46: Chapter 17 Tools
Tools This chapter contains the following sections. • FM Radio • Flashlight • Sound Record • Mirror • Calculator • Downloads • System Update • Feedback • SIM Toolkits 17. 1 FM Radio Scan stations Connect a headset to the phone. On the Home screen, tap Tools ->... -
Page 47: Calculator
17. 5 Calculator On the Home screen, tap Tools -> Calculator. Tap numbers and use the arithmetic feature to complete an operation. 17. 6 Downloads On the Home screen, tap Tools -> Downloads to view the download information. 17. 7 System Update On the Home screen, tap Tools ->... -
Page 48: Chapter 18 Settings
Settings This chapter contains the following sections. • SIM cards • Airplane mode • Display • Sound and notification • Storage • Battery • Apps • Location • Security • Accounts • Language and input • Backup and reset • Date and time •... -
Page 49: Sound And Notification
• Brightness level: Tap to adjust screen brightness. • Adaptive brightness: Turn the switch on to enable optimizing brightness level for available light. • Wallpaper: Tap to set the wallpaper. • Sleep: Tap to set the time when the screen turns off. •... -
Page 50: Security
Location. Tap the switch to enable the location services. Tap Mode to select the location mode. • High accuracy: Use GPS, WLAN, and cellular networks to determine location. • Battery saving: Use WLAN and cellular networks to determine location. • Device only: Use GPS to determine location. 18. -
Page 51: Backup And Reset
Keyboard settings For more information, see Enter a text. Use Google Voice Typing This feature uses Google voice recognition to convert your spoken words into text. To quickly access Google Voice Typing, tap on the Home screen and speak the words you want your phone to type. -
Page 52: Accessibility
• Use 24-hour format: Tap to switch between the 24-hour format and 12-hour format. 18. 14 Accessibility Use Accessibility to make mobile phones easy to use for all individuals, including those with disabilities. On the Home screen, tap Settings. Accessibility. Set the accessibility options. -
Page 53: Appendix A: Specifications
Appendix A: Specifications Specifications Height: 136mm Width: 67.7mm Size and Weight Depth: 10.15mm Weight: 154 g Color Pearl White/Dark Grey 4.5inches, FWVGA 480 x 854 Display 217.7PPI AGC® Glass 2 Qualcomm MSM8909 ARM Cortex-A7 1.1 GHz GPU: Adreno™ 304 Operation System Android 5.1 ROM: 8 GB Memory... - Page 54 Audio formats: MP3, FLAC, WAV, Ogg, MIDI, 3GP Decoder: 1080p/30 fps Video Encoder: 720p/30 fps Video formats: MPEG-4, 3GP, 3G2, MOV, H264, H263 Cloud Service Supported Battery 2000mAh TP-LINK Neffos C5L Charger In the box USB Cable Quick Start Guide...
-
Page 55: Appendix B: Technical Support
Appendix B: Technical Support Contact our technical support if you have any questions related to this product. Support Countries/Regions Tel: +86 755 26504400 (English Service) Fee: Depending on rate of different carriers, IDD. Global E-mail: support@neffos.com(English Service) Service Time: 24 hours a day, 7 days a week. Tel: +86 755/ 26504400 (englischsprachig) Germany E-mail: support@neffos.com (englischsprachig) - Page 56 Support Countries/Regions Toll Free:1800 2094 168 India E-mail:support.in@neffos.com Service Time:10:00AM to 6:00PM, Monday to Saturday. Local No.: (+62) 021 63861936 E-mail: support.id@neffos.com Indonesia Service Time: 09:00AM to 12:00AM & 01:00PM to 06:00PM, Monday to Friday. Tel: + 60 (3) 2141 4358 (Mon-Sun, 10.30am-8.00pm) Malaysia E-mail: support.my@neffos.com Service Time: 24 hours a day, 7 days a week...
- Page 57 No part of the specifications may be reproduced in any form or by any means or used to make any derivative such as translation, transformation, or adaptation without permission from TP-LINK TECHNOLOGIES CO., LTD. Copyright © 2016 TP-LINK TECHNOLOGIES CO., LTD. All rights reserved.
- Page 58 FCC STATEMENT This equipment has been tested and found to comply with the limits for a Class B digital device, pursuant to part 15 of the FCC Rules. These limits are designed to provide reasonable protection against harmful interference in a residential installation. This equipment generates, uses and can radiate radio frequency energy and, if not installed and used in accordance with the instructions, may cause harmful interference to radio communications.
- Page 59 Copyright © 2016 TP-LINK TECHNOLOGIES CO., LTD. All rights reserved. Trademarks and permissions is trademarks or registered trademarks of Neffos Limited. TP-LINK is responsible for Neffos. Android is a trademark of Google Inc. The Bluetooth® word mark and logos are registered trademarks owned by Bluetooth SIG, Inc. and any use of such marks by Neffos Limited is under license.
- Page 60 DISCLAIMER ALL CONTENTS OF THIS MANUAL ARE PROVIDED “AS IS”. EXCEPT AS REQUIRED BY APPLICABLE LAWS, NO WARRANTIES OF ANY KIND, EITHER EXPRESS OR IMPLIED, INCLUDING BUT NOT LIMITED TO, THE IMPLIED WARRANTIES OF MERCHANTABILITY AND FITNESS FOR A PARTICULAR PURPOSE, ARE MADE IN RELATION TO THE ACCURACY, RELIABILITY OR CONTENTS OF THIS MANUAL.
- Page 61 • Do not use a headset while driving or riding. Doing so may distract your attention and cause an accident, or may be illegal depending on your region. Areas with flammables and explosives • Turn off your device in potentially explosive environments instead of removing the battery. Always comply with regulations, instructions and signs in potentially explosive environments.
- Page 62 • Using generic batteries or chargers may shorten the life of your device or cause the device to malfunction. They may also cause a fire or cause the battery to explode. • TP-LINK cannot be responsible for the user’s safety when using accessories or supplies that are not approved by TP-LINK.
- Page 63 • If you notice strange smells or sounds coming from your device or the battery, or if you see smoke or liquids leaking from the device or battery, stop using the device immediately and take it to a TP-LINK Service Centre.
- Page 64 To prevent possible harm to the environment or human health from uncontrolled waste disposal, please separate these items from other types of waste and recycle them responsibly to promote the sustainable reuse of material resources. Household users should contact either the retailer where they purchased this product, or their local government office, for details of where and how they can take these items for environmentally safe recycling.
- Page 65 TP-LINK TECHNOLOGIES CO , LTD DECLARATION OF CONFORMITY We, TP-LINK TECHNOLOGIES CO., LTD., Address: Building 24 (floors 1,3,4,5) and 28 (floors1-4) Central Science and Technology Park, Shennan Rd, Nanshan, Shenzhen, China Declare under our own responsibility that the product: Model: TP601/A/B/C/E...