Table of Contents
Advertisement
Congratulations on owning a Scag mower! This manual contains the operating
instructions and safety information for your Scag mower. Reading this manual
can provide you with assistance in maintenance and adjustment procedures to
keep your mower performing to maximum efficiency. The specific models that
this book covers are listed on the inside cover. Before operating your machine,
please read all the information enclosed.
© 2015
Scag Power Equipment
Division of Metalcraft of Mayville, Inc.
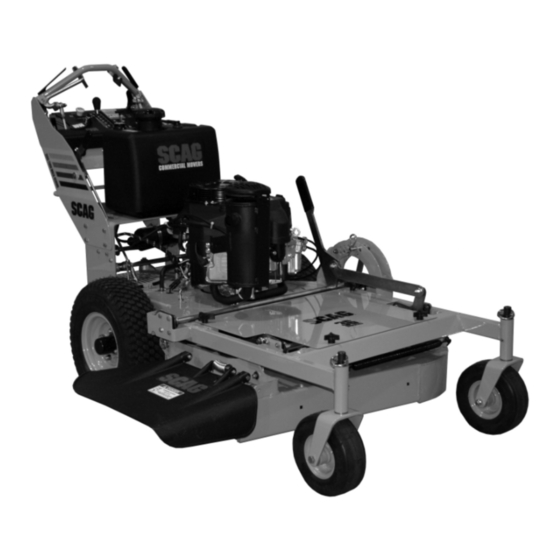
OPERATOR'S
MANUAL
SWZT
Walk-Behind
Model:
SWZT36-14FS
SWZT48-15FS
SWZT52-18FS
SWZT52-18FSE
SWZT61-22FSE
PART NO. 03395
PRINTED 9/2015
PRINTED IN USA
Advertisement
Table of Contents

Related Manuals for Scag Power Equipment SWZT36-14FS


Summary of Contents for Scag Power Equipment SWZT36-14FS
- Page 1 The specific models that this book covers are listed on the inside cover. Before operating your machine, please read all the information enclosed. © 2015 PART NO. 03395 Scag Power Equipment PRINTED 9/2015 Division of Metalcraft of Mayville, Inc. PRINTED IN USA...
- Page 2 CONCERN, PRUDENCE, AND PROPER TRAINING OF THE PERSONNEL INvOLvED IN THE OPERATION, TRANSPORT, MAINTENANCE, AND STORAGE OF THE EqUIPMENT. This manual covers the operating instructions and illustrated parts list for: SWzT36-14FS with a serial number of L3400001 to L3499999 SWzT48-15FS...
-
Page 3: Table Of Contents
Table of Contents Table of Contents SECTION 1 - GENERAL INFORMATION ...................1 1.1 INTRODUCTION ............................1 1.2 DIRECTION REFERENCE ...........................1 1.3 SERvICING THE ENGINE AND DRIvE TRAIN COMPONENTS ..............1 1.4 SYMBOLS ..............................2 SECTION 2 - SAFETY INFORMATION ..................3 2.1 INTRODUCTION ............................3 2.2 SIGNAL WORDS ............................3 2.3 BEFORE OPERATION CONSIDERATIONS ....................3 2.4 OPERATION CONSIDERATIONS ........................4... - Page 4 Table of Contents SECTION 6 - ADJUSTMENTS ....................18 6.1 PARkING BRAkE ADJUSTMENT ......................18 6.2 NEUTRAL ADJUSTMENT .........................18 6.3 NEUTRAL LATCH ADJUSTMENT ......................19 6.4 TRACkING ADJUSTMENT ........................19 6.5 THROTTLE CONTROL AND CHOkE ADJUSTMENTS ................20 6.6 BELT ADJUSTMENT ..........................20 6.7 BELT ALIGNMENT .............................20 6.8 CUTTER DECk ADJUSTMENTS ......................20 6.9 ELECTRIC CLUTCH ADJUSTMENT ......................22 SECTION 7 -...
-
Page 5: General Information
Scag service parts. All information is based upon product information available - IMPORTANT - at the time of approval for printing. Scag Power Equipment The replacement of any part on this product reserves the right to make changes at any time without by other than the manufacturer's authorized notice and without incurring any obligation. -
Page 6: Symbols
Section 1 SYMBOLS SYMBOL DESCRIPTION SYMBOL DESCRIPTION Choke Transmission Parking Brake Spinning Blade 48071S On/Start Spring Tension on Idler Off/Stop Falling Hazard Thrown Object Hazard Fast Slow Continuously Variable - Linear Cutting Element - Basic Symbol Pinch Point Cutting Element - Engage 481039S Hour meter/Elapsed Operating Hours Cutting Element - Disengage... -
Page 7: Safety Information
Section 2 SAFETY INFORMATION INTRODUCTION DANGER Your mower is only as safe as the operator. Carelessness or operator error may result in serious bodily injury The signal word “DANGER” denotes that an extremely or death. Hazard control and accident prevention are hazardous situation exists on or near the machine that dependent upon the awareness, concern, prudence, and could result in high probability of death or irreparable injury... -
Page 8: Operation Considerations
Section 2 DO NOT allow children to ride or play on the Fuel is flammable; handle it with care. Fill the fuel machine, it is not a toy. tank outdoors. Never fill it indoors. Use a funnel or spout to prevent spillage. Clean up any spillage Clear the area to be mowed of objects that could be before starting the engine. - Page 9 Section 2 Start the engine when the neutral latches are in CAUTION the neutral lock position, the cutter blades are disengaged, parking brake is engaged and the speed control lever is in neutral. Do not touch the engine or the muffler while the If the mower discharge ever plugs, shut off the engine is running or immediately after stopping.
-
Page 10: Maintenance Considerations & Storage
Section 2 MAINTENANCE CONSIDERATIONS & WARNING STORAGE Never make adjustments to the machine with the Hydraulic fluid is under high pressure and can engine running unless specifically instructed to do penetrate skin causing injury. If hydraulic fluid so. If the engine is running, keep hands, feet, and is injected into the skin, it must be surgically clothing away from moving parts. -
Page 11: Safety And Instructional Decals
Section 2 SAFETY AND INSTRUCTIONAL DECALS WARNING WARNING INSTALL BELT COvER BEFORE DO NOT OPERATE WITHOUT DISCHARGE CHUTE, MULCHING OPERATING MACHINE kIT, OR ENTIRE GRASS CATCHER INSTALLED READ OPERATOR'S MANUAL 483405 483402 483405 WARNING SPINNING BLADES ROTATING BLADES AND BELTS kEEP CLEAR * keep hands, feet &... -
Page 12: Specifications
General Type ....................Heavy Duty Industrial/Commercial Gasoline Brand ..................................Kawasaki Engine Model: (Scag Model SWZT36-14FS) .................... Kawasaki Model # FS481V (Scag Model SWZT48-15FS) .................... Kawasaki Model # FS541V (Scag Model SWZT52-18FS) .................... Kawasaki Model # FS600V (Scag Model SWZT52-18FSE) ..................Kawasaki Model # FS600V (Scag Model SWZT61-22FSE) .................. -
Page 13: Cutter Deck
Section 3 CUTTER DECk Type ................................ Out-Front design Construction ................10-Gauge top with 11-Gauge reinforcement throughout the spindle area, 7-Gauge skirt for strength and longevity True Cutting Width: 36 .................................35.5" (90.2 cm) 48 ................................48" (122.0 cm) 52 ................................52" (132.0 cm) 61 ................................61" (154.94 cm) Cutting Height Adjustment .............. -
Page 14: Operating Instructions
Section 4 OPERATING INSTRUCTIONS Mower Deck Switch (Figure 4-1). Used to engage WARNING and disengage the mower drive system. Pulling up on the switch will engage the deck drive. Pushing down on the switch will disengage the deck drive. Do not attempt to operate this mower unless you Engine Choke Control (Figure 4-1). -
Page 15: Safety Interlock System
Section 4 Speed Control Lever (Figure 4-1). Used to select Check interlock system for proper operation. (See the forward speed. Section 4.2.) Neutral Latch (Figure 4-1). Used to secure the Check tire pressure. Adjust pressure if necessary. hydraulic drive system in neutral. Apply neutral (See Section 7.8.) latches when parking the machine. -
Page 16: Engaging The Deck Drive (Cutter Blades)
Section 4 Learn to feather the steering controls to obtain a CAUTION smooth operating action. Practice operating the mower until you are comfortable with the controls before proceeding Before backing up, observe the rear for persons to mow. and obstructions. Clear the area before backing up. -
Page 17: Hillside Operation
Section 4 AFTER OPERATION - NOTE - A squealing noise may be heard when engaging Wash the entire mower after each use. Do not or disengaging the deck drive. It is caused by the use high pressure spray or direct the spray onto electric clutch plates meshing as the mower comes electrical components. -
Page 18: Moving Mower With Engine Stopped
Section 4 If the discharge chute becomes clogged, shut off The discharge chute must not be removed and the engine and remove the ignition key. Using a stick must be kept in the lowest position to deflect grass or similar item, dislodge the clogged material. Then clippings and thrown objects downward. -
Page 19: Troubleshooting Cutting Conditions
Section 5 TROUBLESHOOTING CUTTING CONDITIONS CONDITION CAUSE CURE STRINGERS - OCCASIONAL Low engine RPM Run engine at full RPM BLADES OF UNCUT GRASS Ground speed too fast Slow speed to adjust for conditions Wet grass Cut grass after it has dried out Dull blades, incorrect sharpening Sharpen blades Deck plugged, grass accumulation... - Page 20 Section 5 TROUBLESHOOTING CUTTING CONDITIONS (CONT'D) CONDITION CAUSE CURE U N E v E N C U T O N F L AT Lift worn from blade Replace blade GROUND - WAvY HIGH-LOW APPEARANCE, SCALLOPED Blade upside down Mount with cutting edge toward ground CUT, OR ROUGH CONTOUR Deck plugged, grass accumulation Clean underside of deck...
- Page 21 Section 5 TROUBLESHOOTING CUTTING CONDITIONS (CONT'D) CONDITION CAUSE CURE SCALPING - BLADES HITTING Low tire pressures Check and adjust pressures DIRT OR CUTTING vERY CLOSE TO THE GROUND Ground speed too fast Slow speed to adjust for conditions May need to reduce ground speed, raise Cutting too low cutting height, change direction of cut, and/or change pitch and level...
-
Page 22: Adjustments
Section 6 ADJUSTMENTS PARkING BRAkE ADJUSTMENT - NOTE - If this procedure does not achieve proper brake adjustment, please contact your authorized Scag WARNING dealer. NEUTRAL ADJUSTMENT Do not operate the mower if the parking brake is not operable. Possible severe injury could -NOTE- result. -
Page 23: Neutral Latch Adjustment
Section 6 NEUTRAL LATCH ADJUSTMENT -NOTE- This adjustment is made to allow the steering control levers to be moved out of the neutral latch without engaging reverse. Raise the drive wheels off the ground and block the CONTACT HERE caster wheels to prevent the machine from moving. Make sure the speed control lever is in neutral, the steering control levers are in the neutral latch position, and the parking brake is on. -
Page 24: Throttle Control And Choke Adjustments
Section 6 If the machine pulls to one side, stop the mower WARNING by placing the steering control levers in the neutral position. Using a wrench, turn the tracking adjustment nut on the slower side counter clockwise If the pump drive belt fails, steering control will be until the machine tracks straight. - Page 25 Section 6 ADJUST HERE ADJUST HERE Figure 6-6. Cutter Deck Pitch Adjustment Figure 6-5. Cutter Deck Level Adjustment Move bolts on the front hanger chains up or down in Move bolts on the front and rear deck hanger chains the slots until the cutter deck pitch is equal between up or down in the slots until the cutter deck is level both sides.
-
Page 26: Electric Clutch Adjustment
Section 6 CUTTER DECk HEIGHT ELECTRIC CLUTCH ADJUSTMENT The cutter deck height adjustment is made to ensure The electric clutch serves two functions in the operation of that the cutter deck is cutting at the height indicated on the mower. In addition to starting and stopping the power the cutting height index gauge. - Page 27 Section 6 ADJUSTMENT NUTS ADJUSTMENT NUTS Figure 6-11. Clutch Air Gap Adjustment This adjustment should be done every 500 hours of operation or annually, whichever comes first. In cases where the machine is heavily used, airgap settings should be checked more often. If the air gap is too narrow, the clutch armature may drag when disengaged, resulting in premature failure.
-
Page 28: Maintenance
Section 7 MAINTENANCE MAINTENANCE CHART - RECOMMENDED SERvICE INTERvALS HOURS PROCEDURE COMMENTS BREAk-IN 100 200 400 (FIRST 10) Check all hardware for tightness C h e c k a l l b e l t s f o r p r o p e r See paragraph 7.6 alignment Check all hydraulic fittings and... -
Page 29: Lubrication
Section 7 MAINTENANCE CHART - RECOMMENDED SERvICE INTERvALS (CONT'D) HOURS PROCEDURE COMMENTS BREAk-IN (FIRST 10) Check hardware for tightness Change engine oil filter See paragraph 7.4 Replace engine fuel filter See paragraph 7.5 Grease caster wheel pivot See paragraph 7.2 shafts Drain hydraulic system, replace Use SAE 20W50 Motor Oil. -
Page 30: Hydraulic System
Section 7 HYDRAULIC SYSTEM B. CHANGING HYDRAULIC OIL The hydraulic system oil should be changed after the first A. CHECkING HYDRAULIC OIL LEvEL 120 hours of machine operation and every 400 hours or annually thereafter, whichever occurs first. The oil should The hydraulic oil level should be checked after the first 10 also be changed if the color of the fluid has become black hours of operation. - Page 31 Section 7 Remove the hydraulic filters from both axles and The hydraulic system will need to be purged of allow the fluid to drain into the container. Properly all air. Raise the rear of the machine so the drive discard the oil when the system has drained wheels are off the ground.
-
Page 32: Engine Oil
Section 7 ENGINE OIL FILLER NECK INSERT A. CHECkING ENGINE CRANkCASE OIL LEvEL FUEL LEVEL The engine oil level should be checked after every 8 hours of operation or daily as instructed in the Engine Operator’s Manual furnished with this mower. B. -
Page 33: Engine Air Cleaner
Section 7 BATTERY - ELECTRIC START MODELS Replace gas cap and tighten the fuel cap until it ratchets. B. REPLACING IN-LINE FUEL FILTER WARNING ELEMENTS The engine fuel filter should be replaced after every 500 Lead-acid batteries produce flammable and hours of operation or annually, whichever occurs first. -
Page 34: Cutter Blades
Section 7 A. CHARGING THE BATTERY WARNING Refer to the battery charger’s manual for specific instructions. Always wear proper hand and eye protection when working with cutter blades. Under normal conditions the engine’s alternator will have no problem keeping a charge on the battery. If the battery has been completely discharged for a long period of time, Check the cutter blades for straightness. -
Page 35: Tires
Section 7 To install the new cutter blade, put the lockwasher Angle Blade Back and flatwasher onto the blade bolt and slide the bolt into the hole in the cutter blade. Do Not Cut In X Must NOT Exceed 1/3 Blade Width SGB033 CUTTER BLADE Figure 7-6. -
Page 36: Notes
Section 7 NOTES... -
Page 37: Illustrated Parts List
Section 8 ILLUSTRATED PARTS LIST SCAG APPROvED ATTACHMENTS AND ACCESSORIES. Attachments and accessories manufactured by companies other than Scag Power Equipment are not approved for use on this machine. Scag approved attachments and accessories: • Mulch Plate (p/n 920G, 9298, 9299) •... -
Page 38: 36" Cutter Deck
Section 8 36" CUTTER DECk 2014 SWZT 36CD... - Page 39 Section 8 36" CUTTER DECk Ref. Ref. Part No. Description Part No. Description 04019-06 Nut, Serrated Flange 1/2-13 04021-09 Nut, Elastic Stop 3/8-16 04001-46 Bolt, Hex Head 3/8-16 x 2-1/4" 424615 Bracket, Belt Guide 425959 Pusharm 04043-04 Flatwasher, 3/8-.391 x .938 x .105 04001-72 Bolt, Hex Head 1/2-13 x 2"...
-
Page 40: 48" Cutter Deck
Section 8 48" CUTTER DECk 2014 SWZT CD - Rev 1... - Page 41 Section 8 48" CUTTER DECk Ref. Ref. Part No. Description Part No. Description 04001-77 Bolt, Hex Head 3/8-16 x 3-1/2" 04021-09 Nut, Elastic Stop 3/8-16 04019-04 Nut, Serrated Flange 3/8-16 424615 Bracket, Belt Guide 04001-175 Bolt, Hex Head 5/16-18 x 1-1/2" Gr.8 04112-06 Nut, 3/4-16 Spiral Lock 482877...
-
Page 42: 52" Cutter Deck
Section 8 52" CUTTER DECk 2014 SWZT 52 CD... - Page 43 Section 8 52" CUTTER DECk Ref. Ref. Part No. Description Part No. Description 482878 Cutter Blade, 18" 04021-09 Nut, Elastic Stop 3/8-16 04043-06 Flatwasher, 5/8-.688 x 1.75 x .134 HD 424615 Bracket, Belt Guide 04030-07 Lockwasher, 1/2 Spring 04112-06 Nut, 3/4-16 Spiral Lock 04001-121 Bolt, Hex Head 5/8-11 x 1-1/2"...
-
Page 44: 61" Cutter Deck
Section 8 61" CUTTER DECk 2016 SWZT61... - Page 45 Section 8 61" CUTTER DECk Ref. Ref. Part No. Description Part No. Description 461950 Spindle Assembly 462836 Cutter Deck w/Decals, SWZT61 483304 Debris Shield 484026 Pulley, 6.32" Dia. 483303 Bearing 485511 Belt, Cutter Deck - SWZT61 43693 Spacer 04112-06 Nut, Spiral Lock 3/4-16 462014 Spindle Housing 04063-01...
-
Page 46: Cutter Deck Controls
Section 8 CUTTER DECk CONTROLS... - Page 47 Section 8 CUTTER DECk CONTROLS Ref. No. Part No. Description 481625-01 Knob W/Stud, 3/8-16 x 1-1/4" 04029-04 Wing Nut, 3/8" Plastic Small 462683 Belt Cover w/Decals 462788 Belt Cover w/Decals - SWZT61 462522 Deck Bellcrank Assy. (Incl. item #8) 462792 Deck Bellcrank Assy.
-
Page 48: Engine Deck & Hydraulic System
Section 8 ENGINE DECk & HYDRAULIC SYSTEM... - Page 49 Section 8 ENGINE DECk & HYDRAULIC SYSTEM Ref. Ref. Part No. Description Part No. Description 04001-135 Bolt, Hex Head 3/8-16 x 1-3/4" *485014 Engine, Kawasaki FS481V 04043-04 Flatwasher, 3/8-.391 x .938 x .105 Hardened *485015 Engine, Kawasaki FS541V 04021-09 Nut, Elastic Stop 3/8-16 *485016 Engine, Kawasaki FS600V (Recoil Start) 43720...
-
Page 50: Steering Controls
Section 8 STEERING CONTROLS... - Page 51 Section 8 STEERING CONTROLS Ref. Ref. Part No. Description Part No. Description 04021-08 Nut, Elastic Stop 1/4-20 04021-09 Nut, Elastic Stop 3/8-16 04040-15 Flatwasher, 5/16-.375 x .875 x .083 484589 Linkage, Speed Control 425948 Bracket, Neutral Switch (Manual Start) 43674 Spacer 426568 Bracket, Neutral Switch (Electric Start Only)
-
Page 52: Brake Components
Section 8 BRAkE COMPONENTS... - Page 53 Section 8 BRAkE COMPONENTS Ref. No. Part No. Description 04069-01 Pin, Rue Cotter 3/8" Dia. 462515 Brake Lever w/Grip 481548 Grip, Brake Lever 04062-02 Hair Pin, .080 x 1.19" 44187 Rod, Brake Linkage 04017-16 Cpscrw, 5/16-18 x 3/4"Serrated Flange HH 04061-02 Cotter Pin, 3/32 x 3/4"...
-
Page 54: Electrical System And Throttle Control - Manual Start
Section 8 ELECTRICAL SYSTEM AND THROTTLE CONTROL - MANUAL START... - Page 55 Section 8 ELECTRICAL SYSTEM AND THROTTLE CONTROL - MANUAL START Ref. No. Part No. Description 462069 Key Assembly w/Fob 483609 Key w/Shroud 48017-04 Nut, 5/8-32 Special 48017-03 Lockwasher, 5/8" Internal Tooth 462576 Instrument Panel w/Decal 04003-43 Bolt, Carriage #10-24 x 1/2" 04003-12 Bolt, Carriage 5/16-18 x 3/4"...
-
Page 56: Electrical System And Throttle Control - Electric Start
Section 8 ELECTRICAL SYSTEM AND THROTTLE CONTROL - ELECTRIC START... - Page 57 Section 8 ELECTRICAL SYSTEM AND THROTTLE CONTROL - ELECTRIC START Ref. No. Part No. Description 462069 Key Assembly w/Fob 483609 Key w/Shroud 48017-04 Nut, 5/8-32 Special 48017-03 Lockwasher, 5/8" Internal Tooth 462684 Instrument Panel w/Decal 04003-43 Bolt, Carriage #10-24 x 1/2" 04003-12 Bolt, Carriage 5/16-18 x 3/4"...
-
Page 58: Swzt Fuel System
Section 8 SWzT FUEL SYSTEM Tank Purge To Fuel Pump To Engine Purge Port... - Page 59 Section 8 SWzT FUEL SYSTEM Ref. No. Part No. Description 484286 Fuel Cap w/ Tether 484297 Fuel Cap w/ Tether - California Models Only (not shown) 484259 Fuel Gauge Assembly (incl. #3) 484242 Seal, Fuel Gauge 462375 Fuel Tank Assembly (incl. #2, 3, 5, 6, 17, 18) 482571 Bushing, .56 Dia.
-
Page 60: Zt-2800 Hydraulic Axle Assembly
Section 8 zT-2800 HYDRAULIC AXLE ASSEMBLY... - Page 61 Section 8 zT-2800 HYDRAULIC AXLE ASSEMBLY Ref. Ref. Part No. Description Part No. Description HG52027 Clip, Retaining HG53246 Bolt, Hex Head 1/4-20 x 1-1/8" HG53973 Handle, Brake HG9005110- Plug, 9/16-18 HG51950 Washer, .343 x 1.5 x .062 5600 HG71594* Kit, RTN Assembly * HG71574* Kit, Side Cover * HG71572**...
-
Page 62: Replacement Decals And Information Plates
Section 8 REPLACEMENT DECALS AND INFORMATION PLATES FAST FAST THROTTLE SPEED CONTROL SLOW WARNING WARNING MOWER DECK INSTALL BELT COVER BEFORE OPERATING MACHINE SLOW BEFORE OPERATING READ OPERATOR'S MANUAL *Read operator's manual N E U T R A L *Make sure guards, shields &... - Page 63 Section 8 REPLACEMENT DECALS AND INFORMATION PLATES Ref. No. Part No. Description 484662 Decal, Instrument Panel (Manual Start) 485185 Decal, Instrument Panel (Electric Start Only) 48314 Decal, Scag Logo 483402 Decal, Belt Cover 484673 Decal, Handle - LH 484674 Decal, Handle - RH 483406 Decal, Warning-Rotating Blades 485403...
-
Page 64: Swzt Electrical Schematic - Manual Start
Section 8 SWzT ELECTRICAL SCHEMATIC - MANUAL START (shown with the key Off, PTO Off, Parking Brake Applied, Speed Control in Neutral, OPC Disengaged) SWITCH Position PTO Switch Legend H + F C + D B + C G + H E + A SWITCH L.H. -
Page 65: Swzt Electrical Schematic - Electric Start
Section 8 SWzT ELECTRICAL SCHEMATIC - ELECTRIC START (shown with the key Off, PTO Off, Parking Brake Applied, Speed Control in Neutral, OPC Disengaged) SWITCH Position PTO Switch Legend Position Key Switch Legend H + F C + D G + M + A B + C G + H E + A... -
Page 66: Limited Warranty - Commercial Equipment
Cutter decks are warranted against cracking for a period of three (3) years. (parts and labor 1st and 2nd year; parts only 3rd year.) The repair or replacement of the cutter deck will be at the option of Scag Power Equipment. We reserve the right to request compo- nents for evaluation. - Page 67 © 2015 Scag Power Equipment Division of Metalcraft of Mayville, Inc.