Table of Contents
Advertisement
U
se and Care Guide
THERMAL-CONVECTION* Ovens
4450571 Rev. A
KITCHENAID* Electric Built-In
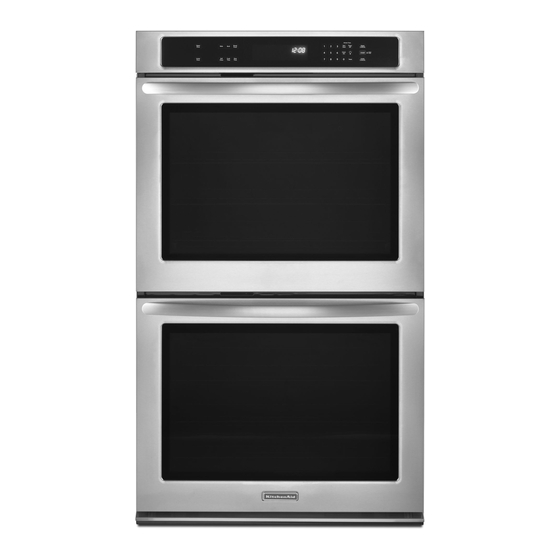
Models: KEBS278D KEBS207D KEBS277D KEBS247D
KEBS208D KEBS107D KEBS177D KEBS147D
Table of Contents
(complete) ..................
A Note to You ................
Oven Safety ................
Getting to Know
Your Oven .....................
Using Your Oven ..........
Conversion ...............
Oven.............................
Self-Cleaning Cycle ....
Troubleshooting .........
Requesting Assistance or
Service in the U.S.A. ..
Requesting Assistance
or Service in Canada ...
Index ............................
Warranty ......................
In the U.S.A. for assistance or service,
call the Consumer Assistance Center:
1-800-422-1230
In Canada for assistance
or service, see page 3.
2
3
4-5
6
7
29
44
47
52
54
55
58
60
Advertisement
Table of Contents

Related Manuals for KitchenAid KEBS207D


Summary of Contents for KitchenAid KEBS207D
-
Page 1: Table Of Contents
Warranty ...... In the U.S.A. for assistance or service, call the Consumer Assistance Center: 1-800-422-1230 In Canada for assistance or service, see page 3. KITCHENAID* Electric Built-In THERMAL-CONVECTION* Ovens Models: KEBS278D KEBS207D KEBS277D KEBS247D KEBS208D KEBS107D KEBS177D KEBS147D 4450571 Rev. A... - Page 2 able of Contents A Note to You .......... Caring for Your Oven ......Cleaning your oven and controls ..Oven Safety .......... Removing the oven door ..... Getting to Know Your Oven ....Using and replacing the oven lights ... Using Your Oven ........
-
Page 3: A Note To You
KITCHENAID appliance! KITCHENAID designs the best tools for the most important room in your house. To ensure that you enjoy many years of trouble-free operation, we developed this Use and Care Guide. It contains valuable information concerning how to operate and maintain your new appliance properly and safely. -
Page 4: Oven Safety
ven Safety Your safety is important to us. This symbol alerts you to hazards such as fire, electrical This guide contains safety statements shock, or other injuries. under warning symbols. Please pay special attention to these symbols and follow any instructions given. -
Page 5: Oven Safety
afety Care and cleaning Do not heat unopened contain- • ers. They could explode. The Small amounts of formaldehyde • hot contents could cause burns and carbon monoxide are given and container particles could off in the Self-Cleaning cycle cause injury. from fiberglass insulation and Use only cookware approved •... -
Page 6: Getting To Know Your Oven
etting to Know Your Oven This section tells you what features your oven has and where they are located. Please review this information before using your oven. To help you find information on specific parts or features quickly, page references are included. Feature locations (Models KEBS208D and KEBS278D shown) Electronic... -
Page 7: Using Your Oven
sing Your Oven This section tells you, step by step, how to operate all oven functions controlled by the electronic control. Carefully follow these instructions, along with the cooking tips, for successful use of your oven. NOTE: Displays and command pads shown are from double upper ovens. In some cases, lower oven and single oven displays and command pads may look different than those shown. - Page 8 sing Your Oven Starting an operation To turn on and off end-of-cycle tones and reminder tones (single or double ovens): After programming a function, you must press the Start pad to start PRESS and hold for 5 seconds START the function. If you do not COOK press the Start pad within TIME...
- Page 9 sing Using the control lock Setting your single oven for the Sabbath † The control lock prevents unwanted use of the oven by disabling the control panel If you want to set your oven to meet “no command pads. work” requirements for the Sabbath, follow these steps: NOTES: Turn the oven light on or off, as desired,...
- Page 10 sing What your oven will do while in the Press START and hold for 2 seconds. Sabbath mode: NOTE: It may take the oven up START • The oven will not shut off automatically. to one half hour to reach the desired temperature.
- Page 11 sing Your Oven Press and hold Number Pad 6 for To change the temperature during the 5 seconds to go into the Sabbath mode for holidays: Sabbath mode. Press upper/lower oven pad. Press a Number Pad for the desired temperature. Each Number Pad is NOTES: programmed for a specific set •...
-
Page 12: Oven Settings
sing Your Oven Oven settings This chart tells you when to use each setting. It also explains which elements heat up for each setting. SETTING DIAGRAM SETTING INFORMATION • BAKE The bottom element and both top Use this setting for elements heat up. - Page 13 sing SETTING DIAGRAM SETTING INFORMATION • CONVECTION BROIL Both top elements heat up. Use this setting for • For even heating, the fan at the back of broiling thick cuts the oven circulates air in the oven cavity. of meat. •...
-
Page 14: Setting The Clock
sing Setting the clock NOTE: These examples are for double upper ovens only. Other ovens may look slightly different. NOTE: If a timed oven function is active or programmed, you cannot change the clock. If an untimed oven function is active or programmed, you can change the clock, however the start time will disappear. -
Page 15: Using The Timer
sing Your Oven Using the timer The Timer does not start or stop the oven. It works like a regular kitchen timer. It can be set in hours and minutes up to 99 hours, 59 minutes, or in minutes and seconds up to 99 minutes, 99 seconds. -
Page 16: Baking Or Convection Baking
sing To change the timer during its operation: Press Timer Set/Start pad. Enter new desired time. Press Timer Set/Start pad. To cancel the timer during PRESS its operation: TIMER You can cancel the Timer any time during CANCEL its operation. Press the Timer Cancel pad. Baking or convection baking NOTES: •... - Page 17 sing Your Oven 2. Choose baking setting. PRESS NOTE: On double ovens, the cavity symbol flashes to tell you which oven you are setting. to select oven (for double ovens) PRESS YOU SEE BAKE (or 177°C) PRESS to select oven (for double ovens) PRESS YOU SEE...
-
Page 18: Convection Roasting
sing Your Oven 4. Preheat oven. PRESS YOU SEE After the temperature reaches 170°F, the START temperature display will show the actual oven temperature at each 5°F (3°C) increase. It will then stop at the set temperature. One long tone will sound when oven is preheated. -
Page 19: Your Oven
sing 2. Choose setting. PRESS YOU SEE NOTE: On double ovens, the cavity symbol flashes to tell you which oven you are setting. to select oven (for double ovens) (or 149°C) PRESS CONVECTION ROAST 3. Set temperature (optional). PRESS YOU SEE Do this step if you want to set a temperature other than 300°F. -
Page 20: Using Your Oven
sing Your Oven Cooking tips Baking/convection baking tips Rack placement for specific foods: The hot air must circulate around the pans in RACK the oven for even heat to reach all parts of FOOD POSITION the oven. This results in better baking. Frozen pies For best air circulation: Angel food and bundt cakes,... - Page 21 sing Roasting tips • Do not cover the entire rack with alumi- num foil. It will reduce air circulation and • Spatter can be reduced by lining the cause poor cooking results. bottom of the roasting pan with lightly crushed aluminum foil. NOTE: Do not line oven bottom with foil or •...
-
Page 22: Adjusting Oven Temperature
sing Your Oven Adjusting oven temperature Although your new oven is properly adjusted to provide accurate temperatures, it may cook faster or slower than your old oven. If, after using the oven for a period of time, you are not satisfied with the baking/roasting results, you can change the offset tempera- ture by following the steps below. -
Page 23: Using The Temperature Probe
sing 3. Enter the adjustment. PRESS YOU SEE (display will go blank) NOTE: If you press the Cancel/Off pad START instead of the Start pad, the offset temperature will stay the same. How to determine the amount of adjustment needed The following chart tells you how much to ADJUST BY THIS TO COOK... - Page 24 sing Your Oven 2. Put food in oven. Place meat on the convection roasting rack, place rack on broiler pan and grid, and place pan in the center of the oven. 3. Connect probe to oven. YOU SEE Insert the plug into the jack located on NIGHT LIGHT DELAY PROBE TEMP...
- Page 25 sing 7. Set temperature (optional). PRESS YOU SEE Do this step if you want to set an oven DELAY NIGHT LIGHT PROBE TEMP temperature other than the one dis- RAISING BREAD CHECK played. DEHYDRATE CONVECTION FOOD AT ENTER STANDARD COOK TIME CLOSE COOK TEMP...
-
Page 26: Using Convect Full Meal
sing wWARNING Burn Hazard Use an oven mitt or pot holder to remove temperature probe. Do not touch broil element. Failure to follow these instructions can result in burns. 9. After cooking, unplug probe. The probe symbol will remain lit until you unplug the Temperature Probe. - Page 27 sing Your Oven 1. Place food in cold oven. If you need the Temperature Probe for your cycle (settings 6 thru 0 in chart on page 28), insert probe into food. Place food in oven and plug probe into jack. 2.
- Page 28 sing Convect full meal chart CYCLE CONVECTION OVEN TIME OR NUMBER CYCLE TEMP PROBE TEMP FOOD OR MEAL Conv. Bake 325°F 1 hr Meal#1: Spinach and ricotta stuffed meat loaf, Baked potatoes, Fall apple cake Conv. Roast 325°F ⁄ Meal#2: Pesto stuffed turkey breast, Caramel- sweet potato casserole, Rhubarb-pineapple...
-
Page 29: Using Easy Convect* Conversion
sing Your Oven Using EASY CONVECT* Conversion (upper oven/single oven/both ovens on Models KEBS208D and KEBS278D) EASY CONVECT Conversion lets you convection cook without entering convection cook temperatures and times. Simply enter the standard cook temperature and time for the food to be cooked. The oven will reduce the temperature, or the temperature and time, for convection cooking. - Page 30 sing 4. Enter standard cook time. PRESS YOU SEE NOTES: NIGHT LIGHT DELAY PROBE TEMP RAISING • This step is not needed when using CHECK BREAD DEHYDRATE CONVECTION FOOD AT the temperature probe. ENTER STANDARD COOK TIME CLOSE CLEAN TIME EASYCONVECT DOOR •...
-
Page 31: Broiling
sing Your Oven EASY CONVECT * Conversion setting chart EASY CONVECT SETTING FOODS YOU CAN COOK WITH THIS SETTING Baked Goods Cakes: layer, angel food Breads: quick and yeast Biscuits and cookies Casseroles, including frozen entrees and soufflés, Fish Meats Chicken: whole and pieces Roasts: pork, beef, and ham Meat loaf, Baked potatoes... - Page 32 sing Your Oven 2. Put food in oven. Place food on grid in broiler pan and place in center of the oven rack. NOTES: Broiler grid Broiler pan • Place food about 3" or more from the broil elements. • To ensure adequate grease drainage, do not use cookie sheets or similar pans for broiling.
- Page 33 sing Your Oven 5. Set temperature (optional). PRESS YOU SEE Do this step if you want to use variable NIGHT LIGHT temperature broiling (see below). DEHYDRATE ENTER COOK TEMP (example shows 325°F broiling temperature for Maxi Broil) 6. Start oven. PRESS YOU SEE NOTE:...
-
Page 34: Convection Broiling
sing Convection broiling (upper oven/single oven/both ovens on Models KEBS208D and KEBS278D) Use this setting when broiling thick cuts of meat. NOTE: These examples are for double upper ovens only. Other ovens may look slightly different. 1. Position rack. See “Broiling rack positions” on page 35 for recommended rack positions. - Page 35 sing 5. For best results, preheat oven PRESS YOU SEE for 5 minutes. START NOTE: If you want to change the convec- tion broiling temperature after broiling has begun, repeat Steps 3, 4, and 5. 6. Put food in oven. Place food on grid in broiler pan and place in center of the oven rack.
-
Page 36: Timed Cooking
sing Your Oven Timed cooking The electronic clock/oven control will turn the oven on and off at times you set, even when you are not around. Delayed time cooking is ideal for foods which do not require a preheated oven, such as meats and casseroles. - Page 37 sing 3. Set temperature (optional). PRESS YOU SEE Do this step if you want to set a tempera- ture other than the one displayed. NOTE: See a reliable cookbook or your convection oven cookbook for tempera- ture recommendations. (example shows 325°F temperature setting in Convection Roast) 4.
- Page 38 sing To delay start and stop automatically: 1. Prepare oven. Position the oven rack(s) properly and place the food in the oven. For correct rack placement, see “Baking or convec- tion baking” on page 16 and “Rack placement” chart on page 20. 2.
- Page 39 sing 5. Set cook time. PRESS YOU SEE NIGHT LIGHT DELAY START TIME PROBE TEMP RAISING STOP BREAD TIME DEHYDRATE CONVECTION ENTER STANDARD COOK TIME CONTROL LOCK COOK TEMP CLEAN TIME LOCKED START (example shows 2-hour cook time with stop time now 2 hours later than time of day) 6.
- Page 40 sing Your Oven 9. When baking/roasting is done: YOU SEE “End” will show on the display. Four tones will sound, followed by 4 reminder tones (unless they have been disabled), COOK TIME every minute until you open the door, or (double oven display) press the Cancel/Off pad.
-
Page 41: Dehydrating
sing Dehydrating (upper oven/single oven/both ovens on Models KEBS208D and KEBS278D) You can use your THERMAL-CONVECTION* oven to dehydrate fruits and vegetables. NOTE: These examples are for double upper ovens only. Other ovens may look slightly different. NOTE: If you do not turn off oven after dehydrating, the oven will keep running until you press CANCEL/OFF. -
Page 42: Raising Bread
sing Your Oven 5. Set temperature (optional). PRESS YOU SEE Do this step if you want to set a NIGHT LIGHT temperature (from 100°F to 200°F) other than 140°F. DEHYDRATE ENTER COOK TEMP (example shows 125°F dehydrating temperature) 6. Start oven. PRESS YOU SEE NOTE:... -
Page 43: The Oven Vent(S)
sing 1. Put dough in oven. NOTE: Be sure to close the door. 2. Press and hold Baked Goods PRESS YOU SEE pad for 5 seconds. NIGHT LIGHT DELAY RAISING BREAD NOTE: On double ovens, the cavity DEHYDRATE ENTER symbol flashes to tell you which oven to select oven (for (or 38˚C) you are setting. -
Page 44: Caring For Your Oven
aring for Your Oven Cleaning your oven and controls Make sure all controls are off and the oven is cool before cleaning. Your oven is designed for easy care. You can do most cleaning with items found around your home. Cleaning your oven whenever spills or soiling occurs will help to keep it looking and operating like new. -
Page 45: Removing The Oven Door
aring for Your Oven Removing the oven door For normal use of your oven, you do not need to remove the door. However, you can remove the door by following the instructions in this section. The oven door is heavy. Use both hands to remove and replace the door. -
Page 46: Using And Replacing The Oven Lights
aring for Your Oven Using and replacing the oven lights The oven lights will come on when you open the oven door. To turn the lights on when the oven door is closed, press the Oven Light on the control panel. Press the OVEN LIGHT again to turn off the lights. -
Page 47: Using The Self-Cleaning Cycle
sing the Self-Cleaning Cycle The Self-Cleaning cycle saves you from the toil and mess that often come with hand- cleaning the oven interior. Like the other functions of your oven, you operate the Self-Cleaning cycle with the easy-to-use electronic control. To use this cycle properly, follow the step-by-step instructions in this section. -
Page 48: Using The Self-Cleaning Cycle
sing the Self-Cleaning Cycle Before setting the controls • Make sure the oven door is • Make sure clock is set to completely closed. correct time of day. The clock cannot be set during the Self- Cleaning cycle. Setting the controls NOTE: These examples are for double upper ovens only. - Page 49 the Self-Cleaning Cycle sing 3. Start oven. PRESS YOU SEE NOTE: The door will lock right after you NIGHT LIGHT DELAY START TIME PROBE TEMP START RAISING STOP press START. BREAD TIME DEHYDRATE ENTER STANDARD CONTROL LOCK COOK TEMP CLEAN TIME DOOR LOCKED START...
- Page 50 the Self-Cleaning Cycle sing 4. Set stop time. PRESS YOU SEE Example for 7:00: NIGHT LIGHT DELAY START PROBE TEMP TIME RAISING STOP BREAD TIME DEHYDRATE ENTER STANDARD CONTROL LOCK COOK TEMP CLEAN TIME DOOR LOCKED START (display shows stop time of 7:00 and start time of 3:00 –...
-
Page 51: For Best Cleaning Results
sing the Self-Cleaning Cycle For best cleaning results • After the oven is cool, wipe up any resi- • If the Self-Cleaning cycle does not get due or ash with a damp cloth or sponge. the oven as clean as you expected, the If any spots remain, clean with a mild cycle may not have been set long enough abrasive cleanser or cleaning sponge. -
Page 52: Troubleshooting
roubleshooting Most cooking problems often are caused by little things you can find and fix without tools of any kind. Check the lists below and on the next page before calling for assistance or service. If you still need help, see “Requesting Assistance or Service” on pages 54 and 55. - Page 53 roubleshooting PROBLEM CAUSE • Cooking results are not The oven is not level. (See Installation Instructions.) what you expected • The oven temperature seems too low or too high. See “Adjusting oven temperature” on page 22 to adjust oven temperature. •...
-
Page 54: Requesting Assistance Or Service In The U.s.a
If you are unable to obtain the name of a local authorized KitchenAid servicer, call our Consumer Assistance Center telephone number (see Step 1). Don’t forget, KitchenAid offers a full line of quality home appliances. Built-In Refrigerators Trash Compactors Ranges & Cooktops... -
Page 55: Requesting Assistance Or Service In Canada
Referrals to local dealers Accessory and repair part sales • Specifications on all our appliances Authorized Service Centres For service of Inglis, Whirlpool, KitchenAid, Roper, Estate, & Admiral Appliances Direct Service Branches: BRITISH COLUMBIA Vancouver Inglis Home Appliance Service 604-291-6426 3627 E. - Page 56 ndex This index is alphabetical. It contains all the topics included in this manual, along with the page(s) on which you can find each topic. TOPIC PAGE TOPIC PAGE ASSISTANCE ........54, 55 CONVECT FULL MEAL ......26 BAKING CONVECTION BAKING Aluminum foil ........
- Page 57 ndex TOPIC PAGE SELF-CLEANING Delay cleaning ........49 How cycle works ........51 Preparing oven ........47 Setting controls ........ 48-50 Starting immediately ......48 Stopping cycle........50 Tips ............51 SERVICE .......... 54, 55 TEMPERATURE PROBE Cleaning ..........26 Connecting to oven .......
-
Page 58: Index
“Troubleshooting,” additional help can be found by checking the “Requesting Assistance or Service” sections or by calling our Consumer Assistance Center telephone number, 1-800-422-1230, from anywhere in the U.S.A. In Canada, call KitchenAid Canada at one of the telephone numbers listed on page 3.