Table of Contents
Advertisement
Quick Links
Advertisement
Table of Contents

Related Manuals for Fortec Star Advantech AIMB-586


Summary of Contents for Fortec Star Advantech AIMB-586
- Page 2 Manual Advantech AIMB-586 /8th Generation Intel® Xeon® / Core™ i7/i5/i3 Micro-ATX Motherboard for 9 LGA1151 Processor with HDMI/2 DP++/eDP (LVDS)/6 COM, 4 LANs, USB 3.1 The information contained in this document has been carefully researched and is, to the best of our knowledge, accurate.
- Page 3 User Manual AIMB-586 Intel® Xeon® E3/Core™ i7/i5/i3 LGA1151 MicroATX with HDMI / 2 DP / eDP(LVDS), 6 COM, Quad LAN, DDR4, PCIe x 16, PCIe x 8 and SATAIII, 4 x USB3.1(Gen2), 6 USB 2.0, 2USB3.0...
- Page 4 Copyright The documentation and the software included with this product are copyrighted 2019 by Advantech Co., Ltd. All rights are reserved. Advantech Co., Ltd. reserves the right to make improvements in the products described in this manual at any time without notice.
- Page 5 A Message to the Customer Advantech Customer Services Each and every Advantech product is built to the most exacting specifications to ensure reliable performance in the harsh and demanding conditions typical of indus- trial environments. Whether your new Advantech equipment is destined for the labo- ratory or the factory floor, you can be assured that your product will provide the reliability and ease of operation for which the name Advantech has come to be known.
- Page 6 Declaration of Conformity FCC Class B This device complies with the requirements in part 15 of the FCC rules: Operation is subject to the following two conditions: This device may not cause harmful interference This device must accept any interference received, including interference that may cause undesired operation.
- Page 7 Product Warranty (2 years) Advantech warrants to you, the original purchaser, that each of its products will be free from defects in materials and workmanship for two years from the date of pur- chase. This warranty does not apply to any products which have been repaired or altered by persons other than repair personnel authorized by Advantech, or which have been subject to misuse, abuse, accident or improper installation.
- Page 8 Ordering Information Chipset SATAIII COM PCIex16 PCIex8 PCIex4 PCIex1 M.2 E-key M.2 M-key HDMI (LVDS) AIMB- 2+(2) 586QG2- Q370 6+(2) 2/1** 1/(1) 00A1E AIMB- 2+(2) 586WG2- C246 6+(2) 2/1** 1/(1) 00A1E AIMB-586L- 1*** 2+(4) 1 H310 6+(2) 2/1 (1)/0 00A1E *() BOM options available on MP version.
-
Page 9: Table Of Contents
Contents Chapter General Information ......1 Introduction ....................2 Features ....................2 Specifications .................... 2 1.3.1 System ..................2 1.3.2 Memory ..................2 1.3.3 Input/Output .................. 3 1.3.4 Graphics..................3 1.3.5 Ethernet LAN ................3 1.3.6 Industrial features ................. 3 1.3.7 Mechanical and environmental specifications....... - Page 10 PS/2 Keyboard and Mouse Connector ........... 18 CPU Fan Connector (CPU_FAN1) ............18 System FAN Connector (SYSFAN1/2/3/4) ..........19 Front Panel Connectors (JFP1/JFP2)............. 20 2.9.1 ATX soft power switch (JFP1/PWR_SW) ........20 2.9.2 Reset (JFP1/RESET)..............20 2.9.3 HDD LED (JFP1/HDDLED) ............20 2.9.4 External speaker (JFP1/SPEAKER) ...........
- Page 11 Introduction ..................... 80 Features ....................80 Installation ....................80 Windows® 10 Driver Setup (Intel I219LM/ Intel I211AT) ......81 Appendix A Programming the Watchdog Timer..83 Programming the Watchdog Timer ............84 A.1.1 Watchdog Timer Overview............84 A.1.2 Programming the Watchdog Timer ..........84 Table A.1: Watchdog Timer Registers ........
- Page 12 Table B.22:USB 2.0 Connector (USB1112)......102 B.23 Dual port USB3.0 header (USB1314) ........... 102 Table B.23:Dual port USB3.0 header (USB1314) ....102 B.24 CMOS battery connector (BAT1) ............103 Table B.24:CMOS battery connector (BAT1) ......103 B.25 COMS Mode selection (JCOMS1) ............103 Table B.25:COMS Mode selection (JCOMS1) ......
- Page 13 B.50 ATX 4 Pin main power connector (ATX12V1)........117 Table B.50:ATX 4 Pin main power connector (ATX12V1) ..117 B.51 CPU FAN connector (CPUFAN1) ............117 Table B.51:CPU FAN connector (CPUFAN1)......117 B.52 System Fan #3 connector (SYSFAN3) ..........118 Table B.52:System Fan #3 connector (SYSFAN3)....
- Page 14 AIMB-586 User Manual...
-
Page 15: Chapter 1 General Information
Chapter General Information... -
Page 16: Introduction
Introduction AIMB-586 is designed with the Intel Q370/C246/H310 for industrial applications that require both performance computing and enhanced power management capabilities. The motherboard supports Xeon E-2124G/ E-2176G/ Core i7-8700/ Core i5-8500/ Core i3-8100/ Pentium G5400/ Celeron G4900 processor up to 12 MB L3 cache and DDR4 2666 MHz up to 64GB, per slot up to 16 GB. -
Page 17: Input/Output
1.3.3 Input/Output PCIe slot: 1 PCIe x16 expansion slot BOM option to 2 PCIe x 8 expansion slot, 1 PCIe x4 expansion slot, 1 PCIe x1 expansion slot Serial port: Six serial ports, one is RS-232/422/485 with hardware auto-flow control and five are RS-232. -
Page 18: Jumpers And Connectors
1.6 A 0.47 A 0.365 A Measure the maximum current value which system under maximum load (CPU: Top speed, RAM & Graphic: Full loading) Board size: 244 mm x 244 mm (9.6" x 9.6") Board weight: 0.365 kg Jumpers and Connectors Connectors on the AIMB-586 motherboard link it to devices such as hard disk drives and a keyboard. -
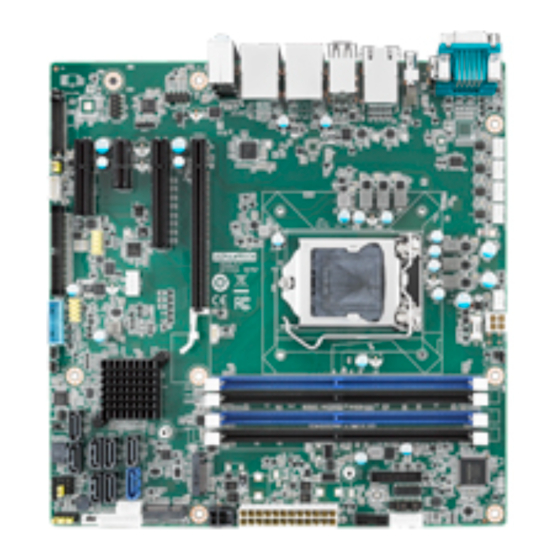
Page 19: Board Layout: Jumper And Connector Locations
eDP1 eDP connector (2 x 20 pin header) KBMS1 On board external keyboard and Mouse connector AUDIO1 Line Out, Mic IN connector FPAUDIO1 Front Panel audio connector (FP_AU-DIO) PSON1 AT(1-2) / ATX (2-3) (Default 2-3) SPI_CN1 SPI flash programming connector GPIO1 GPIO pin header (SMD pitch=2.0 mm) SMBUS1... -
Page 20: Aimb-586 Board Diagram
AIMB-586 Board Diagram Figure 1.3 AIMB-586 Block Diagram AIMB-586 User Manual... -
Page 21: Safety Precautions
Safety Precautions Warning! Always completely disconnect the power cord from chassis whenever you work with the hardware. Do not make connections while the power is on. Sensitive electronic components can be damaged by sudden power surges. Only experienced electronics personnel should open the PC chassis. -
Page 22: Cmos Clear (Cmos1)
1.8.2 CMOS Clear (CMOS1) The AIMB-586 motherboard contains a jumper that can erase CMOS data and reset the system BIOS information. Normally this jumper should be set with pins 1-2 closed. If you want to reset the CMOS data, set CMOS1 to 2-3 closed for just a few seconds, and then move the jumper back to 1-2 closed. -
Page 23: Jusbpwr1-2 (Usb Power Selection Connector)
1.8.4 JUSBPWR1-2 (USB Power Selection Connector) JUSBPWR1: selection for LAN1_USB12, LAN2_USB34, USB5678 JUSBPWR2: selection for USB910,USB1112,USB1314 Table 1.5: JUSBPWR1-2 (USB Power Selection Connector) Pin Name +V5_Vsb +V5_USB 1.8.5 PSON1: ATX, AT Mode Selector Table 1.6: PSON1: ATX, AT Mode Selector Closed Pins Result AT Mode... -
Page 24: Jsetcom2: Com2 Rs232, Rs422, Rs485 Selection
1.8.7 JSETCOM2: COM2 RS232, RS422, RS485 Selection Table 1.8: COM2 RS232, RS422, RS485 Selection Signal Signal UART_SIN [2] RXD_RS485 UART_SIN [2] RXD_RS422 UART_SIN [2] RXD_RS232 DCDB SOUT [2] COM2_DCD# COM2_SOUT COM2_TXD485- COM2_RXD485+ SIN [B] DTR [B] COM2_SIN COM2_DTR# COM2_TXD485+ COM2_RXD485- RS-232 Mode (Default) (5-6) (7-9) (8-10) (13-15) (14-16) RS-422 Mode... -
Page 25: Jcaseop_Sw1: Case Open Selection Pin Header
1.8.9 JCASEOP_SW1: Case Open Selection Pin Header Table 1.9: JCASEOP_SW1: Case Open Selection Pin Header Closed Pins Result Normal Mode 2-3* Normal Open (Default) Default Normal Close Normal Open (Default) 2-3 closed 1-2 closed 1.8.10 JSETCOM1_V1: COM1_RI# Pin RI# / 5V / 12V Jumper position for RI# (Default) Jumper position for +5V Jumper position for +12V... -
Page 26: Cache Memory
1.11 Cache Memory The AIMB-586 supports a CPU with one of the following built-in full speed L3 caches: 12MB for Intel Xeon E-2176G 8MB for Intel Xeon E-2124G 12MB for Intel Core i7 8700 12MB for Intel Core i7 8700T 9MB for Intel Core i5 8500 9MB for Intel Core i5 8500T 6MB for Intel Core i3 8100... -
Page 27: Chapter 2 Connecting Peripherals
Chapter Connecting Peripherals... -
Page 28: Introduction
Introduction You can access most of the connectors from the top of the board as it is being installed in the chassis. If you have a number of cards installed or have a packed chassis, you may need to partially remove the card to make all the connections. USB Ports (LAN1_USB12/LAN2_USB34/LAN3/ LAN4/USB5678/USB910/USB1112/USB1314 The AIMB-586 provides up to 14 USB ports. -
Page 29: Usb Power Switch (Jusbpwr1/Jusbpwr2)
USB Power Switch (JUSBPWR1/JUSBPWR2) AIMB-586 allows users to set USB power between +5 VSB and +5 V. When the jumper is set as +5 V (default 2-3 pin), the board doesn't support wake from S3 via keyboard or mouse. If you need to set it to +5 Vsb, you need to modify the jumper (1- 2 pin) . -
Page 30: Com1/Hdmi/Dp1/Dp2 Connector
COM1/HDMI/DP1/DP2 Connector AIMB-586 includes COM1 and HDMI, DP interfaces that can drive conventional COM1 and HDMI, DP displays. COM1 is a standard 9-pin connector support RS-232. Pin assignments for COM1 and HDMI, DP connectors are detailed in Appendix B. DP max resolution support to 4096 x 2304 @ 60 Hz HDMI default is support to HDMI 1.2. -
Page 31: Serial Ports (Com1~Com6)
Serial Ports (COM1~COM6) AIMB-586 supports six serial ports. COM1, COM2, COM4-6 supports RS-232. COM2 supports RS-232/422/485 (with 5V/12V power). JSETCOM2 is used to select the RS- 232/422/485 mode for COM2. These ports can connect to serial devices, such as a mouse or a printer, or to a com- munications network. -
Page 32: Ps/2 Keyboard And Mouse Connector
PS/2 Keyboard and Mouse Connector 6-pin mini-DIN connectors (KBMS1, 2.54pitch) is for supporting the PS/2 keyboard and PS/2 mouse by a cable P/N 1700018699. CPU Fan Connector (CPU_FAN1) If a fan is used, this connector supports cooling fans of 1500 mA (18 W) or less. AIMB-586 User Manual... -
Page 33: System Fan Connector (Sysfan1/2/3/4)
System FAN Connector (SYSFAN1/2/3/4) If a fan is used, this connector supports cooling fans of 1500 mA (18 W) or less. Default only with System fan 1 & System fan 2. System fan 3 and System fan 4 are BOM optional. Please notice that, system fan 3 and system fan 4 can't be read rota- tional speed in BIOS. -
Page 34: Front Panel Connectors (Jfp1/Jfp2)
Front Panel Connectors (JFP1/JFP2) There are several headers for monitoring and controlling the AIMB-586. 2.9.1 ATX soft power switch (JFP1/PWR_SW) If your computer case is equipped with an ATX power supply, you should connect the power on/off button on your computer case to (JFP1/ PWR_SW), for convenient power on and off. -
Page 35: Power Led And Keyboard Lock Connector
2.9.5 Power LED and keyboard lock connector (JFP2/PWR_LED & KEY LOCK) (JFP2/PWR_LED & KEY LOCK) is a 5-pin connector for the power on LED and Key Lock function. Refer to Appendix B for detailed information on the pin assignments. The Power LED cable should be connected to pin 1-3. The key lock button cable should be connected to pin 4-5. -
Page 36: Digital Audio Connector (Spdif_Out1)
2.11 Digital Audio Connector (SPDIF_OUT1) This connector is for the S/PDIF audio module to allow digital output sound. Connect one end of the S/PDIF audio cable to this connector and the other end to the S/PDIF module. Note! The S/PDIF module should be purchased separately by end user. AIMB-586 User Manual... -
Page 37: Serial Ata Interface (Sata1 ~ Sata8)
2.12 Serial ATA Interface (SATA1 ~ SATA8) AIMB-586 features a high performance Serial ATA III interface (up to 600 MB/s) which eases hard drive cabling with thin, space-saving cables.In QG2,WG2 sku, SATA1 colay with M.2 E-key SATA interface. If M.2 E-key with PCIe interface, SATA1 can be used normally. ... -
Page 38: 8-Pin Alarm Board Connector (Volt1)
2.13 8-pin Alarm Board Connector (VOLT1) VOLT1 connects to the alarm board on the chassis. These alarm boards give warn- ings if a power supply or fan fails, or if the chassis overheats. 2.14 PCI Express x16 Slot / PCI Express x 8 AIMB-586 provides a PCIe x16 slot ,which can BOM option to 2 PCIex8 for users to install add-on cards when their applications require higher graphic performance than the CPU embedded graphics controller can provide. -
Page 39: Front Panel Audio Connector (Fpaud1)
Note! BOM option to 2 PCIex8, When PCIe x8 slot is used, PCIe x16 slot only supports x8 bandwidth. 2.15 Front Panel Audio Connector (FPAUD1) This connector is for a chassis-mounted front panel audio I/O module that supports either HD Audio or legacy AC’97 (optional) audio standard. Connect this connector with the front panel audio I/O module cable. -
Page 40: Atx Power Connector (Eatxpwr1, Atx12V1)
2.16 ATX Power Connector (EATXPWR1, ATX12V1) This connector is for an ATX Micro-Fit power supply. The plugs from the power sup- ply are designed to fit these connectors in only one direction. Determine the proper orientation and push down firmly until the connectors mate completely. Note! Please connect the ATX12V1 connector with the PSU ATX 12V 4- pin connector. -
Page 41: General Purpose I/O Connector (Gpio1)
2.17 General purpose I/O Connector (GPIO1) 2.18 eDP/LVDS Connector (eDP1) AIMB-586 User Manual... -
Page 42: Edp Backlight Inverter(Inv1)
2.19 EDP Backlight inverter(INV1) 2.20 M.2 (E-key)/ M.2 (M-key) M.2 M-key : 2280, support SATA or PCIex4 interface, and can support NVMe devices. M.2 E-key: 2230, support USB, PCIex1 interface, can support wifi module devices and Intel CNVi module. AIMB-586 User Manual... -
Page 43: Bios Operation
Chapter BIOS Operation... -
Page 44: Introduction
Introduction AMI BIOS has been integrated into many motherboards, and has been very popular for over a decade. With the AMI BIOS Setup program, you can modify BIOS settings to control the special features of your computer. The Setup program uses a number of menus for making changes. -
Page 45: Main Menu
3.2.1 Main Menu Press <Del> or <Esc> to enter AMI BIOS CMOS Setup Utility, the Main Menu will appear on the screen. Use arrow keys to select among the items and press <Enter> to accept or enter the sub-menu. The Main BIOS setup screen has two main frames. The left frame displays all the options that can be configured. -
Page 46: Advanced Bios Features
3.2.2 Advanced BIOS Features Select the Advanced tab from the AIMB-586 setup screen to enter the Advanced BIOS Setup screen. You can select any of the items in the left frame of the screen, such as CPU Configuration, to go to the sub menu for that item. You can display an Advanced BIOS Setup option by highlighting it using the <Arrow>... - Page 47 3.2.2.1 Trusted Computing To enable/disable TPM (TPM 1.2/2.0) set up in BIOS. TPM (Trusted Platform Mod- ule) is a secure key generator and key cache management component, enables pro- tected storage of encryption keys and authentication credentials for enhanced security capabilities. ...
- Page 48 3.2.2.2 ACPI Settings Enable ACPI Auto Configuration [ Disabled] Enable or disable BIOS ACPI auto configuration. Enable Hibernation [ Enabled ] Enables or Disables System ability to Hibernate (OS/S4 Sleep State). This option may be not effective with some OS. ...
- Page 49 3.2.2.3 PCH FW Configuration MEDS BIOS Status Code [ Disable ] Firmware update Configuration – ME FW Image Re-Flash [ Disabled ] AIMB-586 User Manual...
- Page 50 3.2.2.4 AMT Configuration Intel ASF [ Enabled ] This item allows users to enable or disable Intel Alert Standard Format. OEM Flags Settings – MEBx Hotkey Pressed [ Disabled ] Enable/Disable BIOS hotkey press. – MEBx Select Screen [ Disabled ] Enable/Disable MEBx selection screen.
- Page 51 3.2.2.5 NCT6776 Super IO Configuration Super IO Chip [ NCT6776 ] Serial Port 1 Configuration AIMB-586 User Manual...
- Page 52 – Serial Port [ Enabled ] – Device Settings: IO=3F8h; IRQ =4 – Change Settings [ Auto ] To select an optimal setting for serial port 1. Serial Port 2 Configuration – Serial Port [ Enabled ] – Device Settings: IO=2F8h; IRQ =3 –...
- Page 53 3.2.2.6 NCT5114DSEC Super IO Configuration – Serial Port [ Enabled ] To “enable or disable” Serial Port 3. – Device Settings: IO=240H; IRQ=5 – Change Settings [ Auto ] To select an optimal setting for serial port 3. AIMB-586 User Manual...
- Page 54 Serial Port 4 Configuration – Serial Port [Enabled] To "enable or disable" serial port 4. – Device Settings: IO=248H; IRQ=5 – Change Settings [ Auto ] To select an optimal setting for serial port 4. AIMB-586 User Manual...
- Page 55 Serial Port 5 Configuration – Serial Port [Enabled] To “enable or disable” serial port 5. – Device Settings: IO=250H; IRQ=5 – Change Settings [ Auto ] To select an optimal setting for serial port 5. AIMB-586 User Manual...
- Page 56 Serial Port 6 Configuration – Serial Port [ Enabled ] To “enable or disable” serial port 6. – Device Settings: IO=258H; IRQ=5 – Change Setting [ Auto ] To select an optimal setting for serial port 6. AIMB-586 User Manual...
- Page 57 3.2.2.7 NCT6776 Configuration PC Health Status – CPU Warning Temperature [ Disabled ] Use this to set the CPU warning temperature threshold. When the system reaches the warning temperature, the speaker will beep. – ACPI Shutdown Temperature [ Disabled ] Use this to set the ACPI shutdown temperature threshold.
- Page 58 Smart Fan Mode Configuration CPU FAN Mode [ SMART FAN IV Mode ] The item shows you CPU temperature and fan speed (PWM) information. SYSFAN Mode [ SMART FAN IV Mode ] The item shows you system temperature and fan speed (PWM) information. AIMB-586 User Manual...
- Page 59 Digital I/O Configuration – Digital I/O Pin 1 - 16 [ Input ] AIMB-586 User Manual...
- Page 60 3.2.2.8 S5RTC Wake Settings The item allow you enable or disable system wake up on alarm event. Wake system with Fixed Time [ Disabled ] Note! When enabled, system will wake up on the specified time. AIMB-586 User Manual...
- Page 61 3.2.2.9 Serial Port Console Redirection Console Redirection [ Disabled ] Enable or disable the console redirection feature AIMB-586 User Manual...
- Page 62 3.2.2.10 Network Stack Configuration[Disabled] Enable/Disable UEFI Network Stack Note! When network stack [enable], item must enable: LANx PXE OpROM [enable] AIMB-586 User Manual...
- Page 63 3.2.2.11 CSM Configuration Boot option filter [UEFI only] Network [UEFI] Storage [UEFI] Video [UEFI] Other PCI device [UEFI] Note! If your HDD or other boot device is installed as Legacy mode, it may cause blue screen situation. There are 2 ways to solve this: 1.
- Page 64 3.2.2.12 USB Configuration Legacy USB Support [ Enabled ] Enables support for legacy USB. Auto option disables legacy support if no USB devices are connected. XHCI Hand-off [ Enabled ] USB Mass Storage Driver Support [ Enabled ] ...
-
Page 65: Chipset Configuration Setting
Chipset Configuration Setting Select the chipset tab from the BIOS setup screen to enter the Chipset Setup screen. Users can select any item in the left frame of the screen, such as PCI express Con- figuration, to go to the sub menu for that item. Users can display a Chipset Setup option by highlighting it using the <Arrow>... - Page 66 VT-d [ Enabled ] Disable or enable VT-d function on MCH. AIMB-586 User Manual...
- Page 67 3.3.1.1 Graphics Configuration Skip Scaning of External Gfx Card [disabled] Primary Display [ Auto ] Select which of IGFX/PEG/PCI Graphics device should be Primary Display Internal Graphics [ Auto ] Keep IGD enabled based on the setup options. ...
- Page 68 Display Combination List BIOS WES 10 Single Display PASS PASS PASS PASS PASS PASS PASS PASS PASS HDMI PASS PASS PASS Dual Display DP1/DP2+HDMI PASS DP1+DP2 PASS DP1/DP2+EDP PASS eDP+HDMI PASS Triple Display DP1+HDMI+DP2 PASS DP1+HDMI+eDP PASS DP2+eDP+HDMI PASS 3.3.1.2 DMI Configuration ...
- Page 69 3.3.1.3 PEG Port Configuration Enable Root Port [ Auto ] Max Link Speed [Auto] Program PCIe ASPM after OpROM [ Disabled ] Enabled: PCIe ASPM will be programmed after OpROM. Disabled: PCIe ASPM will be programmed before OpROM. ...
- Page 70 3.3.1.4 Memory Configuration The item shows you memory specification included RC version, Frequency, size and voltage information etc. Max TOLUD [ Dynamic ] Maximum Value of TOLUD. Dynamic assignment would adjust TOLUD auto- matically based on largest MMIO length of installed graphic controller. ...
-
Page 71: Pch-Io Configuration
3.3.2 PCH-IO Configuration PCI Express Configuration Details of PCI Express items. (See 3.3.2.1) Security Configuration Details of BIOS security items. (See 3.3.2.3) LAN 1controller [ Enabled ] Enable or disable the LAN 1 controller. LAN 2 controller [ Enabled ] ... - Page 72 3.3.2.1 PCI Express Configuration PCI Express Clock Gating [ Enabled ] Enable or Disable PCI Express clock gating for each port. PCIe-USB Glitch W/A [ Disabled ] PCIe-USB Glitch W/A for bad USB device(s) connected behind PCIE/PEG Port. ...
- Page 73 PCI Express x1 slot – PCI Express Root Port 1 [ Enabled ] Control the PCI Express Root Port. – ASPM Support [ Auto ] Set the ASPM Level: Force L0s - Force all links to L0s State : AUTO - BIOS auto configure : DISABLE - Disables ASPM –...
- Page 74 LAN3 Controller LAN4 Controller AIMB-586 User Manual...
- Page 75 PCI Express x4 slot – PCI Express x4 [ Enabled ] Control the PCI Express Root Port. – ASPM Support [ Auto ] Set the ASPM Level: Force L0s - Force all links to L0s State : AUTO - BIOS auto configure : DISABLE - Disables ASPM –...
- Page 76 M.2 M-key slot – M.2 M-key slot [ Enabled ] Control the Mini PCI Express Root Port. – ASPM Support [ Auto ] Set the ASPM Level: Force L0s - Force all links to L0s State : AUTO - BIOS auto configure : DISABLE - Disables ASPM –...
- Page 77 3.3.2.2 SATA and RST Configuration AIMB-586 User Manual...
-
Page 78: Security Setting
Security Setting Administrator Password Select this option and press <ENTER> to access the sub menu, and then type in the password. Set the Administrator password. User Password Select this option and press <ENTER> to access the sub menu, and then type in the password. -
Page 79: Boot Setting
Boot Setting Setup Prompt Timeout User the <+> and <-> keys to adjust the number of seconds to wait for setup activation key. Bootup NumLock State [ On ] On or Off power on state for the NumLock ... -
Page 80: Save & Exit Configuration
Save & Exit Configuration Save Changes and Exit When users have completed system configuration, select this option to save changes, exit BIOS setup menu and reboot the computer to take effect all sys- tem configuration parameters. Select Exit Saving Changes from the Exit menu and press <Enter>. The fol- lowing message appears: Save Configuration Changes and Exit Now? [Ok] [Cancel] Select Ok or cancel. - Page 81 Select Reset Discarding Changes from the Exit menu and press <Enter>. The following message appears: Discard Changes and Exit Setup Now? [Ok] [Cancel] Select Ok to discard changes and reset. Discard Changes Select Discard Changes from the Exit menu and press <Enter>. ...
- Page 82 AIMB-586 User Manual...
-
Page 83: Software Introduction & Service
Chapter Software Introduction & Service... -
Page 84: Introduction
Introduction The mission of Advantech Embedded Software Services is to "Enhance quality of life with Advantech platforms and Microsoft® Windows® embedded technology." We enable Windows® Embedded software products on Advantech platforms to more effectively support the embedded computing community. Customers are freed from the hassle of dealing with multiple vendors (hardware suppliers, system integrators, embedded OS distributors) for projects. - Page 85 4.2.1.2 Display Brightness Control The Brightness Control API allows a developer to access embedded devices and easily control brightness. Backlight The Backlight API allows a developer to control the backlight (screen) on/off in embedded devices. 4.2.1.3 Monitor Watchdog A watchdog timer (WDT) is a device that performs a specific operation after a certain period of time if something goes wrong and the system does not recover on its own.
-
Page 86: Software Utility
4.2.2 Software Utility BIOS Flash The BIOS Flash utility allows customers to update the flash ROM BIOS version, or use it to back up current BIOS by copying it from the flash chip to a file on the customers’ disk. The BIOS Flash utility also provides a command line version and an API for fast implementation into custom- ized applications. -
Page 87: Chipset Software Installation Utility
Chapter Chipset Software Installation Utility... -
Page 88: Before You Begin
Before You Begin To facilitate the installation of the enhanced display drivers and utility software, read the instructions in this chapter carefully. The drivers for AIMB-586 are located on Advantech website. (http://support.advantech.com/Support/.) Updates are provided via Service Packs from Microsoft*. Before you begin, it is important to note that most display drivers need to have the relevant software application already installed in the system prior to installing the enhanced display drivers. -
Page 89: Windows 10 Driver Setup
Windows 10 Driver Setup When enter the website of Advantech, then search product AIMB-586. There is "Chipset" driver inside. AIMB-586 User Manual... - Page 90 AIMB-586 User Manual...
-
Page 91: Vga Setup
Chapter VGA Setup... -
Page 92: Introduction
Introduction The Intel Xeon, Core i7/i5/i3, Pentium and Celeron CPUs are embedded with an inte- grated graphics controller. You need to install the VGA driver to enable this function. Optimized integrated graphic solution: With flexible Intel Graphics, versatile display options and 32-bit 3D graphics engine are supported. Dual independent displays and enhanced display modes for widescreen flat panels include extended, twin, and clone dual display modes, plus optimized 3D support delivers an intensive and realis- tic visual experience. -
Page 93: Lan Configuration
Chapter LAN Configuration... -
Page 94: Introduction
Introduction The AIMB-586 has dual Gigabit Ethernet LANs via dedicated PCI Express x1 lanes (Intel I219LM (LAN1), I211AT (LAN2), Realtek 8111G (LAN3/LAN4)) that offer band- width of up to 500 MB/sec, eliminating the bottleneck of network data flow and incor- porating Gigabit Ethernet at 1000 Mbps. -
Page 95: Windows® 10 Driver Setup (Intel I219Lm/ Intel I211At)
Windows® 10 Driver Setup (Intel I219LM/ Intel I211AT) When enter the website of Advantech, then search product AIMB-586. There is "LAN" driver inside. AIMB-586 User Manual... - Page 96 AIMB-586 User Manual...
- Page 97 Appendix Programming the Watchdog Timer...
-
Page 98: Appendix A Programming The Watchdog Timer
Programming the Watchdog Timer AIMB-586's watchdog timer can be used to monitor system software operation and take corrective action if the software fails to function within the programmed period. This section describes the operation of the watchdog timer and how to program it. A.1.1 Watchdog Timer Overview The watchdog timer is built into the super I/O controller Nuvoton NCT6776. - Page 99 Unlock NCT6776 Select register of watchdog timer Enable the function of the watchdog timer Use the function of the watchdog timer Lock NCT6776 AIMB-586 User Manual...
- Page 100 Table A.1: Watchdog Timer Registers Address of Register (2E) Attribute Value (2F) & Read/Write description Write this address to I/O address port 2E (hex) 87 (hex) ----- twice to unlock the NCT6106D. 07 (hex) write Write 08 (hex) to select register of watchdog timer. Write 01 (hex) to enable the function of the watch- 30 (hex) write...
-
Page 101: Example Program
A.1.3 Example Program Enable watchdog timer and set 10 sec. as timeout interval ;----------------------------------------------------------- Mov dx,2eh ; Unlock NCT6776 Mov al,87h Out dx,al Out dx,al ;----------------------------------------------------------- Mov al,07h ; Select registers of watchdog timer Out dx,al Inc dx Mov al,08h Out dx,al ;----------------------------------------------------------- Dec dx ;... - Page 102 ;----------------------------------------------------------- Mov al,07h ; Select registers of watchdog timer Out dx,al Inc dx Mov al,08h Out dx,al ;----------------------------------------------------------- Dec dx ; Enable the function of watchdog timer Mov al,30h Out dx,al Inc dx Mov al,01h Out dx,al ;----------------------------------------------------------- Dec dx ; Set minute as counting unit Mov al,0f5h Out dx,al Inc dx...
- Page 103 Dec dx ; Enable the function of watchdog timer Mov al,30h Out dx,al Inc dx Mov al,01h Out dx,al ;----------------------------------------------------------- Dec dx ; Enable watchdog timer to be reset by mouse Mov al,0f7h Out dx,al Inc dx In al,dx Or al,80h Out dx,al ;----------------------------------------------------------- Dec dx ;...
- Page 104 ;----------------------------------------------------------- Dec dx ; Lock NCT6776 Mov al,0aah Out dx,al Generate a time-out signal without timer counting ;----------------------------------------------------------- Mov dx,2eh ; Unlock NCT6776 Mov al,87h Out dx,al Out dx,al ;----------------------------------------------------------- Mov al,07h ; Select registers of watchdog timer Out dx,al Inc dx Mov al,08h Out dx,al...
-
Page 105: Appendix B Pin Assignments
Appendix Pin Assignments... -
Page 106: High Definition Multimedia Interface (Hdmi1)
High Definition Multimedia Interface (HDMI1) Table B.1: High Definition Multimedia Interface (HDMI1) Signal Signal HDMI1_Z_D2+ HDMI1_Z_CLK- HDMI1_Z_D2- HDMI1_Z_D1+ HDMI1_SCL HDMI1_Z_D1- HDMI1_SDA HDMI1_Z_D0+ +V5_HDMI HDMI1_Z_D0- HDMI1_HPD HDMI1_Z_CLK+ COM1 connector (COM1) Table B.2: COM1 connector (COM1) Signal Signal DCD# [1] DSR# [1] RXD [1] RTS# [1] TXD [1]... -
Page 107: Displayport1 (Dp1)
DisplayPort1 (DP1) Table B.3: COM1 connector (COM1) Signal Signal DCD# [1] RXD [1] DP1_3- TXD [1] DP1_AUX_EN# DTR# [1] DP1_AUX+ DP1_AUX- DP1_HPD +V3.3_DP1 DisplayPort2 (DP2) Table B.4: DisplayPort2 (DP2) Signal Signal DP2_0+ DP2_3- DP2_0- DP2_AUX_EN# DP2_1+ DP2_AUX+ DP2_1- DP2_2+ DP2_AUX- DP2_HPD DP2_2- DP2_3+... -
Page 108: Rj45 Port 3/Port4 Connector (Lan34)
RJ45 Port 3/Port4 connector (LAN34) Table B.5: RJ45 Port 3/Port4 connector (LAN34) Signal Signal MDI_LAN3_DP0 MDI_LAN4_DN2 MDI_LAN3_DN0 MDI_LAN4_DP3 MDI_LAN3_DP1 MDI_LAN4_DN3 MDI_LAN3_DN1 LAN4_CON MDI_LAN3_DP2 MDI_LAN3_DN2 LAN4_LED0_100M# MDI_LAN3_DP3 LAN4_LED2_1G# MDI_LAN3_DN3 +V3.3_DUAL LAN3_CON LAN4_LED1_ACT# LAN3_LED2_100M# MDI_LAN4_DP0 LAN3_LED1_1G# MDI_LAN4_DN0 +V3.3_DUAL MDI_LAN4_DP1 LAN3_LED0_ACT# MDI_LAN4_DN1 MDI_LAN4_DP2 Universal Serial Bus Port 5 / 6 / 7 / 8 (USB5678) AIMB-586 User Manual... -
Page 109: Rj45 + Usb3.1 Stack Connector (Lan1_Usb12)
Table B.6: Universal Serial Bus Port 5 / 6 / 7 / 8 (USB5678) Signal Signal +USBV3 (*) +USBV3 (*) USB_CM_N5 USB_CM_N7 USB_CM_P5 USB_CM_P7 +USBV3 (*) +USBV3 (*) USB_CM_N6 USB_CM_N8 USB_CM_P6 USB_CM_P8 RJ45 + USB3.1 stack connector (LAN1_USB12) Table B.7: RJ45 + USB3.1 stack connector (LAN1_USB12) Signal Signal VBUS (*) -
Page 110: Rj45 + Usb3.0 Stack Connector (Lan2_Usb34)
RJ45 + USB3.0 stack connector (LAN2_USB34) Table B.8: RJ45 + USB3.0 stack connector (LAN2_USB34) Signal Signal VBUS (*) VBUS (*) D-_3 D-_4 D+_3 D+_4 RX-_3 RX-_4 RX+_3 RX+_4 TX-_3 TX-_4 TX+_3 TX+_4 (*) Depends on JUSBPWR1 Jump Setting Signal Signal MDI_0+ MDI_2+ MDI_0-... -
Page 111: Hd Audio Interface (Audio1)
HD Audio Interface (AUDIO1) Table B.9: HD Audio Interface (AUDIO1) Signal MIC IN LINE OUT LINE IN B.10 Front panel audio pin header (FPAUD1) Table B.10: Front panel audio pin header (FPAUD1) Signal Signal MIC IN-L MIC IN-R FPAUD_DETECT# LINE OUT-R SENSE R1 SENSE LINE OUT-L... -
Page 112: Hd Audio Interface (Spdif1)
B.12 HD Audio interface (SPDIF1) Table B.12: HD Audio interface (SPDIF1) Signal SPDIF OUT B.13 LAN LED (LANLED1) Table B.13: LAN LED (LANLED1) Signal Signal LAN1 ACTIVE LAN2 ACTIVE LAN1 LED PWR LAN2 LED PWR LAN1 LINK1000 LAN2 LINK1000 LAN1 LINK100 LAN2 LINK100 +3.3VSB B.14... -
Page 113: Lvds Panel Connector (Lvds1)
B.15 LVDS Panel Connector (LVDS1) Table B.15: LVDS Panel Connector (LVDS1) Signal Signal +VDD_LVDS1 +VDD_LVDS1 LVDS_DET# +VDD_LVDS1 +VDD_LVDS1 LVDS1_A0N LVDS1_A4N LVDS1_A0P LVDS1_A4P LVDS1_A1N LVDS1_A5N LVDS1_A1P LVDS1_A5P LVDS1_A2N LVDS1_A6N LVDS1_A2P LVDS1_A6P LVDS1_CLK1N LVDS1_CLK2N LVDS1_CLK1P LVDS1_CLK2P LVDS1_SCD LVDS1_SDD LVDS1_PIN34 LVDS1_A3N LVDS1_A7N LVDS1_A3P LVDS1_A7P LVDS1_ENBKL LVDS1_VCON... -
Page 114: Lvds Backlight Inverter Power Connector (Inv1)
B.17 LVDS Backlight inverter power connector (INV1) Table B.17: LVDS Backlight inverter power connector (INV1) Signal +12V BKL EN BKL CTRL B.18 COM3 RI# selection pin header (JSETCOM3_V1) Table B.18: COM3 RI# selection pin header (JSETCOM3_V1) Signal Signal RI# [1] Advantech define Advantech define +12V... -
Page 115: Com3 ~ Com6 Box Header (Com3456)
B.20 COM3 ~ COM6 box header (COM3456) Table B.20: COM3 ~ COM6 box header (COM3456) Signal Signal DCD# [3] DSR# [3] RXD [3] RST# [3] TXD [3] CTS# [3] DTR# [3] RI# [3] DCD# [4] DSR# [4] RXD [4] RST# [4] TXD [4] CTS# [4] DTR# [4]... -
Page 116: Usb 2.0 Connector (Usb1112)
B.22 USB 2.0 Connector (USB1112) Table B.22: USB 2.0 Connector (USB1112) Signal Signal VBUS (*) VBUS (*) USB_CM_N12 USB_CM_N13 USB_CM_P12 USB_CM_P13 (*) Depends on JUSBPWR2 Jump Setting B.23 Dual port USB3.0 header (USB1314) Table B.23: Dual port USB3.0 header (USB1314) Signal Signal VBUS (*) -
Page 117: Cmos Battery Connector (Bat1)
B.24 CMOS battery connector (BAT1) Table B.24: CMOS battery connector (BAT1) Signal VBAT B.25 COMS Mode selection (JCOMS1) Table B.25: COMS Mode selection (JCOMS1) Signal VBAT RTC RESET# B.26 USB Power selection header #2 (JUSBPWR2) Table B.26: USB Power selection header #2 (JUSBPWR2) Signal +VDUAL Advantech define... -
Page 118: Spi Pin Header (Spi_Cn1)
B.27 SPI Pin Header (SPI_CN1) Table B.27: SPI Pin Header (SPI_CN1) Signal Signal +3.3VSB SCLK MISO MOSI B.28 Serial ATA interface connector (SATA8) Table B.28: Serial ATA interface connector (SATA8) Signal AIMB-586 User Manual... -
Page 119: Spi Bios Flash Socket (Spi1)
B.29 SPI BIOS flash socket (SPI1) Table B.29: SPI BIOS flash socket (SPI1) Signal Signal MOSI MISO SCLK WP# / IO2 HOLD# / IO3 +V3.3_SPI B.30 Serial ATA interface connector (SATA7) Table B.30: Serial ATA interface connector (SATA7) Signal AIMB-586 User Manual... -
Page 120: Power Switch/Hdd Led/Smbus/Speaker Pin Header (Jfp1)
B.31 Power switch/HDD LED/SMBus/Speaker pin header (JFP1) Table B.31: Power switch/HDD LED/SMBus/Speaker pin header (JFP1) Signal Signal HDD LED+ Power Button+ SPK_P2 HDD LED- Power Button- SPK_P3 SMB_DATA System Reset+ SPK_P4 SMB_CLK System Reset- B.32 Power LED and keyboard lock pin header (JFP2) Table B.32: Power LED and keyboard lock pin header (JFP2) Signal LED Power... -
Page 121: (Jir1+Jobs1+Jwdt1)
Table B.33: CIR interface, Watchdog timer output and OBS beep (JIR1+JOBS1+JWDT1) Signal Signal Watch Dog Reset# output IRRX System Reset input# SIO Warning Beep output SP1 Buzzer Beep IRTX input B.34 AT/ATX Mode selection (PSON1) Table B.34: AT/ATX Mode selection (PSON1) Signal +3.3V AIMB-586 User Manual... -
Page 122: Alarm Board/Cmm Power Connector (Volt1)
B.35 Alarm Board/CMM Power Connector (VOLT1) Table B.35: AT/ATX Mode selection (PSON1) Signal +5VSB +3.3V -12V +12V B.36 Serial ATA interface connector (SATA1~6) Table B.36: Serial ATA interface connector (SATA1~6) Signal AIMB-586 User Manual... -
Page 123: Sata Power Connector (Sata_Pwr1)
B.37 SATA Power Connector (SATA_PWR1) Table B.37: SATA Power Connector (SATA_PWR1) Signal +V12 AIMB-586 User Manual... -
Page 124: M.2 E Key Connector (M2E1)
B.38 M.2 E Key connector (M2E1) Table B.38: M.2 E Key connector (M2E1) Signal Signal 3.3V USB_D+ 3.3V USB_D- LED1# (I)(OD) PCM_CLK/I2S SCK (O/I)(0/1.8V) PCM_SYNC/I2S WS CNV_WR_D1- (I/O)(0/1.8V) PCM_IN/I2S SD_IN CNV_WR_D1+ (I)(0/1.8V) PCM_OUT/I2S SD_OUT (O)(0/1.8V) CNV_WR_D0- LED2# (I)(OD) CNV_WR_D0+ UART WAKE# (I)(0/ 3.3V) UART RXD (I)(0/ CNV_WR_CLK-... -
Page 125: M.2 M Key Connector (M2M1)
Table B.38: M.2 E Key connector (M2E1) RESERVED RESERVED/PETp1 RESERVED RESERVED/PETn1 RESERVED M.2_38P4M_REFCL RESERVED/PERp1 RESERVED RESERVED/PERn1 RESERVED PCIE_WAKE# RESERVED/ 3.3V REFCLKp1 RESERVED/ 3.3V REFCLKn1 B.39 M.2 M Key connector (M2M1) Table B.39: M.2 M Key connector (M2M1) Signal Signal 3.3V 3.3V PERn3 PERp3... -
Page 126: Sata Power Connector (Sata_Pwr2)
Table B.39: M.2 M Key connector (M2M1) PETn0/SATA-A- PERST# (O)(0/3.3V) PETp0/SATA-A+ or N/C CLKREQ# (I/O)(0/ 3.3V) or N/C PEWAKE# (I/O)(0/ REFCLKn 3.3V) or N/C REFCLKp Connector Key Connector Key Connector Key Connector Key Connector Key Connector Key Connector Key Connector Key SUSCLK(32kHz) (O)(0/3.3V) PEDET (NC-PCIe/... -
Page 127: Com2 Box Header (Com2)
Table B.41: ATX 24pin power connector (EATXPWR1) Signal Signal +3.3V +3.3V +3.3V -12V PSON# PWROK +5VSB +12V +12V +3.3V B.42 COM2 box header (COM2) Table B.42: COM2 box header (COM2) Signal Signal DCD# [2] DSR# [2] RXD [2] RST# [2] TXD [2] CTS# [2] DTR# [2]... -
Page 128: Keyboard & Mouse Connector (Kbms1)
B.43 Keyboard & Mouse connector (KBMS1) Table B.43: Keyboard & Mouse connector (KBMS1) Signal KB_CLK# KB_DAT# MS_CLK# VCC (+5VSB) MS_DAT# B.44 COM2 RS232, RS422, RS485 selection pin header (JSETCOM2) Table B.44: COM2 RS232, RS422, RS485 selection pin header (JSETCOM2) Signal Signal UART_SIN [2] RXD_RS485... -
Page 129: Low Pin Count Interface Connector (Lpc1)
B.45 Low pin count interface connector (LPC1) Table B.45: Low pin count interface connector (LPC1) Signal Signal CLK (24MHz) RESET# FRAME# +3.3V SMB CLK SERIRQ SMB DAT +5VSB AIMB-586 User Manual... -
Page 130: 16-Bits General Purpose I/O Pin Header (Gpio1)
B.46 16-bits General Purpose I/O pin header (GPIO1) Table B.46: 16-bits General Purpose I/O pin header (GPIO1) Signal Signal GPIO0 GPIO8 GPIO1 GPIO9 GPIO2 GPIO10 GPIO3 GPIO11 GPIO4 GPIO12 GPIO5 GPIO13 GPIO6 GPIO14 GPIO7 GPIO15 +5VSB +5VSB B.47 Case Open selection pin header (JCASEOP_SW1) Table B.47: Case Open selection pin header (JCASEOP_SW1) Signal... -
Page 131: Atx 8 Pin Main Power Connector (Atx12V2)
B.49 ATX 8 Pin main power connector (ATX12V2) Table B.49: ATX 8 Pin main power connector (ATX12V2) Signal Signal +12V +12V +12V GND# +12V B.50 ATX 4 Pin main power connector (ATX12V1) Table B.50: ATX 4 Pin main power connector (ATX12V1) Signal +12V +12V... -
Page 132: System Fan #3 Connector (Sysfan3)
B.52 System Fan #3 connector (SYSFAN3) Table B.52: System Fan #3 connector (SYSFAN3) Signal SYSTEM FAN VCC SYSTEM FAN SPEED SYSTEM FAN PWM B.53 System Fan #1 connector (SYSFAN1) Table B.53: System Fan #1 connector (SYSFAN1) Signal SYSTEM FAN VCC SYSTEM FAN SPEED SYSTEM FAN PWM B.54... -
Page 133: System Fan #4 Connector (Sysfan4)
B.55 System Fan #4 connector (SYSFAN4) Table B.55: System Fan #4 connector (SYSFAN4) Signal SYSTEM FAN VCC SYSTEM FAN SPEED SYSTEM FAN PWM AIMB-586 User Manual... -
Page 134: Usb Power Selection For Usb910, Usb1112, Usb1314 (Jusbpwr2)
Jumper Setting List: Table B.56: Jumper Setting List Description Part Reference USB Power selection for USB910, USB1112, JUSBPWR2 USB1314 USB Power selection for LAN1_USB12, JUSBPWR1 LAN2_USB34, USB5678 LVDS VESA, JEIDA format JLVDS_VCON1 selection pin header RTC / CMOS clear JCOMS1 PWRBTN#/ RESET#/HDD LED/ Serial bus from HW JFP1... -
Page 135: Usb Power Selection For Lan1_Usb12, Lan2_Usb34, Usb5678
B.57 USB Power selection for LAN1_USB12, LAN2_USB34, USB5678 (JUSBPWR1) Table B.58: USB Power selection for LAN1_USB12, LAN2_USB34, USB5678 (JUSBPWR1) Function Jumper Setting Set USB VBUS as +5VSB (Default) Set USB VBUS as +5V B.58 LVDS VESA, JEIDA format selection pin header (JLVDS_VCON1) Table B.59: LVDS VESA, JEIDA format selection pin header (JLVDS_VCON1) -
Page 136: Pwrbtn#/ Reset#/Hdd Led/ Serial Bus From Hw Monitor Ic/Internal Buzzer / External Speaker Header (Jfp1)
B.60 PWRBTN#/ RESET#/HDD LED/ Serial bus from HW monitor IC/Internal Buzzer / External Speaker header (JFP1) Table B.61: PWRBTN#/ RESET#/HDD LED/ Serial bus from HW monitor IC/Internal Buzzer / External Speaker header (JFP1) Function Jumper Setting Internal Buzzer (Default) B.61 CIR interface, Watchdog timer output and OBS beep (JIR1+JOBS1+JWDT1) Table B.62: CIR interface, Watchdog timer output and OBS beep... -
Page 137: At / Atx Mode Selection (Pson1)
B.62 AT / ATX Mode selection (PSON1) Table B.63: AT / ATX Mode selection (PSON1) Function Jumper Setting ATX Mode (Default) AT Mode B.63 COM2 RS232, RS422, RS485 selection pin header (JSETCOM2) Table B.64: COM2 RS232, RS422, RS485 selection pin header (JSETCOM2) Function Jumper Setting... -
Page 138: Case Open Selection Pin Header (Jcaseop_Sw1)
B.64 Case open selection pin header (JCASEOP_SW1) Table B.65: Case open selection pin header (JCASEOP_SW1) Function Jumper Setting Normal Close Normal Open (Default) B.65 COM1_RI# Pin RI# / 5V / 12V selection (JSETCOM1_V1) Table B.66: COM1_RI# Pin RI# / 5V / 12V selection (JSETCOM1_V1) Function Jumper Setting Jumper position for RI# (Default) -
Page 139: Lvds Panel Voltage Selection (Jlvds1)
B.66 LVDS Panel Voltage Selection (JLVDS1) Table B.67: LVDS Panel Voltage Selection (JLVDS1) Function Jumper Setting Jumper position for 5V Jumper position for 3.3V (Default) Jumper position for 12V AIMB-586 User Manual... - Page 140 www.advantech.com Please verify specifications before quoting. This guide is intended for reference purposes only. All product specifications are subject to change without notice. No part of this publication may be reproduced in any form or by any means, electronic, photocopying, recording or otherwise, without prior written permis- sion of the publisher.
- Page 141 Our company network supports you worldwide with offices in Germany, Austria, Switzerland, the UK and the USA. For more information please contact: Headquarters Germany FORTEC Elektronik AG Augsburger Str. 2b 82110 Germering Phone: +49 89 894450-0 E-Mail: info@fortecag.de Internet: www.fortecag.de Fortec Group Members Distec GmbH Office Vienna Austria...