Table of Contents
Advertisement
Quick Links
Advertisement
Table of Contents

Related Manuals for Epson SureColor T2170


Summary of Contents for Epson SureColor T2170
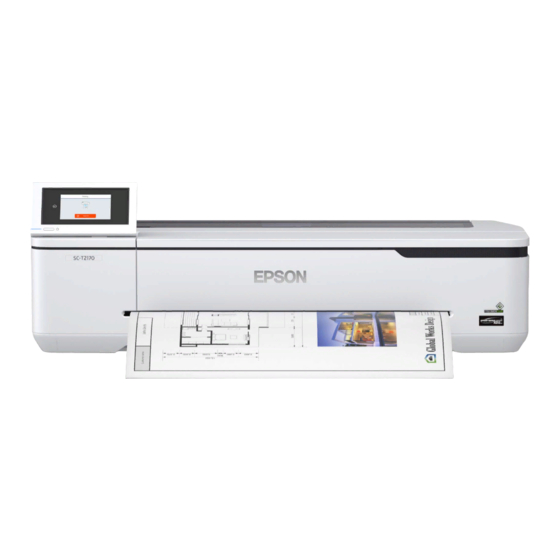
- Page 1 ® ® Epson SureColor T2170/T3170/T5170 User's Guide...
-
Page 3: Table Of Contents
Contents Epson SureColor T2170/T3170/T5170 User's Guide................. 9 Introduction to Your Printer........................10 Printer Features ..........................10 Optional Equipment and Replacement Parts................. 11 Notations Used in the Documentation ....................11 Printer Part Locations......................... 12 Product Parts - Front ........................12 Product Parts - Top/Inside ......................13 Product Parts - Rear ........................ - Page 4 Removing Paper from the Auto Sheet Feeder ................61 Creating Custom Paper Configurations....................64 Selecting Custom Paper Configurations..................64 Compatible Epson Papers........................65 Paper or Media Type Settings - Printing Software................67 Selecting the Paper Settings for Each Source - Control Panel ............68 Paper Type Settings - Control Panel .....................
- Page 5 Changing the Language of the Printer Software Screens.............. 92 Changing Automatic Update Options .................... 93 Printing with the Built-in Epson Driver - Windows 10 S............... 94 Selecting Print Settings - Windows 10 S..................95 Printing on a Mac ..........................97 Selecting Basic Print Settings - Mac ....................
- Page 6 Checking Ink Cartridge and Maintenance Box Status with Windows........... 136 Checking Cartridge and Maintenance Box Status - Mac ............. 137 Purchase Epson Ink Cartridges and Maintenance Box ..............138 Ink Cartridge and Maintenance Box Part Numbers..............139 Removing and Installing Ink Cartridges.................... 139 Replacing the Maintenance Box.......................
- Page 7 Discharging Ink..........................164 Solving Problems ............................ 166 Checking for Software Updates......................166 Product Status Messages ........................ 167 Resetting Control Panel Defaults ..................... 168 Solving Printer Problems........................169 Printer Does Not Turn On ......................169 LCD Screen Shuts Off ......................... 170 Solving Network Problems .......................
- Page 8 FCC Compliance Statement......................203 Binding Arbitration and Class Waiver ....................203 Trademarks ............................207 Copyright Notice..........................207 A Note Concerning Responsible Use of Copyrighted Materials........... 208 Default Delay Times for Power Management for Epson Products ..........208 Copyright Attribution ........................208...
-
Page 9: Epson Surecolor T2170/T3170/T5170 User's Guide
Epson SureColor T2170/T3170/T5170 User's Guide Welcome to the Epson SureColor T2170/T3170/T5170 User's Guide. For a printable PDF copy of this guide, click here. -
Page 10: Introduction To Your Printer
Using AirPrint Assembling the Printer Stand and Paper Basket Printer Features The Epson SureColor T2170/T3170/T5170 printer includes these special features: High productivity • Print accurate A1/D-size prints in 31 seconds (SureColor T5170), 34 seconds (SureColor T3170), or 43 seconds (SureColor T2170) •... -
Page 11: Optional Equipment And Replacement Parts
• Supports both roll and sheet paper up to 24 inches (609.6 mm) [SureColor T2170/T3170] or 36 inches (914.4 mm) [SureColor T5170]. The auto sheet feeder supports sheets up to 11 × 17 inches (279 × 432 mm). Optional Equipment and Replacement Parts... -
Page 12: Printer Part Locations
Printer Part Locations Check the printer part illustrations to learn about the parts on your printer. Product Parts - Front Product Parts - Top/Inside Product Parts - Rear Control Panel Parts Parent topic: Introduction to Your Printer Product Parts - Front... -
Page 13: Product Parts - Top/Inside
Control panel Cutter cover Stand and paper basket (included with optional stand for SureColor T2170/T3170) Casters (included with optional stand for SureColor T2170/T3170) Output tray (optional for SureColor T2170) B1-size paper support (available only on SureColor T5170) Edge guides Auto sheet feeder... -
Page 14: Product Parts - Rear
Roll paper cover Paper feeder Ink cartridges Ink cartridge cover Roll paper spindle 2-inch core paper stop (left side is removeable) Roll paper spindle holders Parent topic: Printer Part Locations Product Parts - Rear... -
Page 15: Control Panel Parts
Maintenance box cover Maintenance box AC inlet Ethernet LAN port Status light Data light OPTION port (for scanner connection) USB port Airflow vents Caution: Do not block the airflow vents shown above. Parent topic: Printer Part Locations Control Panel Parts home button power light power button... - Page 16 LCD Screen Display Status messages Roll paper information When roll paper is not loaded, - - - is displayed. Paper Setting menu Printer Status menu (or Enlarged Copy if a scanner is connected) Settings menu Message List (displays notifications or warnings)
-
Page 17: Using The Control Panel
Network Connection Settings : No Ethernet connection : Ethernet connection established : No Wi-Fi connection : Wi-Fi network error or the product is searching for a connection : Wi-Fi connection established; the number of bars indicates signal strength : No Wi-Fi Direct connection : Wi-Fi Direct connection established Supply Status (displays remaining ink cartridge and maintenance box levels) Parent topic:... -
Page 18: Selecting The Date And Time
You see this screen: 3. Select a language. 4. Press the home button to exit. Parent topic: Using the Control Panel Selecting the Date and Time Before using your product, select the current date, time, and daylight saving phase in your area, and choose your preferred date and time format. -
Page 19: Setting A Password And Locking The Control Panel
You see this screen: 3. Select Date/Time. 4. Select the date format you want to use. 5. Use the on-screen keyboard to enter the current date and select OK. 6. Select the time format you want to use. 7. Use the on-screen keyboard to enter the current time and select OK. 8. - Page 20 Note: This setting can be locked by an administrator. If you cannot access or change this setting, contact your administrator for assistance. Note: For more information on administration settings, see the Administrator's Guide. 1. Press the home button, if necessary. 2.
-
Page 21: Using Airprint
Wi-Fi or Wired Networking Assembling the Printer Stand and Paper Basket Follow these steps to assemble the printer stand and paper basket for the SureColor T5170 printer. Note: You can purchase an optional printer stand and paper basket for the SureColor T2170/T3170 printer. - Page 22 Before you begin, make sure you have enough space to set up the printer as shown here. 2 inches (50 mm) 12 inches (310 mm) 6 inches (150 mm) Note: At least two people are required to lift the printer onto the stand after it is assembled.
- Page 23 1. Make sure you have all of these items for assembly: Left mounting bracket...
- Page 24 Right mounting bracket Support brace Left leg Right leg Paper basket bar Left leg base (square hole is the front side) Right leg base (square hole is the front side) Allen wrench Paper basket rod Left paper basket support rod Right paper basket support rod Screws (28;...
- Page 25 3. Use the Allen wrench to insert 8 screws (four on each side) into the holes on the support brace and leg bases. 4. Attach the legs to the bases.
- Page 26 5. Insert 8 screws (4 on each side) into the holes in the legs. 6. Push in the cloth on the paper basket bar so it does not get caught between the bar and the legs, and attach the bar to the legs.
- Page 27 Note: Make sure the L and R stickers on the paper basket bar are correctly oriented with the L and R stickers on the leg bases. 7. Insert 4 screws (2 on each side) into the holes on the paper basket bar to secure it to the legs.
- Page 28 8. Make sure the L and R stickers on the mounting brackets are correctly oriented with the left and right legs and attach them as shown. 9. Insert 4 screws into 4 screw holders (2 on each side) and insert them into the holes on the legs to secure the mounting brackets.
- Page 29 10. Slide the paper basket rod into the pocket on the end of the paper basket cloth. 11. Insert the top of the paper basket support rods through the loops on the paper basket cloth and attach them to the paper basket rods.
- Page 30 12. Insert the ends of the paper basket support rods into the holes on the leg bases. 13. Close the paper basket as shown.
- Page 31 14. On the back of the paper basket and stand, attach the loops on the paper basket cloth to the hooks on the leg bases as shown. 15. On the front of the stand, lock the casters.
- Page 32 16. Have at least two people lift the printer using the indented areas as shown. Caution: Do not hold the printer by the paper support. You may damage it.
- Page 33 17. Align the notches on the printer with the notches on the back of the stand as shown and place the printer on the stand. 18. Do one of the following: • If your stand does not include thumbscrews, insert 4 screws (2 on each side) into the bottom of the mounting brackets to secure the printer to the stand.
- Page 34 • If your stand includes thumbscrews, insert 4 thumbscrews (2 on each side) into the bottom of the mounting brackets to secure the printer to the stand. On the left rear side, insert the thumbscrew through the wired loop on the printer as shown. Parent topic: Introduction to Your Printer Related references...
-
Page 35: Wi-Fi Or Wired Networking
Wi-Fi or Wired Networking See these sections to use your product on a Wi-Fi or wired network. Network Security Recommendations Wi-Fi Infrastructure Mode Setup Wi-Fi Direct Mode Setup Wi-Fi Protected Setup (WPS) Printing a Network Status Sheet Changing or Updating Network Connections Network Security Recommendations To help deter unauthorized access to your product over a network, you should protect your network environment using appropriate security measures. -
Page 36: Wi-Fi Infrastructure Mode Setup
The wireless router or access point can be connected to your computer over a wireless or wired network. Note: You cannot connect to a wired and wireless network at the same time. Epson product Wireless router or access point Computer with a wireless interface... -
Page 37: Selecting Wireless Network Settings From The Control Panel
To install your product on a wireless network, install the necessary software by downloading it from the Epson website. The installer program guides you through network setup. Note: This setting can be locked by an administrator. If you cannot access or change this setting, contact your administrator for assistance. - Page 38 LCD screen and should be able to connect to your product directly from your computer or device, and then print. If you are printing from a computer, make sure you installed the network software from the Epson website.
-
Page 39: Wi-Fi Direct Mode Setup
You can set up your product to communicate directly with your computer or another device without requiring a wireless router or access point. In Wi-Fi Direct Mode, the product itself acts as a network access point for up to 4 devices. Epson product Computer with a wireless interface Other wireless device... - Page 40 Note: This setting can be locked by an administrator. If you cannot access or change this setting, contact your administrator for assistance. 1. Press the home button, if necessary. 2. Select the icon. You see a screen like this: 3. Select Wi-Fi Direct > Start Setup > Start Setup. You see a screen like this:...
-
Page 41: Wi-Fi Protected Setup (Wps)
LCD screen and should be able to connect to your product directly from your computer or device, and then print. If you are printing from a computer, make sure you installed the network software from the Epson website. Note: If you don't see the icon on the LCD screen, you may have selected the wrong network name or entered the password incorrectly. -
Page 42: Printing A Network Status Sheet
LCD screen and should be able to connect to your product directly from your computer or device, and then print. If you are printing from a computer, make sure you installed the network software from the Epson website. Note: If you don't see the icon, repeat these steps to try again. -
Page 43: Changing Or Updating Network Connections
You see a screen like this: 3. Select Print Status Sheet > Print. Examine the settings shown on the network status sheet to diagnose any problems you have. Parent topic: Wi-Fi or Wired Networking Changing or Updating Network Connections See these sections to change or update how your product connects to a network. Accessing the Web Config Utility Changing a USB Connection to a Wi-Fi Connection Changing a Wi-Fi Connection to a Wired Network Connection... -
Page 44: Changing A Usb Connection To A Wi-Fi Connection
Wi-Fi connection. 1. Disconnect the USB cable from your product. 2. Uninstall your product software. 3. Download and install your product software from the Epson website using the instructions on the Start Here sheet. Parent topic: Changing or Updating Network Connections... -
Page 45: Connecting To A New Wi-Fi Router
1. Do one of the following: • Windows: Uninstall your product software. • Mac: Go to the next step. 2. Download and install your product software from the Epson website using the instructions on the Start Here sheet. Parent topic:... -
Page 46: Disabling Wi-Fi Features
Related concepts Uninstall Your Product Software Disabling Wi-Fi Features You may need to disable your product's Wi-Fi features if you change your network connection type or need to solve a problem with your network connection. Note: Before disabling Wi-Fi features, make a note of your product's SSID (network name) and password. -
Page 47: Media Handling
See these sections to load and handle media on your product. Roll Paper Handling Cut Sheet Handling Creating Custom Paper Configurations Compatible Epson Papers Paper or Media Type Settings - Printing Software Selecting the Paper Settings for Each Source - Control Panel Roll Paper Handling See these sections to load, cut, and remove roll paper in your product. - Page 48 3. Open the cut sheet cover. 4. Release the central lock and open the roll paper cover. 5. Remove the spindle. 6. Remove the transparent paper stop from the spindle.
- Page 49 7. Insert the spindle into the roll paper core as shown, with the lead edge of the roll paper facing towards you. 8. Push the fixed paper stop against the roll paper until there is no gap between the paper stop and the roll paper.
- Page 50 11. Insert the leading edge of the roll paper into the paper feeder until you hear a beep. Note: Make sure the leading edge of the roll paper is not bent or skewed, or a paper jam or skew error may occur. 12.
-
Page 51: Cutting Roll Paper
Related references Compatible Epson Papers Paper Specifications Roll Paper Options - Windows Related tasks Removing Roll Paper Selecting Advanced Settings - Mac Cutting Roll Paper The printer has a built-in cutter that can automatically cut most paper types. When Auto Cut is turned on, paper is automatically cut after each page prints, or if the roll paper leading edge is not straight. -
Page 52: Removing Roll Paper
• If you are using a paper type that cannot be cut with the built-in cutter, turn off the setting in the control panel. From the roll paper information area, select Advanced Media Setting > Auto Cut > Off. 2. Print your document. 3. - Page 53 2. Release the central lock and open the roll paper cover. 3. Select Remove on the LCD screen. The roll paper rewinds and ejects automatically. Note: Make sure the roll paper is rewound completely before removing it from the printer. 4.
-
Page 54: Cut Sheet Handling
7. Place the roll paper in its original package. Note: Store roll paper on its end or horizontally (if the packaging end-caps are installed). Never store roll paper on its edge, as a flat spot can develop and lead to imaging artifacts on the prints. Do not store roll paper in dusty areas. -
Page 55: Loading Single Cut Sheets
Parent topic: Media Handling Loading Single Cut Sheets You can print on a variety of cut sheet paper types and sizes up to 24 inches (61 cm) [SureColor T2170/T3170] or 36 inches (91 cm) [SureColor T5170] wide and 0.1 inch (0.27 mm) thick. You can load and print on one sheet at a time. - Page 56 5. Insert the paper into the paper feeder until you hear a beep. Note: Make sure the leading edge of the paper is straight to prevent a skew error or paper jam. 6. Select the paper type and size you loaded on the LCD screen. Note: When you load B1 (27.8 ×...
-
Page 57: Loading Paper In The Auto Sheet Feeder
Parent topic: Cut Sheet Handling Related references Compatible Epson Papers Paper Specifications Loading Paper in the Auto Sheet Feeder You can load up to 50 sheets of plain paper up to 0.1 inch (0.27 mm) thick in the auto sheet feeder in the following sizes: A3 (11.7 ×... - Page 58 1. Attach the output tray (optional for SureColor T2170) by inserting its hooks into the holes in the front of the printer. 2. Make sure Load paper is displayed on the home screen. 3. Open the cut sheet cover.
- Page 59 4. Tilt back the auto sheet feeder and pull the paper support extensions all the way out and upward.
- Page 60 5. Slide the edge guides out. 6. Load paper, printable side up, into the auto sheet feeder.
-
Page 61: Removing Paper From The Auto Sheet Feeder
8. Select the paper type and size you loaded on the LCD screen. Parent topic: Cut Sheet Handling Related references Compatible Epson Papers Paper Specifications Removing Paper from the Auto Sheet Feeder Remove paper from the auto sheet feeder when you finish printing. - Page 62 1. Slide out the edge guides and remove the paper from the auto sheet feeder.
- Page 63 2. Fold down and push in the paper support extensions and close the auto sheet feeder.
-
Page 64: Creating Custom Paper Configurations
Cut Sheet Handling Creating Custom Paper Configurations You can create and store up to 10 custom paper configurations for use if printing on non-Epson paper or paper that is not supported by the Epson printer driver. 1. Load the type of paper that you want to configure in the printer. -
Page 65: Compatible Epson Papers
(U.S.) or proimaging.epson.ca (Canada), select your product series and product, and click the Where to Buy button. Or call 800-GO-EPSON (800-463- 7766) in the U.S. or 800-807-7766 in Canada. Note: Paper/media availability varies by country. Note: For the most updated list of supported Epson papers, visit proimaging.epson.com... - Page 66 1 roll Paper (30.5 m) Cut Sheets Paper Type Size Part number Amount Epson Ultra Premium Photo Paper Letter (8.5 × 11 inches S041405 50 sheets Luster [216 × 279 mm]) Epson Premium Photo Paper Letter (8.5 × 11 inches...
-
Page 67: Paper Or Media Type Settings - Printing Software
Epson Doubleweight Matte Paper Doubleweight Matte Paper Epson Premium Presentation Paper Matte Enhanced Matte Paper Archival Matte Paper Epson High Quality Ink Jet Paper Photo Quality Inkjet Paper Coated paper (generic) Coated Paper (Generic) Epson Premium Glossy Photo Paper (170) -
Page 68: Selecting The Paper Settings For Each Source - Control Panel
Selecting the Paper Settings for Each Source - Control Panel You can change the default paper size and paper type for each source using the control panel on the product. 1. Press the home button, if necessary. 2. Select Paper Setting. You see a screen like this: 3. -
Page 69: Paper Type Settings - Control Panel
Plain paper 16 to 20 lb (60 to 75 g/m Plain Paper Coated paper (generic) Coated Paper (Generic) Epson Doubleweight Matte Paper Doubleweight Matte Epson Premium Photo Paper Glossy Premium Glossy Sheet Photo Paper Epson Premium Presentation Paper Matte Matte Paper Tracing paper/vellum paper... -
Page 70: Printing From A Computer
You can print with your product using any Windows application, as described in these sections. Note: If you are using your Epson product with the Windows 10 S operating system, you cannot use the software described in this section. You also cannot download and install any Epson product software from the Epson website for use with Windows 10 S;... -
Page 71: Selecting Basic Print Settings - Windows
Selecting Basic Print Settings - Windows Select the basic settings for the document you want to print. 1. Open a document for printing. 2. Select the print command in your application. Note: You may need to select a print icon on your screen, the Print option in the File menu, or another command. - Page 72 5. Click Settings to select the Document Size setting that matches the size of the document you are printing. 6. If you want your printout to be a different size than the selected document size, select the Output Size setting. Note: If you select Fit to Output Size, you can select a different output size.
-
Page 73: Document Size Options - Windows
Note: The Emphasize Thin Lines setting may reduce print speed, especially if the printer is connected wirelessly. Use a wired connection if you enable this setting. Note: Available options depend on the selected Select Target setting. 12. To see a preview of how your document will print, select Print Preview. (The preview appears after you click Print but before printing starts.) 13. -
Page 74: Print Mode Options - Windows
Color Mode Options - Windows You can adjust the Color Mode setting to fine-tune the colors in your printout or turn off color management in your printer software. EPSON Standard (sRGB) Optimizes the sRGB space and corrects the color. Business Graphics Performs color correction to optimize your images based on the sRGB space. -
Page 75: Level Options - Windows
Note: In most cases, you get better results by applying color management in your application, rather than in the printer driver. Off (No Color Adjustment) Turns off color management in your printer software so you can manage color using only your application software. - Page 76 Speed Select to prioritize print speed over print quality; quality may be reduced. Quality Select to prioritize print quality over print speed. Max Quality Select to use the maximum print quality; print speed may be slower. Quality Options Select print speed or print quality levels using a slider. Parent topic: Selecting Basic Print Settings - Windows...
-
Page 77: Using Layout Manager - Windows
Using Layout Manager - Windows Layout Manager lets you include multiple pieces of print data created in different applications onto one sheet of paper for printing. - Page 78 You can also place the same print data multiple times as shown here.
- Page 79 You can place print data in different sizes and orientations to maximize media usage, as shown here.
- Page 80 You can place print data on roll paper as shown here. 1. Open the file you want to print in your application. 2. Select the print command in your application.
- Page 81 3. Select the Layout Manager checkbox on the Printer Settings tab. 4. Choose an option for the Document Size setting that matches the size of the document in your application. 5. Click OK and then click Print, if necessary. The Layout Manager screen opens and displays one page in the layout. 6.
-
Page 82: Selecting Print Layout Options - Windows
8. Click File > Properties and select your print settings, including the size of the paper you are printing 9. Open the File menu on the Layout Manager screen and click Print. Note: To save the current job to a file, open the File menu on the Layout Manager screen, save the file, and close the Layout Manager screen. -
Page 83: Page Layout Options - Windows
• To print multiple pages on one sheet of paper, or print one image on multiple sheets of paper, select the Page Layout checkbox and select the option you want. • To print on both sides of the paper, select the 2-sided Printing checkbox and select the options you want. -
Page 84: Selecting Advanced Settings - Windows
Selecting Advanced Settings - Windows You can select advanced printing settings on the Advanced tab. • To control how roll paper is cut after printing, select an Auto Cut option. Select other roll paper options as necessary. • To print on cut sheet paper with 14 mm margins above and below your print, select Vertical Centering. -
Page 85: Roll Paper Options - Windows
Parent topic: Printing with Windows Roll Paper Options - Windows Select any of the available roll paper options. Note: Some settings may not be available, depending on the Roll Paper Option you selected for your paper size. Auto Cut • Off: Select this option to cut your prints manually. •... -
Page 86: Selecting Additional Settings - Windows
• Click Head Cleaning to clean the print head if you notice banding or gaps in your printouts. • Click Epson Status Monitor 3 to check the printer's status. • Click Monitoring Preferences to select the error notifications displayed on the Epson Status Monitor 3 screen, or add a shortcut to the utility in the Windows taskbar. -
Page 87: Printing Your Document - Windows
• Click Menu Arrangement to arrange the Select Setting, Media Type, and Paper Size options by frequency of use. • Click Export or Import to save the print settings to a file or import them from a file. This is useful when you want to select the same print settings on multiple computers. -
Page 88: Checking Print Status - Windows
2. Click OK or Print to start printing. Checking Print Status - Windows Parent topic: Printing with Windows Checking Print Status - Windows During printing, you see this window showing the progress of your print job. It allows you to control printing and check ink cartridge status. - Page 89 1. Make sure the selected settings on the Printer Settings, Layout, and Advanced tabs are set to what you want to save. 2. Under the Select Setting dropdown menu, select Custom Settings. You see a window like this: 3. Verify that your settings are correct, enter a name for the group of settings in the Name field, and click Save.
-
Page 90: Editing Print Setting Displays - Windows
Parent topic: Saving, Sharing, and Customizing the Printer Settings Related tasks Selecting Basic Print Settings - Windows Printing Your Document - Windows Editing Print Setting Displays - Windows You can arrange the displayed print settings so you can easily select the settings you use most often. 1. -
Page 91: Selecting Default Print Settings - Windows
3. Select the item you want to edit. 4. Order or group items in the List box as follows: • To move and reorder items, drag and drop them in the list. • To add a new group (folder), click Add Group. •... -
Page 92: Changing The Language Of The Printer Software Screens
You see the printer settings window: 3. Select the print settings you want to use as defaults in all your Windows programs. 4. Click OK. These settings are now the defaults selected for printing. You can still change them as needed for printing in any program session. -
Page 93: Changing Automatic Update Options
2. Select Printer Settings. You see the printer settings window. 3. Click the Utility tab. You see these options: 4. Select the language you want to use as the Language setting. 5. Click OK to close the printer software window. The printer software screens appear in the language you selected the next time you access them. -
Page 94: Printing With The Built-In Epson Driver - Windows 10 S
Note: The built-in Epson driver in Windows 10 S does not include all the available print settings for your product. To print with additional settings, download and install the Epson Print and Scan utility from the Windows Store. -
Page 95: Selecting Print Settings - Windows 10 S
Selecting Print Settings - Windows 10 S Parent topic: Printing from a Computer Selecting Print Settings - Windows 10 S Select the settings for your print job in your Windows 10 S application. 1. Open a document for printing. 2. Select the print command in your application. Note: You may need to select a print icon on your screen, the Print option in the File menu, or another command. - Page 96 4. Select the type of paper you loaded as the Media setting. Note: The setting may not exactly match the name of your paper. Check the paper type settings list for details. 5. Click the Advanced button. You see a window like this: 6.
-
Page 97: Printing On A Mac
13. Click OK or Print to start printing. Parent topic: Printing with the Built-in Epson Driver - Windows 10 S Printing on a Mac You can print with your product using any Mac printing program, as described in these sections. -
Page 98: Selecting Basic Print Settings - Mac
Selecting Print Layout Options - Mac Selecting Advanced Settings - Mac Managing Color - Mac Sizing Printed Images - Mac Selecting Printing Preferences - Mac Printing Your Document - Mac Parent topic: Printing from a Computer Selecting Basic Print Settings - Mac Select the basic settings for the document you want to print. - Page 99 You see the expanded printer settings window for your product: Note: The print window may look different, depending on the Mac OS version and the application you are using. 5. Select the Copies and Pages settings as necessary. Note: If you do not see these settings in the print window, check for them in your application before printing.
- Page 100 6. Select the size of the paper you loaded as the Paper Size setting. Note: You can reduce or enlarge the size of the printed image by selecting Paper Handling from the pop-up menu and selecting a scaling option. 7. Choose portrait or landscape as the Orientation setting. 8.
- Page 101 10. Select the Paper Source setting that matches the paper feeding method you are using. Note: If you select Roll Paper, select the width of the roll as the Roll Paper Width setting. 11. Select the Media Type setting that matches the paper you loaded. Note: If you want to use paper settings that have been set in the printer's control panel, select Use Printer Settings.
-
Page 102: Paper Size Options - Mac
Print Mode Options - Mac Color Mode Options - Mac Level Options - Mac Parent topic: Printing on a Mac Related tasks Selecting Advanced Settings - Mac Printing Your Document - Mac Paper Size Options - Mac You can select any of the Paper Size options in the Printer Settings menu to size your printed image. Same as Paper Size Sizes your printed image to fit the selected paper size. -
Page 103: Print Mode Options - Mac
Color Mode Options - Mac You can adjust the Color Mode setting to fine-tune the colors in your printout or turn off color management in your printer software. EPSON Standard (sRGB) Optimizes the sRGB space and corrects the color. Business Graphics Performs color correction to optimize your images based on the sRGB space. -
Page 104: Level Options - Mac
Click Settings to open the Color Controls window, where you can specify values for adjusting brightness, contrast, saturation, and individual Cyan, Magenta, and Yellow color tones. You can choose from two Gamma settings, and use either a color circle or slide bar to adjust color. Parent topic: Selecting Basic Print Settings - Mac Level Options - Mac... -
Page 105: Selecting Print Layout Options - Mac
Parent topic: Selecting Basic Print Settings - Mac Selecting Print Layout Options - Mac You can select a variety of layout options by selecting Layout from the pop-up menu on the print window. • To print multiple pages on one sheet of paper, select the number of pages in the Pages per Sheet pop-up menu. - Page 106 You see this window: Note: Some settings may not be available, depending on the selected paper source and the Roll Paper option you selected for your paper size. 2. Select one of the following Auto Cut settings: • Off: Select this option to cut your prints manually. •...
-
Page 107: Managing Color - Mac
• When Auto Cut is enabled, select the Save Roll Paper checkbox to have the printer cut the roll paper at the end of the image as positioned on the page. 4. If you want to adjust color density, click Settings, adjust the Black and Color settings, and click OK. Parent topic: Printing on a Mac Managing Color - Mac... -
Page 108: Color Matching Options - Mac
You can select from these settings on the Color Matching menu. ColorSync Prints using standard color profiles for your product and paper to help match image colors. EPSON Color Controls Lets you manage color using controls in your printer software or turn off color management. Parent topic:... -
Page 109: Printing Preferences - Mac
1. In the Apple menu or the Dock, select System Preferences. 2. Select Print & Fax, Print & Scan, or Printers & Scanners, select your product, and select Options & Supplies. 3. Select Options. You see a screen like this: 4. -
Page 110: Printing Your Document - Mac
Maintenance Call Notification Alerts you if the maintenance box is nearing capacity or needs to be replaced. Warning Notifications Lets you choose whether or not to receive warning notifications from the printer software for various operating conditions. Establish bidirectional communication Allows the product to communicate with the computer. -
Page 111: Checking Print Status - Mac
Click Print at the bottom of the print window. Checking Print Status - Mac Parent topic: Printing on a Mac Checking Print Status - Mac During printing, you can view the progress of your print job, control printing, and check ink status. 1. -
Page 112: Printing Cad Drawings
You see the print status window: 2. Select the following options as necessary for your Mac OS version: • To cancel printing, click the print job and click or Delete. • To pause a print job, click the print job and click or Hold. - Page 113 Note: If lines in your drawing are not printed properly, print the drawing using HP-GL/2 or HP RTL mode using the product control panel. 1. Open the file you want to print in your CAD software. 2. Click Plot and select your product as the printer. 3.
-
Page 114: Printing Cad Drawings In Hp-Gl/2 Or Hp Rtl Mode
10. Start printing your drawing from the CAD software. Parent topic: Printing CAD Drawings Printing CAD Drawings in HP-GL/2 or HP RTL Mode You can change settings in your product's control panel to print CAD drawings using HP-GL/2 or HP RTL mode. - Page 115 You see this screen: 7. Change the settings as necessary. 8. Select the left arrow to return to the previous screen. 9. Select Printing Language. • If you are printing over USB, select USB and change the Printing Language setting to HP-GL/2. •...
-
Page 116: Using Your Printer As A Copier
Using Your Printer as a Copier You can connect a supported Epson scanner to your printer and print out enlarged scans on roll paper. The following Epson scanners are supported: • DS-530 • DS-7500 • DS-70000 Note: Visit the Epson website for the most updated list of supported scanners. -
Page 117: Placing Originals In The Scanner
Parent topic: Using Your Printer as a Copier Placing Originals in the Scanner See your scanner's User's Guide for instructions on placing originals in the scanner. Note the tips below to prevent reduced print quality or other scanning problems: • You can copy only one side of a double-sided document at a time, even if your scanner supports double-sided scanning. -
Page 118: Supported Copy Sizes
2. Make sure roll paper is loaded in the printer. Note: Only roll paper is supported for enlarged copies. 3. Select Enlarged Copy. You see a screen like this: 4. Select the size of your original as the Original Size setting. 5. - Page 119 22 × 34 inches (559 × 864 mm) 34 × 44 inches (864 × 1120 mm)* Note: The original size depends on the scanner you are using. *Not supported on SureColor T2170/T3170 Parent topic: Printing Enlarged Copies from the Scanner...
-
Page 120: Using The Control Panel Menus
Using the Control Panel Menus Follow the instructions in these sections to access the printer menu system and select settings. Accessing the Printer's Menus Paper Setting Menu Basic Settings Menu Printer Settings Menu Network Settings Menu System Administration Settings Menu Maintenance Menu Printer Status/Print Menu Accessing the Printer's Menus... -
Page 121: Paper Setting Menu
4. Press the up or down arrow to move through the settings, or swipe up or down on the LCD screen. 5. To select a setting, select OK any time the OK option is displayed. You can also select a setting to toggle it on or off. - Page 122 Advanced Media Setting menu (in the Roll Paper menu) Setting Options Description Platen Gap Adjusts the distance between the print head and the paper; displayed when Custom Paper is selected as the Paper Type setting Top/Bottom Margins Standard The Standard margins are as follows for the top and bottom: Top 3 mm/Bottom 3 •...
-
Page 123: Basic Settings Menu
Setting Options Description Change Paper Type/Paper Paper Type Select Plain Paper, Coated Paper (Generic), Size or Premium Glossy Sheet. Select Others to choose another paper type. Paper Size Select a paper size or select User-Defined if your desired size is not listed Cut Sheet (1 sheet) menu Setting Options... - Page 124 Setting Options Description Sound Mute Select On to mute control panel sounds Normal Mode Button Press: Adjusts the volume of control panel sounds Error Notice: Adjusts the volume of error notifications Sound Type: Adjusts the type of control panel sounds Sleep Timer 1 to 210 minutes Selects the amount of time until the...
-
Page 125: Printer Settings Menu
Printer Settings Menu Select Settings > General Settings > Printer Settings to customize paper and printing options. Setting Options Description Paper Source Settings Various options See the Paper Source Settings table below Custom Paper Settings 1 to 10 See the Custom Paper Settings table below Printing Language* Select the printing language to use for each connection mode... - Page 126 Setting Options Description Error Notice Paper Size Notice Select On to display an error message when the output size or paper type settings are Paper Type Notice different between the driver and printer Roll Paper Setup Detect Paper Select On to display an error message and Meandering stop printing if the printer detects the paper is skewed...
- Page 127 Setting Options Description Advanced Media Setting Platen Gap Select a larger value if print results are smudged by print head strikes Top/Bottom Margins The Standard margins are as follows for the top and bottom: • CAD/line drawings: 3 mm • Other: 30 mm Select a different value as necessary.
- Page 128 Setting Options Description Quality Standard Select the print quality Speed Fine Super Fine Color Mode Color Select the color you want for printing Black/White Page Margins option Clip By Margins Adds the value selected for the page margin inside the hard clip area of the PS command of the data, or the size selected for the base output size Oversize...
- Page 129 (the default setting) is selected, available 300 dpi resolutions depend on the selected paper type 600 dpi 1200 dpi Color Mode (Common) EPSON Standard Optimize the sRGB space and correct the (sRGB) color Business Graphics Perform color correction to optimize your...
- Page 130 MC command of the data Select to move lines to be printed later to the front at intersections Color Mode (HP-GL/2) EPSON Standard Optimize the sRGB space and correct the (sRGB) color Business Graphics...
-
Page 131: Network Settings Menu
Selecting the Paper Settings for Each Source - Control Panel Printing CAD Drawings in HP-GL/2 or HP RTL Mode Network Settings Menu Select Settings > General Settings > Network Settings to configure your printer's network settings. Setting Options Description Wi-Fi Setup Router See the link below for more information Wi-Fi Direct... - Page 132 Firmware Update Update Select Start Checking to access the Epson website and search for a firmware update. The printer must be connected to the internet. Follow the prompts to update the firmware, which can take up to 5 minutes.
-
Page 133: Maintenance Menu
Maintenance Menu Select Settings > Maintenance to run nozzle checks, cleaning cycles, and other maintenance operations. Caution: Follow the instructions in the topic links below the table to use these menu settings correctly. Setting Description Print Quality Adjustment Perform when there are streaks in printouts, ruled lines are duplicated, or text is blurred Print Head Nozzle Check Prints a nozzle check pattern so you can check for clogged... -
Page 134: Printer Status/Print Menu
Cleaning the Auto Sheet Feeder Discharging Ink Removing and Installing Ink Cartridges Replacing the Maintenance Box Replacing the Cutter Printer Status/Print Menu Select Settings > Printer Status/Print to view current printer and network settings. Setting Options Description Print Status Sheet Configuration Status Sheet Prints a summary of current printer settings... -
Page 135: Replacing Ink Cartridges And Maintenance Boxes
When the maintenance box is full, you need to replace it. Note: Please dispose of your used Epson branded ink cartridges responsibly and in accordance with local requirements. If you would like to return your used ink cartridges to Epson for proper disposal, please go to epson.com/recycle for more information. -
Page 136: Checking Ink Cartridge And Maintenance Box Status With Windows
2. Do one of the following: • Select the ink color icons at the top of the home screen. • Select Printer Status > Supply Status. You see a screen like this: Note: The displayed ink and maintenance box levels are approximate. Parent topic: Check Cartridge and Maintenance Box Status Related tasks... -
Page 137: Checking Cartridge And Maintenance Box Status - Mac
2. Replace or reinstall the ink cartridge or maintenance box as indicated on the screen. Note: If any of the ink cartridges installed in the product is broken, incompatible with the product model, or improperly installed, Epson Status Monitor will not display an accurate ink status. Parent topic:... -
Page 138: Purchase Epson Ink Cartridges And Maintenance Box
• Replace or reinstall the maintenance box or any ink cartridge as indicated on the screen. Note: If any of the cartridges installed in the product is broken, incompatible with the product model, or improperly installed, Epson Status Monitor will not display an accurate cartridge status. Parent topic:... -
Page 139: Ink Cartridge And Maintenance Box Part Numbers
Epson authorized reseller. To find the nearest one, call 800-GO-EPSON (800-463-7766) in the U.S. or 800-807-7766 in Canada. Note: This product is designed to work with genuine Epson inks. Non-Epson ink or any other ink not specified for this printer could cause damage not covered by Epson's warranties. - Page 140 3. Open the front cover. 4. Press the tab on the ink cartridge cover and lift to open the cover. 5. Push in the tab at the top of the ink cartridge and pull it out. Note: Dispose of used cartridges carefully. Do not take the used cartridge apart or try to refill it.
- Page 141 Warning: If ink gets on your skin, wash it thoroughly with soap and water. If ink gets into your eyes, flush them immediately with water. If ink gets into your mouth, spit it out and see a doctor right away. Keep ink cartridges out of the reach of children.
-
Page 142: Replacing The Maintenance Box
Parent topic: Replacing Ink Cartridges and Maintenance Boxes Related concepts Purchase Epson Ink Cartridges and Maintenance Box Replacing the Maintenance Box Replace the maintenance box when a message is displayed on the LCD screen telling you that the maintenance box is near or at the end of its service life. - Page 143 1. Open the maintenance box cover on the back of the product. 2. Pull out the maintenance box carefully without tilting it. Warning: If ink gets on your skin, wash it thoroughly with soap and water. If ink gets into your eyes, flush them immediately with water.
- Page 144 5. Place the used maintenance box in the bag supplied with the new box and seal the bag. Note: Dispose of the used maintenance box carefully. 6. Close the maintenance box cover. Parent topic: Replacing Ink Cartridges and Maintenance Boxes Related concepts Purchase Epson Ink Cartridges and Maintenance Box Related references Optional Equipment and Replacement Parts...
-
Page 145: Adjusting Print Quality
Adjusting Print Quality If your print quality declines, you may need to run a utility to clean or align the print head. If running these utilities does not solve the problem, you may need to replace the ink cartridges. Print Head Maintenance Adjusting Print Quality Using the Product Control Panel Cleaning the Auto Sheet Feeder Cleaning the Roll Paper Feeder... - Page 146 2. Press the home button, if necessary. 3. Select Settings > Maintenance > Print Head Nozzle Check. You see a screen like this: 4. If you want to change the paper source that the nozzle check pattern prints on, select Paper Source.
-
Page 147: Checking The Nozzles Using A Computer Utility
6. Do one of the following: • If there are no gaps in the pattern, select the icon. • If there are gaps or the pattern is faint, select the icon on the Head Cleaning screen. Select Start to clean the print head. If you don’t see any improvement after cleaning the print head three times, perform a Powerful Cleaning. - Page 148 You see a window like this: 4. Click Print. The nozzle pattern prints.
-
Page 149: Print Head Cleaning
5. Check the printed pattern to see if there are gaps in the lines. Print head is clean Print head needs cleaning 6. If there are no gaps in the pattern, click Finish. If there are gaps or the pattern is faint, click Clean. If you don’t see any improvement after cleaning the print head three times, perform a Powerful Cleaning. -
Page 150: Cleaning The Print Head Using The Product Control Panel
Parent topic: Print Head Maintenance Related tasks Removing and Installing Ink Cartridges Cleaning the Print Head Using the Product Control Panel You can clean the print head using the control panel on your product. 1. Make sure roll paper or cut sheet paper is loaded in the printer. 2. -
Page 151: Cleaning The Print Head Using A Computer Utility
6. Check the printed pattern to see if there are gaps in the lines. Print head is clean Print head needs cleaning 7. Follow the instructions on the screen to clean the print head, check the nozzles, and repeat the process as necessary. - Page 152 You see a window like this: 4. Click Start to begin the cleaning cycle. When the cleaning cycle is finished, the power light stops flashing and a confirmation screen appears. Caution: Never open any covers or turn off the product during a cleaning cycle or you may damage 5.
-
Page 153: Using The Powerful Cleaning Utility
6. Check the printed pattern to see if there are gaps in the lines. Print head is clean Print head needs cleaning If you don’t see any improvement after cleaning the print head three times, perform a Powerful Cleaning. Parent topic: Print Head Cleaning Related tasks Cleaning the Print Head Using the Product Control Panel... - Page 154 You see a screen like this: 3. Select Start to begin the cleaning cycle. When the cleaning cycle is finished, the power light stops flashing and a confirmation screen appears. Caution: Never open any covers or turn off the product during a cleaning cycle or you may damage 4.
-
Page 155: Adjusting Print Quality Using The Product Control Panel
5. Check the printed pattern to see if there are gaps in the lines. Print head is clean Print head needs cleaning If nozzles are still clogged, turn off the printer and leave it off overnight. If nozzles are still clogged, contact Epson for support. Parent topic: Print Head Cleaning Related tasks... - Page 156 3. Make sure the correct paper type is selected on the product control panel. 4. Select Settings > Maintenance > Print Quality Adjustment. You see a screen like this: 5. If you want to change the paper source that the adjustment pattern prints on, select Paper Source. Otherwise, select Start to print the adjustment pattern.
-
Page 157: Cleaning The Auto Sheet Feeder
Cleaning the Auto Sheet Feeder If ink smears on a printout when printing from the auto sheet feeder (especially on glossy paper), you can clean the auto sheet feeder roller to remove excess ink. Note: If ink smears when printing on glossy paper, we recommend printing individual cut sheets one at a time instead of using the auto sheet feeder. -
Page 158: Cleaning The Roll Paper Feeder
Cleaning the Roll Paper Feeder If ink smears on a printout when printing on roll paper or cut sheets, you can clean the roll paper feeder to remove excess ink. 1. Make sure roll paper is loaded in the printer. 2. -
Page 159: Maintenance And Transportation
Maintenance and Transportation See the instructions in these sections to maintain your printer for optimum results, or to move or transport your printer. Replacing the Cutter Moving or Transporting Your Product Replacing the Cutter If you notice that your paper does not cut cleanly, you may need to replace the cutter. You will need a Phillips-head screwdriver. - Page 160 4. Use a Phillips-head screwdriver to loosen the screw holding the cutter in place and carefully remove the cutter. Place the cutter in a plastic bag and dispose of it properly. Warning: Keep the cutter out of the reach of children. The blade is sharp and can cause injury.
- Page 161 5. Align the pins on the new cutter with the holes in the product and insert the cutter. Tighten the cutter screw securely. Note: Make sure the screw is tightened securely, otherwise the cut position may be slightly shifted or skewed.
-
Page 162: Moving Or Transporting Your Product
Note: Do not remove the protective piece shown here. 7. Select OK. The cutter moves into position and cuts off the protective piece. Remove the protective piece from the printer. 8. Close the cutter cover. Parent topic: Maintenance and Transportation Related references Optional Equipment and Replacement Parts Moving or Transporting Your Product... - Page 163 5. Remove the output tray, if necessary. 6. Close all covers on the product. 7. For a product without a stand, have at least two people lift the product using the indented areas as shown. Warning: The product is heavy and requires two or more people to move it. 8.
-
Page 164: Discharging Ink
Print Head Cleaning Discharging Ink If you need to move or transport your product when the temperature is 14°F (–10°C) or lower, you must first discharge the ink to keep the print head in optimum condition. Note: The maintenance box needs enough capacity to discharge the ink. Replace the maintenance box first if the remaining capacity is low. - Page 165 Caution: Do not open the cover or turn off the product while ink is discharging. 8. When a message appears on the LCD screen, open the front cover and the ink cartridge cover again. 9. Reinsert all the ink cartridges. 10.
-
Page 166: Solving Problems
Solving Print Quality Problems Cannot Make Enlarged Copies from Scanner Uninstall Your Product Software Where to Get Help Checking for Software Updates Periodically, it's a good idea to check Epson's support website for free updates to your product software. Visit epson.com/support (U.S.), epson.ca/support (Canada), or epson.com.jm/support... -
Page 167: Product Status Messages
Maintenance Request A part used in the printer is nearing or at the end of its service life. Contact Epson for support and provide them with the displayed maintenance request Replace Parts Soon/End code. The error persists until you replace the requested part. -
Page 168: Resetting Control Panel Defaults
Turn off the printer, disconnect the power cable from the outlet and from the printer, and reconnect it. Turn on the printer again. If the message persists, Printer error. Turn the contact Epson for support and provide them with the displayed printer error power off and on again. code. -
Page 169: Solving Printer Problems
You see a screen like this: 3. Select one of these options: • Network Settings: Resets all network settings. • Clear All Data and Settings: Resets all control panel settings except date and time, length unit, and language settings. You see a confirmation screen. 4. -
Page 170: Lcd Screen Shuts Off
Check these solutions if you have problems setting up or using your product on a network. Note: Breakdown or repair of this product may cause loss of network data and settings. Epson is not responsible for backing up or recovering data and settings during or after the warranty period. We recommend that you make your own backup or print out your network data and settings. -
Page 171: Network Software Cannot Find Product On A Network
Note: If you are reading these instructions online, you will lose your Internet connection when you restart your router. • Check to see if access restrictions, such as MAC address filtering, are set on the router or access point. If access restrictions are set, add your product's MAC address to your router's address list. To obtain your product's MAC address, print a network status sheet. -
Page 172: Product Does Not Appear In Mac Printer Window
Note: If you are reading these instructions online, you will lose your Internet connection when you restart your router, so note the next step before restarting it. 4. Download your product software from the Epson website using the instructions on the Start Here sheet. -
Page 173: Cannot Print Over A Network
Cannot Print Over a Network If you cannot print over a network, try these solutions: • Make sure that your product is turned on. • Make sure you install your product's network software as described in your product documentation. • Print a network status sheet and verify that the network settings are correct. If the network status is Disconnected, check any cable connections and turn your product off and then on again. -
Page 174: Solving Printing Problems
• Check your wired LAN router or access point to see if the LED for the port to which your product is connected is on or flashing. If the link LED is off, try the following: • Make sure the Ethernet cable is securely connected to your product and to your router, access point, switch, or hub. -
Page 175: Print Head Moves But Nothing Prints
• Make sure any interface cables are connected securely at both ends. If you have a spare cable, try connecting with the spare cable. • Check the model and specifications of the interface cable to see if the cable is appropriate for your computer and printer. -
Page 176: Paper Feeding Problems
Paper Feeding Problems If you have problems feeding paper, try these solutions: • Make sure paper is loaded in the correct orientation. Load cut sheets vertically (short edge first). • For best results, follow these guidelines: • Use new, smooth, high-quality paper that is not damp, curled, creased, old, too thin, or too thick. •... -
Page 177: Printout Quality Problems
• If the paper creases as it ejects into the paper basket, close the paper basket and support the printout with your hands before it touches the floor. *The paper basket and stand are optional for the SureColor T2170/T3170. Parent topic:... - Page 178 3. Cut the paper above the paper feed slot. 4. Close the roll paper cover and the cut sheet cover. 5. Remove the jammed paper from the front of the product. 6. Open the front cover and remove any other jammed paper as necessary. Note: Do not touch the print head.
-
Page 179: Cut Sheet Paper Jam Problems
9. Cut the edge of the roll paper straight horizontally, and reload the roll paper. Note: Make sure to cut off any jagged or folded sections of paper. Parent topic: Solving Paper Problems Related tasks Loading Roll Paper Cutting Roll Paper Manually Cut Sheet Paper Jam Problems If cut sheet paper has jammed in the product, follow the steps here to clear the jam. -
Page 180: Solving Print Quality Problems
3. Remove any other jammed paper as necessary. Note: Do not touch the print head. 4. Close the front cover. 5. Turn the printer off and on. 6. Reload a cut sheet. Parent topic: Solving Paper Problems Related tasks Loading Single Cut Sheets Loading Paper in the Auto Sheet Feeder Solving Print Quality Problems Check these sections if you have problems with print quality. - Page 181 • Enable color management in the software application or in the printer driver. • If you are using non-Epson media, make sure you create a custom paper configuration for the media. • Check the quality setting that you selected in the printer driver. Using a faster printing method may decrease the overall print quality.
-
Page 182: Lines Are Misaligned
• If you are using non-Epson media, make sure you create a custom paper configuration for the media. • Depending on the print density and type of paper you are using, the ink may take a while to dry. Do not stack the prints until the ink is completely dry. -
Page 183: Prints Are Not Positioned Properly
Related references Paper Specifications Paper Setting Menu Printer Settings Menu Related tasks Selecting Basic Print Settings - Windows Selecting Basic Print Settings - Mac Creating Custom Paper Configurations Cleaning the Auto Sheet Feeder Cleaning the Roll Paper Feeder Prints are Not Positioned Properly If your prints are not positioned properly on the media, try these solutions: •... -
Page 184: Cannot Make Enlarged Copies From Scanner
If you cannot make enlarged copies from a scanner connected to your printer, try these solutions: • Make sure all cables are securely connected and the scanner is turned on. • Make sure the scanner connected to the printer is compatible. Visit the Epson website for the most updated list of supported scanners. -
Page 185: Uninstalling Product Software - Mac
Uninstalling Product Software - Mac In most cases, you do not need to uninstall your product software before re-installing it. However, you can download the Uninstaller utility from the Epson support website to uninstall your product software as described here. -
Page 186: Where To Get Help
4. Run the file you downloaded. 5. Double-click the Uninstaller icon. 6. In the Epson Uninstaller screen, select the checkbox for each software program you want to uninstall. 7. Click Uninstall. 8. Follow the on-screen instructions to uninstall the software. - Page 187 Where to Buy button. Or call 800-GO-EPSON (800-463- 7766) in the U.S. or 800-807-7766 in Canada. Parent topic: Solving Problems...
-
Page 188: Technical Specifications
Technical Specifications These sections list the technical specifications for your product. Note: Epson offers a recycling program for end of life Epson products. Please go to this site (U.S) or this site (Canada) for information on how to return your Epson products for proper disposal. -
Page 189: Mac System Requirements
Note: Since the quality of any particular brand or type of paper may be changed by the manufacturer at any time, Epson cannot guarantee the quality of any non-Epson brand or type of paper. Always test a sample of paper stock before purchasing large quantities or printing large jobs. - Page 190 Other paper types: 5 sheets Cut sheet paper (1 sheet) Width SureColor T2170/T3170: 8.23 to 24 inches (210 to 610 mm) SureColor T5170: 8.23 to 36 inches (210 to 914 mm) Length 11 to 46.8 inches (279.4 to 1189 mm) Thickness 0.005 to 0.01 inch (0.12 to 0.27 mm)
-
Page 191: Printable Area Specifications
Note: Margins may change depending on the Top/Bottom Margins setting that you select. The numbers below are the standard settings. Printable width: SureColor T2170/T3170: 12.95 to 24 inches (329 to 610 mm) SureColor T5170: 12.95 to 36 inches (329 to 914 mm) Printable length: 11 to 708.67 inches (279.4 to 18000 mm) Left/right margin: 0.12 inch (3 mm) minimum... - Page 192 Cut sheet (auto sheet feeder) Printable width: 8.27 to 11.69 inches (210 to 297 mm) Left/right/top/bottom margin: 0.12 inch (3 mm) Printable length: 10.98 to 16.54 inches (279 to 420 mm) Cut sheet (1 sheet)
-
Page 193: Ink Cartridge Specifications
Technical Specifications Ink Cartridge Specifications Note: We recommend that you use genuine Epson cartridges and do not refill them. The use of other products may affect your print quality and could result in printer damage. The cartridges included with the printer are designed for printer setup and not for resale. After some ink is used for charging, the rest is available for printing. -
Page 194: Dimension Specifications
Depth: 3.82 inches (97 mm) Height: 1.95 inches (49.5 mm) Parent topic: Technical Specifications Related references Ink Cartridge and Maintenance Box Part Numbers Dimension Specifications SureColor T2170 Height 9.05 inches (230 mm) Width 38.19 inches (970 mm) Depth 20.0 inches (505 mm) Weight 57.52 lb (27 kg) -
Page 195: Electrical Specifications
Weight 57.52 lb (27 kg) (without ink cartridges or output tray) SureColor T5170 Dimensions include the opened paper basket and the attached output tray. Height 35.94 inches (913 mm) Width 49.92 inches (1268 mm) Depth 38.67 inches (982 mm) Weight 101.41 lb (46 kg) (without ink cartridges or output tray) -
Page 196: Environmental Specifications
Environmental Specifications Temperature Operating: 50 to 95 °F (10 to 35 °C) Operating (recommended): 59 to 77 °F (15 to 25 °C) Storage (before unpacking): –4 to 140 °F (–20 to 60 °C) 1 month at 104 °F (40 °C) Storage (after unpacking): 14 to 104 °F (–10 to 40 °C) 1 month at 104 °F (40 °C) Humidity... -
Page 197: Safety And Approvals Specifications
Safety and Approvals Specifications United States Safety: UL60950-1 EMC: FCC part 15 Subpart B class B Canada Safety: CAN/CSA C22.2 No. 60950-1 EMC: CAN/CSA-CEI/IEC CISPR 22 Class B This equipment contains the following wireless module: • Manufacturer: Epson • Type: WLU6320-D69 (RoHS) - Page 198 This product conforms to Part 15 of FCC Rules and RSS-210 of the IC Rules. Epson cannot accept responsibility for any failure to satisfy the protection requirements resulting from a non-recommended modification of the product. Operation is subject to the following two conditions: (1) this device may not cause harmful interference, and (2) this device must accept any interference received, including interference that may cause undesired operation of the device.
-
Page 199: Notices
Notices Check these sections for important notices about your product. Note: Epson offers a recycling program for end of life Epson products. Please go to this site (U.S) or this site (Canada) for information on how to return your Epson products for proper disposal. - Page 200 • Do not let the power cord become damaged or frayed. Place it to avoid abrasions, cuts, fraying, crimping, and kinking. Do not place objects on top of it and do not allow it to be stepped on or run over. Be careful to keep the cord straight at each end.
-
Page 201: Ink Cartridge Safety Instructions
• Unplug the product and refer servicing to qualified service personnel under the following conditions: if the power cord or plug is damaged; if liquid has entered the product; if the product has been dropped or the cabinet damaged; if the product does not operate normally or exhibits a distinct change in performance. -
Page 202: Lcd Screen Safety Instructions
• Do not use a pointy or sharp object, such as a pen or your fingernail, to operate the LCD screen. • If the LCD screen chips or cracks, do not touch or attempt to remove the broken pieces; contact Epson for support. -
Page 203: Fcc Compliance Statement
1. DISPUTES, BINDING INDIVIDUAL ARBITRATION, AND WAIVER OF CLASS ACTIONS AND CLASS ARBITRATIONS 1.1 Disputes. The terms of this Section 1 shall apply to all Disputes between you and Epson. The term "Dispute" is meant to have the broadest meaning permissible under law and includes any dispute, claim,... - Page 204 1.3 Pre-Arbitration Steps and Notice. Before submitting a claim for arbitration, you and Epson agree to try, for sixty (60) days, to resolve any Dispute informally. If Epson and you do not reach an agreement to resolve the Dispute within the sixty (60) days), you or Epson may commence an arbitration. Notice to Epson must be addressed to: Epson America, Inc., ATTN: Legal Department, 3840 Kilroy Airport Way,...
- Page 205 Hearing Format. During the arbitration, the amount of any settlement offer made shall not be disclosed to the arbitrator until after the arbitrator determines the amount, if any, to which you or Epson is entitled. The discovery or exchange of non-privileged information relevant to the Dispute may be allowed during...
- Page 206 Epson's last written offer, if any, to settle the Dispute, Epson will: (i) pay you $1,000 or the amount of the award, whichever is greater; (ii) pay you twice the amount of your reasonable attorney's fees, if any;...
-
Page 207: Trademarks
Seiko Epson Corporation. The information contained herein is designed only for use with this Epson product. Epson is not responsible for any use of this information as applied to other products. -
Page 208: A Note Concerning Responsible Use Of Copyrighted Materials
Notices A Note Concerning Responsible Use of Copyrighted Materials Epson encourages each user to be responsible and respectful of the copyright laws when using any Epson product. While some countries' laws permit limited copying or reuse of copyrighted material in certain circumstances, those circumstances may not be as broad as some people assume.