Table of Contents
Advertisement
Quick Links
Advertisement
Table of Contents

Related Manuals for Toshiba SD-3010


Summary of Contents for Toshiba SD-3010
- Page 1 SD3010KB...
-
Page 2: Introduction
USE OF ANY CONTROLS, ADJUSTMENTS, OR PROCEDURES OTHER THAN THOSE SPECIFIED HEREIN MAY RESULT IN HAZARDOUS RADIATION EXPOSURE. Changes or modifications made to this equipment, not expressly approved by Toshiba, or parties authorized by Toshiba, could void the user' s authority to operate the equipment. - Page 3 Introduction 18. Do not use a cracked , deformed, or repaired disc. These discs are easily broken and may cause serious personal injury and apparatus malfunction. 19. If the apparatus should smoke or smell, immediately disconnect the power cord from the wall outlet. Wait until the smoke or smell stops, then ask your dealer for a check and repair.
- Page 4 Introduction CAUTION: This Digital Video Disc Player employs a Laser System. To ensure proper use of this product, please read this owner’s manual carefully and retain for future reference Should the unit require maintenance, contact an authorized service location. Use of controls or adjustments or performance of procedures other than those specified herein may result in hazardous radiation exposure.
-
Page 5: Setup
WARNING may result in death or serious the optical unit (laser). Therefore, refrain from using injury. Refer all servicing not specified in this manual a cleaning CD. to a Toshiba Authorized Service Center. Moisture Condensation Setup Moisture condensation damages the DVD player. - Page 6 European standards Asia Pacifi c, listed under the Low Voltage Directive 2006/95/EC and Taiwan, Korea the EMC Directive 2004/108/EC.” Responsible for CE-marking is TOSHIBA INFORMATION SYSTEMS (U.K.) LTD, Toshiba Court, Weybridge Australia, Business Park, Addlestone Road, Weybridge,Surrey, New Zealand, KT15 2UL, United Kingdom.
-
Page 7: Table Of Contents
Introduction Table of Contents Introduction SAFETY PRECAUTIONS IMPORTANT SAFETY INSTRUCTIONS Setup Cleaning discs Moisture Condensation Region Codes Table of Contents Connections Connecting to television Connecting to a Stereo System Connecting to a Digital AV Receiver Connecting the power cord Product Overview Front and Rear panels Remote Control Getting Started... -
Page 8: Connections
Connections Using HDMI cable Connecting to television IMPORTANT! HDTV / DVI TV – You only need to make one video connection from the following options, depending on the HDMI IN capabilities of your television. HDMI IN – Connect the DVD player directly to the television. -
Page 9: Connecting To A Stereo System
Connections Connecting to a Stereo System Connecting to a Digital AV Receiver Receiver has a PCM, Dolby Digital or MPEG Stereo System with Left/Right Audio In Jacks decoder Select one of the video connections (CVBS VIDEO Select one of the video connections (CVBS VIDEO IN, SCART IN or HDMI IN) depending on the options IN, SCART IN or HDMI IN) depending on the options available on your TV. -
Page 10: Connecting The Power Cord
Connections Connecting the power cord After everything is connected properly, plug in the AC power cord to the power outlet. Never make or change any connections with the power switched on. Helpful hint: Before making or changing any connections, make sure that all the devices are disconnected from the power outlet. -
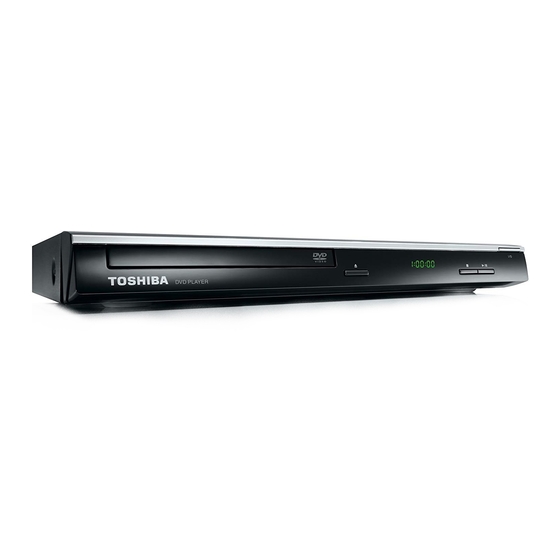
Page 11: Product Overview
Product Overview Front and Rear panels Disc tray - Place a disc here ON/STANDBY I/ 2 OPEN/CLOSE ç - Turns the player on or switches it to standby - Opens or closes the disc tray mode IR Sensor B/X PLAY/ PAUSE - Points the remote control towards this sensor - Starts or pauses playback Display... -
Page 12: Remote Control
Product Overview Remote Control See the page in [ ] for details. REMOTE SIGNAL EMITTER DISPLAY [ 15 ] [ 12 ] -Displays information on -Point remote control to the sensor on TV screen during playback the front panel ON / STANDBY OPEN/CLOSE [ 13 ] [ 13 ]... -
Page 13: Getting Started
Getting Started and highest channels and may be called FRONT, Inserting Batteries A/V IN or VIDEO. See your TV' s manual for more details. Or, you may go to channel 1 on your TV, then press the Channel down button repeatedly until you see the Video In channel. -
Page 14: Playable Discs
IMPORTANT! copyright owners to download or use copyrighted - DVD discs and players are designed with regional content. Toshiba cannot and does not grant such restrictions. Before playing a disc, make sure the permission. disc is for the same zone as your player. -
Page 15: Basic Playback Control
Playback Feature Tips: For VCD: - Do not overturn the DVD player while disc loading, Program playing or ejecting. - Do not close the disc tray manually if the power is Track 1 switched off. Track 2 Track 3 Basic playback control Track 4 Track 5 Track 6... -
Page 16: Selecting Various Repeat Functions
Playback Feature For VCD: Forward/ Reverse Searching VCD 2.0 (Elapsed/remaining time for current track) Time 00:02:10/00:03:00 You can fast forward or fast reverse a disc during Track 1/14 (Track No.(If PBC is enabled, "PBC on" playback and select a desired search speed. will be displayed)) For DVD,VCD, SVCD,CD, MP3 For DVD:... -
Page 17: Special Vcd And Svcd Features
Playback Feature Playback Selection Subtitles During playback, you can; Press SUBTITLE repeatedly to select different subtitle languages. Press PREV / NEXT to select the previous/next track/file in the current folder. Special VCD and SVCD Features Press PLAY/PAUSE repeatedly to pause/ resume playback. -
Page 18: Using The Language Setup Menu
Playback Feature/DVD Menu Options This DVD Player setup is carried out via the TV, - If Repeat Single is selected, Random cannot be selected and vice versa. enabling you to customise the DVD player to suit your particular requirement. Edit Mode: Program operation works only when Edit Mode is selected. -
Page 19: Using The Video Setup Menu
DVD Menu Options Use / to select a setting and press OK to confirm. Using the Video setup menu Tip: -Depending on the type of disc, you may not be able Press SETUP on the remote control. to view the mode as selected. The system setup menu appears. -
Page 20: Using The Audio Setup Menu
DVD Menu Options Using the Audio setup menu Brightness Contrast Tint Press SETUP on the remote control. Color The system setup menu appears. Close Digital Output Press / to highlight one of the following options. Language Night Mode Brightness Video Down Sampling... -
Page 21: Using The Rating Setup Menu
DVD Menu Options To exit, press SETUP. { On } Select this to set low volume output. This feature Rating Level settings is only available for movie discs with Dolby Digital Depending on the DVD, you may be asked to mode. -
Page 22: Using The Misc (Miscellaneous) Setup Menu
DVD Menu Options When doing this for the first time, enter the default password '0000 '. Tray Lock If you forget your old four-digit password, enter the default password ' 0000'. Press OK again to enter the new four-digit password. Press SETUP button, then press the number button The new four-digit password will now take effect. -
Page 23: Specifications
Specifications DVD Player/Outputs/Supplied Accessories DVD Player Power supply 110 V - 240 V AC, 50/60 Hz Power Consumption 12W ( standby :<1W ) Net weight 1.26 kg External dismensions 330 X 43 X 209 mm (W/H/D) Signal System PAL, NTSC Laser Semiconductor laser, wavelength 657/790 nm Frequency range... -
Page 24: Troubleshooting
Do not open the DVD player as there is a risk of electric shock. If a fault occurs, first check the points listed below before taking the DVD player for repair. If you are unable to remedy a problem by following these guides, consult your dealer or TOSHIBA for help. Problem... - Page 25 Troubleshooting Problem Solution Buttons do not work -To completely reset the player, unplug the AC cord from AC outlet for 5-10 seconds. Player does not respond to some operating -Operations may not be permitted by the disc. commands during playback. Refer to the instructions of the disc jacket.
-
Page 26: Glossary
Glossary PCM: Analogue audio: ® Dolby Digital: (Pulse Code Modulation) An electrical signal that directly A system developed by Dolby PCM is a format that converts audio represents sound. In contrast, Laboratories that compresses digital audio can also be an electrical into digital data.