Table of Contents
Advertisement
Quick Links
Advertisement
Table of Contents

Related Manuals for BenQ SP830


Summary of Contents for BenQ SP830
- Page 1 SP830/SP831 Digital Projector User Manual Welcome...
-
Page 2: Table Of Contents
Table of contents Important safety instructions ... 5 Introduction ... 9 Projector features ...9 Shipping contents ...10 Standard accessories ... 10 Optional accessories ... 10 Projector exterior view...11 Controls and functions ...12 Projector ... 12 Remote control... 13 Positioning your projector... 17 Choosing a location ...17 Obtaining a preferred projected picture size ...18 How to determine the position of the projector for a given screen size ... - Page 3 Magnifying and Searching for details on the projected picture... 41 Selecting a picture mode ... 42 Fine-tuning the picture quality... 45 Advanced picture quality controls... 46 Operating in a high altitude environment ... 50 Hiding the picture ... 50 Displaying more than one picture source simultaneously...
- Page 4 Specifications ... 76 Projector specifications ...76 Timing chart...77 Dimensions ...78 Warranty and Copyright information ... 79 Regulation statements ... 80 Table of contents...
-
Page 5: Important Safety Instructions
1. Important safety instructions Your BenQ projector is designed and tested to meet the latest standards for safety of information technology equipment. However, to ensure safe use of this product, it is important that you follow the instructions mentioned in this manual and marked on the product. - Page 6 Safety Instructions (Continued) The lamp becomes extremely hot during operation. Allow the projector to cool for approximately 45 minutes prior to removing the lamp assembly for replacement. Do not operate lamps beyond the rated lamp life. Excessive operation of lamps beyond the rated life could cause them to break on rare occasions.
- Page 7 Safety Instructions (Continued) Do not place this projector in any of the following environments. - Space that is poorly ventilated or confined. Allow at least 50 cm clearance from walls and free flow of air around the projector. - Locations where temperatures may become excessively high, such as the inside of a car with all windows rolled up.
- Page 8 Ceiling mounting the projector We want you to have a pleasant experience using your BenQ projector, so we need to bring this safety matter to your attention to prevent damage to person and property. If you intend to mount your projector on the...
-
Page 9: Introduction
2. Introduction Projector features The projector integrates high-performance optical engine projection and a user-friendly design to deliver high reliability and ease of use. The projector offers the following features. • Split Screen and PIP allowing two input sources to be displayed at the same time •... -
Page 10: Shipping Contents
Carefully unpack and verify that you have all of the items shown below. If any of these items are missing, please contact your place of purchase or check the most updated accessory list on line at www.BenQ.com. Standard accessories The supplied accessories will be suitable for your region, and may differ from those illustrated. -
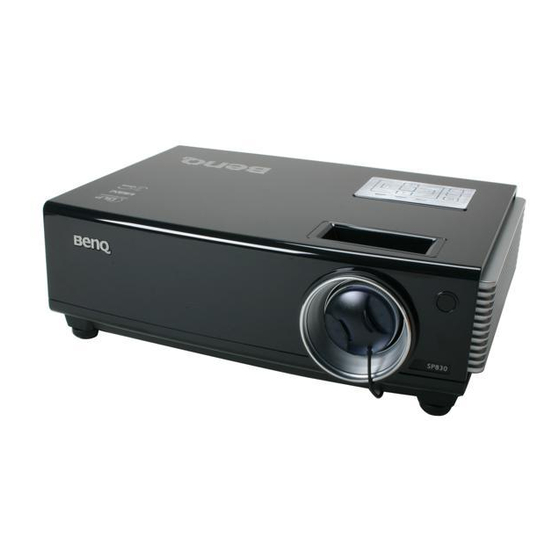
Page 11: Projector Exterior View
Projector exterior view Front/upper side Rear/lower side 14 15 16 17 18 19 20 21 22 Quick-release foot Projection lens Lens cap External control panel (See pages 12-13 for details.) Focus ring and Zoom ring Vent (cool air intake) Front IR remote sensor Quick-release button AC power cord inlet Main power switch... -
Page 12: Controls And Functions
Controls and functions Projector Focus ring Adjusts the focus of the projected picture. See "Fine-tuning the picture size and clarity" on page 36 Zoom ring Adjusts the size of the picture. See "Fine-tuning the picture size and clarity" on page 36 Power indicator light Lights up or flashes when the projector is under operation. -
Page 13: Remote Control
Lamp indicator light Indicates the status of the lamp. Lights up when the lamp has developed a problem. See "Indicators" on page 73 for details. EXIT Goes back to previous OSD menus, exits and saves menu settings. See "Using the menus" on page 31 details. - Page 14 See your own startup screen" on page 54 for details. Introduction WIRELESS (This function is not available with the SP830/S831.) MUTE Toggles projector audio between on and off. Turns the Picture In Picture (PIP) window on or off. See Picture) operation"...
- Page 15 LASER Emits visible laser pointer light for presentation purposes. See LASER pointer" on the right for details. PAGE UP) and PAGE Operate your display software program (on a connected PC) which responds to page up/down commands (like Microsoft PowerPoint). See "Remote paging operations"...
-
Page 16: Remote Control Effective Range
Remote control effective range Infra-Red (IR) remote control sensors are located on the front and the back of the projector. The remote control must be held at an angle within 30 degrees perpendicular to the projector's IR remote control sensors to function correctly. -
Page 17: Positioning Your Projector
Select this location with the projector suspended upside-down from the ceiling behind the screen. Note that a special rear projection screen and the BenQ Projector Ceiling Mounting Kit are required for this installation location. *Set Ceiling Rear after you turn the projector on. -
Page 18: Obtaining A Preferred Projected Picture Size
BenQ has provided tables of 16:9-aspect-ratio and 4:3-aspect-ratio screen sizes to assist you in determining the ideal location for your projector. There are two dimensions to consider, the perpendicular horizontal distance from the center of the screen (projection distance), and the vertical offset height of the projector from the horizontal edge of the screen (offset). -
Page 19: How To Determine The Recommended Screen Size For A Given Distance
The recommended position for the projector is aligned perpendicular to the horizontal center of the screen, at the distance from the screen determined in step above, and offset by the value determined in step For example, if you are using an 120-inch, 4:3-aspect-ratio screen and the projected picture is 15:9, please refer to Table B2. -
Page 20: Projection Dimensions
Projection dimensions Refer to "Dimensions" on page 78 calculating the appropriate position. When the screen aspect ratio is 16:9 and the projected picture is 16:9 Floor Installation Maximum zoom Ceiling Installation Maximum zoom Table A: The screen aspect ratio is 16:9 and the projected picture is 16:9 Screen Dimensions Diagonal Feet... - Page 21 When the screen aspect ratio is 4:3 and the projected picture is 16:9 or 15:9 Floor Installation Maximum zoom Ceiling Installation Maximum zoom Table B1: The screen aspect ratio is 4:3 and the projected picture is 16:9 Screen Dimensions Diagonal Height Feet Inches mm 1270...
- Page 22 There is 3% tolerance among these numbers in Table A, Table B1, and Table B2 due to optical component variations. BenQ recommends that if you intend to permanently install the projector, you should physically test the projection size and distance using the actual projector in situ before you permanently install it, so as to make allowance for this projector's optical characteristics.
-
Page 23: Connection
4. Connection When connecting a signal source to the projector, be sure to: Turn all equipment off before making any connections. Use the correct signal cables for each source. Ensure the cables are firmly inserted. In the connections shown below, some cables may not be included with the projector (see "Shipping contents"... -
Page 24: Connecting A Monitor
Connecting a monitor If you want to view your presentation close-up on a monitor as well as on the screen, you can connect the projector to an external monitor by following the instructions below. To connect the projector to a monitor (either through a VGA cable or VGA to DVI-A cable): •... -
Page 25: Connecting Video Source Devices
Connecting Video source devices This section describes how to connect the projector to Video source devices using video cables. Video cable connections are recommended for Video presentations. You can connect your projector to various Video source devices that provide any one of the following output sockets: •... - Page 26 Connecting a DVI source device The projector provides a DVI-I input socket that allows you to connect it to a DVI source device like a DVD player, or a VGA output device like a notebook or desktop computer. There are three types of DVI connectors: DVI-A, DVI-D, and DVI-I. The DVI-I socket is an integrated connector which supports both formats: DVI-A, and DVI-D.
-
Page 27: Connecting A Component Video Source Device
Connecting a Component Video source device Examine your Video source device to determine if it has a set of unused Component Video output sockets available: • If so, you can continue with this procedure. • If not, you will need to reassess which method you can use to connect to the device. To connect the projector to a Component Video source device through a Component Video cable: Take a Component Video cable and connect one end to the Component Video output... - Page 28 Connecting an S-Video or a composite Video source device Examine your Video source device to determine if it has an unused S-Video or Video output socket available: • If it has both sockets, use the S-Video output socket for connection as the S-Video termial provides better picture quality than the Video terminal.
-
Page 29: Connecting Audio Device
Connecting Audio device The projector has built-in speakers which are designed to provide basic audio functionality accompanying data presentations for business purposes only. It is not designed for, nor intended for audio reproduction use as might be expected in home theater or home cinema applications. -
Page 30: Operation
The start up procedure takes about 30 seconds after pressing . In the later stage of start up, a default BenQ logo is projected. (If necessary) Rotate the focus ring to adjust the picture clearness. If you are prompted for a password, press the arrow keys to enter a six digit password. -
Page 31: Using The Menus
+ 50 Reset Picture Settings Rename User Mode Analog RGB Presentation + 50 + 50 + 50 + 50 EXIT Back English BenQ Floor Front Disable Disable Disable Blue EXIT Back Presentation Status Press EXIT to the previous page or to exit. -
Page 32: Securing The Projector
Securing the projector Using a security cable lock The projector has to be installed in a safe place to prevent stealing. If not, purchase a lock, like Kensington lock, to secure the projector. You can locate a Kensington lock slot on the rear side of the projector. -
Page 33: If You Forget The Password
Write down the number and turn off your projector. Seek help from the local BenQ service center to decode the number. You may be required to provide proof of purchase documentation to verify that you are an authorized user of the projector. -
Page 34: Disabling The Password Function
You have successfully assigned a new password to the projector. Remember to enter the new password next time the projector is started. To leave the OSD menu, press MENU. Disabling the password function To disable password protection, go back to the Advanced Setup >... -
Page 35: Switching Input Source
Input Source Auto Source Search Analog RGB Analog RGB DVI-A DVI-D RJ-45 S-Video Component Video for details. English BenQ Floor Front Disable Disable Disable Blue ENTER EXIT Back Select RJ-45 only when the optional Signal Shuttle module is connected to the projector RJ-45 input socket. -
Page 36: Adjusting The Projected Picture
Adjusting the projected picture Adjusting the projection angle The projector is equipped with 2 quick-release adjuster feet. These adjusters change the picture height and projection angle. To adjust the projector, slightly lift the front of the projector and press and hold the quick- release buttons on the both sides near bottom until the picture is positioned where you want it. -
Page 37: Correcting Picture Distortion
Correcting picture distortion Correcting two-dimensional keystone Keystoning occurs when the projector is not perpendicular to the screen and is where the projected picture displays visible as a trapezoid shape like either of the following: • Two parallel sides (left and right, or top and bottom) but is noticeably wider on either side. - Page 38 Correcting pincushion distortion and barrel distortion Your projected picture may suffer from pincushion or barrel distortions due to the curved projection surface. • Pincushion distortion The horizontal and vertical lines that do not go through the center of the picture bend inwards toward the center of the picture.
-
Page 39: Selecting The Aspect Ratio
Selecting the aspect ratio The 'aspect ratio' is the ratio of the picture width to the picture height. Most analog TV and computers are in 4:3 ratio, and digital TV and DVDs are usually in 16:9 ratio. With the advent of digital signal processing, digital display devices like this projector can dynamically stretch and scale the picture output to a different aspect than that of the picture input source. - Page 40 Anamorphic: Scales a picture so that it is displayed in the center of the screen using 1280 x 720 pixels. This may alter the projected aspect, depending upon the original aspect of the source image. Anamorphic is most suitable for images which are already in a 16:9 aspect, like high definition TV, as it displays them without aspect alteration.
-
Page 41: Magnifying And Searching For Details On The Projected Picture
Magnifying and Searching for details on the projected picture If you need to find the details on the projected picture, magnify the picture. The picture can be enlarged up to 300% than the original picture size with 50% increments. Use the direction arrow keys for navigating the picture. -
Page 42: Selecting A Picture Mode
Selecting a picture mode The projector is preset with several pre-defined picture modes so that you can choose one to suit your operating environment and input source picture type. The picture modes available for different types of signals are listed below. Dynamic mode: Maximizes the brightness of the projected picture. - Page 43 Fine-tuning the selected picture mode The pre-defined picture mode settings can be altered via the available items shown in the Picture -- Basic and Picture -- Advanced menus. To fine-tune the picture mode: Press MENU and then press menu is highlighted. Press to highlight the item you want to adjust (from among Brightness, Contrast, Color, Tint, Sharpness, Color Temperature, Clarity Control, Gamma Selection, Color...
- Page 44 Renaming user modes You can change User 1, User 2, and User 3 to the names easy to be identified or understood by the users of this projector. The new name can be up to 12 characters including English letters (A-Z, a-z), digits (0-9), and space (_). To rename user modes: In the Picture -- Basic menu, highlight Rename User Mode and press ENTER to display the Rename User Mode page.
-
Page 45: Fine-Tuning The Picture Quality
Fine-tuning the picture quality No matter what picture mode you have selected, you are able to fine-tune those settings to fit every presentation purpose. Those adjustments will be saved to the preset mode you are at when you exit the OSD menu. Adjusting Brightness Highlight Brightness in the Picture -- Basic menu and adjust the values by pressing... -
Page 46: Advanced Picture Quality Controls
Advanced picture quality controls There are more advanced functions in the Picture -- Advanced menu to be adjusted to your preference. To save the settings, just press MENU to leave the OSD menu. Setting Black Level Highlight Black Level and press projector or remote control to select 0 IRE or 7.5 IRE. -
Page 47: Selecting A Color Temperature
Selecting a color temperature Highlight Color Temperature and select a preferred setting by pressing on the projector or remote control. There are several color temperature settings available. Lamp Native: With the lamp’s original color temperature and higher brightness. This setting is suitable for environments where high brightness is required, such as projecting pictures in well lit rooms. -
Page 48: Color Management
Color Management The Color Management provides six sets (RGBCMY) of colors to be adjusted to favorite colors. When you select each color, you can independently adjust its color range and saturation according to your preference. To adjust and store the settings: In the Picture -- Advanced menu, highlight Color Management and press ENTER. - Page 49 Selecting a Gamma setting Highlight Gamma Selection and select a preferred setting by pressing on the projector or remote control. Gamma refers to the relationship between input source and picture brightness. The lower the figure, the more black detail is visible. •...
-
Page 50: Operating In A High Altitude Environment
EXIT Back High Altitude Mode is used when the environment is higher than 1500m. Do you want to turn the High Altitude Mode on? Language English Splash Screen BenQ My Screen Projector Position Floor Front Blank Timer Disable Auto Off Disable... -
Page 51: Displaying More Than One Picture Source Simultaneously
Displaying more than one picture source simultaneously Your projector is capable of displaying pictures simultaneously from two input sources, which can be used to enhance your presentation in an interesting way. Ensure the signals you want to display are correctly connected to the projector. Splitting the screen The projector is able to display two input sources by dividing the projection equally into two screens on the left and right sides. -
Page 52: Pip (Picture In Picture) Operation
PIP (Picture In Picture) operation To display the PIP window: • Using the remote control Press PIP to display the PIP page and make adjustments by following the steps starting from step 3 in the section ‘User the OSD menu’ below. •... - Page 53 Split Screen and PIP source conflict list The following source combinations cannot display at the same time for the Split Screen and PIP functions: DVI-A+DVI-D, Component+Video, Component+S-Video, RJ-45+Video, RJ-45+S-Video, and Video+S-Video. Disabled functions for the active windows The following OSD menu functions cannot work on the active windows for the Split Screen: Digital Screen Shift, Digital Zoom, Pan, PIP, My Screen, Auto Source Search, Aspect Ratio.
-
Page 54: Creating Your Own Startup Screen
Creating your own startup screen In addition to selecting the projector preset startup screen from among BenQ logo or Blue screen, you can make your own startup screen that is a picture projected from your computer or video source. To create your own startup screen, project the picture you want to use as your startup screen from either a computer or video source. -
Page 55: Adjusting The Sound
Adjusting the sound The sound adjustments made as below will have an effect on the projector speaker and, if using external speakers, on the audio output signal. Be sure you have made a correct connection to the projector audio input(s) and, if using external speakers, to the projector audio outputs. -
Page 56: Remote Paging Operations
Remote paging operations Connect the projector to your PC or notebook with a USB cable prior to using the paging function. See "Connecting a computer" on page 23 You can operate your display software program (on a connected PC) which responds to page up/down commands (like Microsoft PowerPoint) by pressing PAGE on the remote control. -
Page 57: Shutting Down The Projector
Shutting down the projector Press Power on the remote control or projector and a confirmation message will display prompting you. If you don't respond in a few seconds, the message will disappear. Press Power a second time. The Power indicator light flashes orange, the projection lamp shuts down, and the fans will continue to run for approximately 90 seconds to cool down the projector. -
Page 58: Menu Operation
Menu operation On-Screen Display menu structure Please note that the on-screen display (OSD) menus vary according to the signal type selected. Main menu Sub-menu Picture Mode Load Settings From Picture -- Brightness Basic Contrast Color Tint Sharpness Reset Picture Settings Rename User Mode Black Level Clarity Control... - Page 59 Aspect Ratio Digital Screen Shift Keystone Attachable Lens Position Overscan Adjustment Digital Zoom Display Split Screen PC & Component YPbPr Tuning 4:3/Anamorphic/Fill/Letter Box/ Wide/Real -24–+24 2D Keystone Pincushion -20–+20 Correction On/Off 0/1/2/3 100%–300% On/Off Main Source Analog RGB/DVI-A/DVI-D/RJ-45/S- Video/Component/Video Second Source Active Window Main/Second Top-Right/Top-Left/Bottom-Right/...
- Page 60 Note that the menu items are available when the projector detects at least one valid signal. If there is no equipment connected to the projector or no signal detected, limited menu items are accessible. Operation BenQ/Blue/My Screen Floor Front/Ceiling Front/Floor Rear/Ceiling Rear Disable/5 min/10 min/15 min/20...
-
Page 61: Picture -- Basic Menu
Picture -- Basic menu FUNCTION DESCRIPTION (default setting/ value) Pre-defined picture modes are provided so you can optimize your Picture Mode projector picture set-up to suit your program type. See Analog RGB/ picture mode" on page 42 DVI-A/DVI-D/RJ- Presentation; S-Video/ Component/ Video Standard... -
Page 62: Picture -- Advanced Menu
Adjusts the picture quality projected via the RJ-45 signal. Signal This menu is available when the optional accessory–Signal Shuttle is Shuttle connected and the RJ-45 signal is detected. You can purchase Signal Shuttle through BenQ retailers. Operation for details. "Controlling image clarity" on page 46 for details. -
Page 63: Display Menu
Display menu FUNCTION DESCRIPTION (default setting / value) There are several options to set the picture's aspect ratio depending on Aspect Ratio your input source. See (Fill) Adjusts the vertical position of the projected picture. See Digital picture around the black areas" on page 39 Screen Shift Corrects any keystoning of the picture. -
Page 64: System Setup Menu
Language menus" on page 31 (English) Allows you to select which logo screen will display during projector start- Splash up. Three options are available: BenQ logo screen, Blue screen, or My Screen Screen. (BenQ logo) My Screen Captures and stores the projected picture as My Screen. See own startup screen"... -
Page 65: Advanced Setup Menu
Advanced Setup menu FUNCTION DESCRIPTION (default setting / value) Lamp Power Selects the projector lamp between Normal and Eco. (Economic) modes. Lamp Hours Shows the lamp hours information. Lamp "Getting to know the lamp hour" on page 68 Reset Lamp Timer Once the lamp is renewed, select Reset to return the lamp timer to '0'. -
Page 66: Information Menu
Information menu This menu shows you the current operating status of the projector. Some picture adjustments are available only when certain input sources are in use. Unavailable adjustments are not shown on the screen. FUNCTION DESCRIPTION Shows the current signal source. Source Shows the selected mode in the Picture -- Basic >... -
Page 67: Maintenance
6. Maintenance Care of the projector Your projector needs little maintenance. The only thing you need to do on a regular basis is to keep the lens clean. See Never remove any parts of the projector except the lamp. Contact your dealer if other parts need replacing. -
Page 68: Lamp Information
Blank Timer Auto Off Sleep Timer Background Color Menu Settings Input Source Auto Source Search Analog RGB ENTER EXIT Back Eco. ENTER EXIT Back 100hr 150hr EXIT Back English BenQ Floor Front Disable Disable Disable Blue EXIT Back . The time... -
Page 69: Timing Of Replacing The Lamp
Timing of replacing the lamp When the Lamp indicator lights up red or a message appears suggesting it is time to replace the lamp, please install a new lamp or consult your dealer. An old lamp may cause a malfunction in the projector and in some instances the lamp may explode. The Lamp indicator light and Temperature warning light will light up if the lamp becomes too hot. -
Page 70: Replacing The Lamp
Replacing the lamp • To reduce the risk of electrical shock, always turn the projector off and disconnect the power cord before changing the lamp. • To reduce the risk of severe burns, allow the projector to cool for at least 45 minutes before replacing the lamp. - Page 71 Lift the handle so that it stands up. Use the handle to slowly pull the lamp out of the projector. • Pulling it too quickly may cause the lamp to break and scatter broken glass in the projector. • Do not place the lamp in locations where water might splash on it, children can reach it, or near flammable materials.
-
Page 72: Resetting The Lamp Timer
Resetting the lamp timer After the startup logo, press MENU and then press until the Advanced Setup menu is highlighted. Press to highlight Lamp and press ENTER. The Lamp page displays. Highlight Reset Lamp Timer and press ENTER. A warning message displays asking if you want to reset the lamp timer. -
Page 73: Indicators
The projector needs to cool for 90 seconds after the power is turned off. • The lamp has been damaged. Please contact your local BenQ customer center for purchasing a new lamp. • The lamp is not properly attached. •... -
Page 74: Troubleshooting
7. Troubleshooting The projector does not turn on. Cause There is no power from the power cable. Attempting to turn the projector on again during the cooling process. No picture Cause The video source is not turned on or connected correctly. The projector is not correctly connected to the input source device. - Page 75 Display > Position menu. Configure the computer's external display resolution to the projector's native resolution (1280 x 768 for SP830/ SP831). If this option is not available, select one of the compatible listed in "Supported timing for PC (including DVI- I) input"...
-
Page 76: Specifications
8. Specifications Projector specifications All specifications are subject to change without notice. Optical Resolution 1280 x 768 WXGA Display system 1-CHIP DMD Lens F/Number F=2.4 to 2.58, f= 22.32 to 26.06 mm Lamp 300 W lamp Electrical Power supply AC100–240V, 4.5A, 50-60 Hz (Automatic) Power consumption 450 W (Max);... -
Page 77: Timing Chart
Timing chart Supported timing for PC (including DVI-I) input Horizontal Resolution Frequency (kHz) 720 x 400 640 x 480 800 x 600 1024 x 768 1280 x 768 1280 x 1024 1280 x 960 1440 x 900 1400 x 1050 1680 x 1050 **1600 x 1200 VIDEO... -
Page 78: Dimensions
Supported timing for Component Video input Signal Format 480i(525i)@60Hz 480p(525p)@60Hz 576i(625i)@50Hz 576p(625p)@50Hz 720p(750p)@60Hz 720p(750p)@50Hz 1080i(1125i)@60Hz 1080i(1125i)@50Hz 1080p@60Hz Supported timing for Video and S-Video inputs Video mode NTSC SECAM PAL-M PAL-N PAL-60 NTSC4.43 Dimensions 277 mm (W) x 115 mm (H) x 375 mm (D) Unit: mm Specifications Horizontal Frequency (kHz) Vertical Frequency (Hz) -
Page 79: Warranty And Copyright Information
For other information, please visit www.BenQ.com. Copyright Copyright © 2007 by BenQ Corporation. All rights reserved. No part of this publication may be reproduced, transmitted, transcribed, stored in a retrieval system or translated into any language or computer language, in any form or by any means, electronic, mechanical, magnetic, optical, chemical, manual or otherwise, without the prior written permission of BenQ Corporation. -
Page 80: Regulation Statements
10. Regulation statements FCC statement CLASS B: This equipment generates, uses and can radiate radio frequency energy and, if not installed and used in accordance with the instructions, may cause harmful interference to radio communications. However, there is no guarantee that interference will not occur in a particular installation.