
Related Manuals for LG RC9011G2


Summary of Contents for LG RC9011G2
- Page 1 OWNER’S MANUAL DRYER Please read this manual carefully before operating your dryer and retain it for future reference. RC9011A RC9011A1 RC9011G2 RC9011B RC9011B1 RC9011C RC9011C1 MFL68721023...
-
Page 2: Table Of Contents
Ultra big Capacity Drum The Ultra big 9kg capacity drum on this LG Dryer allows you to dry your washing in larger loads than ever before Lower Energy Consumption Energy LG dryers use less energy than conventional dryers due to the cutting-edge technology we have applied to the drying system and to the heat control mechanism. -
Page 3: Safety Instructions
afety Instructions To help reduce any risk of electric shock, fire, or other personal or property injury when using your dryer, please follow basic safety instructions. WARNING Serious injury or death may occur when not observing the following rules. Not allowed actions. •... - Page 4 afety Instructions • Do not use damaged power • Prevent pets biting the dryer. cord, plug and socket. Pets may die from an It may cause a fire or an electric shock or electric shock. appearance may be damaged. • Do not install or store the •...
- Page 5 afety Instructions • Young children should be supervised to ensure that they do not play with the appliance. • The appliance is not intended for use by young children or infirm persons without supervi- sion. • Young Children should be supervised to ensure that they do not play with appliance. Children may fall off.
-
Page 6: Installation Instructions
Stacking Installation Instructions The LG Dryer can be placed on the top of a front loading washing machine. They are sure to be fixed with stacking kit (See the next page). This installation must be conducted by an experienced installer in order to secure robust installation of both washer and dryer. - Page 7 • Do not operate if the dryer is disassembled. This dryer may only be stacked on top of an LG wash- 3. Align the stacking kit holes and the rear cover er. DO NOT attempt to stack this dryer on any other holes.
- Page 8 nstallation Instructions Level the Dryer 1. Leveling the dryer is to prevent undesirable noise and vibration. When placing your dryer in an solid and level area where water is not dripping and freezing, flammable materials are not stored. 2. If the dryer is not properly level, adjust the front leveling legs up and down as necessary.
-
Page 9: Appearance & Design
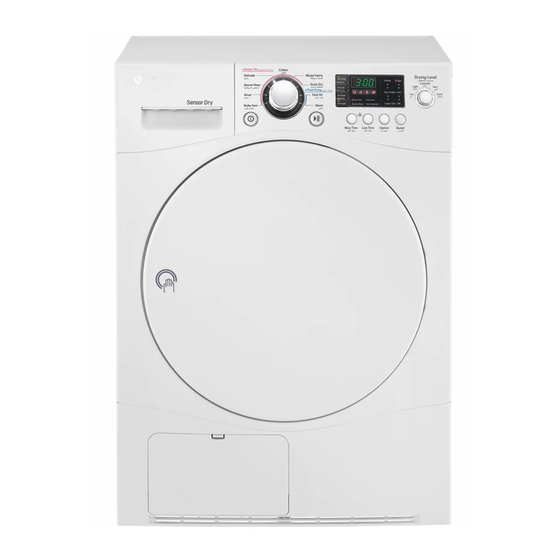
ppearance & Design RC9011A B C RC9011A1 B1 C1 Control Panel Water Container Glass Door Opaque Door Condenser Cover Air Ventilation Grill Control Panel RC9011A/B/C/G2 LED Display • Time Display Program Selector • Indicator Lamps & Left Time Drying Level •... -
Page 10: Operating Your Dryer
perating Your Dryer Cycle Selection Table Drying Electronic Sensor Dry Cycles Level Towels, dressing gowns Extra For thick and quilted fabrics and bed linen Cotton Cycles Terry towels, tea towels, Very For thick and quilted fabrics which do not need to be ironed (Note) Select the towels, bed linen gentle by... - Page 11 After removing the packaging, please carry out the following checks to ensure the LG Dryer is correctly installed and ready for use. 1. Check the dryer is well balanced by using a spirit level. If not, adjust the feet of the LG Dryer until the machine is balanced.
- Page 12 perating Your Dryer 5. Close the door. Select the desired Before you close the door, make sure fabrics cycle. are well placed inside and that foreign objects, especially flammable ones, are not caught around door. CAUTION Be careful not to trap laundry in between the loading door and rubber seal.
-
Page 13: Additional Functions
dditional Functions RC9011A/B/C/G2 RC9011A1/B1/C1 Time Delay Favourite You can use the Time Delay function to delay the If there is some cycle you would like to make finishing time of drying cycle. based on your own drying habit, use “Favourite”. Maximum Time Delay is 19 hours. - Page 14 dditional Functions Anti-Crease Child Lock ( Anti-Crease is functioning to prevent creases and For the safety of your children, press More Time rumples that are formed when the laundry is not and Less Time buttons at the same time for unloaded promptly at the end of drying cycle.
-
Page 15: Caring For Your Dryer
aring for Your Dryer How important care and cleaning is~ Empty Water Container It’s not very difficult to care for your dryer. All you have Condensed water is collected to water container to do is to follow the information below. You should empty the water container after every use. - Page 16 aring for Your Dryer Condenser Condenser is also a very important part for efficient drying performance result so it needs a special care from you. It is recommended that condenser be cleaned three or four times a year or when the condenser clean lamp blinks. 1.
- Page 17 aring for Your Dryer Ventilation Grille and Cool Air 3. Connect drain hose Inlet Grille to the kit. Vacuum the front ventilation grill 3~4 time a year to make sure there must be no build-up of lints or dirts which cause improper intake air flow. Moisture Sensor? This device functions to sense the moisture remaining contents of the laundry during...
-
Page 18: Additional Tips For Smart Use
dditional Tips for Smart Use Drying Guide & Energy consumption Display Drying Time Course Ca. of Dryer (Including Cooling Time) Iron 97min Cottons Light * 103min Cupboard 115min Mixed Cupboard 48min Fabric 50min Quick Dry 1.5kg 45min Delicate 1.5kg Special Sports Wear 30min Fabrics... - Page 19 550mm and 600mm for 4. The model No. and the serial No. both. of your dryer. 5. The date of purchase. If stacking is needed, you must stack the dryer upon LG washing machine. A stacking kit is sold separately.
-
Page 20: Troubleshooting Guidelines
roubleshooting Guidelines Troubleshooting Tips To save you time and money, the following page will help answer your questions before service call. Questions What to do Dryer doesn't work 1. Check dryer is plugged in. 2. Check "Start" button is pressed. 3. - Page 21 roubleshooting Guidelines Error Mode • : LED displays “ ” in case of the door open. The door must be closed and start Button must be pressed for re-operation. • : If display errors continues to occur, unplug the power cords and then call to the Service Center.
-
Page 22: Technical Data
echnical Data 850 mm 640 mm 600 mm Weight : 45 kg Electrical Requirements Ventilation Requirement Alcove or Volts Hertz Watts Closet undercounter 220 V 60 Hz 2600 Ensure air flow Closet door must have of 112 cu.ft./min 2(louvered) openings, You are sure to check the rating plate on the through dryer each having a mini-... -
Page 23: Warranty
arranty Disposal of your old appliance 1. All electrical and electronic products should be disposed of separately from the municipal waste stream via designated collection facilities appointed by the government or the local authorities. 2. The correct disposal of your old appliance will help prevent potential negative consequences for the environment and human health.