Table of Contents
Advertisement
Quick Links
Advertisement
Table of Contents

Related Manuals for AEG HKB95450NB


Summary of Contents for AEG HKB95450NB
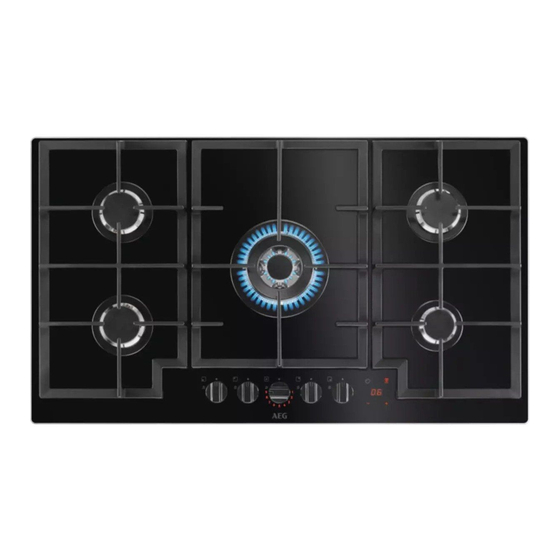
- Page 1 HKB95450NB User Manual USER MANUAL...
-
Page 2: Table Of Contents
11. ENVIRONMENTAL CONCERNS..............26 FOR PERFECT RESULTS Thank you for choosing this AEG product. We have created it to give you impeccable performance for many years, with innovative technologies that help make life simpler – features you might not find on ordinary appliances. Please spend a few minutes reading to get the very best from it. - Page 3 ENGLISH instructions in a safe and accessible location for future reference. 1.1 Children and vulnerable people safety This appliance can be used by children aged from 8 • years and above and persons with reduced physical, sensory or mental capabilities or lack of experience and knowledge if they have been given supervision or instruction concerning the use of the appliance in a safe way and understand the hazards involved.
- Page 4 WARNING: The appliance and its accessible parts • become hot during use. Care should be taken to avoid touching heating elements. WARNING: Unattended cooking on a hob with fat or • oil can be dangerous and may result in fire.
-
Page 5: Safety Instructions
ENGLISH Where the appliance is directly connected to the • power supply, an all-pole isolating switch with a contact gap is required. Complete disconnection in compliance with the conditions specified in overvoltage category III must be guaranteed. The earth cable is excluded from this. When you route the mains cable, make sure that the •... - Page 6 2.2 Electrical Connection • Use only correct isolation devices: line protecting cut-outs, fuses (screw type WARNING! fuses removed from the holder), earth Risk of fire and electric leakage trips and contactors. shock. • The electrical installation must have an isolation device which lets you •...
- Page 7 ENGLISH • The vapours that very hot oil releases CAUTION! can cause spontaneous combustion. The use of a gas cooking • Used oil, that can contain food appliance results in the remnants, can cause fire at a lower production of heat, moisture temperature than oil used for the first and products of combustion time.
-
Page 8: Installation
2.5 Care and cleaning • Concerning the lamp(s) inside this product and spare part lamps sold WARNING! separately: These lamps are intended Do not remove the buttons, to withstand extreme physical knobs or gaskets from the conditions in household appliances, control panel. - Page 9 ENGLISH determine the requisite air vent When the final connection has been requirements. made, it is essential that a thorough leak test is carried out on the hob and Location installation. The hob may be located in a kitchen, a kitchen/diner or bed sitting room (with a Make sure that the main connection pipe volume greater than 20 m³), but not in a...
- Page 10 3.5 Adjustment of minimum level WARNING! Information for authorised installer only. To adjust the minimum level of the burners: 1. Light the burner. 2. Turn the knob on the minimum position. 3. Remove the knob and using thin screwdriver lift up and remove the plastic magnet holder.
- Page 11 ENGLISH contractor who is on the roll of the The wires in the cord are coloured as National Inspection Council for Electrical follows: Installation Contracting [NICEIC]). Green and yellow - Earth The manufacturer refuses to be held responsible, if Blue - Neutral these safety measures are not abided by.
- Page 12 2. Connect the blue (neutral) wire to the terminal which is marked with the letter 'N' or coloured blue. 3. Connect the brown (live) wire to the terminal which is marked with the 400 mm letter 'L'. It must always be connected to the network phase.
-
Page 13: Product Description
ENGLISH B) supplied brackets Kitchen unit with door or drawer CAUTION! min 6 mm Install the appliance only on a worktop with flat surface. 3.9 Installing hob under the min 30 mm hood If you install the hob under a min 5 mm hood, please see the (max 150 mm) - Page 14 4.2 Control panel layout Use the sensor fields to operate the Minute Minder and Hob²Hood. The displays, indicators and sounds tell which functions operate. Sensor Function Comment field To select the Timer function. To activate Hob²Hood icons. To make the LEDs visible.
-
Page 15: Daily Use
ENGLISH 4.4 Residual heat LEDs full light LEDs light slowly reduced LEDs light off Knob opened Residual heat starts Residual heat ends WARNING! The residual heat indicator There is a risk of burns from lights up when you turn off residual heat. - Page 16 5.1 Burner overview 1. Push the control knob down and turn it counterclockwise to the maximum gas supply position ( ). 2. Keep the control knob pushed for equal or less than 10 seconds. This lets the thermocouple warm up. If not, the gas supply is interrupted.
- Page 17 ENGLISH The hob is supplied with The function has no effect StepPower. This function on the operation of the allows you to set the power burners. more precisely from 9-1. Hob²Hood WARNING! If you do not switch the knob It is an advanced automatic function to the off position, after two which connects the hob to a special hours a warning sound is...
-
Page 18: Hints And Tips
Flash Memory Repeat the same procedure and recalled at startup. to select another Hob²Hood Automatic Mode. Automatic modes: Mode Description H2H icon H2H display Automatic Fan speed light No remote control Remote control... - Page 19 To find the full range of cooker hoods When you operate the hob with the which work with this function refer to our function: consumer website. The AEG cooker • Protect the hood panel from direct hoods that work with this function must sunlight.
- Page 20 Food categories Recipes Burner type Power level Mushrooms rice Multi Crown Pasta - Rice - other Ce‐ Couscous Rapid reals Ravioli Auxiliary Vegetable soup Semi-rapid Mushrooms and pota‐ Soup - Legumes Semi-rapid toes soup Fish soup Multi Crown Beef meatballs...
-
Page 21: Care And Cleaning
ENGLISH The settings suggested in For an optimal delicate the cooking table should cooking use the auxiliary only serve as guidelines and burner. be adjusted depending on the rawness of food, its weight and quantity as well as on the type of gas used and the material of the cookware used to prepare the dish. - Page 22 7.3 Removing pan supports The shape of pan supports and the amount of burners can be different in To keep the pan supports in the correct other models of the appliance. position, they are put on metal pins installed in the rear side of the hob. For 7.4 Cleaning the hob...
-
Page 23: Troubleshooting
ENGLISH 8. TROUBLESHOOTING WARNING! Refer to Safety chapters. 8.1 What to do if... Problem Possible cause Remedy There is no spark when you The hob is not connected to Check if the hob is correctly try to activate the spark gen‐ an electrical supply or it is connected to the electrical erator. -
Page 24: Technical Data
Problem Possible cause Remedy The display shows "E t" Turn off the control knobs and wait until the display is off or disconnect the appli‐ ance to the main to return to the initial condition. Selected Automatic Mode is Refer to "Daily use". - Page 25 ENGLISH Depth 510 mm 9.2 Bypass diameters BURNER Ø BYPASS 1/100 mm Multi Crown Semi-rapid Auxiliary 9.3 Other technical data Gas original: G20 (2H) 20 mbar 10,45 kW TOTAL POW‐ Gas replace‐ G30 (3+) 28-30 mbar 745 g/h ment: G31 (3+) 37 mbar 732 g/h Electric supply: 220-240 V ~ 50-60 Hz...
-
Page 26: Energy Efficiency
G31 37 mbar mbar Auxiliary 0,33 10. ENERGY EFFICIENCY 10.1 Product Information according to UK Ecodesign Regulation Model identification HKB95450NB Type of hob Built-in hob Number of gas burners Left rear - Semi-rapid 56.8% Right rear - Semi-rapid 58.7% Energy efficiency per gas burner Centre middle - Multi Crown 55.6%... - Page 28 www.aeg.com/shop...