Table of Contents
Advertisement
Quick Links
Advertisement
Table of Contents

Related Manuals for AEG L7FE96CS


Summary of Contents for AEG L7FE96CS
- Page 1 L7FE96CS User Manual Washing Machine USER MANUAL...
-
Page 2: Table Of Contents
16. ACCESSORIES......................37 FOR PERFECT RESULTS Thank you for choosing this AEG product. We have created it to give you impeccable performance for many years, with innovative technologies that help make life simpler features you might not find on ordinary appliances. Please spend a few minutes reading to get the very best from it. -
Page 3: Safety Information
ENGLISH SAFETY INFORMATION Before the installation and use of the appliance, carefully read the supplied instructions. The manufacturer is not responsible for any injuries or damages that are the result of incorrect installation or usage. Always keep the instructions in a safe and accessible location for future reference. -
Page 4: Safety Instructions
The ventilation opening in the base (if applicable) • must not be covered by a carpet, mat, or any floor covering. The appliance must be connected to the water mains • using the new supplied hose sets, or other new hose sets supplied by the Authorised Service Centre. -
Page 5: Installation
ENGLISH cable. Should the mains cable need • This appliance is for household use to be replaced, this must be carried only. out by our Authorised Service Centre. • Follow the safety instructions on the • Connect the mains plug to the mains detergent packaging. - Page 6 7. Remove the polystyrene protection from the bottom. 3. Remove the internal film. 8. Fully clean and dry the bottom of the appliance. 4. Open the door and remove the polystyrene piece from the door seal and all the items from the drum.
- Page 7 ENGLISH 12. Refer to the illustration. Make sure that the barriers are securely attached. 16. Pull out the plastic spacers. 17. Put the plastic caps, that you find in the user manual bag, in the holes. Attach the sound barriers at a room temperature.
- Page 8 The appliance must be level and stable. Make sure that the inlet hose is not in vertical position. A correct adjustment of the appliance level prevents the 3. If necessary, loose the ring nut to set vibration, noise and the it in the correct position.
- Page 9 ENGLISH Make sure that the drain hose end is not immersed in the water. There may be a return of dirty water into the appliance. 3. To a stand pipe with vent-hole - Insert the drain hose directly into a drain pipe.
-
Page 10: Product Description
You can extend the drain hose to maximum 400 cm. Contact the authorized service centre for the other Make sure that the drain drain hose and the extension. hose makes a loop to prevent particles going into the appliance from the sink. -
Page 11: Control Panel
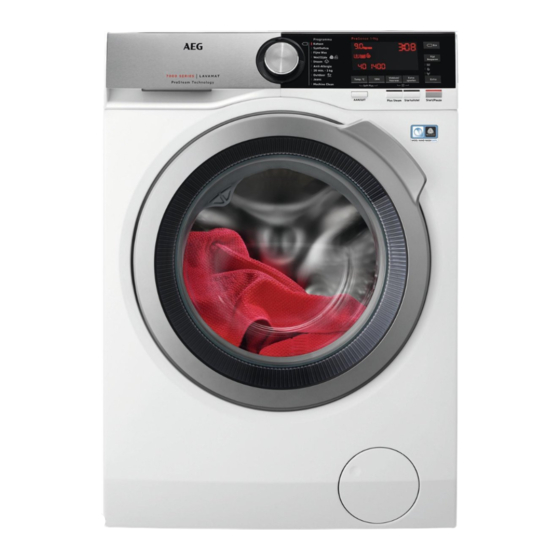
ENGLISH 4.2 Appliance overview 11 12 Worktop Drain hose Detergent dispenser Inlet hose connection Control panel Mains cable Door handle Transit bolts Rating plate Hose support Drain pump filter Feet for levelling the appliance 5. CONTROL PANEL 5.1 Control panel description 11 10... - Page 12 Programme dial Extra rinse touch button (Extra Display Spoelen) Delay start touch button (Startuitstel) Eco touch button (Eco) Time saving touch button (Tijd Super steam touch button (Plus Besparen) Steam) Skipping phase touch button (Extra) Anti-stain and prewash touch button •...
-
Page 13: Knob And Buttons
ENGLISH Energy saving indicators. The indicator appears by selecting a pro- gramme for cotton at 40 °C or 60 °C. Washing phase indicator: it flashes during prewash and wash phase. Rinsing phase indicator: it flashes during rinse phase. indicator appears when the Soft Plus option is activated. Spin and drain phase indicator. - Page 14 You must drain the water to unlock 6.3 Temp.°C the door. When you select a washing programme, Touch the Start/Pauze button: the the appliance automatically proposes a appliance performs only the draining default temperature. phase. Touch this button repeatedly until the...
- Page 15 ENGLISH This option increases the programme If you select the Cotton duration. programme at 40°C or 60°C, the display shows the If the Extra Spoelen is set as a default option and you indicator ; these are select a compatible washing the standard cotton programme, the display programmes, the most...
-
Page 16: Programmes
Touch repeatedly the button to set the 6.12 Start/Pauze required delay. The time increases by Touch the Start/Pauze button to start, steps of 30 minutes up to 90' and from 2 pause the appliance or interrupt a hours up to 20 h. - Page 17 ENGLISH Programme Programme description Steam programme for cotton and synthetic items. Steam can be used for dried , washed or worn once laundry. This Stoom programme reduce creases and odours and relaxes the fi- bers. When the programme is completed, quickly remove the laundry from the drum.
- Page 18 Programme Programme description Denim clothing and jersey items. Normal soil. This pro- gramme performs a gentle rinsing phase, designed for denim, Jeans that reduces fading and avoids washing powder residues on the fibres. Maintenance cycle with hot water to clean and freshen the drum and to remove residue that may cause odour.
- Page 19 ENGLISH Programme Default temperature Maximum spin speed Maximum load Temperature range Spin speed range 30 °C 1200 rpm 2.5 kg Outdoor 40 °C - Cold 1200 rpm - 400 rpm 1 kg 40 °C 1200 rpm 9 kg 60 °C - Cold 1200 rpm - 400 rpm Jeans 1200 rpm...
-
Page 20: Before First Use
■ ■ ■ ■ ■ Soft Plus 1) This option is not available with temperature lower than 40 °C. 2) This option is not available with a temperature lower than 30 °C. 3) If you set a shorter duration, we recommend that you decrease the load size. It is possible to fully load the appliance, however the washing results can be less satisfactory. -
Page 21: Daily Use
ENGLISH 9.3 Permanent Extra Rinse • Before you touch the Start/Pauze button: the appliance cannot start. With this option you can permanently The appliance keeps the selection of this have an extra rinse when you set a new option after you switch it off. programme. - Page 22 Always follow the instructions that you find on the packaging of the detergent products, but we recommend that you do not exceed the maximum indicated level ( ). This quantity will however guarantee the best washing results. After a washing cycle, if...
- Page 23 ENGLISH 4. To use liquid detergent, turn the flap The indicator of the Start/Pauze button down. flashes. The display shows the maximum declared load for the programme, the default temperature, the maximum spin speed, the washing phase indicators (when available) and an indicative programme duration.
- Page 24 Cancelling the delay start after In this case, for 30 seconds, it is possible to pause the appliance and remove the the countdown has started exceeding garments. To cancel the delay start: Once removed the exceeding garments, touch the Start/Pauze button to start the 1.
- Page 25 ENGLISH 10.10 Interrupting a 3. Close the door and touch the button Start/Pauze. programme and changing the The programme or the delay start options continues. When the programme is running, you 10.13 End of the programme can change only some options: When the programme has finished, the 1.
-
Page 26: Hints And Tips
10.15 Stand-by option • The drum still turns at regular intervals to prevent the creases in the laundry. The Stand-by function automatically • The door stays locked. deactivates the appliance to decrease • You must drain the water to open the... -
Page 27: Care And Cleaning
ENGLISH 11.2 Stubborn stains • Use the recommended products for the type and colour of the fabric, the For some stains, water and detergent is programme temperature and the not sufficient. level of soil. We recommend that you pre-treat these 11.4 Ecological hints stains before you put the items in the appliance. - Page 28 For an efficient descaling action, we 1. Clean the drum with special products suggest our products: Electrolux Clean & for stainless steel. Care and Electrolux descaler. Always follow the instructions that you find on Always follow the the packaging of the instructions that you find on product.
- Page 29 ENGLISH Clean the drain pump if: • The appliance does not drain the water. • The drum does not turn. • The appliance makes an unusual noise because of the blockage of the drain pump. • The display shows the alarm code WARNING! •...
- Page 30 5. When the bowl is full of water, close 10. Clean the filter under the water tap. the drainage duct back and empty the container. 6. Repeat the steps 4 and 5 until the water stops to flow out.
- Page 31 ENGLISH When you drain the water with the emergency drain procedure, you must activate the drain system again: a. Put 2 litres of water in the main wash compartment of the detergent dispenser. b. Start the programme to drain the water.
-
Page 32: Troubleshooting
2. Close the water tap. WARNING! 3. Put the two ends of the inlet hose in Make sure that the a container and let the water flow out temperature is higher than 0 of the hose. °C before you use the 4. - Page 33 ENGLISH Problem Possible solution Make sure that the appliance door is closed. Make sure that there is not a damaged fuse in the fuse box. Make sure that the Start/Pauze has been touched. If the delay start is set, cancel the setting or wait for the end of countdown.
- Page 34 Problem Possible solution There is water on the Make sure that the couplings of the water hoses are tight and floor. there is not water leakages. Make sure that the drain hose have no damages. Make sure you use the correct detergent and the correct quan- tity of it.
-
Page 35: Consumption Values
ENGLISH After the check, activate the appliance. The programme continues from the point of interruption. If the problem occurs again, contact the Authorised Service Centre. If the display shows other alarm codes. Deactivate and activate the appliance. If the problem continues, contact the Authorised Service Centre. 13.3 Emergency door opening To open the door, proceed as follows: 1. -
Page 36: Technical Data
Programmes Load Energy Water Approxi- Remain- (kg) consump- consump- mate pro- ing mois- tion (kWh) tion (litre) gramme ture (%) duration (minutes) Katoen 60°C 1.65 Katoen 40°C 1.25 Synthetica 40°C 0.78 Fijne Was 40°C 0.60 Wol/Zijde 30°C 0.35 Standard cotton programmes 0.814... -
Page 37: Accessories
Only appropriate 16.3 Fixing plate kit accessories approved by AEG ensure the safety If you install the appliance on a plinth, standards of the appliance. If secure the appliance in the fixing plates. unapproved parts are used,... - Page 38 www.aeg.com...
- Page 39 ENGLISH...
- Page 40 www.aeg.com/shop...