
Related Manuals for LG FG105


Summary of Contents for LG FG105
- Page 1 ENGLISH GPRS Phone USER’S MANUAL MODEL: FG105 Please read this manual carefully before operating your mobile phone. Retain it for future reference.
- Page 2 Introduction Congratulations on your purchase of the advanced and compact FG105 cellular phone, designed to operate with the latest digital mobile communication technology. This user’s guide contains important information on the use and operation of this phone. Please read all the information carefully for optimal performance and to prevent any damage to or misuse of the phone.
- Page 3 Exposure to radio frequency energy Radio wave exposure and Specific Absorption Rate (SAR) information This mobile phone model FG105 has been designed to comply with applicable safety requirement for exposure to radio waves. This requirement is based on scientific guidelines that include safety margins designed to assure this safety of all persons, regardless of age and health.
- Page 4 Guidelines for safe and efficient use Product care and maintenance Warning: Use only batteries, charger and accessories approved for use with this particular phone model. The use of any other types may invalidate any approval or warranty applying to the phone, and may be dangerous. •...
- Page 5 Fuse Replacement Always replace a blown fuse with a fuse of the same type and size. Never use a fuse of a higher rating. Efficient phone operation To enjoy optimum performance with minimum power consumption please: • Hold the phone as you speak to any other telephone. While speaking directly into the microphone, angle the antenna in a direction up and over your shoulder.
- Page 6 Guidelines for safe and efficient use Road safety Check the laws and regulations on the use of mobile phones in the areas when you drive. • Do not use a hand-held phone while driving. • Give full attention to driving. •...
- Page 7 Unlike other battery systems, there is no memory effect that could compromise the battery’s performance. • Use only LG batteries and chargers. LG chargers are designed to maximize the battery life. • Do not disassemble or short-circuit the battery pack.
-
Page 8: Table Of Contents
Contents Overview ..............Part of the Phone • Main body of the Phone ............12 • Outside of the Phone ............13 ............... Key Description • Side of the Key ..............15 • Letter Keys ................16 Display Information ..............Display Information •... - Page 9 ................. Access Codes • PIN code (4 to 8 digits) ............27 • PIN2 code (4 to 8 digits) ............27 • PUK code (4 to 8 digits) ............27 • PUK2 code (4 to 8 digits) ............27 • Security code (4 to 8 digits) ........... 27 Accessing the Menu ................
- Page 10 Contents • General [Menu 3-3] ............... 52 • Loud [Menu 3-4] ..............52 • Headset [Menu 3-5] ............... 52 • Car [Menu 3-6] ..............52 ..............Settings [Menu 4] • Date & Time [Menu 4-1] ............55 • Phone settings [Menu 4-2] ............ 55 •...
- Page 11 • Go to URL [Menu 7-4] ............80 • Cache settings [Menu 7-5] ............ 80 • Cookies settings [Menu 7-6] ........... 80 • Security certification [Menu 7-7] ..........80 • Reset profiles [Menu 7-8] ............80 • Browser version [Menu 7-9] ..........80 ..............
-
Page 12: Part Of The Phone
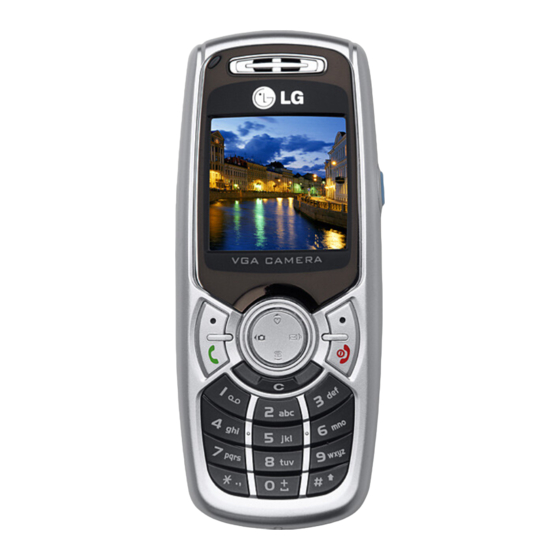
Part of the Phone Main body of the Phone Earpiece Display Screen Message key Soft Left Key Soft Right Key Send Key End/Power Key Clear/Cancel Key Numeric Keys Star Key Hash Key Microphone... -
Page 13: Outside Of The Phone
Outside of the Phone Handstrap Hole Battery Lock Battery SIM Card Socket Battery Terminals Cable Connector/ Battery Charging Connector/ Hands-Free Car kit Connector... -
Page 14: Key Description
Key Description The following shows key components of the phone. Keypad Description Description Soft Left Key / Soft Right Key Each of these keys performs the function indicated by the text on the display immediately above it. Message key You can go to Message menu (Inbox, Voice mail, Scheduler or Alarm) directly. -
Page 15: Side Of The Key
Description You can delete the characters, go back the menu. In addition, you can view voice memo list when you press this key shortly in a standby mode. Side of the Key Description Up/Down Side Key When you open the flip, you can control the volume of key tone in the standby mode and the volume during a call. -
Page 16: Letter Keys
Key Description Letter Keys Each key can be used for several symbols. There are shown below. Description . , / ? ! - : ' " 1 A B C 2 Ä À Á Â Ã Å Æ Ç a b c ä à á â ã å æ ç D E F 3 Ë... -
Page 17: Display Information
Display Information The screen displays several icons. There are described below. On-Screen Icons Icon/Indicator Description Tells you the strength of the network signal. Call is connected. You can use GPRS service. Shows that you are using a roaming service. Line 1/2 is in use for outgoing calls – if you subscribe to the Two Line Service. -
Page 18: Installation
Installation 1. Inserting the SIM Card Locate the SIM card socket in the back of the phone. Follow the steps below to install the SIM card. 1. Remove the battery if attached. 2. Slide the SIM card into the slot, under the silvery holders, with the golden connectors facing down. -
Page 19: Installing The Battery
3. Installing the Battery 1. Position the lugs on the bottom of the battery into the retaining holder. 2. Then push to the half of the battery into position. 4. Charging the Battery To connect the travel adapter to the phone, you must have installed the battery. -
Page 20: Disconnecting The Charger
Installation Warning • Do not force the connector as this may damage the phone and/or the travel adapter. Note • “Battery Charging” is displayed on the screen after connecting the travel adapter. Only if the battery is totally empty, Call indicator Light is on without displaying “Battery Charging”... -
Page 21: Making And Answering Calls
Making and Answering Calls Making a call 1. Key in phone number including the area code. If you want to delete number, press 2. Press to call the number. 3. Press to end the call. International Calls 1. Press and hold the key for the international prefix. -
Page 22: In Call Menu
In call Menu The menu displayed on the handset screen during a call is different to the default main menu reached from the idle screen, and the options are described here. 1 During a call 1-1 Putting a Call on Hold When a call is made or answered, press the S [Send] to place it on hold. - Page 23 1-4 Answering an Incoming Call To answer an incoming call when the handset is ringing, simply press the [Send] key. The handset is also able to warn you of an incoming call while you are already in a call. A tone sounds in the earpiece, and the display will show that a second call is waiting.
-
Page 24: Multiparty Or Conference Calls
In call Menu 1-7 Switching DTMF Tones on During a Call To turn DTMF tones on during a call, for example, to allow your handset to make use of an automated switchboard, select [Options], then DTMF On. DTMF tones can be turned off the same way. - Page 25 2-1 Making a Second Call You can make a second call while you are already in a call. To do this, enter the second number and press S [Send]. When you get second call the first call is automatically put on hold. You can swap between calls by selecting [Options] then Swap.
- Page 26 In call Menu 2-7 Putting a Member of a Multiparty Call on Hold To place one selected caller (whose number is currently displayed on-screen) of a multiparty call on hold, select [Options] then Multiparty / Exclude. 2-8 A Private Call in a Multiparty Call To have a private call with one caller of a multiparty call, display the number of the caller you wish to talk to on the screen, then select [Options] and Multiparty / Private to put all the other callers on...
-
Page 27: Access Codes
Access Codes You can use the access codes described in this section to avoid unauthorized use of your phone. The access codes (except PUK and PUK2 codes) can be changed by using [Menu 4-4-5]. PIN code (4 to 8 digits) The PIN (Personal Identification Number) code protects your SIM card against unauthorized use. -
Page 28: Menu Tree
Menu Tree 1 Messages 3 Profiles 1 Write text message 1 Vibrate only 2 Write multimedia message 2 Quiet 3 Inbox 3 General 4 Outbox 4 Loud 5 Drafts 5 Headset 6 Listen to voice mail 6 Car 7 Info message 8 Templates 9 Settings 4 Settings... - Page 29 6 Fun & Tools 8 Applications 1 Favorites 1 Applications 2 Games 2 Download 3 Calculator 3 Profles 4 My folder 5 Unit converter 6 World time 7 Voice recorder 9 SIM Service 8 Memory status This menu depends on SIM and the network services.
-
Page 30: Messages [Menu 1]
Messages [Menu 1] This menu includes functions related to SMS (Short Message Service), MMS (Multimedia Message Service), voice mail, as well as the network’s service messages. Write text message [Menu 1-1] You can write and edit text message, checking the number of message pages. - Page 31 • Save Stores messages in Outbox. • Font You can select Size and Style of fonts. • Colour You can select Colour of foreground and background. • Alignment You can make the message contents aligned Right, Centre or Left. • Add T9 dictionary You can add your own word.
-
Page 32: Write Multimedia Message [Menu 1-2]
Messages [Menu 1] Insert • Symbol You can add special characters. • Picture You can insert the Default pictures or pictures in My folder that are available for short messages. • Sound You can insert sounds that are available for short messages. •... - Page 33 Options • Send You can send multimedia messages to multiple recipients, prioritise your message, and make it sent later as well. • Preview You can preview multimedia messages you wrote. • Save You can save multimedia messages in the drafts or as templates. •...
- Page 34 Messages [Menu 1] • Add T9 dictionary You can add your own word. This menu can be shown only when edit mode is Predictive (T9Abc/T9abc/T9ABC). • T9 languages Select a T9 input mode. • Exit You can back to the Message menu. Note •...
- Page 35 How to Use T9 T9 allows you to input text quickly. In T9, you only need to press the key with the corresponding letter once. This is based on a built-in dictionary to which you can also add new words. •...
- Page 36 Messages [Menu 1] Alternatively : Press * key and select insert symbols. Select the desired character and press Select. 2. When you have finished writing a word, check whether the word is correct. If the word is correct : Press 0 and write the next word. If the word is not correct : Search by U , D (Previous and Next word).
-
Page 37: Inbox [Menu 1-3]
Inbox [Menu 1-3] You will be alerted when you have received messages. They will be stored in Inbox. In Inbox, you can identify each message by icons. For detail, see the icon directive. Icon directive ] Multimedia message ] Short message ] SIM message ] Read ] Notified multimedia message... -
Page 38: Outbox [Menu 1-4]
Messages [Menu 1] Forward You can forward the selected message to another party. Return call You can call back to the sender. Delete You can delete the current message. Extract You can extract picture, sound and text. They will be saved in My folder or Phonebook. - Page 39 Icon directive ] Sent ] Failed ] Delivery confirmed ] SMS sent ❇ When you already sent the message: Forward You can forward the current message to other recipients. Delete You can delete the current message. View information You can view information about outbox messages; Recipient’s address, Subject (only for Multimedia message), Message date &...
-
Page 40: Drafts [Menu 1-5]
Messages [Menu 1] View information You can view information about outbox messages. Drafts [Menu 1-5] You can view the messages saved as a draft. The draft messages are listed with the date and time when they were saved. Scroll through the list using up/down navigation keys. Icon directive ] Multimedia message ] Text message... -
Page 41: Listen To Voice Mail [Menu 1-6]
Listen to voice mail [Menu 1-6] You can listen to voice mail. Info message [Menu 1-7] Info service messages are text messages delivered by the network to GSM. They provide general information such as weather reports, traffic news, taxis, pharmacies, and stock prices. Each type of information has the number;... -
Page 42: Templates [Menu 1-8]
Messages [Menu 1] Templates [Menu 1-8] Text templates [Menu 1-8-1] You have 11 text templates. You can change the predefined templates into your favorite ones or fill the <empty>s. Multimedia templates [Menu 1-8-2] You can use the following options. • Preview You can preview multimedia messages you wrote. -
Page 43: Settings [Menu 1-9]
• Add T9 dictionary You can add your own word. This menu can be shown only when edit mode is Predictive (T9Abc/T9abc/T9ABC). • T9 languages Select a T9 input mode. • Exit You can back to the Message menu. Signature [Menu 1-8-3] You can make your Signature. - Page 44 Messages [Menu 1] • SMS centre If you want to send the text message, you can receive the address of SMS centre through this menu. Multimedia message [Menu 1-9-2] • Priority You can send the message after setting the level of priority: Low, Normal and High.
- Page 45 - Bearer • Data • GPRS - Data settings Appears only if you select Data settings as a Bearer\service. IP address Dial number : Enter the telephone number to dial to access your WAP gateway. User ID Password Call type : Select the type of data call, Analogue or Digital (ISDN).
- Page 46 Messages [Menu 1] • Permitted types Personal : Personal message. Advertisements : Commercial message. Information : Necessary information. Voice mail centre [Menu 1-9-3] You can receive the voicemail if this feature is supported by your network service provider. When a new voicemail is arrived, the symbol will be displayed on the screen.
- Page 47 • Alert - Yes Your phone will beep when you have received Info service message numbers. - No Your phone will not beep even though you have received info service messages. • Languages You can select the language you want by pressing [On/Off]. Then, the info service message will be shown in the language that you selected.
-
Page 48: Call Register [Menu 2]
Call register [Menu 2] Missed calls [Menu 2-1] This menu shows recently missed numbers. You can call these numbers, save and view the date and the time. Received calls [Menu 2-2] This menu shows recently received numbers. You can call these numbers, save and view the date and the time. - Page 49 Call duration [Menu 2-5-1] This function allows you to view the duration of your Last Call, All Calls, Received calls and Dialled calls in hours, minutes and seconds. You can also reset the call timers. 1. Press < [Menu] in standby mode. 2.
- Page 50 Call register [Menu 2] Settings [Menu 2-5-3] (SIM Dependent) • Set tariff You can set the currency type and the unit price. Contact your service providers to obtain charging unit prices. To select the currency or unit in this menu, you need the PIN2 code. If you want to input , £, $ symbol, clear all currency strings and then press * key.
-
Page 51: Gprs Information [Menu 2-6]
GPRS information [Menu 2-6] You can check the amount of data transferred over the network through GPRS. In addition, you can view how much time you are online. Call duration [Menu 2-6-1] You can check the duration of Last call and All calls. You can also reset the call timers. -
Page 52: Profiles [Menu 3]
Profiles [Menu 3] In this menu, you can adjust and customize the phone tones for different events and environments. 1. Press < [Menu] in standby mode. 2. Press 3 for direct access or use L and R. 3. You can also enter this menu directly by pressing L key in standby mode. - Page 53 Note • Headset and Car profiles can be activated only when Handsfree kit or Ear microphone put on the handset. However, their properties can be personalised. Activate [Menu 3-x-1] Activates the selected Profile. Personalise [Menu 3-x-2] Each has the submenus as shown below except for Vibrate only. Call alert type Allows to select alert type such as Ring, Vibrate, etc.
- Page 54 Profiles [Menu 3] Keypad tone Allows to select the keypad tone for adjusting environment. Flip tone Allows to set the flip tone for adjusting environment. Effect sound volume Allows to set the effect sound volume for adjusting environment. Power on/off volume Allows to set the power on/off volume for adjusting environment Auto answer This function will be activated only when your phone is connected to...
-
Page 55: Settings [Menu 4]
Settings [Menu 4] You can set the following menus for your convenience and preferences. 1. Press < [Menu] in standby mode. 2. Press 4 for direct access to enter Settings. Date & Time [Menu 4-1] You can set functions relating to the date and time. Set date [Menu 4-1-1] You can enter the current date. - Page 56 Settings [Menu 4] Greeting note [Menu 4-2-2] If you select On, you can edit the text which is displayed in standby mode. Language [Menu 4-2-3] You can change the language for the display texts in your phone. This change will also affect the Language Input mode. Backlight [Menu 4-2-4] You can set the light-up duration of the internal display.
-
Page 57: Call Settings [Menu 4-3]
Call settings [Menu 4-3] You can set the menu relevant to a call by pressing < [Select] in the Setting menu. Call divert [Menu 4-3-1] The Call divert service allows you to divert incoming voice calls, fax calls, and data calls to another number. For details, contact your service provider. - Page 58 Settings [Menu 4] The submenus Call divert menus have the submenus shown below. - Activate Activate the corresponding service. To voice mail centre Forwards to message centre. This function is not shown at All data calls and All fax calls menus. To other number Inputs the number for diverting.
- Page 59 Send my number [Menu 4-3-3] (network and subscription dependent) • On You can send your phone number to another party. Your phone number will be shown on the receiver’s phone. • Off Your phone number will not be shown. • Set by network If you select this, you can send your phone number depending on two line service such as line 1 or line 2.
-
Page 60: Security Settings [Menu 4-4]
Settings [Menu 4] Auto redial [Menu 4-3-6] • On When this function is activated, the phone will automatically try to redial in the case of failure to connect a call. • Off Your phone will not make any attempts to redial when the original call has not connected. - Page 61 2. Set On/Off. 3. If you want to change the setting, you need to enter PIN code when you switch on the phone. 4. If you enter wrong PIN code more than 3 times, the phone will lock out. If the PIN is blocked, you will need to key in PUK code. 5.
- Page 62 Settings [Menu 4] • Incoming when abroad The barring service for all incoming calls when roaming • Cancel all You can cancel all barring services. • Change password You can change the password for Call Barring Service. Each call barring menu has following submenus: •...
-
Page 63: Network Settings [Menu 4-5]
Change codes [Menu 4-4-5] PIN is an abbreviation of Personal Identification Number used to prevent use by only unauthorized person. You can change the access codes: PIN2 code, Security code. 1. If you want to change the Security code/PIN/PIN2 code input your original code, and then press <... -
Page 64: Gprs Setting [Menu 4-6]
Settings [Menu 4] GPRS setting [Menu 4-6] You can set GPRS service depending on various situation. Power on [Menu 4-6-1] If you select this menu, the phone is automatically registered to a GPRS network when you switch the phone on. Starting a WAP or PC dial-up application created the connection between phone and network and data transfer is possible. -
Page 65: Organiser [Menu 5]
Organiser [Menu 5] Alarm clock [Menu 5-1] You can set up to 5 alarm clocks to go off at a specified time. 1. Select On and enter the alarm time you want. 2. Select the repeat period : Once, Mon~Fri, Mon~Sat, Everyday. 3. - Page 66 Organiser [Menu 5] Add new [Menu 5-2-1] You can edit maximum 39 characters and take up to 20 notes. • Schedule Input the subject, the schedule time, the repeat, the alarm by pressing allowed keys. • Memo 1. Select Add new by pressing < [Select]. 2.
-
Page 67: Phonebook [Menu 5-3]
Phonebook [Menu 5-3] 1. To use Phonebook, press > [Names] in standby mode. 2. To use Phonebook, press < [Menu] in standby mode and select Organiser. Search [Menu 5-3-1] (Calling from phonebook) 1. In standby mode, press > [Names]. 2. Search by pressing < [Select]. 3. - Page 68 Organiser [Menu 5] Add new [Menu 5-3-2] You can add phonebook entry by using this function. Phone memory capacity is 200 entries. SIM card memory capacity depends on the cellular service provider. You can also save 20 characters of name in The Phone memory, and save characters in the SIM card.
- Page 69 • Group ring tone Allows you to specify ring tone for the group members' call. • Group icon Allows you to select the icon dependent on Group. • Add member You can add group members. Each group member souldn’t be exceeded 20.
- Page 70 Organiser [Menu 5] Settings [Menu 5-3-5] 1. Press > [Names] in standby mode. 2. Scroll to Settings, then press < [Select]. • Set memory Scroll to highlight Set memory, then press < [Select]. - If you select Variable, when adding entry, the phone will ask where to store.
- Page 71 Copy all [Menu 5-3-6] You can copy/move entries from SIM card memory to Phone memory and vice versa. 1. Open the Phonebook first by pressing > [Names] in standby mode. 2. Scroll to Copy all, then press < [Select] to enter this menu. •...
- Page 72 Organiser [Menu 5] Information [Menu 5-3-8] • Service dial number Use this function to access a particular list of services provided by your network operator (if supported by the SIM card). 1. Open the phonebook first by pressing > [Names] in standby mode and select Information.
-
Page 73: Fun & Tools [Menu 6]
Fun & Tools [Menu 6] Favorites [Menu 6-1] You can set up to 9 menus which you have used often in Favorites. You can connect this menu directly by pressing hot key D . If you want to register the menu in favorites, select <Empty> on a list. -
Page 74: Calculator [Menu 6-3]
Fun & Tools [Menu 6] Calculator [Menu 6-3] This contains the standard functions such as +, –, x, ÷ : Addition, Subtraction, Multiplication, and Division. 1. Input the numbers by pressing numeric keys. 2. Use a navigation key to select a sign for calculation. 3. -
Page 75: Unit Converter [Menu 6-5]
• Set as Wallpaper / Set as ring tone You can set downloaded sounds or pictures as wallpaper or Ring tone. • Delete You can delete each downloaded content. • Delete all You can delete all downloaded contents. Unit converter [Menu 6-5] This converts any measurement into a unit you want. -
Page 76: Voice Recorder [Menu 6-7]
Fun & Tools [Menu 6] Voice recorder [Menu 6-7] The voice memo feature you to record up to 10 voice messages and each memo is up to 20 Seconds. Record [Menu 6-7-1] 1. You can record voice memo in Voice recorder menu and also holding down C in the standby mode. -
Page 77: Internet [Menu 7]
Internet [Menu 7] The phone supports services based on Wireless Application Protocol (WAP). You can access services supported by your network. The services menu allows you to get the information such as news, weather reports, and flight times. Home [Menu 7-1] Connect to a homepage. - Page 78 Internet [Menu 7] - Bearer You can set the bearer data service. • Data • GPRS - Data settings Appeares only if you select Data settings as a Bearer\service. IP address : Enter the IP address of the WAP gateway you want.
- Page 79 - Display image You can select whether images on WAP cards are displayed or not. - Connection type The options for connection type are Temporary or Continuous and depend on the gateway you are using. Continuous A confirmed delivery mechanism but generates more network traffic.
-
Page 80: Go To Url [Menu 7-4]
Internet [Menu 7] Go to URL [Menu 7-4] You can directly connect to the site you want. You need to enter a specific URL. Cache settings [Menu 7-5] You can remove the contents of Cache memory or change the Cache mode. Clear cache [Menu 7-5-1] The contents of Cache memory will be removed. -
Page 81: On Browsing Menu
On browsing menu If you are on line, you can view the following menus. I Home Refer to [Menu 7-1]. I Reload Reloads the current page. I Bookmarks See [Menu 7-2]. I Save as bookmark You can save a site as bookmark. I Messages During Wap connection, you can see the Short messages. -
Page 82: Applications [Menu 8]
Applications [Menu 8] Applications [Menu 8-1] Java Menu Options Scroll to an application and select Options. 1. New : You can create new folder. 2. Move : You can select a folder which you want. 3. About : Shows Java MIDP information. 4. -
Page 83: Profiles [Menu 8-3]
Profiles [Menu 8-3] Some Java applications may require a network connection to operate, for example, multiplayer games. You can set up to 5 profiles and activate the desired one. This is similar to wap profile setting. Refer to wap profiles when you set this. JAVA™... -
Page 84: Accessories
You can connect your phone to PC to exchange the data between them. Note • Always use genuine LG accessories. • Failure to do this may invalidate your warranty. • Accessories may be different in different regions; please check with our regional service company or... -
Page 85: Care And Maintenance
Care and Maintenance When using this unit, basic safety precautions as below should be always followed. • Do not disassemble this unit. (Take it to a qualified service technician when repair work is required.) • Away from electrical appliance such as a TV, radio or personal computer. - Page 86 Unlike other battery systems, there is no memory effect that could compromise the battery’s performance. • Use only LG batteries and chargers. LG chargers are designed to maximize the battery life. • Do not disassemble or short-circuit the battery pack.
-
Page 87: Technical Data
Technical Data General Product name : FG105 System : GSM 900 / DCS 1800 Ambient Temperatures Max : +55°C Min : -10°C... - Page 88 Suppliers Details Name LG Electronics Inc Address LG Electronics Inc. LG Kang-nam Tower 679, Yoksam-dong, Kangnam-gu, Seoul, Korea Product Details Product Name GSM 900 / GSM 1800 Dual Band Terminal Equipment Model Name C1100 Trade Name Applicable Standards Details R&TTE Directive 1999/5/EC...
- Page 89 Safety Information 1 . SAFETY INFORMATION FOR FIXED WIRELESS TERMINALS .POTE NTIALLY EXPLOSIVE ATMOSPHERES Turn your phone OFF when in any area with a potentially explosive atmosphere and obey all signs and instructions. Sparks in such areas could cauls e an explosion or fire resulting in bodily injury or even death.
- Page 90 SAR INFORMATION THIS MODEL PHONE MEETS THE GOVERNMENT’S REQUIREMENTS FOR EXPOSURE TO RADIO WAVES. Your wireless phone is a radio transmitter and receiver. It is designed and manufactured not to exceed the emission limits for exposure to radiofrequency (RF) energy set by the Federal Communications Commission of the U.S.
- Page 91 U.S.A. U.S.FEDERAL COMMUNICATIONS COMMISSION RADIO FREQUENCY INTERFERENCE STATEMENT INFORMATION TO THE USER NOTE : This equipment has been tested and found to comply with the limits for a Class B digital device pursuant to Part 15 of the FCC Rules. These limits are designed to provide reasonable protection against harmful Interference in a residential installation This equipment generates, uses, and can radiate radio frequency energy and, if Not installed and used in accordance with the instructions, may cause harmful Interference to radio communications.