LG Optimus F3 User Manual
Hide thumbs
Also See for Optimus F3:
- User manual (191 pages) ,
- Start manual (74 pages) ,
- Quick start manual (32 pages)
Table of Contents
Advertisement
Quick Links
Download this manual
See also:
Quick Reference Manual
User Guide
© 2013 Sprint. Sprint and the logo are trademarks of Sprint. Other marks are trademarks of their
respective owners.
All materials in this guide including, without limitation, the design, the text, and any marks are
the property of LG Electronics, Inc. Copyright © 2013 LG Electronics, Inc. ALL RIGHTS
RESERVED. LG and the LG logo are registered trademarks of LG Electronics, Inc. LG Optimus
®
F3 is a trademark of LG Electronics, Inc. The Bluetooth
word mark and logos are registered
trademarks owned by Bluetooth SIG, Inc. microSD™ is a trademark of SanDisk. Other
trademarks and trade names are those of their respective owners. Unless otherwise specified
herein, all accessories referenced herein are sold separately. All features, functionality, and
other product specifications are subject to change. Screen shots are simulated and subject to
change.
Advertisement
Table of Contents

Related Manuals for LG Optimus F3


Summary of Contents for LG Optimus F3
-
Page 1: User Guide
All materials in this guide including, without limitation, the design, the text, and any marks are the property of LG Electronics, Inc. Copyright © 2013 LG Electronics, Inc. ALL RIGHTS RESERVED. LG and the LG logo are registered trademarks of LG Electronics, Inc. LG Optimus ®... -
Page 2: Important Messages
Important Messages IMPORTANT: If the account type you want to set up is not in the phone database, you will be asked to enter more details. Contact your email service provider or your company's Exchange Server administrator for your email settings and additional information. -
Page 3: Table Of Contents
Table of Contents Get Started ..........................1 Your Phone at a Glance ...................... 1 Set Up Your Phone ......................1 Activate Your Phone ......................2 Make Your First Call ......................3 Set Up Your Voicemail ......................4 Sprint Account Information and Help ................... 4 Sprint Account Passwords ................... - Page 4 Home Screen Clean View ...................31 Change the Screen Orientation...................31 Enter Text ..........................31 Google Voice Typing ....................32 LG Keyboard ......................32 Swype .........................35 Tips for Editing Text ......................36 Search Your Phone and the Web ..................37 Phone and Web Search Using Text Entry ..............37 Phone and Web Search Using Voice Command ............38...
- Page 5 Configure Visual Voicemail Settings ................47 Change Your Main Greeting via the Voicemail Menu ..........48 Edit the Display Name via the Voicemail Menu ............48 Voicemail (Traditional) .......................49 Set Up Voicemail ......................49 Voicemail Notification ....................50 Retrieve Your Voicemail Messages ................50 Phone Call Options ......................51 Caller ID ........................51 Call Waiting ........................51 3-way Calling ......................51...
- Page 6 Access Gmail ......................70 Send a Gmail Message ....................72 Read and Reply to Gmail Messages ................73 Change Gmail Settings ....................75 Email ..........................76 Add an Email Account ....................77 Corporate Email ......................78 Open Email .........................79 Create and Send Email ....................79 Reply to or Delete an Email Message .................80 Configure and Sync Corporate Email Settings ............80 Text and Multimedia Messaging..................82 Compose Text Messages ...................83...
- Page 7 Google Maps™ ......................100 Scout by Telenav ....................103 Google Navigation ....................104 LG Tag+ .......................... 104 Web and Data ......................... 106 Connect Wi-Fi ........................106 Turn Wi-Fi On and Connect to a Network ..............106 Add a Wi-Fi Network ....................107 Wi-Fi Direct .......................
- Page 8 Assign Pictures ......................119 Record Videos ......................... 120 Video Settings ......................120 Gallery Options for Videos ..................121 Video Wiz ........................122 Tools and Calendar ......................... 124 VuTalk ..........................124 QuickMemo ........................126 Capture the Screen ......................128 QSlide ..........................128 SmartShare ........................
- Page 9 Airplane Mode ......................148 Wi-Fi Settings ......................149 Bluetooth Settings..................... 149 Mobile Data ......................149 Call Settings ........................149 Incoming Call Popup ....................149 Call Reject ........................ 149 Decline with Message ....................150 Privacy Keeper ......................150 Power Button Ends Call .................... 150 North American Dialing .....................
- Page 10 Sound Settings ......................158 Ringtones and Notifications ..................160 Touch Feedback & System ..................161 Display Settings ......................162 Home Screen ......................164 Lock Screen......................165 Storage ........................168 Battery ........................168 App Settings ......................169 Personal Settings ......................170 Accounts &...
-
Page 11: Get Started
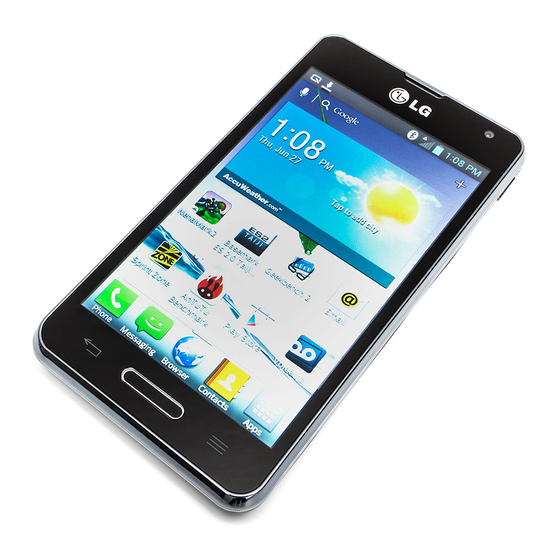
Get Started This section gives you all the information you need to set up your phone and Sprint service for the first time. Your Phone at a Glance The following illustration outlines your phone‟s primary external features and buttons. Set Up Your Phone You must first install and charge the battery to begin setting up your phone. -
Page 12: Activate Your Phone
2. Charge your phone. Connect the charging adapter and USB cable as shown; the LG logo on the charging adapter should face toward you. Plug one end of the USB cable into the phone's Charger/Accessory Port and the other end into an electrical outlet. -
Page 13: Make Your First Call
When you turn the phone on for the first time, you should see a Hands Free Activation screen, which may be followed by a PRL Update screen and a Firmware Update screen. Follow the onscreen instructions to continue. ● If you received your phone in the mail and you are activating a new phone for an existing number on your account (you‟re swapping phones), you can activate on your computer online or directly on your phone. -
Page 14: Set Up Your Voicemail
Note: Your phone's battery should have enough charge for your phone to turn on and find a signal, set up your voicemail, and make a call. You should fully charge your battery as soon as possible. Set Up Your Voicemail Your phone automatically transfers all unanswered calls to your voicemail, even if your phone is in use or turned off. -
Page 15: Manage Your Account
Data Services Password With your Sprint phone, you may elect to set up an optional data services password to control access and authorize Premium Service purchases. For more information, or to change your passwords, sign on to www.sprint.com or call Sprint Customer Service at 1-888-211-4727. - Page 16 Sprint 411 Sprint 411 gives you access to a variety of services and information, including residential, business, and government listings, movie listings or showtimes, driving directions, restaurant reservations, and major local event information. You can get up to three pieces of information per call, and the operator can automatically connect your call at no additional charge.
-
Page 17: Phone Basics
Phone Basics Your phone is packed with features that simplify your life and expand your ability to stay connected to the people and information that are important to you. The topics in this section will introduce the basic functions and features of your phone. Phone Software Upgrades –... - Page 18 16. Proximity Sensor senses proximity towards other objects (such as your head) so that touch commands are not accidentally activated during a call. Note: Please be careful not to cover the sensor with a protective film, pouch, or a protective case not authorized by LG. Phone Basics...
-
Page 19: Status Bar
Rear View 1. Back-Facing Camera Lens lets you take pictures and record videos. 2. Flash helps you take pictures and video in dim lighting. 3. Speaker lets you hear the different ringers and sounds. The speaker also lets you hear the caller„s voice in speakerphone mode. - Page 20 If you have more notifications than can fit in the Status Bar, the icon prompts you to open the Status Bar to view them all. (See Notifications Panel.) The following list identifies the symbols you„ll see on your phone's display screen: Status Icons Icon Status...
- Page 21 Icon Status Battery Full – Shows your current battery charge level. (Icon shown is fully charged.) Battery Charging – Indicates that battery is charging. Alarm Clock – Indicates that an alarm is set. NFC Activated – Indicates that NFC is activated. Android Beam Activated –...
-
Page 22: Turn Your Phone On And Off
Icon Notification USB Connected – The phone has detected an active USB connection. USB Debugging Connected – The phone has detected an active USB connection and is in a USB Debugging mode. More Notifications Not Displayed – Indicates that there are more notifications which are not displayed in the Status Bar. -
Page 23: Lock And Unlock Your Phone
If your phone is unable to find a signal after 15 minutes of searching, a Power Save feature is automatically activated. When a signal is found, your phone automatically returns to standby mode. In Power Save mode, your phone searches for a signal periodically without your intervention. You can also initiate a search for Sprint service by pressing any key (when your phone is turned on). -
Page 24: Battery And Charger
(such as a pattern, PIN, or password) that will need to be entered to unlock it. Battery and Charger Sprint-approved or LG-approved batteries and accessories can be found at Sprint Stores or through LG, or call 1-866-866-7509 to order. They„re also available at www.sprint.com. - Page 25 Always use a Sprint-approved or LG-approved desktop charger, travel charger, or vehicle power adapter to charge your battery. 1. Connect the charging adapter and USB cable as shown; the LG logo on the charging adapter should face toward you. 2. Plug one end of the USB cable into the phone's Charger/Accessory Port and the other end into an electrical outlet.
-
Page 26: Extend Your Battery Life
The USB hub should be powered by an external power source. Note: Low-power USB ports are not supported, such as the USB port on your keyboard or bus- powered USB hub. The LG USB Driver is downloadable from the following site: http://www.lg.com/us/ >... -
Page 27: Phone Function Keys
Battery Charge Level Press > > System settings > About phone > Battery. The battery status (charging or discharging) and level (as a percentage of fully charged) are displayed. Monitor and Control Battery Use The Battery use screen shows which applications consume the most battery power. You can also use it to turn off applications that you„ve downloaded, if they are consuming too much power. - Page 28 Some applications have more Options menu items than can fit in the options menu; tap More to open the additional items. Context Menus Context menus contain options that apply to a specific item on the screen. To open a Context menu, touch and hold an item on the screen.
-
Page 29: Notifications Panel
3. Tap Sound. 4. Slide the screen up to display more menus. 5. Tap Dial pad touch tones to checkmark it. For the purposes of this guide, the above steps condense into: ► Press > > System settings > Sound > Dial pad touch tones. Back Up Within a Menu ►... -
Page 30: Home Key
For example, new voicemail notifications dial your voicemail box, and network disconnect notifications open the list of configured networks so you can reconnect. Clear Notifications 1. Open the Notifications Panel. 2. Tap at the top right of the panel. All event-based notifications will be cleared; ongoing notifications will remain in the list. Close Notifications ►... -
Page 31: Your Home Screen
Home screen to reposition them, as described in Change the Phone’s Wallpaper, or drag the Notifications Panel open, as described in Notifications Panel. ● Swipe or slide: To swipe or slide, quickly move your finger across the surface of the screen, without pausing when you first touch it (so you don‟t drag an item instead). -
Page 32: Extended Home Screen
To return to the Home screen: ► Press at any time, from any application Extended Home Screen The operating system provides multiple Home screen canvases to provide more space for adding icons, widgets, and more. ► Slide your finger left or right across the Home screen. The default canvas is in the center with three extension canvases on either side of it. -
Page 33: Use The Applications Key
Use the Applications Key All of your phone„s applications are located within the Applications screen. This key accesses shortcuts to your currently available applications. Note: The Applications screen houses all default and downloaded applications (installed from Play Store). 1. Press >... - Page 34 Note: The Applications screen closes automatically when you tap an icon to open its application. Dragging an icon onto your Home screen also closes the Applications screen automatically. Open and Switch Applications Multi-tasking is easy with Android™. Opened applications can keep running in the background when you open another application.
-
Page 35: Applications
Backup – Allows you to perform backup and restore all your user data on the phone to your memory card or internal storage. You can back up components of the LG Home screen, contacts, calendar events, messages, LG applications, Settings, and downloaded applications. - Page 36 Now. Google+ – Share and keep up with all the different people in your life. LG Tag+ – Launches the LG Tag+ application. Local – Allows you to discover and share places using the location-based service. Maps – Launches a dynamic map that helps you find local businesses, locate friends, view maps and get driving directions.
-
Page 37: Customize Your Home Screen
Icon Description Sprint Zone – Accesses the Sprint Zone application. Talk – Launches the Google Talk application that lets you chat with family and friends over the Internet for free. Task Manager – Allows you to view running applications, memory usage of them, and stop running or uninstall applications. -
Page 38: Add And Remove Widgets On The Home Screen
1. Press to access the Home screen. 2. Select a location (screen) for your new shortcut by scrolling across your available screens until you reach the desired one. (See Home Screen.) 3. Tap to reveal all your current applications. By default, the applications are listed in a grid view. -
Page 39: Change The Phone's Wallpaper
3. Tap the Widgets tab. 4. Touch and hold an available Widget and drag it to your current screen. To remove a Widget: 1. Go to the Home screen on which the widget is located. 2. Touch and hold the widget. This unlocks it from its location on the current screen. 3. -
Page 40: Customize Applications Icons On The Home Screen
Customize Applications Icons on the Home Screen You can customize each application icon on the Home screen. 1. Touch and hold an application icon until it„s unlocked from its current position. Then drop it on the screen. The editing icon will appear in the upper right corner of the application. -
Page 41: Access Recently-Used Applications
2. Tap Auto-rotate screen to enable (a blue checkmark displays) or disable the screen auto-rotation. Enter Text You can enter text using Google voice typing, LG Keyboard or Swype input methods. While entering text, you will see on the Status Bar. -
Page 42: Google Voice Typing
2. Speak into the phone's microphone and watch your text being entered on screen. 3. If the text is incorrect, tap the word and correct it. LG Keyboard QWERTY keyboard, Phone keyboard, and Handwriting are available. To change the keyboard: 1. - Page 43 QWERTY Keyboard 1. Tap a text field where you want to enter text. 2. Enter the desired text. To enter numbers or symbols, tap To enter letters again, tap Phone Basics...
- Page 44 Note: If you do not want the screen to change orientations automatically, uncheck the Auto- rotate screen. Press > > System settings > Display and deselect Auto- rotate screen. 3. When you have finished typing, tap to close the keyboard. Phone Keyboard To enter text, tap the key labeled with the desired letter until it appears on the screen.
-
Page 45: Swype
Handwriting Write the text with your fingertip. The touchscreen converts your movements into characters. Swype The Swype™ keyboard lets you enter words by drawing a path from letter to letter in one continuous motion. When you lift your finger after the last letter of a word, a space is automatically added. -
Page 46: Tips For Editing Text
1. Pull down the Status Bar and tap Choose input method > Swype. 2. Put your finger on the first letter of the word and draw a path from letter to letter, lifting your finger up after the last letter. For more information about using Swype and its additional capabilities, including using voice entry and personalizing your Swype dictionary, touch and hold from the Swype keyboard... -
Page 47: Search Your Phone And The Web
5. Touch and hold the text field and tap Paste. The text that you pasted also remains in the phone's memory (temporarily), so you can paste that same text in another location. Search Your Phone and the Web You can search for information on your phone and on the web using the Search application. Some applications, such as Gmail, Contacts, and Browser have the ability to search contents within those specific applications. -
Page 48: Phone And Web Search Using Voice Command
You can use the Search preferences to configure some aspects of Google web search (for example, whether it makes suggestions below the search field as you type), and what phone features you want to include in searches. To access these settings, tap >... - Page 49 ● Say “Navigate to,” followed by an address, name, business name, type of business, or other destination to get spoken, turn-by-turn directions to that destination. ● Say “Map of,” followed by an address, name, business name, type of business, or other location, to view that location on Google Maps.
-
Page 50: Phone Calls
Phone Calls With the Sprint National Network and your phone, you can enjoy clear calling across the country. Make Phone Calls There are several convenient ways to place calls from your phone. Call Using the Phone Dialer The most "traditional" way to place a call is by using the phone's dialer screen. 1. -
Page 51: Dialing Options
Tip: To redial your last outgoing call, follow step 1 to access the Dialer, tap the Call logs tab, locate the call entry and tap You can also make calls from your Contacts list, from the Call logs, and using Voice Command. -
Page 52: In-Call Options
– or – 1. Touch and hold on the lock screen. 2. Tap To call the 911 emergency number normally or when your account is restricted: 1. Unlock the screen. For more information, see Wake Up the Screen. 2. Press >... -
Page 53: Dial And Save Phone Numbers With Pauses
● Speaker to turn the speakerphone on or off. The Speaker button lights up to indicate that the speakerphone is on. WARNING: Because of higher volume levels, do not place the phone near your ear while using the speakerphone. Dial and Save Phone Numbers With Pauses You can dial or save phone numbers with pauses for use with automated systems, such as voicemail or credit card billing numbers. -
Page 54: Use Direct Dialing
Use Direct Dialing With Direct Dialing, you are able to directly save a contact to your Home screen. 1. Touch and hold an empty area on a Home screen. 2. Tap the Widgets tab. 3. Scroll right and tap Direct dial. 4. -
Page 55: Answer A Roam Call With Call Guard Enabled
Reject an Incoming Call ► If the screen is locked, swipe in any direction. ► If the screen is unlocked, tap to decline the call. The caller is sent directly to your voicemail box to leave a message. Answer a Roam Call With Call Guard Enabled Call Guard is an option that helps you manage your roaming charges when making or receiving calls while outside the Nationwide Sprint Network. -
Page 56: Review Visual Voicemail
1. Press > > Voicemail. 2. Tap Personalize now and follow the system prompts to: Create a password (part of standard voicemail). Record your name announcement. Record your greeting. 3. When prompted to enter information, tap Dialpad to bring up the onscreen dialpad to enter your numeric responses. -
Page 57: Listen To Multiple Voicemail Messages
Share to share the selected message using your favorite services like Email, Text, and direct to Voicemail. Reply to reply to the message. You can then reply to the sender or forward it to anyone with either an email or phone number. This allows you to send this voicemail message to several recipients at the same time. -
Page 58: Change Your Main Greeting Via The Voicemail Menu
Manage subscription to verify Voicemail-to-Text account information. This may take a minute. Auto forward to email to send a copy of new messages to an email address of your choice. Personalize voicemail to change your voicemail greeting for incoming calls and update password. -
Page 59: Voicemail (Traditional)
1. Press > > Voicemail. 2. Tap > Settings > Display name. 3. Tap the text field and enter a new identifying name (used to identify you to recipients of your voice messages). 4. Tap OK to save your information. Use Visual Voicemail to Delete Your Messages 1. -
Page 60: Voicemail Notification
Voicemail Notification There are several ways your phone alerts you to a new voicemail message. ● By sounding the assigned ringer type. ● By displaying within the Notifications area of the Status Bar when a single new unheard voicemail message is received. ●... -
Page 61: Phone Call Options
Phone Call Options Your phone application provides many useful features and options to help you make the most of your calling experience. Caller ID Caller ID allows people to identify a caller before answering the phone by displaying the number of the incoming call. -
Page 62: Call Forwarding
3. Once you have established the connection, tap Add call 4. Enter the second caller„s phone number and tap or select a number from your Contacts. (Your first call is automatically put on hold.) 5. When you„re connected to the second party, tap Merge calls to combine both calls into a single 3-way call. - Page 63 ● Add call to initiate a 3-way call. ● End to end the current call. ● Dialpad to display the dialpad to enter additional numbers, for example, an extension or access code. For example: When you call your bank‟s 800 number, use your dialpad to enter your account number and PIN.
-
Page 64: Set Up Speed Dialing
When the call is routed to a Bluetooth headset, the current call area shows the Bluetooth call icon ( Note: The Headset button is activated to show the current call is routed to the connected Bluetooth headset. To route the current call back to the phone, tap Bluetooth to temporarily use the phone. - Page 65 Calls are listed in the Call logs tab, the most recent calls are located at the top of the list. Scroll down to see older entries. Note: Call logs record only calls that occur while the phone is turned on. If a call is received while your phone is turned off, it will not be included in the call logs.
- Page 66 ● Copy call number to copy the call number. ● Delete call log to delete all the call logs. ● Delete all logs of this number to delete all the logs of this number only. Make a Call from the Call Logs ►...
-
Page 67: Save A Phone Number
2. If you are certain you want to clear the Call logs, tap Yes. – or – Tap No. Save a Phone Number You can store phone numbers and contact entries in your phone. You can also synchronize them with your Google Account, Microsoft Exchange account, or other accounts that support syncing contacts. - Page 68 Activate Voice Command ► Press > > Voice Dialer. The screen displays “Listening...” and the phone prompts you to say the name of the command you want to use. To complete your task, simply follow the voice prompts or touch an on-screen option.
-
Page 69: Text-To-Speech
3. Speak naturally and clearly and remember to speak one digit at a time (1-800 should be pronounced “One Eight Zero Zero.”) Open Menus with Voice Command The Voice Command application allows you to directly open many menu items or applications by saying voice commands. -
Page 70: Contacts
Contacts The Contacts application lets you store and manage contacts from a variety of sources, including contacts you enter and save directly in your phone as well as contacts synchronized with your Google Account, your PC, compatible email programs (including Exchange Server), and your Facebook friends. -
Page 71: Add A Contact
● Edit tabs: Allows you to edit the tabs on the Contacts screen and rearrange items. ● Settings: Allows you to set various call settings. Add a Contact You can add contacts on your phone and synchronize them with the contacts in your Google™ Account, Microsoft Exchange account, or other accounts that support syncing contacts. -
Page 72: Add A Contact To Your Favorites
Add a Contact to Your Favorites Favorites contains a short list of the contacts you communicate with most often. 1. Press > > 2. Tap a contact to view its details. 3. Tap the star to the right of the contact's name. (A gold star appears.) To remove a contact from your favorites list: 1. - Page 73 from the Google Account are synced to that account on the web, but the information from the Exchange account will remain unchanged. For more information about working with multiple accounts, see Synchronize Accounts. Edit Contact 1. Press > > 2. Touch and hold the contact whose details you want to edit. 3.
- Page 74 3. Tap > Delete. If the contact contains information from a read-only account, you will not be able to delete it; you will only be able to change the sync settings for that account or delete the account itself. ...
-
Page 75: Communicate With Your Contacts
Note: If there is no available space on a particular Home screen canvas, you must delete or remove an item before you can add another item. In this case, you have the option of switching to another Home screen canvas. To use direct dial: ►... - Page 76 1. Tap a contact's picture to open Quick Contact for Android. 2. Tap the icon corresponding to the type of communication you want to start. Depending on the contact information saved, the available actions will be displayed above the name. To communicate with a contact: 1.
-
Page 77: Import, Export, And Share Contacts
(For more information about placing phone calls, see Make Phone Calls.) For more information about sending text and multimedia messages, see Text and Multimedia Messaging. Import, Export, and Share Contacts If you have contacts stored in vCard format on the phone's internal storage, you can import them into your Contacts application on your phone. - Page 78 3. Tap > Share. 4. Choose the method for sending. Contacts...
-
Page 79: Accounts And Messaging
Accounts and Messaging With Sprint service and your phone„s messaging capabilities, you have the opportunity to share information through many different channels and accounts. Gmail This email client is Google„s web-based email service. (See Synchronize Your Google Account.) From a computer, launch your preferred web browser and navigate to www.gmail.com. Depending on your synchronization settings, Gmail (along with calendar events, phone numbers and other contact information) on your phone is automatically synchronized between your phone and your Gmail account on the web. -
Page 80: Access Gmail
4. Tap 5. Select Join Google+ to join or Not now to skip this step and join later. 6. Read the disclaimer about Backup and restore and checkmark the box to keep the phone backed up with the Google Account. Then, tap Next. Your phone then communicates with the Google servers to confirm your information. - Page 81 View Your Gmail Inbox when Gmail is Running ► If you are viewing a message or another label, tap until you return to your Inbox. You can also tap and select Inbox. Add Another Google Account 1. From your Gmail Inbox, tap >...
-
Page 82: Send A Gmail Message
When you open a conversation, the first unread or starred message is displayed. If you want to contact the sender, tap the Contact's picture ID to open Quick Contact. (See Communicate with Your Contacts.) When reading messages in a conversation, you can use the buttons at the bottom of the screen to archive the entire conversation or delete it. -
Page 83: Read And Reply To Gmail Messages
2. Tap Note: This will start the message from your default Gmail account. To send it from another account, on the Accounts screen, tap the triangle icon by the email account, then tap the account you want to use. 3. Enter a recipient's address. As you enter text, matching addresses are displayed from your Contact list. - Page 84 The message will open in a new screen where you can add or remove addresses, edit the subject, and add or remove text or attachments. You can add one or more people to an ongoing conversation by replying to all and then adding the new person's address(es) to the message.
-
Page 85: Change Gmail Settings
after the action) at the bottom of the Inbox screen to return the messages to the Inbox or appropriate label. You can also use UNDO after archiving, and reporting spam. If you never work with batches of messages, you can hide the check boxes to leave more room for the subjects of conversations. -
Page 86: Email
2. Tap > Settings. 3. Tap the account whose settings you want to modify. Priority Inbox: Checkmark to make Priority Inbox the default Inbox for this account. Notifications: Checkmark to receive a Status Bar notification when mail arrives. ... -
Page 87: Add An Email Account
Note: If you have multiple email accounts, you must configure each account with its own settings. If you want to send and receive email messages through an ISP (Internet Service Provider) account (such as Outlook), you will first need to set up an IMAP or POP account. ●... -
Page 88: Corporate Email
Important: If the account type you want to set up is not in the phone database, you will be asked to enter more details. Contact your email service provider or your company's Exchange Server administrator for your email settings and additional information. -
Page 89: Open Email
Note: Signal interruptions or incorrect username or password information can cause completion issues. 5. Read the on-screen activation disclaimer and, if prompted, tap Activate. Depending on the type of account, you might be required to set a password screen lock. 6. -
Page 90: Reply To Or Delete An Email Message
You can add as many message recipients as you want. Note: To send an additional carbon copy (Cc) or a blind carbon copy (Bcc) of the current email to other recipients, enter the recipients in the Cc or Bcc field. 3. - Page 91 3. Place a checkmark next to each option if you want the phone to automatically synchronize. If you want to manually synchronize, tap > Sync now. Configure Corporate Email 1. Press > > System settings > Accounts & sync. 2. Tap Microsoft Exchange to display the account„s synchronization settings screen. 3.
-
Page 92: Text And Multimedia Messaging
• Vibrate: Allows you to configure vibrate options for new emails. • Vibrate Type: Allows you to select the vibration type for new emails. Exchange server settings: Allows you to change the server settings for your account. 4. Tap to return to the previous screen. -
Page 93: Compose Text Messages
Compose Text Messages Quickly compose and send text messages on your phone. 1. Press > > Messaging > 2. Tap the To field and enter the recipient„s phone number or email information using the on-screen keyboard. Contacts: As you enter either a phone number or email address, if the information matches a current contact„s entry information, you will see a match. -
Page 94: Send A Multimedia Message (Mms)
Options include: Add subject, Insert smiley, Quick messages, Discard, Set priority, or Change skin. 4. Review your reply and tap Send. Send a Multimedia Message (MMS) When you need to add a little more to a text message, you can send a multimedia message (MMS) with pictures, voice recordings, audio or video files, or contact cards (vCard). -
Page 95: Save And Resume A Draft Message
Note: To remove or replace a picture or an audio attachment, on the Compose screen, tap next to the attachment. 6. When you are finished creating your new MMS message, tap Send MMS. Save and Resume a Draft Message While composing a text or multimedia message, tap to automatically save your message as a draft. -
Page 96: Delete Messages
Note: When Auto-retrieve in multimedia message settings is disabled, only the message header is downloaded. To download the entire message, tap the Download button at the right side of the message. For details, see Text and Multimedia Message Options. To reply to a text or multimedia message: 1. -
Page 97: Text And Multimedia Message Options
3. Tap the Select all checkbox at the top left corner or select individual messages, then tap Delete. 4. When prompted to confirm, tap Yes. Any locked messages in the thread will not be deleted unless you select the Delete locked messages check box. To delete a message thread: 1. - Page 98 Signature: Tap this to automatically add signature (blue checkmark displays). Callback number: Check this to automatically add callback number (blue checkmark displays). ● Text Message Set priority: Select Normal or High. Message reassembly: Enable this option (blue checkmark displays) so that multi- segment messages can be reassembled and shown as a single message.
-
Page 99: Synchronize Accounts
• Message Reminder: Enable this option if you wish the phone to remind you at every 2 minutes about the messages you haven't read. ● Quick message: Tap this to add or edit quick messages. Quick message is the specified text message to send out when you want to ignore an incoming call and respond to the caller with instead. -
Page 100: Synchronize Your Corporate Account
4. Tap the Email and Password fields and enter your information. 5. Tap . Your phone then communicates with the Google servers to confirm your information. 6. Read the disclaimer about Backup and restore and checkmark to keep the phone backed up with the Google Account. - Page 101 6. Tap Next. For more detailed Work/Corporate email information, see Corporate Email. Accounts and Messaging...
-
Page 102: Apps And Entertainment
Apps and Entertainment All your phone‟s features are accessible through the Apps list. Play Store Play Store provides direct access to Android applications and games to download and install on your phone. Access the Play Store 1. Press > > Play Store. -
Page 103: Sprint Id
Launch an Installed Google Application 1. Press > – or – Press > > Play Store > > My apps. 2. Tap the installed application. Reinstall a Google Application If the Android Operating System is ever updated, any data contained on the phone will be erased. -
Page 104: Sprint Applications
4. Read the information screen for a description of the ID Pack and touch Install. 5. Touch Agree to accept the Terms & Conditions of the ID Pack. 6. If prompted, touch Continue on any following screens until you see the Downloading icon in the Status Bar. -
Page 105: Sprint Zone
Note: Once you download and install one of the Sprint ID packs, various Sprint applications will appear on your Applications screen. When you switch from the Sprint pack to another ID pack, or choose a new ID pack, the Sprint applications will remain installed and visible on your Applications screen. -
Page 106: Nba Game Time
5. Tap an on-screen option to activate features that include: Provides access information for Sprint Cup, Nationwide, and Camping World Truck. Tapto view the home page where you can access the latest NASCAR information. Allows you to vote for the driver you want in the NASCAR Sprint All-Star Race. -
Page 107: Sprint Tv & Movies
League: Allows you to view Conference, Division, and League standings. More: Allows you to access the following options. • Use Local Time: Allows schedules to be displayed using your local time. • Notifications: Allows you to set the notification configurations. •... -
Page 108: Music
4. If applicable, tap a desired clip to view the program. The clip will automatically load and begin playing. Tip: Scroll through the channels to view more selections. Once you find a channel that you want to watch or listen to, simply touch it and wait approximately three seconds, and the channel begins loading. -
Page 109: Back Up Your Downloaded Music Files
Assign a Song as a Ringtone 1. Press > > Music > Songs tab. 2. Touch and hold a song you„d like to use as your new ringtone. A context menu is displayed. 3. Tap Set as ringtone to set the selected song as your new default ringtone. 4. -
Page 110: Youtube
Downloads allows you to view any pending downloads. Music Store provides access to various menus to download music. Ringtone Store provides access to various menus to download ringtones. Ringback Tone Store provides access to various menus to download ringback tones. - Page 111 Launch Google Maps 1. Press > > Maps Note: Before using any navigation apps, make sure your phone is set to allow location detection, and then select which sources you want to use. Press > > System settings > Location access. Tap the Access to my location switch to enable location detection.
- Page 112 Tap each icon at the bottom of the screen. (Search) to search for a location. (Directions) to get directions. (Local) to find restaurants, cafes and more. (Layers) to view locations and additional information ovelaid on the map. To search for a location: 1.
-
Page 113: Scout Tm By Telenav
When you're finished, tap > Clear Map to clear the map. To discover and share places: 1. While viewing a map, tap 2. Tap a category to begin browsing. Results will appear on the map for the area you're currently viewing. -
Page 114: Google Navigation
(maps.google.com). LG Tag+ LG Tag+ lets you set up tags as NFC touch points that apply your own custom settings to your phone by just tapping the phone to the tag. For example, you could have one tag with the settings you want at work and one for settings when you„re at home. - Page 115 Using Tag+ Reading Tap the NFC tag or NFC-enabled phone with the back of your phone. When tapping the set tag or a phone, the preconfigured mode will be activated right away. Apps and Entertainment...
-
Page 116: Web And Data
Web and Data Your phone's data capabilities let you wirelessly access the Internet or your corporate network through a variety of connections, including Wi-Fi, Sprint 4G, Data Services (Sprint 3G Network), and Virtual Private Networks (VPN). This section addresses your phone's data connections and the built-in web browser. Additional data-related features can be found in Accounts and Messaging,... -
Page 117: Add A Wi-Fi Network
If the network is secured, you will be prompted to enter a password. (Ask your network administrator for details.) When you're connected to a network, you can tap the network name in the Wi-Fi settings screen for details about the speed, security, address, and related settings. To receive notifications when open or secured networks are in range: By default, when Wi-Fi is on, you receive notifications in the Status Bar when your phone detects an open Wi-Fi network. -
Page 118: Wi-Fi Direct
Wi-Fi Direct Wi-Fi Direct supports a direct connection between Wi-Fi enabled phones without an access point. Due to the high battery usage of Wi-Fi direct, it is recommended that you plug your phone into a power outlet while using the Wi-Fi Direct feature. To turn on Wi-Fi Direct: 1. -
Page 119: Data Connection Status And Indicators
Note: You can connect to the Internet via Mobile network or via Wi-Fi (access by tapping > System settings > Wi-Fi). Once the Browser loads, you are directed to the home page. Tip: To change the default home page, tap > >... -
Page 120: Set Up Secure Credential Storage
about setting up and using these connections on your phone, see Launch a Web Connection Turn Wi-Fi On and Connect to a Network. Set Up Secure Credential Storage If your network administrator instructs you to download and install security certificates, follow the instructions below. -
Page 121: Browser
Disconnect From a VPN 1. Touch and drag down the Status Bar to open the Notifications Panel. 2. Tap the VPN connection to return to the VPN settings screen, and then tap the VPN connection to disconnect from it. When your phone has disconnected from the VPN, the VPN connected icon disappears in the notification area of the Status Bar. -
Page 122: Go To A Specific Website
Find and Copy Text on a Web Page To find text on a web page: 1. Tap > Find on page. 2. Enter the text you're looking for. As you type, the first word with matching characters is highlighted on the screen and subsequent matches are boxed. -
Page 123: Adjust Browser Settings
► From any open web page, tap Options available within the Browser menu include: ● Refresh: Reloads the current web page and displays the most current information. ● Save to bookmarks: Allows you to save the current page to your bookmarks. ●... -
Page 124: Create Website Settings
3. Select one of the available options and enter the necessary information. Reset the Browser to Default 1. Tap to open the Browser menu. 2. Tap Settings > Advanced > Reset to default. 3. Tap Yes to complete the process. Create Website Settings You can create settings for individual websites. - Page 125 3. Tap the star icon adjacent to a web page entry. The star now turns gold. Enter the desired information and tap OK. – or – Touch and hold an entry from the list to display a context menu. Then, tap Save to bookmarks, enter the desired information, and tap OK to add the selected entry to your current list of bookmarks.
-
Page 126: Camera And Video
Camera and Video You can use the camera or camcorder to take and share pictures and videos. Your phone comes with a 5 megapixel camera with an autofocus feature that lets you capture sharp pictures and videos. You can take pictures and record videos using the Camera application. You can also view your pictures and videos with the Gallery application. -
Page 127: Camera Settings
Swap lens to swap between the rear camera lens and the front camera lens. ● Cheese shutter to turn on or off the voice shot. When on, you just say "Cheese", "Smile", "Whisky", "Kimchi", or "LG" to take a picture. ● Time catch shot to capture the missing moment before pressing the shutter. -
Page 128: View Your Pictures
White balance to select how the camera adjusts colors in different kinds of light in order to achieve the most natural-looking colors for your pictures. Choose from Auto, Incandescent, Sunny, Fluorescent, or Cloudy. Color effect to apply different color effects to your pictures. Choose from None, Mono, Sepia, or Negative. -
Page 129: Assign Pictures
Drag left or right to view more albums. 2. Tap an album to open it and view its contents. (The pictures and videos in the album are displayed in chronological order.) 3. Tap a picture in an album to view it. ... -
Page 130: Record Videos
Home screen wallpaper to assign the picture as a background image, crop the image and tap OK to assign the picture. Lock screen wallpaper to assign the picture as a background image for your lock screen. Record Videos In addition to taking pictures, you can record, view, and send videos with your phone's built-in video camera. -
Page 131: Gallery Options For Videos
Color effect to apply different color effects to your videos. Choose from None, Mono, Sepia, or Negative. Auto review to enable auto review of your video. Geotagging to use your phone's location-based services. Take pictures wherever you are and tag them with the location. If you upload tagged pictures to a blog that supports geotagging, you can see the pictures displayed on a map. -
Page 132: Video Wiz
Scroll left or right to view more albums. 2. Tap an album to open it and view its contents. (The pictures and videos in the album are displayed in chronological order.) 3. Tap a video in an album to play. ... - Page 133 9. Tap to save the video. Note: Tap to view the help information on using this feature. Camera and Video...
-
Page 134: Tools And Calendar
Tools and Calendar Learn how to use many of your phone's productivity-enhancing features. VuTalk With the VuTalk feature, you can make more interactive and creative notes with the other party. Visual communication is possible while sharing a photo, a map or cam preview. Notes: Only available with the phone which has this feature as well. - Page 135 3. Tap the VuTalk switch to turn it off or on. 4. Set the following options as as your preferences. Notification sound: Select the desired notification sound. Vibrate: Select the desired vibrate type. Show request popup: Checkmark this option to display popup when VuTalk request is received.
-
Page 136: Quickmemo
6. When you finish VuTalk, tap to exit the VuTalk feature. The created VuTalk screen is stored in the Gallery. Note: If you press and go back to the home screen, the VuTalk feature is still running. QuickMemo The QuickMemo feature allows you to create memos and capture screen shots. - Page 137 2. Create a memo using the following options: : Tap to enable an overlay on your phone's display for easy multitasking while keeping the memo in the background. Note: Tap to exit the overlay function and go back to the QuickMemo. : Tap to select whether to use the current image or a note image as the background screen.
-
Page 138: Capture The Screen
until you exit QuickMemo. View the Saved QuickMemo Your QuickMemos can be saved in the Gallery application. To view QuickMemos saved in your Gallery: Press > > Gallery and select the QuickMemo album. Capture the Screen You can also capture the screen display. ►... -
Page 139: Smartshare
While using an application that supports QSlide, tap . The function will be continuously displayed as a small window on your screen. 2. Resize or move the QSlide window using the following options. Drag the corner to enlarge the window. ... - Page 140 1. Press > > SmartShare. 2. Tap the Player icon at the top right of the screen, then tap the device you want to use from the renderer device list. 3. Tap the Library icon at the top left of the screen, then tap the device that has your remote content library.
-
Page 141: Calendar
Note: Follow the similar steps to use the Music Player and Video Player to share contents. : Need to be connected network : Select the device on network : Currently, the content is being shared through SmartShare. Note: Check that your device is connected with your home network using Wi-Fi connection to use this application. -
Page 142: Change Calendar View
Change Calendar View You can change the calendar view. ● > Day, Week, Month, Agenda. Each view displays the events in your calendar for the period of time that you specify. Day View Week View Tools and Calendar... -
Page 143: View Event Details
Month View Agenda View View Event Details You can view more information about an event in a number of ways, depending on the current view. In Agenda, Day, or Week view, tap an event to view its details. ... -
Page 144: Create An Event
Create an Event You can use the Calendar tool on your phone to create events that appear on your Phone and in your Google Calendar on the web. 1. Open the Calendar and tap > New event. You can also touch and hold a spot in Day, Week, or Month view to open the new event screen with that day and time already entered. -
Page 145: Set An Event Reminder
Edit an Event 1. Open Calendar and tap the event to open it. (See View Event Details.) 2. Tap . (For information on how to create or change event information, see Create an Event.) 3. Make your changes to the event. 4. -
Page 146: Display And Synchronize Calendars
– or – 4. Tap Dismiss in the Calendar Notifications list to delete all reminders in the list. 5. Tap when viewing the Calendar Notifications list to keep the reminders. The reminders will remain in the Status Bar. Display and Synchronize Calendars Initially, all calendars that you create or subscribe to through Google Calendar on the web are also displayed in the Calendar application on your phone. -
Page 147: Folders
► Open the Calendar, and tap > Settings > Reminder settings. Notifications: Checkmark to allow notifications of new events. When Notifications is set, you can select the notification sound or vibrate type, and whether to pop-up the notification or not. ... - Page 148 2. Tap an existing alarm to change its time and other attributes or tap to add a new one. 3. Set the time of the alarm. You can change the time by taping the buttons and the AM or PM buttons or tap the hour and minutes fields to enter the time with the keyboard.
- Page 149 2. Tap > Settings. 3. You can set the following options: Alarm in silent mode: Tap to place a checkmark and allow your phone to play alarms even when it is in Silent mode. Side button behavior: Allows you to set the desired behavior of the Volume Buttons when pressed during an alarm.
-
Page 150: Tasks
Play Stopwatch 1. Press > > Alarm/Clock > Stopwatch tab. 2. Tap Start to start stopwatch time. 3. Tap Stop to stop the stopwatch. While measuring time, tap Lap to view lap times. Tasks You can add your tasks in Tasks application and synchronize with MS Exchange account. Synchronize MS Exchange 1. - Page 151 3. Tap Tasks and select the account where you want to save the task. 4. Enter the corresponding information on each field and Save. Tasks Options 1. Press > > Tasks. 2. The following options are available. : Tap to view All tasks, Overdue tasks, and Due today tasks. : Tap to search for tasks.
-
Page 152: Calculator
Share: Allows you to share the task with others. Calculator You can use the Calculator application to solve math problems. 1. Press > > Calculator. 2. Enter numbers and arithmetic operators on the basic panel. 3. Drag the basic panel to the left to open the advanced panel. 4. -
Page 153: Bluetooth Settings Menu
Status Bar. 3. Set the following Bluetooth options: LG-LS720: Tap to make your phone visible to other Bluetooth devices for 120 seconds. Note: Your phone is visible for up to 2 minutes. This value appears as a countdown within this field. -
Page 154: Pairing Bluetooth Devices
Pair Your Phone 1. Verify your Bluetooth is active. 2. From the Bluetooth settings page, tap LG-LS720 to make your phone visible. Your phone must be visible to successfully pair with an external device. 3. Tap Search for devices. (Your phone will display a list of discovered in-range Bluetooth devices.) -
Page 155: Send Items Via Bluetooth
3. Tap Unpair. Note: Disconnections are manually done but often occur automatically if the paired device goes out of range of your phone or if it is powered off. Send Items via Bluetooth Depending on your paired phone's settings and capabilities, you may be able to send pictures, videos, Contacts information, or other items using a Bluetooth connection. -
Page 156: System Updates
1. Press > > Settings > System updates > Update Firmware and Update LG software. 2. Follow the on-screen instructions. Update Your Profile This option allows you to automatically update your online user profile information. If you choose to change your user name and select a new one online, you must then update the user name on your phone. - Page 157 Update Your UICC unlock information This option allows you to update the UICC unlock information. 1. Press > > Settings > System updates > UICC Unlock. 2. Follow the on-screen instructions. Tools and Calendar...
-
Page 158: Settings
Settings This section provides an overview of items you can change using your phone„s System settings menus. Wireless & Networks Settings This group of settings lets you control your phone's Wi-Fi settings, Bluetooth, Tethering, VPN, Mobile networks, and more. Airplane Mode Airplane Mode (Flight mode) allows you to use many of your phone„s features, such as games, and music, when you are in an airplane or in any other area where making or receiving calls or data is prohibited. -
Page 159: Wi-Fi Settings
Wi-Fi Settings Your phone lets you take advantage of Wi-Fi hotspots for high-speed data access using available computer networks. For details on your phone‟s Wi-Fi features and settings, see Connect Wi-Fi. Bluetooth Settings Your phone„s Bluetooth capabilities let you use wireless headsets, send and receive pictures and files, and more. -
Page 160: Decline With Message
Decline with Message Quick message is the specified text message to send out when you want to ignore an incoming call and respond to the caller with a text instead. You can add or edit quick messages. 1. Press > >... -
Page 161: Tty Mode
TTY Mode A TTY (also known as a TDD or Text Telephone) is a telecommunications phone that allows people who are deaf, hard of hearing, or who have speech or language disabilities, to communicate by telephone. Your phone is compatible with select TTY phones. Please check with the manufacturer of your TTY phone to ensure that it is compatible with digital cell phones. -
Page 162: Wide Voice Extension
Wide Voice extension This option improves sound quality to get clear voice using wide voice band. To activate Wide voice extension 1. Press > > Systems settings > Call. 2. Tap the Wide voice extension checkbox to turn it on. (A blue checkmark will appear.) Voicemail Settings You can configure your voicemail settings. -
Page 163: Set Roam Mode
Roam on Other Digital Networks When you„re roaming on digital networks, your call quality and security will be similar to the quality you receive when making calls on the Nationwide Sprint Network. However, you may not be able to access certain features, such as data services, depending on the available network. Note: If you„re on a call when you leave the Nationwide Sprint Network, your call will be dropped. -
Page 164: Roaming Guard
Roaming Guard Roaming makes it easy to manage your roaming by requiring confirmation before placing or answering a roaming call. To turn Roaming Guard on or off: 1. Press > > System settings > Roaming > Roaming guard. 2. Tap the Domestic voice roaming, International voice roaming checkboxes or both to activate or deactivate this function. -
Page 165: Share & Connect
Share & Connect Your phone's Share & Connect menu lets you configure NFC, Android Beam, and File networking. NFC Settings NFC (Near Field Communication) is a wireless technology that enables data transmission between two objects when they are brought within a few inches of each others. When you enable NFC on your phone, it can exchange data with other NFC-enabled devices or read information from smart tags embedded in posters, stickers, and other products. -
Page 166: More
4. Tap Set password to configure password for security. 5. Access phone's folder with typing "\\ Device name" or "\\ IP address" at URL address field on PC window. Access Other Device's Folder You can access shared folders of computers, Network storage (NAS) and other devices. 1. -
Page 167: Bluetooth Tethering
1. Press > > System settings > More... > Portable Wi-Fi hotspot. 2. Tap the Portable Wi-Fi hotspot checkbox to activate it. (A blue checkmark will appear.) After a moment, the phone starts broadcasting its Wi-Fi network name (SSID), so you can connect it with up to eight (8) computers or other phones. -
Page 168: Device Settings
Enable/Disable Data Access 1. Press > > System settings > More... > Mobile networks. 2. Tap the Data enabled checkbox to enable/disable data access over the mobile network. Network Mode 1. Press > > System settings > More... > Mobile networks > Network mode. 2. - Page 169 4. Tap Quiet mode to set the time and days. Sound Profile 1. Press > > System settings. 2. From the DEVICE section, tap Sound > Sound profile. 3. Tap one of the three options. To switch to silent mode: 1.
-
Page 170: Ringtones And Notifications
Ringtones and Notifications You can select and assign ringtones and notifications for your incoming calls. Ringtone with Vibration To set the phone to vibrate accompanying the ringtone. 1. Press > > System settings. 2. From the DEVICE section, tap Sound. 3. -
Page 171: Touch Feedback & System
3. Tap a ringtone to select it and to hear it. If you want to set the ringtone, tap OK. If not, select another ringtone or tap Cancel. Touch Feedback & System The Touch Feedback & System menu lets you select whether you hear tones when touching numbers on the dialpad, selecting on-screen options, and more. -
Page 172: Display Settings
2. From the DEVICE section, tap Sound. 3. Tap Emergency tone. 4. Tap Off, Alert, or Vibrate. To set your phone to vibrate when touching buttons and keys: 1. Press > > System settings. 2. From the DEVICE section, tap Sound. 3. - Page 173 1. Press > > System settings. 2. From the DEVICE section, tap Display > Smart screen. (A blue checkmark will appear.) Auto-Rotate Screen Choose whether the phone automatically switches the orientation of the screen as you turn it sideways or even upside down. 1.
-
Page 174: Home Screen
2. From the DEVICE section, tap Display > Front touch key light. 3. Tap the Turn on front key light checkbox. (A blue checkmark will appear.) To set how long the front keys remain back while the screen is turned on: 1. -
Page 175: Lock Screen
2. Tap the desired effect and OK. Wallpaper Choose the desired wallpaper. 1. Press > > Home screen > Wallpaper. 2. Choose a location and select the desired wallpaper. 3. Tap Apply or OK to set it as the wallpaper. Scroll Screens Circularly Checkmark to show the first screen after last screen when scrolling. - Page 176 None: No lock screen. Swipe: Swipe any part of the screen to unlock the screen. Face Unlock: Unlocks the screen through facial recognition. Follow the prompts. You are asked to set a Pattern and/or PIN as a backup. ...
- Page 177 5. Press the Volume Down Key to scroll to Yes -- delete all user data. Then press the Power/Lock Key to select it. 6. The phone will perform a factory reset. 7. Make sure that reboot system now is highlighted and press the Power/Lock Key to make the selection and reboot your phone.
-
Page 178: Storage
1. Press > > Lock screen > Lock timer. 2. Tap the desired time. Power Button Instantly Locks Checkmark to instantly lock the screen when you press the Power/Lock Button . 1. Press > > Lock screen. 2. Tap the Power button instantly locks checkbox to turn on the feature. (A blue checkmark will appear.) Vibrate On Touch The phone will vibrate when entering your unlock sequence. -
Page 179: App Settings
To display the battery percentage on the Status bar: 1. Press > > System settings. 2. From the DEVICE section, tap Battery. 3. Tap Battery percentage. (A blue checkmark will appear.) To turn on Power saver: 1. Press > > System settings > Battery. 2. -
Page 180: Personal Settings
2. Tap the Downloaded tab. 3. Find the application you want to uninstall and tap it. 4. Tap Uninstall. 5. Read the disclaimer and tap OK. To set the phone to end a running application when you open a new application: 1. -
Page 181: Security
Access to My Location You can use information from Wi-Fi and mobile networks to determine your approximate location, used while searching in Google Maps and other applications. When you checkmark this option, you„re asked whether you consent to sharing your location anonymously with Google„s location service. -
Page 182: Language & Input Settings
Encrypt SD Card Opens a screen that encrypts data on the SD card for security. You will be required to enter a PIN or password to decrypt the data each time you power it on. Password Typing Visible Checkmark to briefly show each character of passwords as you enter them so that you can see what you enter. -
Page 183: Backup & Reset
Default Keyboard & Input Methods Shows the default keyboard type. Checkmark the keyboard you want to use from Google voice to configure each keyboard„s settings. typing, LG Keyboard or Swype. Tap Voice Search Tap to configure the Voice Search settings. -
Page 184: System Settings
prompted to reenter the same kind of information as when you first started the phone. See Activate Your Phone. 1. Press > > Systems settings > Backup & reset. 2. If you are certain that you would like to restore all factory settings, tap Factory data reset. - Page 185 Install web scripts: Allows you to enable (or disable) installation of web scripts. Large text: Checkmark to increase the size of the text. Invert color: Checkmark to invert color. Shades: Set the screen to be shade of black. Hearing 1.
-
Page 186: Pc Connection
PC Connection Your device's PC connection menu lets you configure USB connection type and Ask on connection. Also you can see the PC connection help. USB Connection Type Opens a dialog box to choose the default connection mode when connecting your phone to a PC via USB. -
Page 187: Activate This Device
This option allows you to update the Android Operating System (OS) on your phone via an over- the-air connection. There are two components: Sprint User-Interface (UI) firmware and Google 1. Press > > System settings > System updates > Update Firmware and Update LG software. Settings... -
Page 188: About Phone
2. Follow the on-screen instructions. Update Your Profile This option allows you to automatically update your online user profile information. If you choose to change your user name and select a new one online, you must then update the user name on your phone. -
Page 189: Index
Index 3-way Calling, 51 Call Forwarding, 52 About Phone, 178 Call Logs, 54 Access Gmail, 70 Call Reject, 149 Access Recently-Used Applications, 31 Call Settings, 149 Accessibility, 174 Call Using the Phone Dialer, 40 Accounts & Sync, 170 Call Waiting, 51 Activate This Device, 177 Caller ID, 51 Activate Your Phone, 2... - Page 190 Developer Options, 176 LG Keyboard, 32 Device Settings, 158 LG Tag+, 104 Dial and Save Phone Numbers With Listen to Multiple Voicemail Messages, 47 Pauses, 43 Location Access, 170 Dial From the Contacts List, 43 Lock and Unlock Your Phone, 13...
- Page 191 Read and Reply to Text Messages, 83 Synchronize Your Corporate Account, 90 Receive Phone Calls, 44 Synchronize Your Google Account, 89 Record Videos, 120 System Settings, 174 Reply to or Delete an Email Message, 80 System Updates, 146, 177 Respond to an Event Reminder, 135 Take Pictures, 116 Retrieve Your Voicemail Messages, 50 Tasks, 140...
- Page 192 Index...