Table of Contents
Advertisement
Quick Links
Advertisement
Table of Contents

Related Manuals for Lenovo C24-25


Summary of Contents for Lenovo C24-25
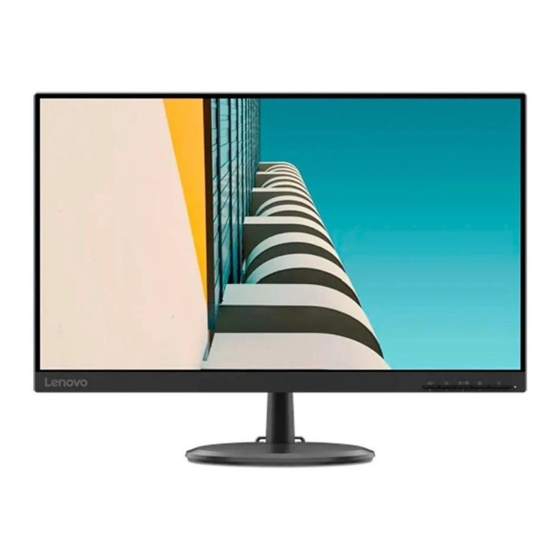
- Page 1 Lenovo C24-25 User Guide...
- Page 2 Product number A20238FD0 66B0-KAC1-** First Edition (April 2020) © Copyright Lenovo 2020. LENOVO products data computer software and services have been developed exclusively at private expense and are sold to governmental entities as commercial items as defined by 48 C.F.R. 2.101 with limited and restricted rights to use reproduction and disclosure.
-
Page 3: Table Of Contents
Contents Safety information .......................... iii General Safety guidelines..................................iii Chapter 1. Getting started ......................1-1 Shipping contents ....................................1-1 Notice for use ....................................... 1-2 Product overview....................................1-3 Types of adjustments ..................................1-3 Tilt........................................1-3 Monitor controls....................................1-4 Cable lock slot....................................1-4 Setting up your monitor .................................. -
Page 4: Safety Information
Safety information General Safety guidelines For tips to help you use your computer safely, go to: http://www.lenovo.com/safety Before installing this product, read the Safety Information. DANGER To avoid shock hazard: • Do not remove the covers. • Do not operate this product unless the stand is attached. -
Page 5: Chapter 1. Getting Started
Setup Poster for brief information. Shipping contents The product package should include the following items: • Flat Panel Monitor • Information Flyer • Lenovo Limited Warranty Booklet (Optional) • Stand • Base • Screw Driver •... -
Page 6: Notice For Use
Notice for use To set up your monitor, please see the illustrations below. Note: Do not touch the monitor within the screen area. The screen area is glass and can be damaged by rough handling or excessive pressure. 1. Place your monitor with the screen face down on a soft flat surface. 2. -
Page 7: Product Overview
Product overview This section will provide information on adjusting monitor positions, setting user controls, and using the cable lock slot. Types of adjustments Tilt Please see the illustration below for an example of the tilt range. Chapter 1. -
Page 8: Monitor Controls
Monitor controls The keypad controls on the panel frame are accesses to various functions. For information on how to utilize these keypad controls, please see “Adjusting your monitor image”on page 2-3. Cable lock slot Your monitor is equipped with a cable lock slot located on the rear of your monitor. Chapter 1. -
Page 9: Setting Up Your Monitor
Setting up your monitor This section provides information on how to set up your monitor. Connecting and turning on your monitor Note: Be sure to read the Safety information on page iii before carrying out this procedure. Power off your computer and all attached devices, then unplug the computer power cord. Connect the cables according to below icon indication. - Page 10 For computer in HDMI connecting. Note: Lenovo recommends that customers who require to use the HDMI input on their monitor purchase the "Lenovo HDMI to HDMI cable OB47070" www.lenovo.com/support/monitor accessories HDMI HDMI Connect the speaker's audio cable and audio jack of monitor to transfer audio source from HDMI.
- Page 11 Power on the monitor and the computer. 8. When you install the monitor driver, download the driver that corresponds to your monitor model from the Lenovo website: http://support.lenovo.com/docs/C24_25 Refer to the ““Manually installing the monitor driver”on page 3-5” section to install the driver.
-
Page 12: Chapter 2. Adjusting And Using Your Monitor
For more detailed information on any of these topics, visit the Healthy Computing Web site at: http://www.lenovo.com/healthycomputing/. Arranging your work area Use a work surface of appropriate height and available working area to allow you to work in comfort. -
Page 13: Quick Tips For Healthy Work Habits
The following are some other tips for comfortable viewing of your monitor: • Use adequate lighting for the type of work you are performing. • Use the monitor brightness, contrast controls, if equipped to optimize the image on your screen to meet your visual preferences. •... -
Page 14: Adjusting Your Monitor Image
Adjusting your monitor image This section describes the control features to adjust your monitor image. Using the direct access controls The direct access controls can be used when the On-Screen Display (OSD) is not displayed. Icon Control Description Switches the video input source Input Source Shift back to previous level when in OSD mode Shortcut key for directly opening the menu of source-... -
Page 15: Using The On-Screen Display (Osd) Controls
Using the On-Screen Display (OSD) controls To adjust the settings, the user controls can be viewed through the OSD. C24-25 1980x1080 Brightness Contrast Display Mode Scaling Mode Over Drive Input Signal: VGA To use the controls: Press to open the main OSD menu. - Page 16 Table 2-1. OSD functions OSD Icon on Controls and Sub menu Description Main Menu Adjustments Brightness Adjusts overall screen brightness. All input ports Contrast Adjusts difference between light and dark areas. Enable dynamic contrast ratio. • • Display Mode Standard/Game/Web/Movie/Picture Scaling Mode Selects type of scaled image.
- Page 17 Table 2-1. OSD functions OSD Icon on Controls and Sub menu Description Main Menu Adjustments Select digital among OSD Controls when you use All input ports VGA. HDMI Select digital among OSD Controls when you use HDMI. Information Shows Model name, refresh rate, and product details. This screen does not allow any changes to the settings.
-
Page 18: Selecting A Supported Display Mode
Selecting a supported display mode The display mode of the monitor uses is controlled by the computer. Therefore, refer to your computer documentation on how to change display modes. The image size, position and shape might be changed when the display mode changes. This is normal and the image can be re-adjusted using automatic image setup and the image controls. -
Page 19: Understanding Power Management
Understanding power management Power management is invoked when the computer recognizes that you have not used your mouse or keyboard for a user-definable period. There are several states as described in the table below. For optimal performance, switch off your monitor at the end of each working day, or whenever you expect to leave it unused for long periods during the day. -
Page 20: Power Management Modes
Power Management Modes Horizontal Vertical Power VESA Modes Video Power Consumption Sync Sync Indicator 23 W (maximum)* Normal operation Active Active Active White 18 W (typical) Active-off mode Inactive Inactive Amber Less than 0.5 W Switch off Less than 0.3 W * Maximum power consumption with max luminance. -
Page 21: Caring For Your Monitor
Caring for your monitor Be sure to turn off the power before you perform any maintenance on the monitor. Do not: • Apply water or liquid directly to your monitor. • Use solvents or abrasives. • Use flammable cleaning materials to clean your monitor or any other electrical equipment. •... - Page 22 Step 4: Attach the mounting bracket from the VESA compatible wall mounting kit (100mm x100mm distance), the type of VESA mounting screw is M4 x 10 mm. VESA hole Step 5: Attach the LCD display to the wall, and follow the instructions in the wall-mounting kit.
-
Page 23: Chapter 3. Reference Information
Chapter 3. Reference information This section contains monitor specifications, instructions to manually install the monitor driver, troubleshooting information, and service information. Monitor specifications Table 3-1. Monitor specifications for type-model C24-25 Dimensions Depth 206.2 mm (8.12 in) Height 403.9 mm (15.90 in) Width 540 mm (21.26 in) - Page 24 Table 3-1. Monitor specifications for type-model C24-25 Communications VESA DDC/CI Supported display Horizontal frequency 30 KHz - 83 KHz modes Vertical frequency 48 Hz - 75 Hz Native Resolution 1920 x 1080 at 60 Hz Temperature Operating 0° to 40° C (32° to 104° F) Storage -20°...
-
Page 25: Troubleshooting
Troubleshooting If you have a problem setting up or using your monitor, you might be able to solve it yourself. Before calling your dealer or Lenovo, try the suggested actions that are appropriate to your problem. Table 3-2. Troubleshooting Problem... -
Page 26: Manual Image Setup
Table 3-2. Troubleshooting Problem Possible cause Suggested action Reference The power The video signal cable Be sure the video cable is “Connecting and indicator is amber, is loose or disconnected connected with the system turning on your but there is no from the system or properly. -
Page 27: Manually Installing The Monitor Driver
(such as a desktop)). 14. Select the "c24-25.inf" file and click the Open button. Click the OK button. 15. In the new window, select C24-25 and click Next. 16. After the installation is complete, delete all downloaded files and close all windows. -
Page 28: Installing The Monitor Driver In Windows 10
(such as a desktop)). 14. Select the "c24-25.inf" file and click the Open button. Click the OK button. 15. In the new window, select C24-25 and click Next. 16. After the installation is complete, delete all downloaded files and close all windows. -
Page 29: Appendix A. Service And Support
Product replacement assistance or exchange of defective components also is available during the warranty period. In addition, if your option is installed in a Lenovo computer, you might be entitled to service at your location. A Lenovo technical support representative can help you determine the best alternative. -
Page 30: Appendix B. Notices
Web sites. The materials at those Web sites are not part of the materials for this Lenovo product, and use of those Web sites is at your own risk. -
Page 31: Recycling Information
Collecting and recycling a disused Lenovo computer or monitor If you are a company employee and need to dispose of a Lenovo computer or monitor that is the property of the company, you must do so in accordance with the Law for Promotion of Effective Utilization of Resources. -
Page 32: Power Cords And Power Adapters
Power cords and power adapters Use only the power cords and power adapters supplied by the product manufacturer. Do not use the ac power cord for other devices. Appendix B.