Table of Contents
Advertisement
Quick Links
Advertisement
Table of Contents

Related Manuals for LG SH85PM-F


Summary of Contents for LG SH85PM-F
- Page 1 OWNER’S MANUAL DVD Receiver System Please read this manual carefully before operating your set and retain it for future reference. MODEL HT805PM (HT805PM, SH85PM-F/ S/ C/ W) P/NO : MFL64940392 HT805PM-D0_BTURLLK_ENG_0392.indd 1 2010-09-07 5:56:39...
- Page 2 Safety Information Safety Information CAUTION: The apparatus shall not be exposed to CAUTION water (dripping or splashing) and no objects filled RISK OF ELECTRIC SHOCK with liquids, such as vases, shall be placed on the DO NOT OPEN apparatus. CAUTION: TO REDUCE THE RISK OF ELECTRIC SHOCK CAUTION concerning the Power Cord DO NOT REMOVE COVER (OR BACK) NO USER- SERVICEABLE PARTS INSIDE REFER SERVICING TO...
- Page 3 You have to set the disc format option to [Mastered] the product on a bed, sofa, rug or other similar in order to make the discs compatible with the LG surface. This product should not be placed in a built- players when formatting rewritable discs.
-
Page 4: Table Of Contents
Contents Contents Optional Equipment Connection AUX IN Connection AUDIO (PORT. IN) In Connection Listening to music from your Safety Information portable player or external device CAUTION USB Connection OPTICAL IN connection Preparation Antenna Connection Unique Features Adjust the setup settings OSD Initial language settings Accessories To display and exit the Setup... - Page 5 Contents Appendix Marked Playback Changing subtitle code page Language Codes Viewing a PHOTO file Options while viewing a photo Area Codes Sleep Timer Setting Trademarks and Licenses Dimmer Specifications Turn off the sound temporarily Last Scene Memory System Select - Optional Adjust the speaker level settings Radio Operations...
-
Page 6: Unique Features
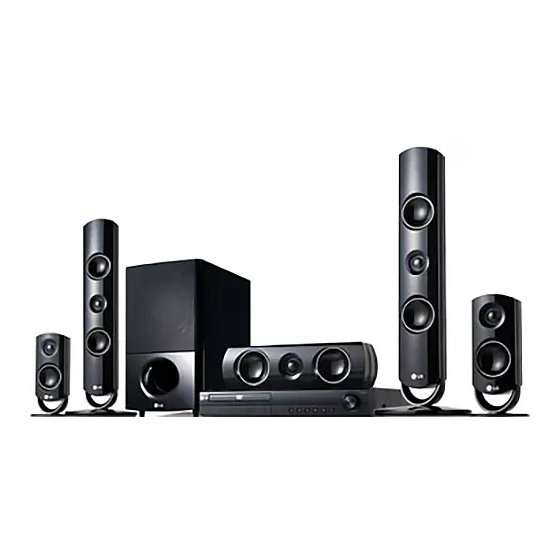
Preparation Preparation Unique Features Accessories Portable In Please check and identify the supplied accessories. Listens to music from your portable device. (MP3, Notebook, etc) USB Direct Recording Records music from CD to your USB device. Remote control (1) Battery (1) Full HD up-scaling Views Full HD picture quality with simple setup. -
Page 7: Introduction
Preparation Introduction Symbol Used in this Manual All discs and file listed below MP3 files Playable Discs DVD and finalized DVD±R/RW This unit plays DVD±R/RW and CD-R/RW that WMA files contains audio titles, DivX, MP3, WMA and/or DivX JPEG files. Some DVD±RW/DVD±R or CD- DivX files RW/CD-R cannot be played on this unit due to Audio CDs... -
Page 8: 8 Playable File Requirement
Preparation Playable file DivX file requirement DivX file compatibility with this unit is limited Requirement as follows : • Available resolution: within 720 x 576 (W x H) pixels. • The file name of the DivX subtitle should be MP3/ WMA music file requirement entered within 45 characters. MP3/ WMA file compatibility with this unit is • If there is impossible code to express in the limited as follows : DivX file, it may be displayed as "... -
Page 9: Remote Control
Preparation Remote control 1 POWER : Switches the unit ON or OFF. Z OPEN/CLOSE : Opens and closes the disc Drawer. SLEEP : Sets the System to turn off Remote control automatically at a specified time. (Dimmer : The display window will be darken by half.) INFO/DISPLAY : Accesses On-Screen Display. - Page 10 REPEAT : Selects a play mode. (Repeat/ Random) • • • • • • • • • • f • • • • • • • • • TV Control buttons : Controls the TV. (LG TV only) z REC : USB Direct Recording.
-
Page 11: Front Panel
Preparation Front panel i h g f e (POWER) (STOP) Switches the unit ON or OFF. Stops playback. b Disc Tray (PLAY / PAUSE) Starts playback. c Display window Pause playback temporarily, press again to Shows the current status of the unit. exit pause mode. -
Page 12: Rear Panel
Preparation Rear panel j i h a Power cord g HDMI OUT (type A) Connects to TV with HDMI inputs. b Speakers connectors (Interface for digital audio and video) Connect the speaker cables. h OPTICAL IN c Cooling Fan Connects to optical audio equipment. d Antenna Connector i COMPONENT VIDEO (Y PB PR)OUTPUT FM- Connects the FM wired antenna... -
Page 13: Installation
Installation Installation Attaching the Color Speaker Position speakers to the unit Grey Rear Rear right Blue Rear Rear left Green Center Center Orange Sub woofer Any front position 1. Connect the wires to the unit. Match each wire’s colored band to the Front Front right same colored connection terminal on the... -
Page 14: Positioning The System
Installation Positioning the A Front left speaker (L)/ B Front right speaker (R): system Place the front speakers to the sides of the monitor or screen and as flush with the screen surface as possible. C Center speaker: The following illustration shows an example Place the center speaker above or below the of positioning the system. -
Page 15: Connections To Your Tv
Installation Connections to Your Component Video Connection Connect the COMPONENT VIDEO OUTPUT (PROGRESSIVE SCAN) jacks on the unit to the corresponding input jacks on the TV using component cables. Make one of the following connections, You can hear the sound through the system’s depending on the capabilities of your existing speakers. -
Page 16: Hdmi Out Connection
Installation HDMI Out Connection NOTE If you have a HDMI TV or monitor, you can • If a connected HDMI device does not accept connect it to this unit using a HDMI cable. the audio output of the unit, the HDMI device Connect the HDMI OUT jack on the unit to ’s audio sound may be distorted or may not the HDMI IN jack on a HDMI compatible TV or output. -
Page 17: Video Connection
Installation Video Connection SCART Connection Connect the VIDEO OUT jack on the unit to the Connect the SCART jack on the unit to the video in jack on the TV using a video cable. SCART in jack on the TV using a SCART cable. You can hear the sound through the You can hear the sound through the system’s system’s speakers. -
Page 18: Resolution Setting
Installation Video Output Resolution Setting Resolution The unit provides several output resolutions for HDMI OUT and COMPONENT VIDEO OUT jacks. You can change the resolution using [Setup] menu. 1. Press HOME. Displayed resolution in display window and 2. Use I / i to select the [Setup] and press outputted resolution may different according ENTER. -
Page 19: Optional Equipment Connection
Installation Optional Equipment AUDIO (PORT. IN) In Connection Connection Connect an output of portable device (MP3 or PMP etc) to the AUDIO (PORT. IN) input connector. PORT.IN Connection AUX IN Connection Connect an Output of auxiliary device to the AUX (L/R) INPUT Connector. AUX IN Connection Unit MP3 player, etc... -
Page 20: Usb Connection
Installation USB Connection Compatible USB Devices • MP3 Player : Flash type MP3 player. Connect the USB port of USB Memory (or MP3 • USB Flash Drive : D evices that support player, etc.) to the USB port on the front of the USB2.0 or USB1.1. unit. • The USB function of this unit does not support some USB devices. USB Connection USB device requirement • Devices which require additional program... -
Page 21: Optical In Connection
Installation Antenna Connection OPTICAL IN connection Connect an optical output of Unit (or Digital Device etc) to the OPTICAL IN connector. OPTICAL IN Connection Connect the supplied FM antenna for listening to the radio. Connect the FM Wire antenna to the FM antenna connector. -
Page 22: Adjust The Setup Settings
Installation Adjust the setup To display and exit the Setup menu settings 1. Press HOME. Displays the [Home] Menu. By using the Setup menu, you can make various adjustments to items such as picture and sound. You can also set a language for the subtitles and the Setup menu, among other things. -
Page 23: Language
Installation Language Display Mode The Display Mode setting works only when the TV Aspect mode is set to 4:3. Menu Language Select a language for the Setup menu and [Letterbox] then on screen display. Displays a wide picture with bands on the upper and lower portions of the screen. -
Page 24: Audio
Installation [1080i] [Speaker selection] Outputs 1 080 lines of interlaced video. Select a speaker that you want to adjust. [720p] NOTE Outputs 720 lines of progressive video. Certain speaker settings are prohibited by the [480p (or 576p)] Dolby Digital licensing agreement. Outputs 480 (or 576) lines of progressive video. -
Page 25: Lock (Parental Control)
Installation Lock (Parental Control) DRC (Dynamic Range Control) Make the sound clear when the volume is turned down (Dolby Digital only). Set to [On] Initial Setting the Area Code: for this effect. When you use this unit for the first time, you have to set the Area Code. -
Page 26: Others
Installation Others Password You can enter or change password. DivX VOD 1. Select [Password] on the [Lock] menu and then press i . We provide you with the DivX® VOD (Video On Demand) registration code that allows you to 2. Press ENTER. rent and purchase videos using the DivX®... -
Page 27: Operation
Operation Operation Using the Home Menu Basic Operations 1. Press HOME. 1. Insert the disc by using the Z OPEN/ CLOSE or Connect the USB device to the Displays the [Home] menu. USB port. 2. Press HOME. Displays the [Home] Menu. 3. -
Page 28: Other Operations
Operation Other Operations Do this Stop Press x STOP. Press B PLAY, MONO/ Displaying Disc Information Playback STEREO. on-screen Pause Press X PAUSE/STEP. You can display various information about the Press X PAUSE/STEP disc loaded on-screen. Frame- repeatedly to play title by-Frame 1. -
Page 29: To Display The Dvd Menu
Operation To display the DVD Menu Starting play from selected time DivX When you play a DVD which contains several menu, you can select the menu you want To start playing at any chosen time on the file using the Menu. or title. -
Page 30: Marked Playback
Operation Marked Playback NOTE If you want to select all files on the list, select The mark function enables you to store your [Select All] and press ENTER. favourite files from any disc or USB device in the unit memory. 1. -
Page 31: Viewing A Photo File
Operation Viewing a PHOTO file About help menu in the full screen. Menu Buttons Operation This unit can play discs with photo files. Displaying the 1. Select [Photo] on the [Home] menu and INFO/ Menu Option menu. press ENTER. DISPLAY Moving to Photo menu... -
Page 32: Sleep Timer Setting
Operation Sleep Timer Setting System Select - Optional Press SLEEP one or more times to select delay You must select the appropriate system mode time between 10 and 180 minutes, after the for your TV system. Press and hold X PAUSE/ unit will turn off. -
Page 33: Radio Operations
Operation Radio Operations Presetting the Radio Stations You can preset 50 stations for FM. Before tuning, make sure that you have turned down the volume. Be sure that both FM aerials are connected. (Refer to the page 21.) 1. Press t RADIO&INPUT until FM appears in the display window. -
Page 34: Seeing Information About A Radio Station
Operation Seeing information about a radio station The FM tuner is supplied with the RDS (Radio Data System) facility. This shows information about the radio station being listened to. Press RDS repeatedly to cycle through the various data types. : (Programme Service Name) The name of the channel will appear in the display... -
Page 35: Sound Adjustment
Operation Sound adjustment On Display Description This function is optimized for compressible MP3, WMA MP3 OPT file. It improves the treble Setting the surround mode sound. This system has a number of pre-set surround During playback, reinforce sound fields. You can select a desired sound BASS the treble, bass and mode by using SOUND EFFECT. -
Page 36: Advanced Operations
Operation Advanced Operations NOTE • You can check the recording percentage rate for the USB record on the screen during the Recording to USB recording. (Audio CD or MP3/ WMA CD only) • During recording MP3/WMA, there is no You can record music or sound souce to USB sound. device by connecting in to the port on the • When you stop recording during playback, the unit. -
Page 37: Maintenance
Maintenance Maintenance Notes on Discs Handling the Unit Handling Discs When shipping the unit Please save the original shipping carton and packing materials. If you need to ship the unit, for maximum protection, re-pack the unit as it was originally packed at the factory. Keeping the exterior surfaces clean Never stick paper or tape on the disc. -
Page 38: Troubleshooting
Troubleshooting Troubleshooting PROBLEM CAUSE CORRECTION Plug the power cord into the wall outlet No power The power cord is disconnected. securely. Select the appropriate video input mode The TV is not set to receive the DVD signal. on the TV so the picture from the unit appears on the TV screen. - Page 39 Appendix Appendix Language Codes Use this list to input your desired language for the following initial settings: Disc Audio, Disc Subtitle, Disc Menu. Language Code Language Code Language Code Language Code Afar 6565 French 7082 Lithuanian 7684 Singhalese 8373 Afrikaans 6570 Frisian 7089...
- Page 40 Appendix Area Codes Choose a area code from this list. Area Code Area Code Area Code Afghanistan Greenland Paraguay Argentina Hong Kong Philippines Australia Hungary Poland Austria India Portugal Belgium Indonesia Romania Bhutan Israel Russian Federation Bolivia Italy Saudi Arabia Brazil Jamaica Senegal...
- Page 41 Licenses What is SIMPLINK? Some functions of this unit are controlled by TV’s remote control when this unit and LG TV with SIMPLINK are connected through HDMI connection. Controllable functions by LG TV’s remote control; Play, Pause, Scan, Skip, Stop, Power Off, etc. Manufactured under license from Dolby Laboratories.
- Page 42 Appendix Specifications Amplifier • Stereo mode: 136 W + 136 W (4 Ω at 1 kHz) • Surround mode: Front 136 W + 136 W (4 Ω at 1 kHz) General Center 136 W (4 Ω at 1 kHz) Surround 136 W + 136 W (4 Ω...
- Page 43 HT805PM-D0_BTURLLK_ENG_0392.indd 43 2010-09-07 5:56:47...