
Related Manuals for ESI S2S


Summary of Contents for ESI S2S
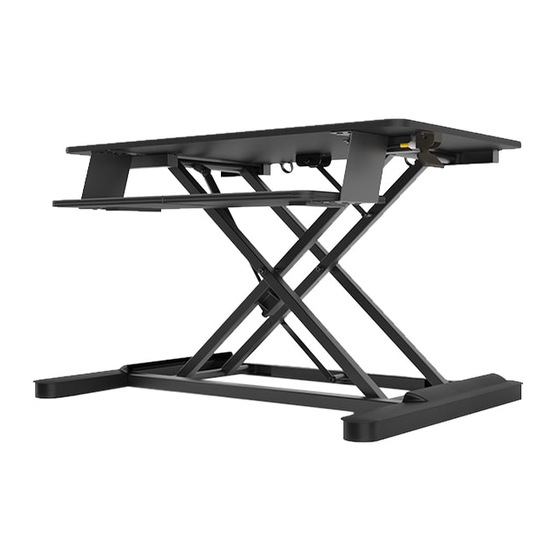
- Page 1 Assembly and operation instructions Desktop sit-to-stand workstation Model #S2S-BLK...
-
Page 2: Parts And Tools
Contact your supplier if any materials are missing. Do not discard the packaging until satisfied that the product operates to your satisfaction. Parts provided S2S assembly (1) 4mm Allen key (1) Ratchet wrench (1) - Page 3 24” 36” Place monitor(s) and keyboard The S2S Sit-To-Stand product can accomodate up to two monitors. However, certain dimension and weight limitations must be observed. • The combined weight of all added components should not exceed 35 lbs. • If two monitors are used, the monitors and other items on the unit must be equal to or less than 24” wide.
-
Page 4: Test Operation
Set-up Test operation To prevent the unit from abruptly raising up, hold the top of the unit while squeezing the paddle lever. Raise the unit to its maximum height and release the lever. Caution: Keep both hands on the top platform to control the rate of movement when operating the paddle lever. - Page 5 Adjustments Make any necessary adjustments If the product operates to your satisfaction, there is no need to make any adjustments. You may skip to “Final Set-Up” on page 5. The two possible adjustments are for keyboard platform projection (below) and load weight (page 5). Increase keyboard platform projection •...
- Page 6 Adjustment Adjust for load weight This adjustment can be used to maximize ease of operation. When operating this product, the platform should move easily to any position and hold that position. • If the platform is difficult to raise or lowers too easily, increase the load adjustment (+). •...
-
Page 7: Tool Storage
Storage and final set-up Tool storage • When finished, the ratchet and Allen key can be stored in the built clips on the underside of the worksurface Note: 180° lock-out feature must be utilized with monitor arms. Final set-up • Move the unit to its maximum height. •... - Page 8 LIMITED WARRANTY ESI warrants this product to be free from defects in manufacturing for a period of 5 years from the date of original purchase. This warranty extends only to the original purchaser, and does not apply if the product has been damaged or fails to function properly as a result of misuse, abuse, modification, alteration, or improper cleaning or maintenance.