Table of Contents
Advertisement
Quick Links
Advertisement
Table of Contents

Related Manuals for Nokia HF-23


Summary of Contents for Nokia HF-23
- Page 1 Nokia Display Car Kit CK-600 User and Installation Guide 9211132 Issue 1 EN...
- Page 2 DECLARATION OF CONFORMITY Hereby, NOKIA CORPORATION declares that this HF-23 product is in compliance with the essential requirements and other relevant provisions of Directive 1999/5/EC. The product is in conformity with the limits defined in Directive 2004/104/EC (amending Directive 72/245/ EEC), Annex I, paragraph 6.5, 6.6, 6.8 and 6.9.
-
Page 3: Table Of Contents
Use the power cable PCU-4..36 Make a call ..........18 Install the car kit in a vehicle ..38 Answer a call ........18 Hands-free unit HF-23....39 Adjust call volume....... 19 Input device CU-10 ......40 Mute or unmute the microphone ... 19 Display SU-34 ........ - Page 4 ISO cable CA-135 ......43 Care and maintenance... 46 Motion sensor........44 Additional safety Optional accessories......44 information ......47 Mobile holder ........44 External antenna ......44 FCC/Industry Canada notice.. 48 Check the operation of the car kit......... 45 Software updates........
-
Page 5: For Your Safety
F o r y o u r s a f e t y For your safety Read these simple guidelines. Not following them may be dangerous or illegal. Read the complete user and installation guide for further information. SWITCH ON SAFELY Do not switch the device on when wireless phone use is prohibited or when it may cause interference or danger. -
Page 6: Quick Start
Q u i c k s t a r t Quick start This section briefly describes the basic features of the car kit. For details, see the respective sections in this guide. ■ First time setup 1. Switch on the car kit (see p. 14) and your mobile phone or music player. - Page 7 Q u i c k s t a r t Press and hold for about 2 seconds to switch a call from the car kit to the compatible device connected to it. 3. Mode key Press the mode key to switch between the standby mode and the music player menu.
- Page 8 Q u i c k s t a r t • Press the wheel to perform the function shown at the bottom of the display.
-
Page 9: Introduction
I n t r o d u c t i o n 1. Introduction With the Nokia Display Car Kit CK-600, you can conveniently make and answer calls hands-free and listen to music from your compatible device. You can also copy contacts from two compatible devices to the car kit, which allows two users to use their contacts immediately after their device is connected to the car kit. -
Page 10: Bluetooth Wireless Technology
I n t r o d u c t i o n ■ Bluetooth wireless technology Bluetooth wireless technology allows you to connect compatible devices without cables. The car kit and the other device do not need to be in line of sight, but they should be within 10 metres (33 feet) of each other. -
Page 11: Get Started
3. Power cable PCU-4 (if supplied in the sales package) 4. Microphone MP-2 5. Display SU-34 6. Charging cable CA-134 with a Nokia 2.0 mm plug 7. Input device CU-10 with Navi wheel 8. Loudspeaker SP-3 (if supplied in the sales package) -
Page 12: Input Device Cu-10
G e t s t a r t e d 10.CD that contains this user and installation guide ■ Input device CU-10 You can operate the car kit using the input device. The device is provided with the Navi wheel that you can turn or press. -
Page 13: Store The Display In The Pouch
G e t s t a r t e d Store the display in the pouch When you do not use the display, detach it from the stand or mounting plate, and put it into the supplied pouch to protect it against scratches. Information shown in the standby mode When the car kit is in the standby mode and connected to a compatible device using Bluetooth wireless technology, the following information is... -
Page 14: Switch The Car Kit On Or Off
G e t s t a r t e d To open the list of menu functions in the standby mode, press the wheel when Menu is displayed at the bottom of the display. To scroll to an item (such as a menu function) or through a list, turn the wheel left or right. -
Page 15: First Time Use
Bluetooth connection in the car even if you keep your device, for example, in a handbag. To charge the battery in your compatible Nokia device while using the car kit, connect the device to the car kit using the supplied charging... -
Page 16: Pair And Connect With Phone Or Music Player
3. Activate the Bluetooth feature on your device, and set it to search for Bluetooth devices. For instructions, see the user guide of your device. 4. Select the car kit (Nokia CK-600) from the list of found devices on your device, or follow the related instructions in the user guide for the device. -
Page 17: Connect The Car Kit Manually
Connect the car kit automatically You may be able to set your phone so that the car kit connects to it automatically. To activate this feature in a Nokia device, change the paired device settings in the Bluetooth menu. When you switch on the car kit, the car kit tries to make a Bluetooth connection to the last used phone. -
Page 18: Calls
C a l l s 3. Calls ■ Make a call To enter a phone number, turn the wheel left in the standby mode. Scroll to the first digit of the phone number, and press the wheel. Select the other digits of the phone number in the same way. (To delete the most recent digit, press .) Once the phone number is displayed, press call it. -
Page 19: Adjust Call Volume
C a l l s new call, press . To switch between the active call and the call on hold, press . To end the active call and make the call on hold active, press . ■ Adjust call volume To adjust the volume during a call or when a call is alerting, turn the wheel left to decrease the volume or right to increase it. -
Page 20: Switch A Call Between Car Kit And Connected Device
C a l l s ■ Switch a call between car kit and connected device To switch a call from the car kit to your compatible phone, press and hold for about 2 seconds. Some phones may close the Bluetooth connection until the call ends. -
Page 21: Music Player
M u s i c p l a y e r 4. Music player You can use the car kit to listen to music from a compatible music player (or its memory card) that supports the A2DP (and possibly AVRCP) Bluetooth profile. -
Page 22: Adjust Music Volume
M u s i c p l a y e r If your music player supports the AVRCP Bluetooth profile, you can also do the following: • To select the previous song, press • To select the next song, press . To return to the previous screen without stopping playback, press . -
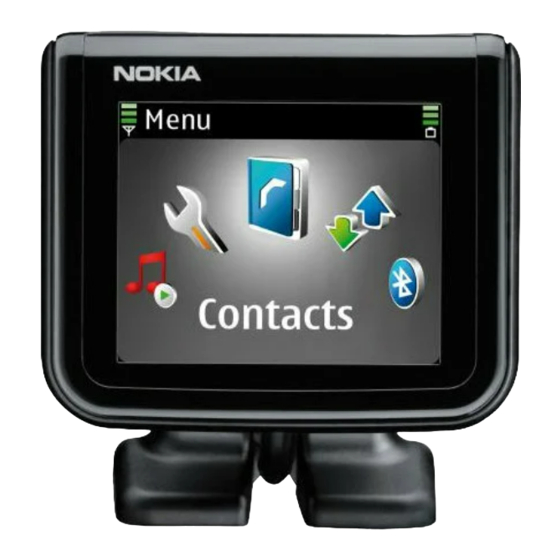
Page 23: Contacts
C o n t a c t s 5. Contacts You can copy names and phone numbers (contacts) from two compatible mobile phones to the car kit, and use the contacts for calling. This is convenient when you use the car kit with two phones because you can access the contacts immediately while the contacts saved in the phone are synchronised with the car kit in the background. -
Page 24: Copy Contacts To Car Kit
C o n t a c t s To set up speed dialling, press the wheel in the standby mode, and select Contacts > Speed dials. • To allow or prevent speed dialling, select Activate or Deactivate. If you deactivate speed dialling, you are prompted to activate it when you try to use speed dialling. -
Page 25: Settings
S e t t i n g s 6. Settings ■ Bluetooth settings To manage Bluetooth connections, press the wheel in the standby mode, and select Bluetooth. To view the devices that are currently connected to the car kit, select Active devices. -
Page 26: Display Settings
S e t t i n g s you receive a call. If you select Always on, the car radio is muted when the connected device produces any sound, for example, a text message tone. To turn the warning tones of the car kit on or off, select Warning tones and the desired option. -
Page 27: Installation Settings
S e t t i n g s incoming call. To set the time period after which the call is answered, see the phone user guide. To change the car kit language, select Language setting and the desired language. To view the software and hardware versions of the product, select Product info. -
Page 28: Troubleshooting
T r o u b l e s h o o t i n g 7. Troubleshooting ■ Reset the car kit The car kit doesn’t react to my actions. How can I reset it? Press and hold for about 10 seconds when the car kit is switched on. The car kit restarts. -
Page 29: Audio Issues
T r o u b l e s h o o t i n g ■ Audio issues My voice echoes at the other end of the line. • Lower the volume of your car speaker. If the car kit is connected to your car stereo system, decrease the input level, if possible. -
Page 30: Other Issues
T r o u b l e s h o o t i n g I can’t hear music played when the mobile phone or music device is connected to the car kit. • Check that your phone or music device supports the A2DP Bluetooth profile and that no other A2DP device (for example, a Bluetooth adapter using A2DP) is connected to the car kit. -
Page 31: Installation
Observe the following safety guidelines when installing the car kit. • Only a qualified service technician should install or service the car kit using the approved original Nokia parts supplied in the sales package. Faulty installation or service may be dangerous and may invalidate any warranty which may apply to the car kit. -
Page 32: Integration With A Car Radio System
Select the appropriate option according to the parts supplied in the sales package. For information about the connectors on the hands-free unit HF-23, see “Hands-free unit HF-23”, p. 39. You can connect the car kit to a loudspeaker with an impedance of at least 2 ohms. -
Page 33: Use The Iso Cable Ca-135
I n s t a l l a t i o n Use the ISO cable CA-135 When you connect the car kit to the car radio system with the ISO cable CA-135, you can select if the car kit amplifier is used for calls and the car radio amplifier is used for music, or if the car kit amplifier is used for both. - Page 34 3. Connect the external input device CU-10 and the microphone MP-2 to the respective connectors on the hands-free unit. 4. To charge a compatible Nokia mobile phone through the car kit, connect one end of the supplied charging cable CA-134 to the hands-free unit and the other end to the 2.0 mm (0.08 inch) charging...
- Page 35 I n s t a l l a t i o n The amplifier and equaliser of your car radio are used for music played on a connected device that supports the A2DP profile. The built-in amplifier of the car kit is used for calls. 1.
-
Page 36: Use The Power Cable Pcu-4
5. Connect the external input device CU-10 and the microphone MP-2 to the respective connectors on the hands-free unit. 6. To charge a compatible Nokia mobile phone through the car kit, connect one end of the supplied charging cable CA-134 to the hands-free unit and the other end to the 2.0 mm (0.08 inch) charging... - Page 37 5. Connect the external input device CU-10 and the microphone MP-2 to the respective connectors on the hands-free unit. 6. To charge a compatible Nokia mobile phone through the car kit, connect one end of the supplied charging cable CA-134 to the hands-free unit and the other end to the 2.0 mm (0.08 inch) charging...
-
Page 38: Install The Car Kit In A Vehicle
I n s t a l l a t i o n loudspeaker (such as the SP-3), select Mono speaker instead of Automatic detection. Do not use the internal amplifier of the hands-free unit to drive external loudspeakers to play back music. If you need to replace a fuse on the PCU-4 cable, only use a fuse with a rating of 2 A or less. -
Page 39: Hands-Free Unit Hf-23
Hands-free unit HF-23 The hands-free unit has the following connectors: 1. Connector for input device CU-10 2. Connector for charging cable CA-134 (to charge a compatible Nokia phone) 3. Connector for the display unit SU-34 4. Mini-USB connector for firmware update 5. -
Page 40: Input Device Cu-10
I n s t a l l a t i o n Do not mount the hands-free unit inside a metal housing or on a metal surface, because this will impair the Bluetooth connection between the hands-free unit and the Bluetooth device that is connected to the car kit. - Page 41 I n s t a l l a t i o n When installing the display, ensure that it does not interfere with or hinder the steering or braking systems or other controls or systems used in the operation of the vehicle (for example, airbags). Ensure that the display cable reaches to the hands-free unit for connection.
- Page 42 I n s t a l l a t i o n 2. Slide the display onto the connector part (2). 3. Set the display to the appropriate position (3). To attach the display to the plate: 1. Press the ball hinge on the stand or plate into the socket on the connector part of the display cable (1).
-
Page 43: Microphone Mp-2
I n s t a l l a t i o n Microphone MP-2 Select the mounting location of the microphone carefully to increase the quality of voice transmission. The best place to mount the microphone is close to the rear view mirror. Mount the microphone so that it points toward the driver’s mouth and at least 1 metre (3 feet) from the car kit loudspeaker to avoid audio feedback. -
Page 44: Motion Sensor
I n s t a l l a t i o n Motion sensor The hands-free unit HF-23 contains a motion sensor that allows the car kit to automatically switch on when you turn on the ignition and start driving. The motion sensor works if it is activated and the ignition sense wire is not connected. -
Page 45: Check The Operation Of The Car Kit
To update the firmware, you need to download and install an installation program to your PC. Check www.nokia.com/support or your local Nokia website for the installation program, the latest firmware version, and additional... -
Page 46: Care And Maintenance
C a r e a n d m a i n t e n a n c e Care and maintenance Your car kit is a product of superior design and craftmanship and should be treated with care. The following suggestions will help you protect your warranty coverage. -
Page 47: Additional Safety Information
A d d i t i o n a l s a f e t y i n f o r m a t i o n Additional safety information ■ Vehicles RF signals may affect improperly installed or inadequately shielded electronic systems in motor vehicles such as electronic fuel injection systems, electronic antiskid (antilock) braking systems, electronic speed control systems, and air bag systems. -
Page 48: Fcc/Industry Canada Notice
NOTE: FCC Radiation Exposure Statement: This equipment complies with FCC radiation exposure limits set forth for an uncontrolled environment. This transmitter must not be co-located or operating in conjunction with any other antenna or transmitter. NOTE: Changes or modifications not expressly approved by Nokia could void the user's authority to operate the equipment.